← Home Archive Photos About Also on Micro.blog
  • cyanotype follow up

    This is the follow up to my original post, where I tried cyanotyping for the first time.

    Since then I took the plunge and bought my own solution (these ones if you are interested) so I can make my own paper. This will give me more freedom over size, plus I can use some nice heavyweight paper, as I found the pre-coated ones to be too thin and flimsy.

    I’m printing these outside using sunlight, trying to keep the paper as flat as possible, using some perspex and rocks. I ended up buying an old frame in a charity shop, just for the heavy glass that came with it, as that does a great job at keeping the paper and the negative squished down.

    I’ve found a couple of issues with making my own paper is applying the solution evenly, I have a sponge brush that seems to work pretty well, but at times I’ve been too eager to coat the whole paper too quickly, which results in the final print being a little patchy in places. I need to be a little more patient, and apply with a drier brush, and then recoat if needed.

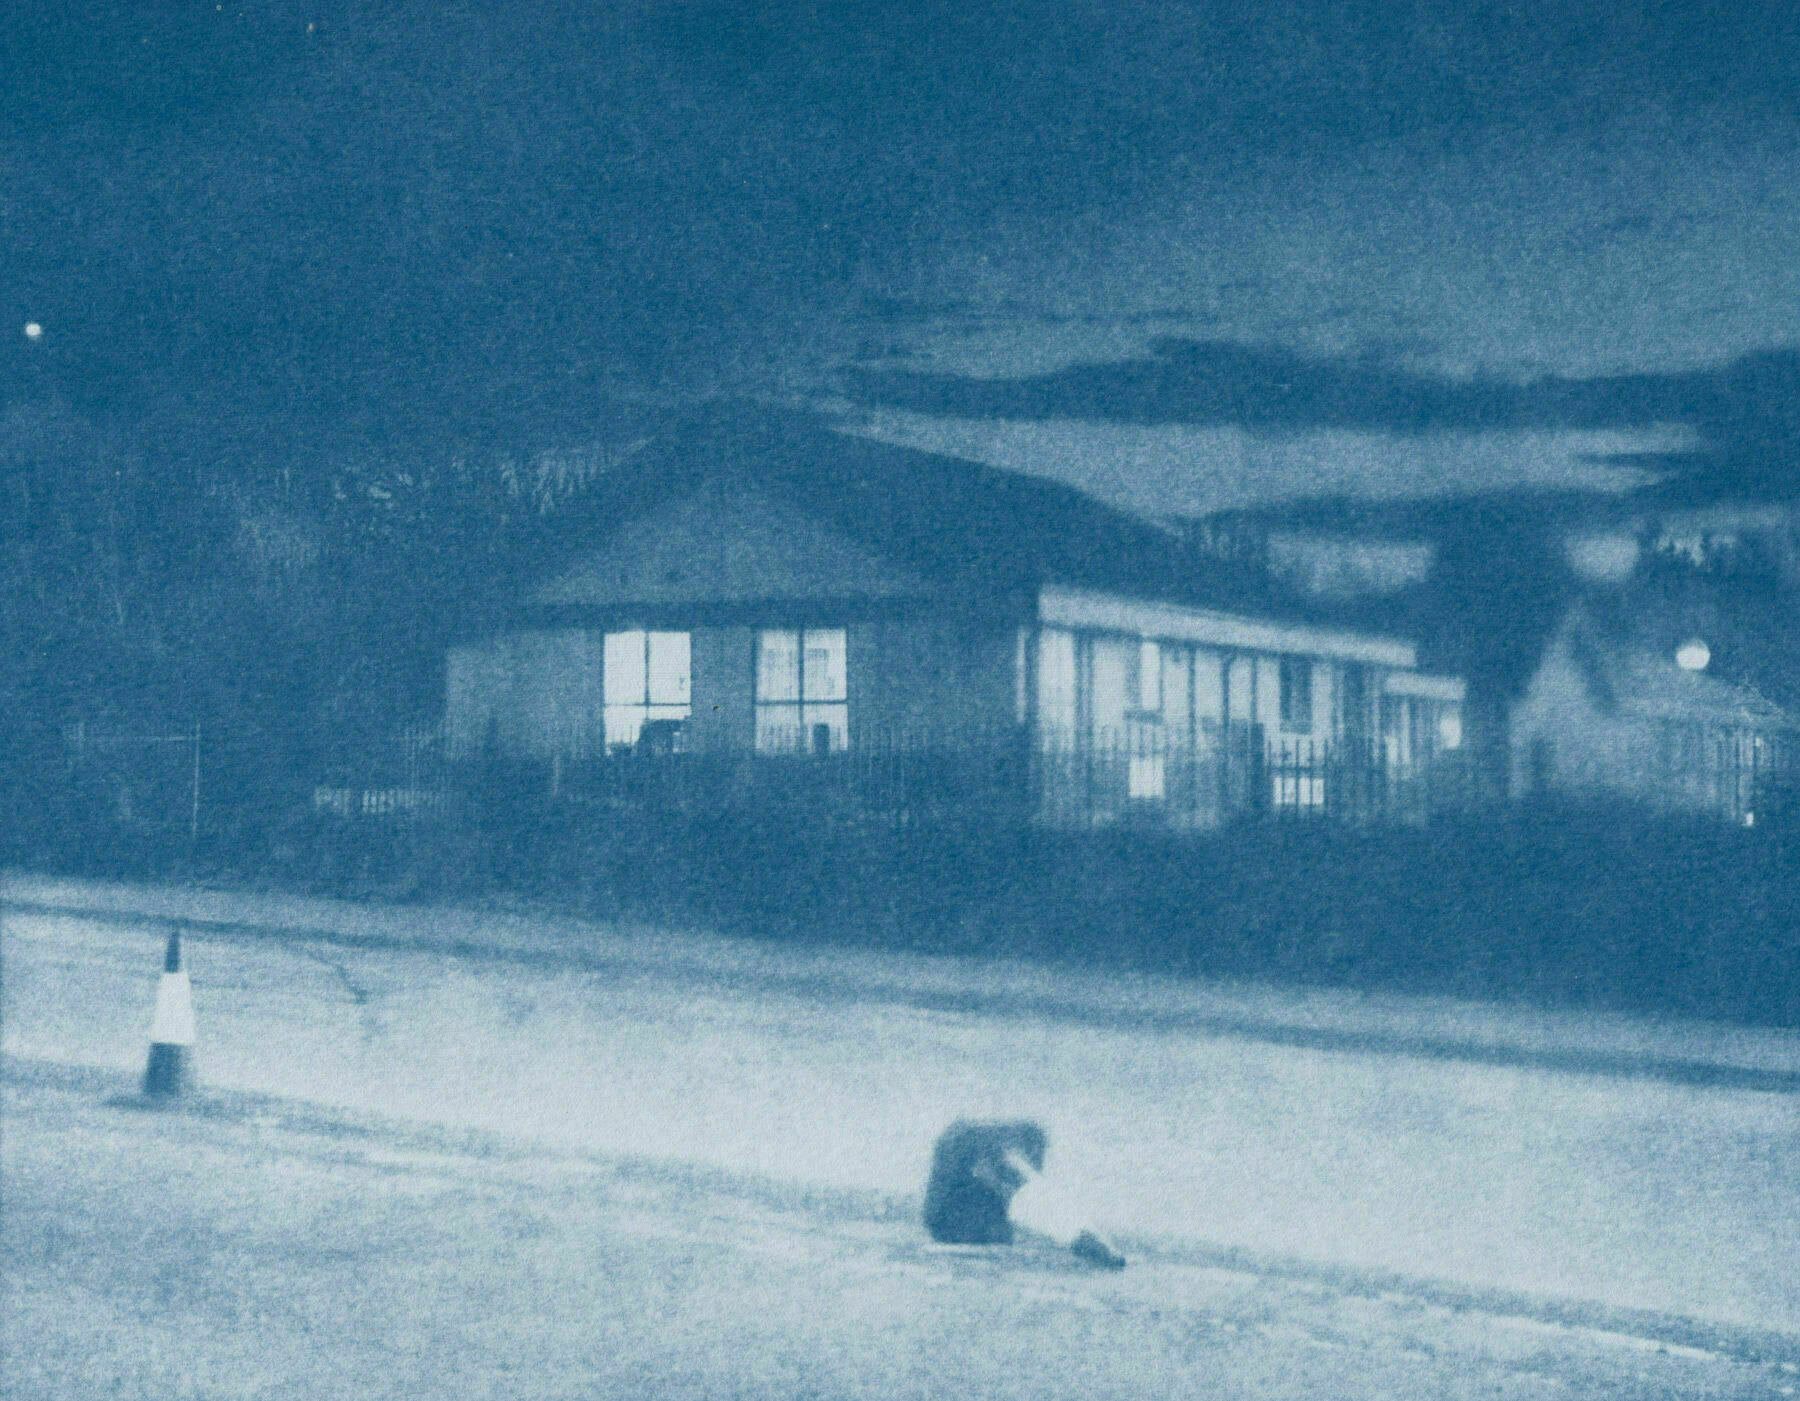
    This print seems to suffer badly from it, I think it’s especially noticeable because there is so much negative space. I don’t actually mind it to be honest, because it’s DIY, handmade, so these imperfections are to be expected. But not so great if you are aiming for a pristine perfect print.

    My other problem has been with exposure times, I think the level of UV changes day to day, which can make it tricky when trying to expose the prints correctly, as it involves a bit of guesswork. I thought I had my timings pretty accurate, but I had one afternoon where every print seemed perfect when removing the glass, but as soon as I dunked it in my water tray, it all just seemed to wash away, leaving me with washed out cloudy image, that was just no good.

    I went online to look troubleshoot, and ended up getting myself in a jumble of new worries, paper type, even the ph level of the water (which seems insane) but it turned out I was just underexposing the images. I made some new prints the following day using a longer 10 minute exposure, and that seemed to fix the issue completely.

    Looking back I think some of my previous images are underexposed, but I just got away with it a little more, as the blue doesn’t look as rich as some of the newer prints.

    This is a more recent one, which looks saturated and punchier.

    The good thing is, the solution bottles last for ages, I have loads left for future paper batches, so printing again is no issue, I can tweak it multiple times until I get it right. Plus through trial and error I’ve found that some images are better suited for cyanotyping than others. Images with strong geometric shapes and high contrast like this leaf seem to work well.

    The other advantage to making your own paper, is the potential to experiment with different papers and surfaces, I’ve been trying printing on some found papers, with mixed results so far, but will be sharing in a future blog post.

    → 2:46 PM, Jun 6
  • evening bike ride

    These are all from an evening bike ride through Ashton Gate, this long stretch of road is just for buses, and they are pretty rare, which means it ends up being really quiet and peaceful along the whole bike path.

    It was overcast, but I spied a thin band of clear sky between the clouds and the horizon, and as soon as the sun dipped under, everything was bathed in this perfect golden light. I’ve been mostly converting to black & white recently, but I’m not a monster, when the light hits like this, it seems like such a waste to lose all of that to monochome.

    → 2:14 PM, May 9
  • Abandoned Motorbike

    I found this burnt out bike last year, it’s in a big park that I visit all the time to walk the dog. I like exploring around the periphery and there is some abandoned ground next to some trees in the far corner, and it’s usually good for finding the old discarded items that I like to photograph. It’s at the end of the narrow path next to the fence that I found the bike, tucked out of site, so you have to walk right up to it to realise it’s there.

    I took a quick photo, but the lighting wasn’t quite right, it’s very flat low contrast, and when processed in black & white, everything just seems to merge into one overall tone of grey. Plus I had recently made a whole blog post all about abandoned motorbikes, so thought from now on, I’ll only post any I find if I’m really pleased with the photo. Also I don’t think anyone really walks down to this spot, so I wasn’t worried about the bike being removed anytime soon.

    Fast forward to February this year and I thought I’ll check back in to see if it is still there? The only difference now, is someone has propped it upright against a tree. Weirdly I find that if I spot one of these bikes and it’s on it’s side, when I come back, someone has almost always propped it up vertically, there must be an natural urge to do this, that people just can’t resist.

    It’s an overcast day, and it’s 10-15 minutes after sunset, so the light is already low. This time there is a light from the factory nearby, which is an older style lamp, so it has a real yellow cast to the light, which is softly illuminating the bike through the trees. This photo is at the absolute limits of shooting handheld, 1/30s, f/2, ISO 3200. But the final photo almost looks as if it was taken in golden hour, which I find really strange.

    I had a torch with me, and thought I would try using that to illuminate the bike, which gives the final photo a completely different look, even though the camera settings are the exact same. They have been edited, but not drastically.

    I don’t really like shooting at ISO 3200 (though I’m always surprised how usable the results are) as they tend to start getting really noisy when editing, especially when pulling shadows. I managed to get back a week or so later with a tripod this time, trying to time it like before at blue hour, but before it gets fully dark. I wanted some shadows for contrast, but not completely black.

    This time I bought my led light and mini tripod, which meant I could get some precision to the direction of the off camera light, and tried a few different options.

    I tried illuminating the whole bike from the side, which gave a nice contrast.

    But I think my favourite is the one illuminating it from just behind the tree on the left, which throws up all of these unusual shadows. I kept a similar exposure, but because I now have the tripod I could slow down the shutter speed to 0.5 s, and keep the ISO way lower at 400.

    You’ll notice I stuck with the same composition for all of these, this is partly out of necessity, it’s pretty thick with trees and there aren’t too many other angles available. But I did like this framing, and I thought it would be interesting to keep it consistent and then I have a direct comparison between each differing style.

    → 10:59 PM, Apr 23
  • RSS
  • JSON Feed
  • Micro.blog