I first had the idea to try this when I saw a story about someone had posted a selfie to instagram repeatedly downloading and uploading the image, to witness it slowly decay as it was subject to instagrams compression algorithms.
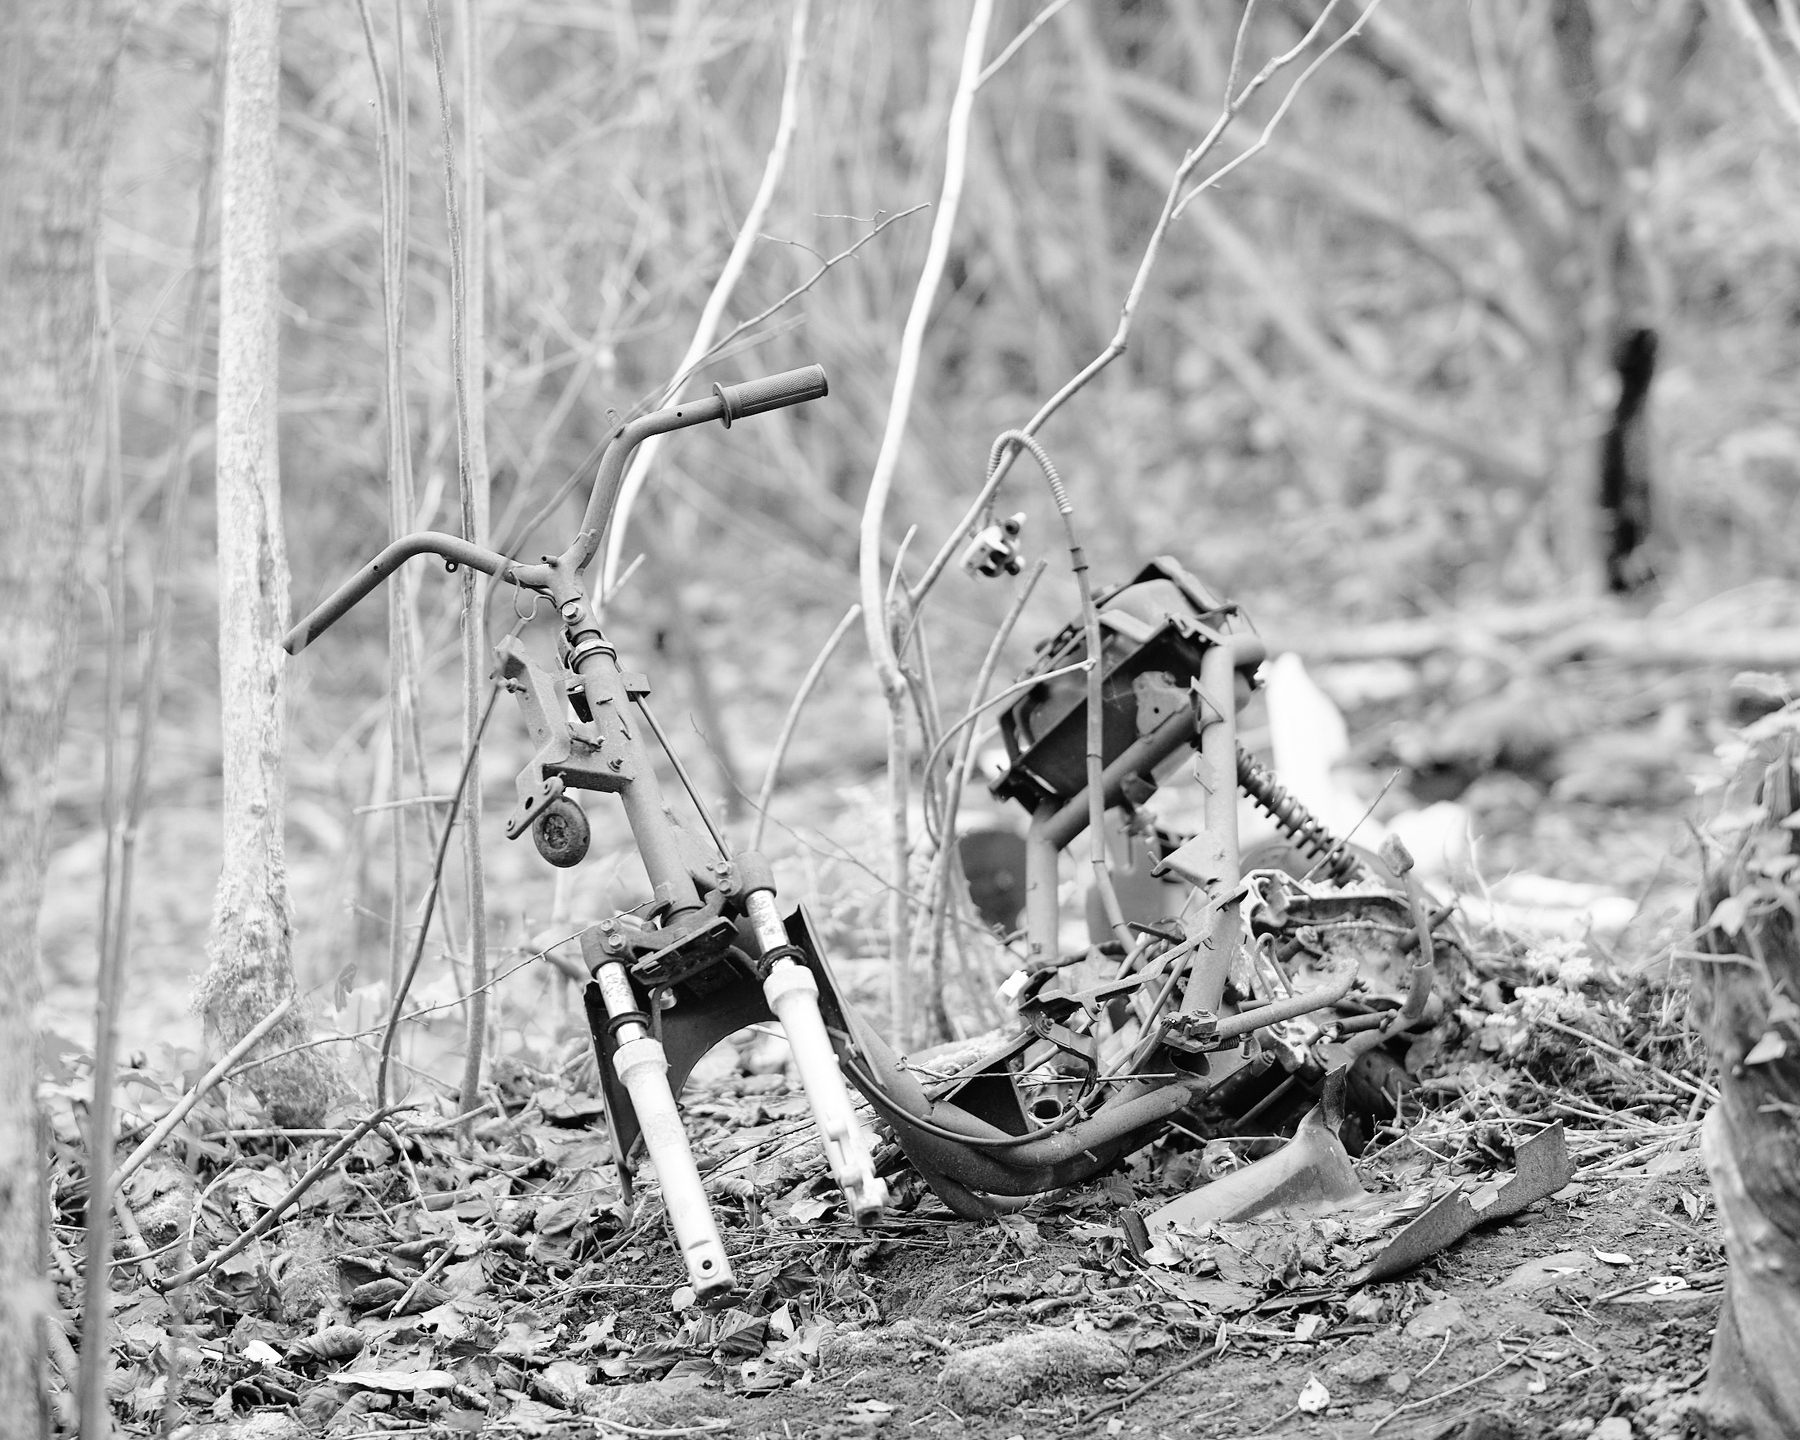
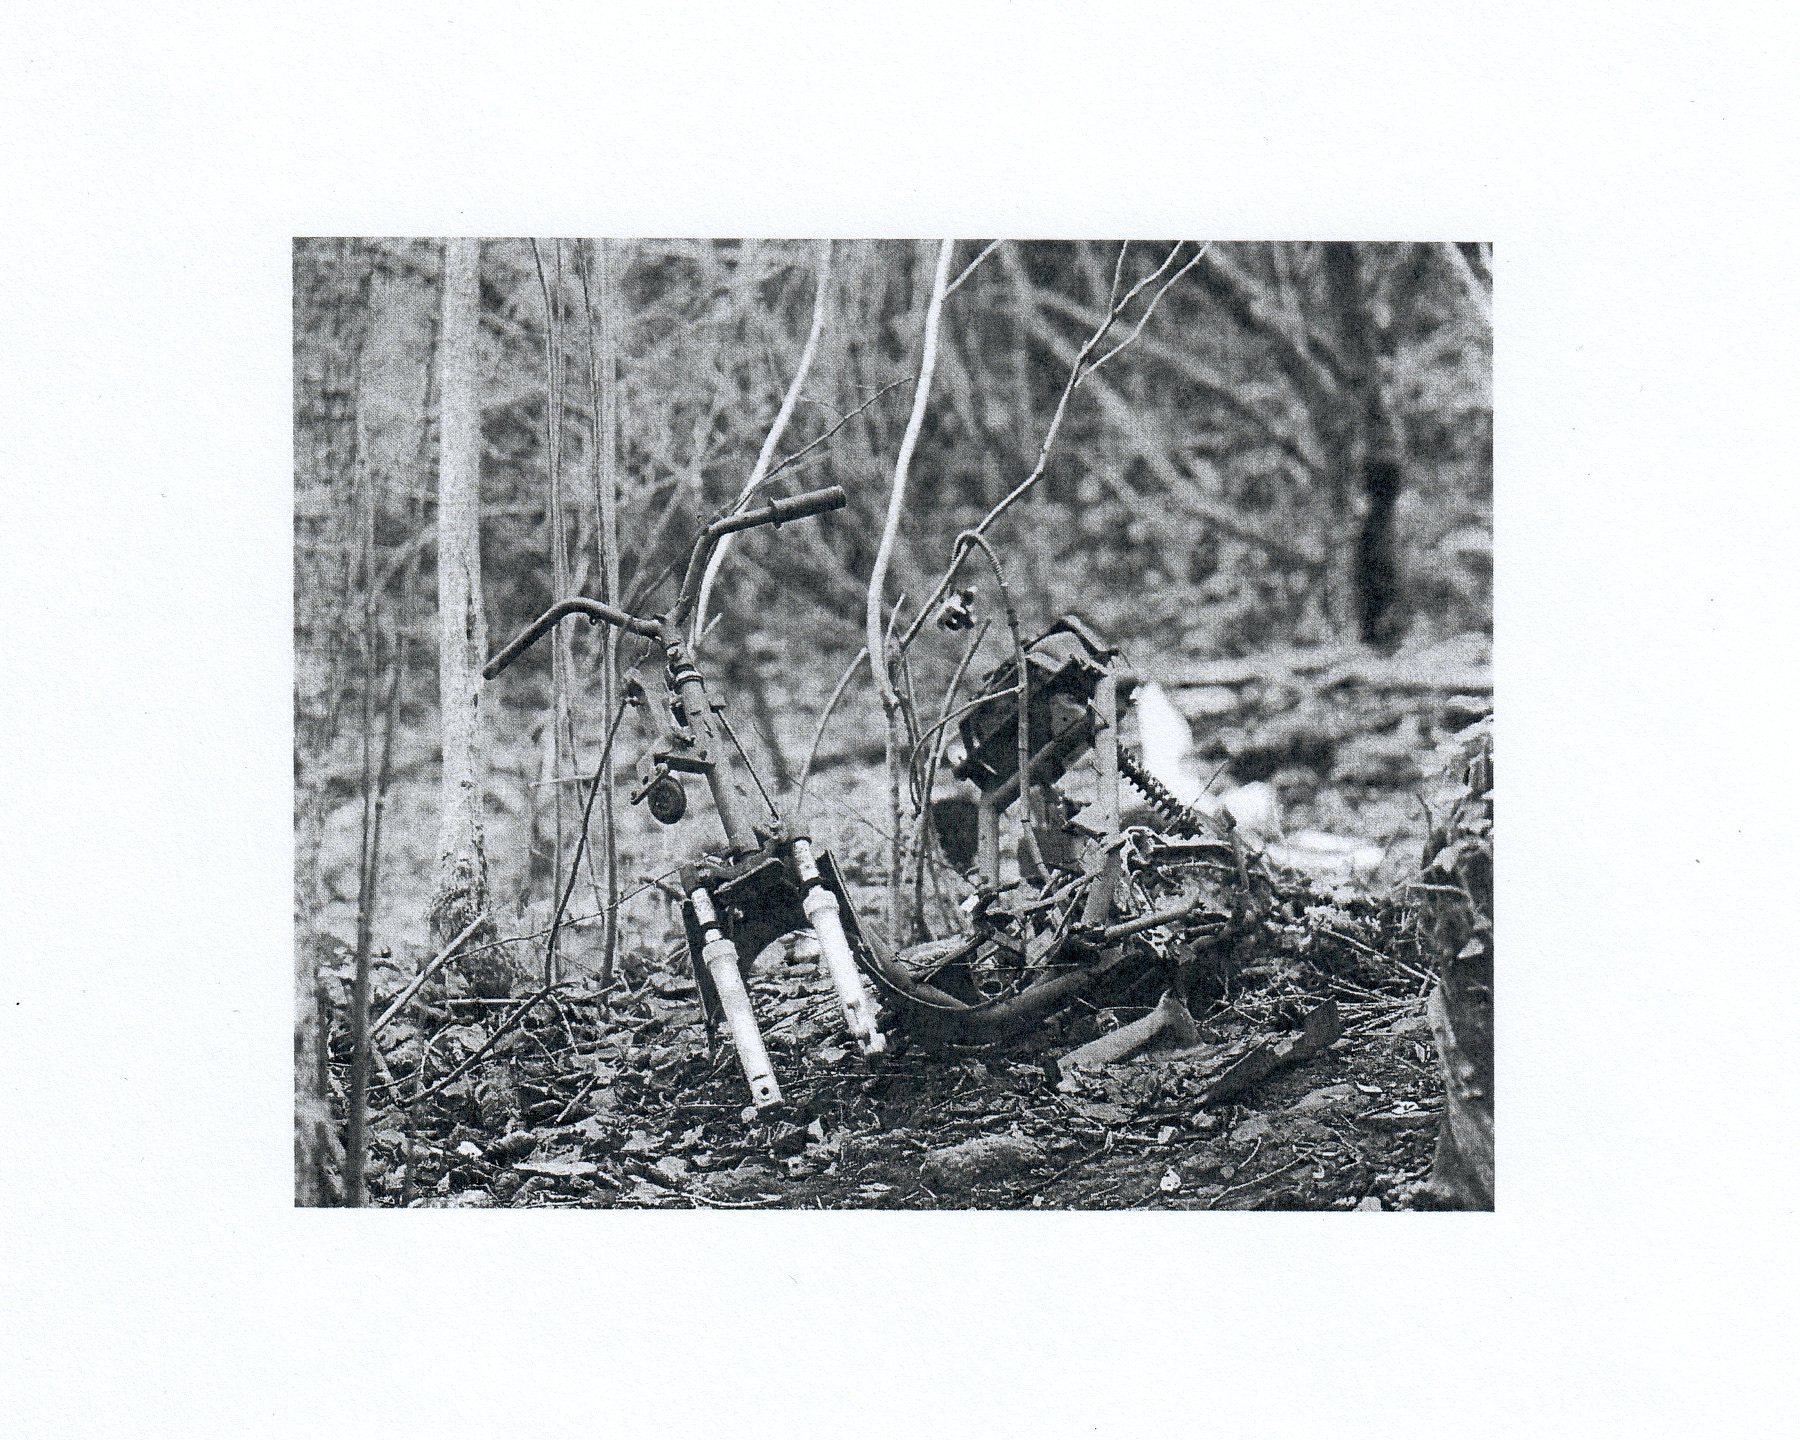
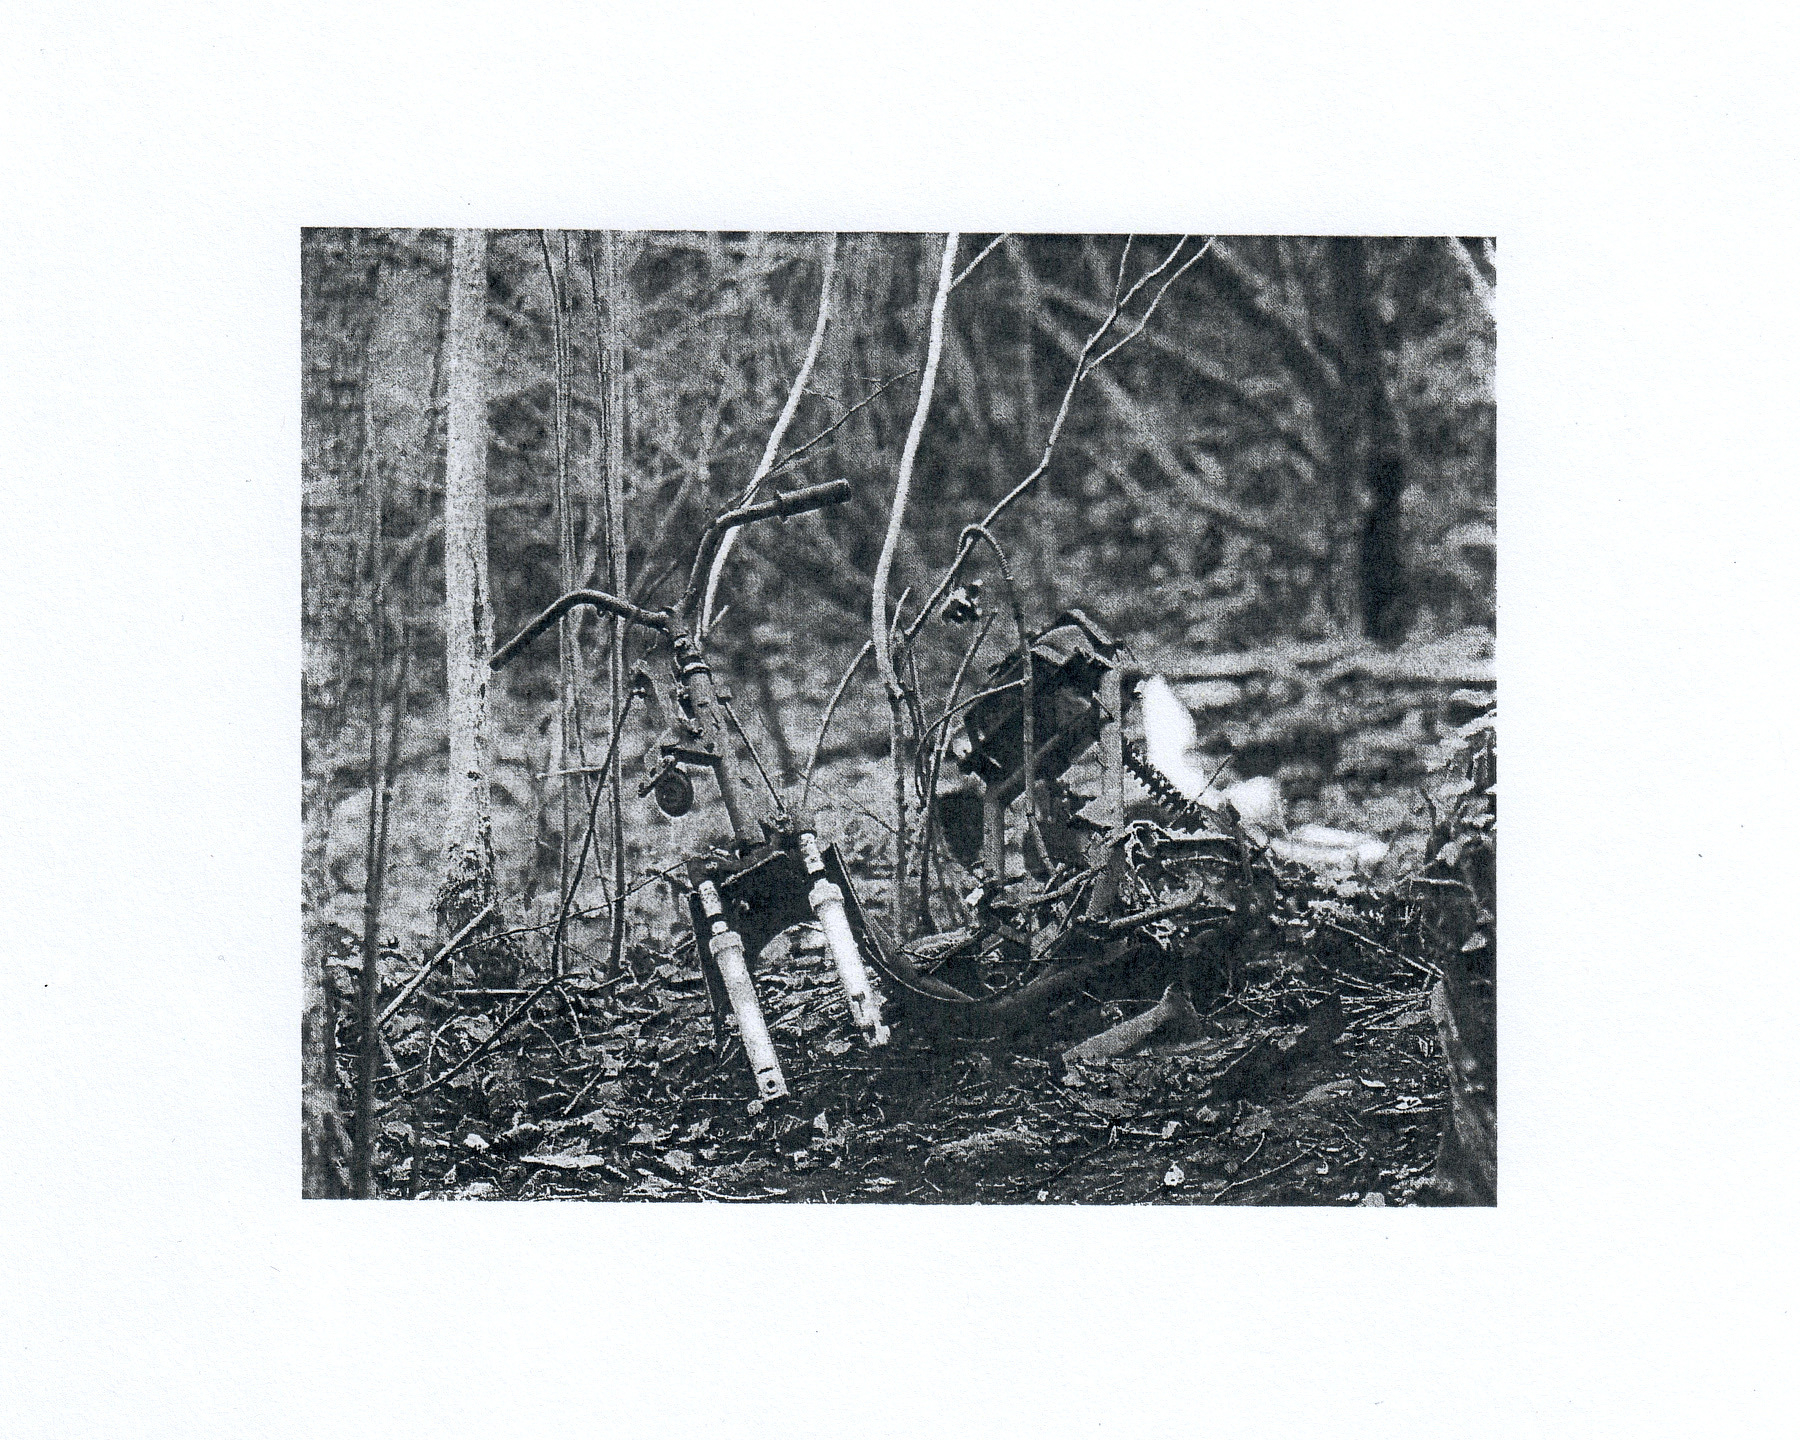
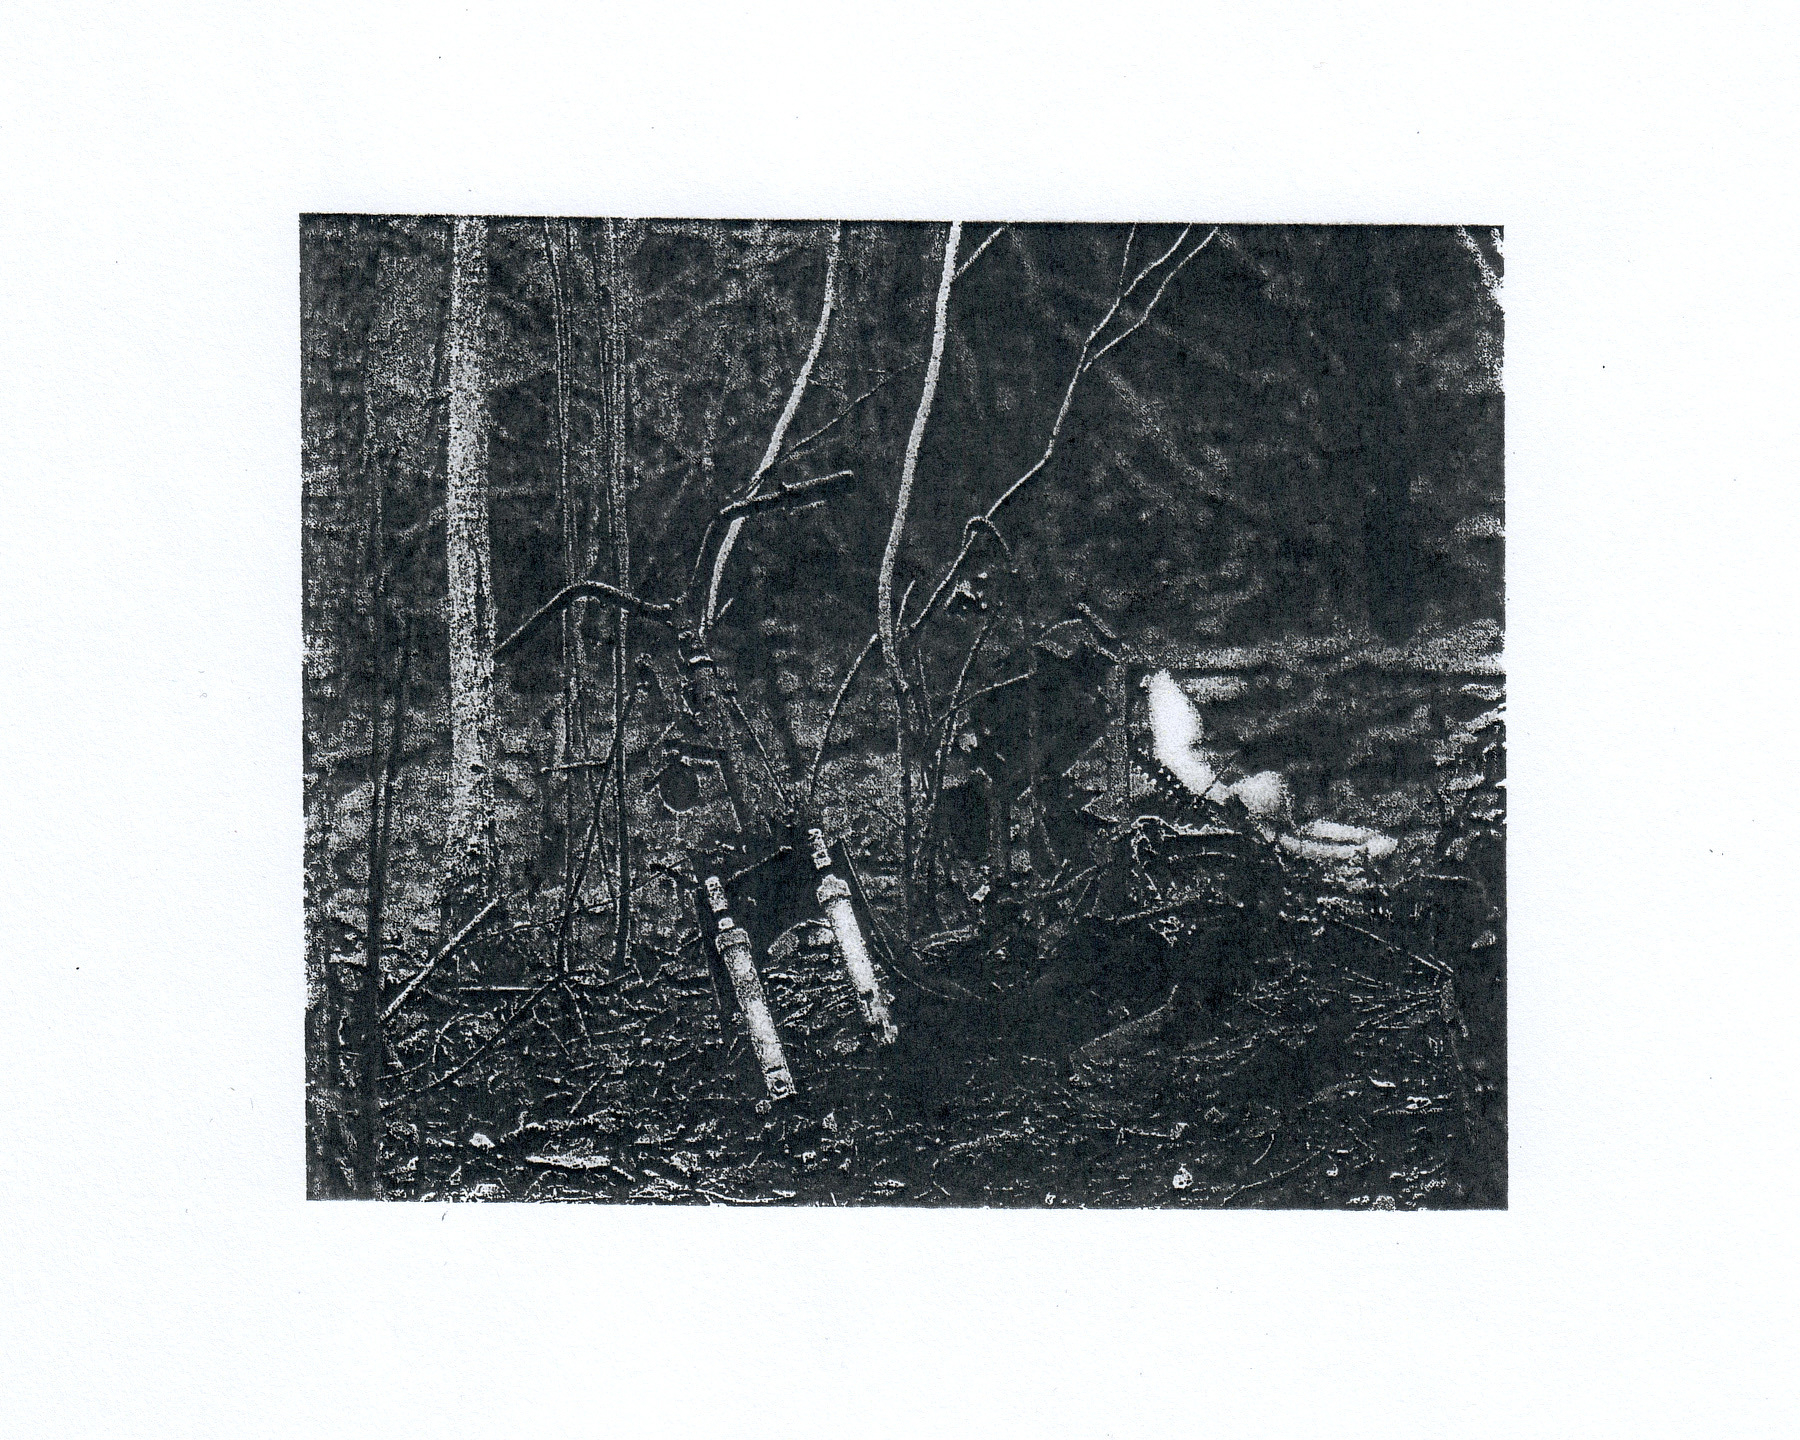
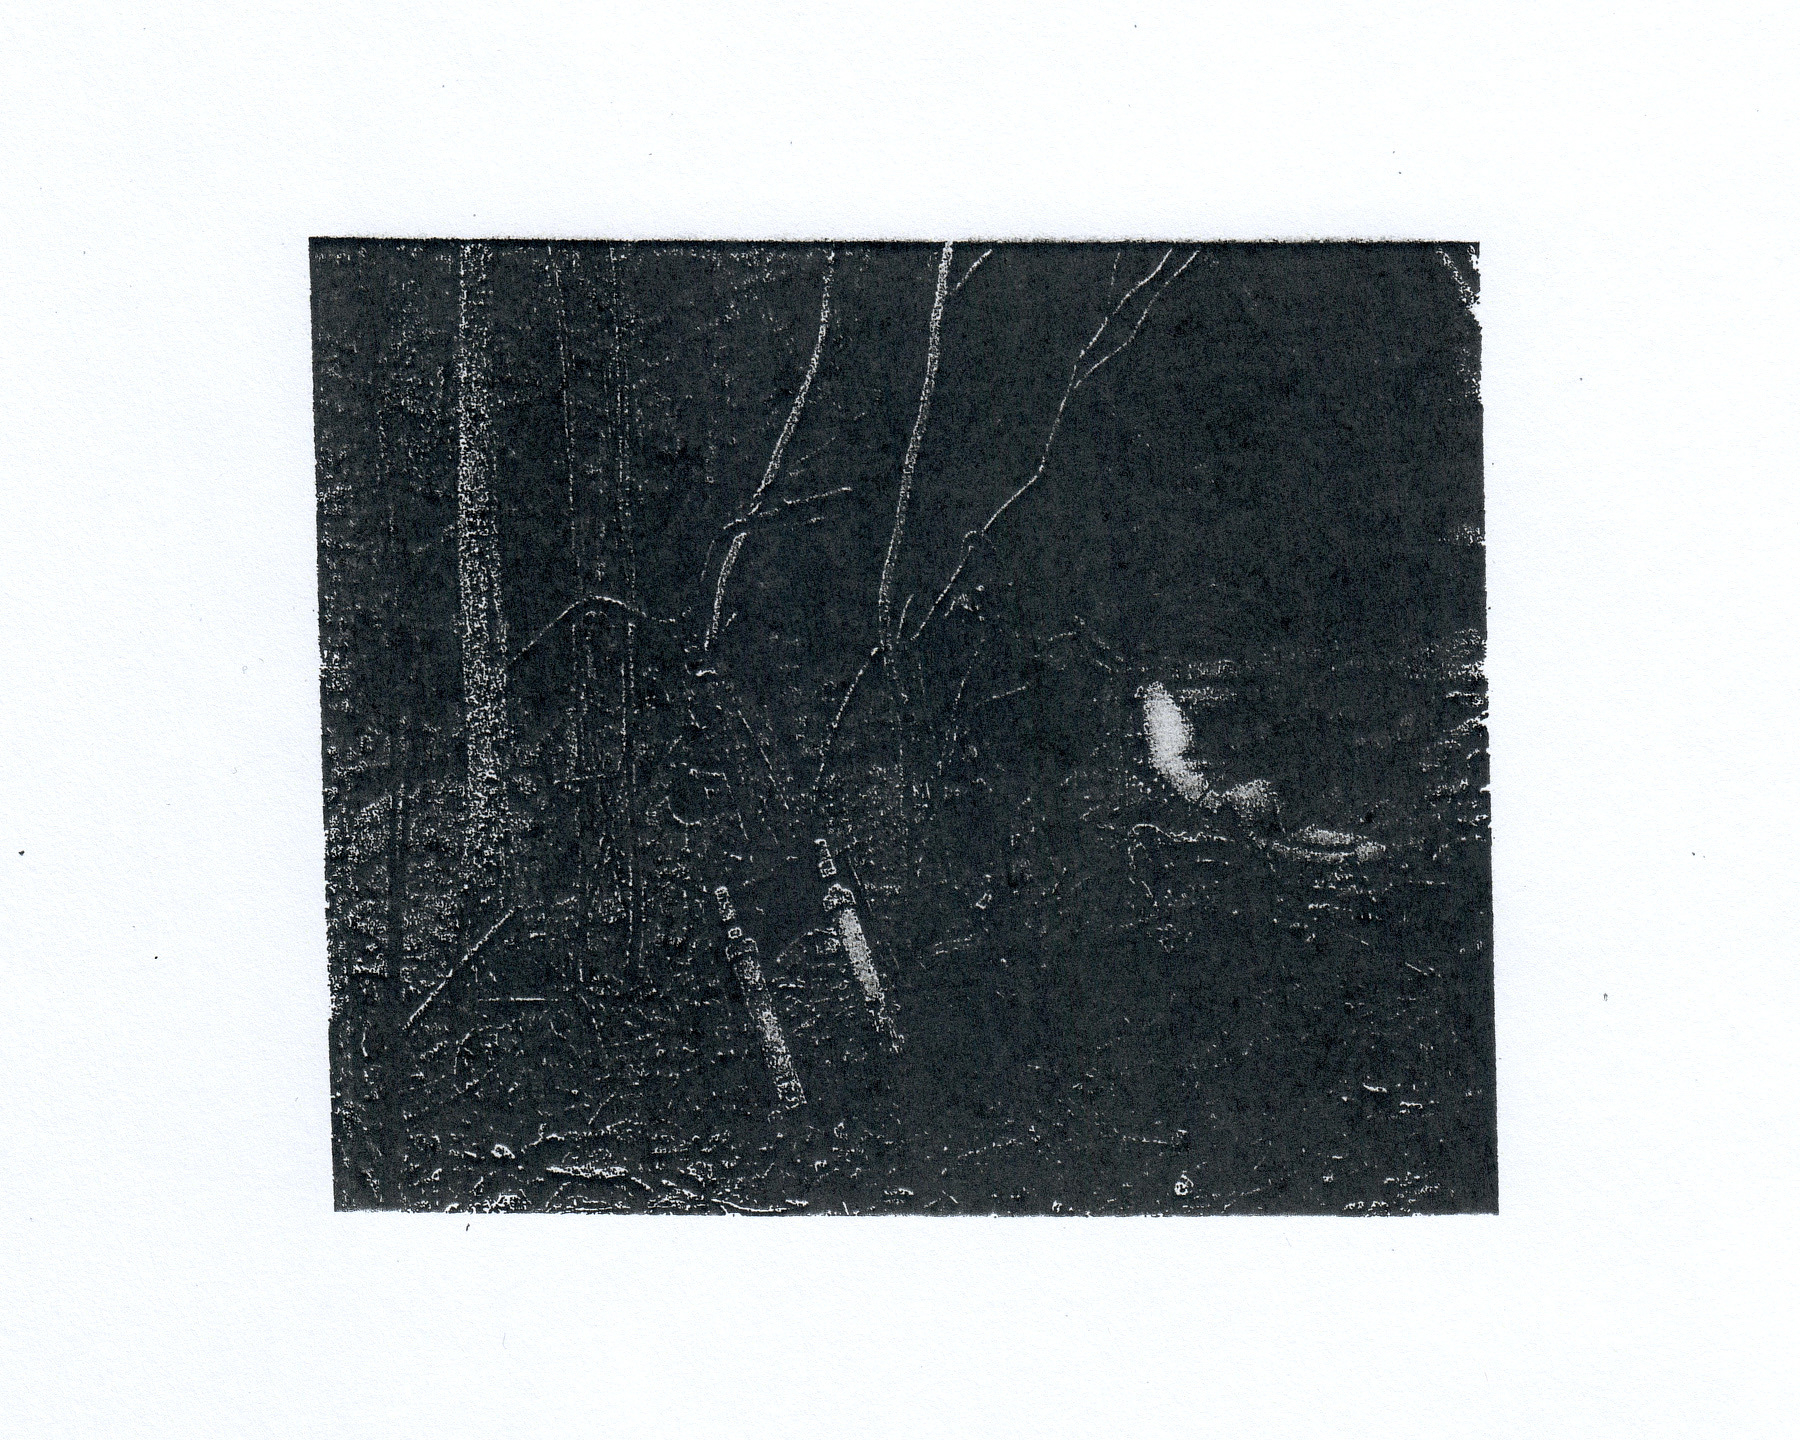
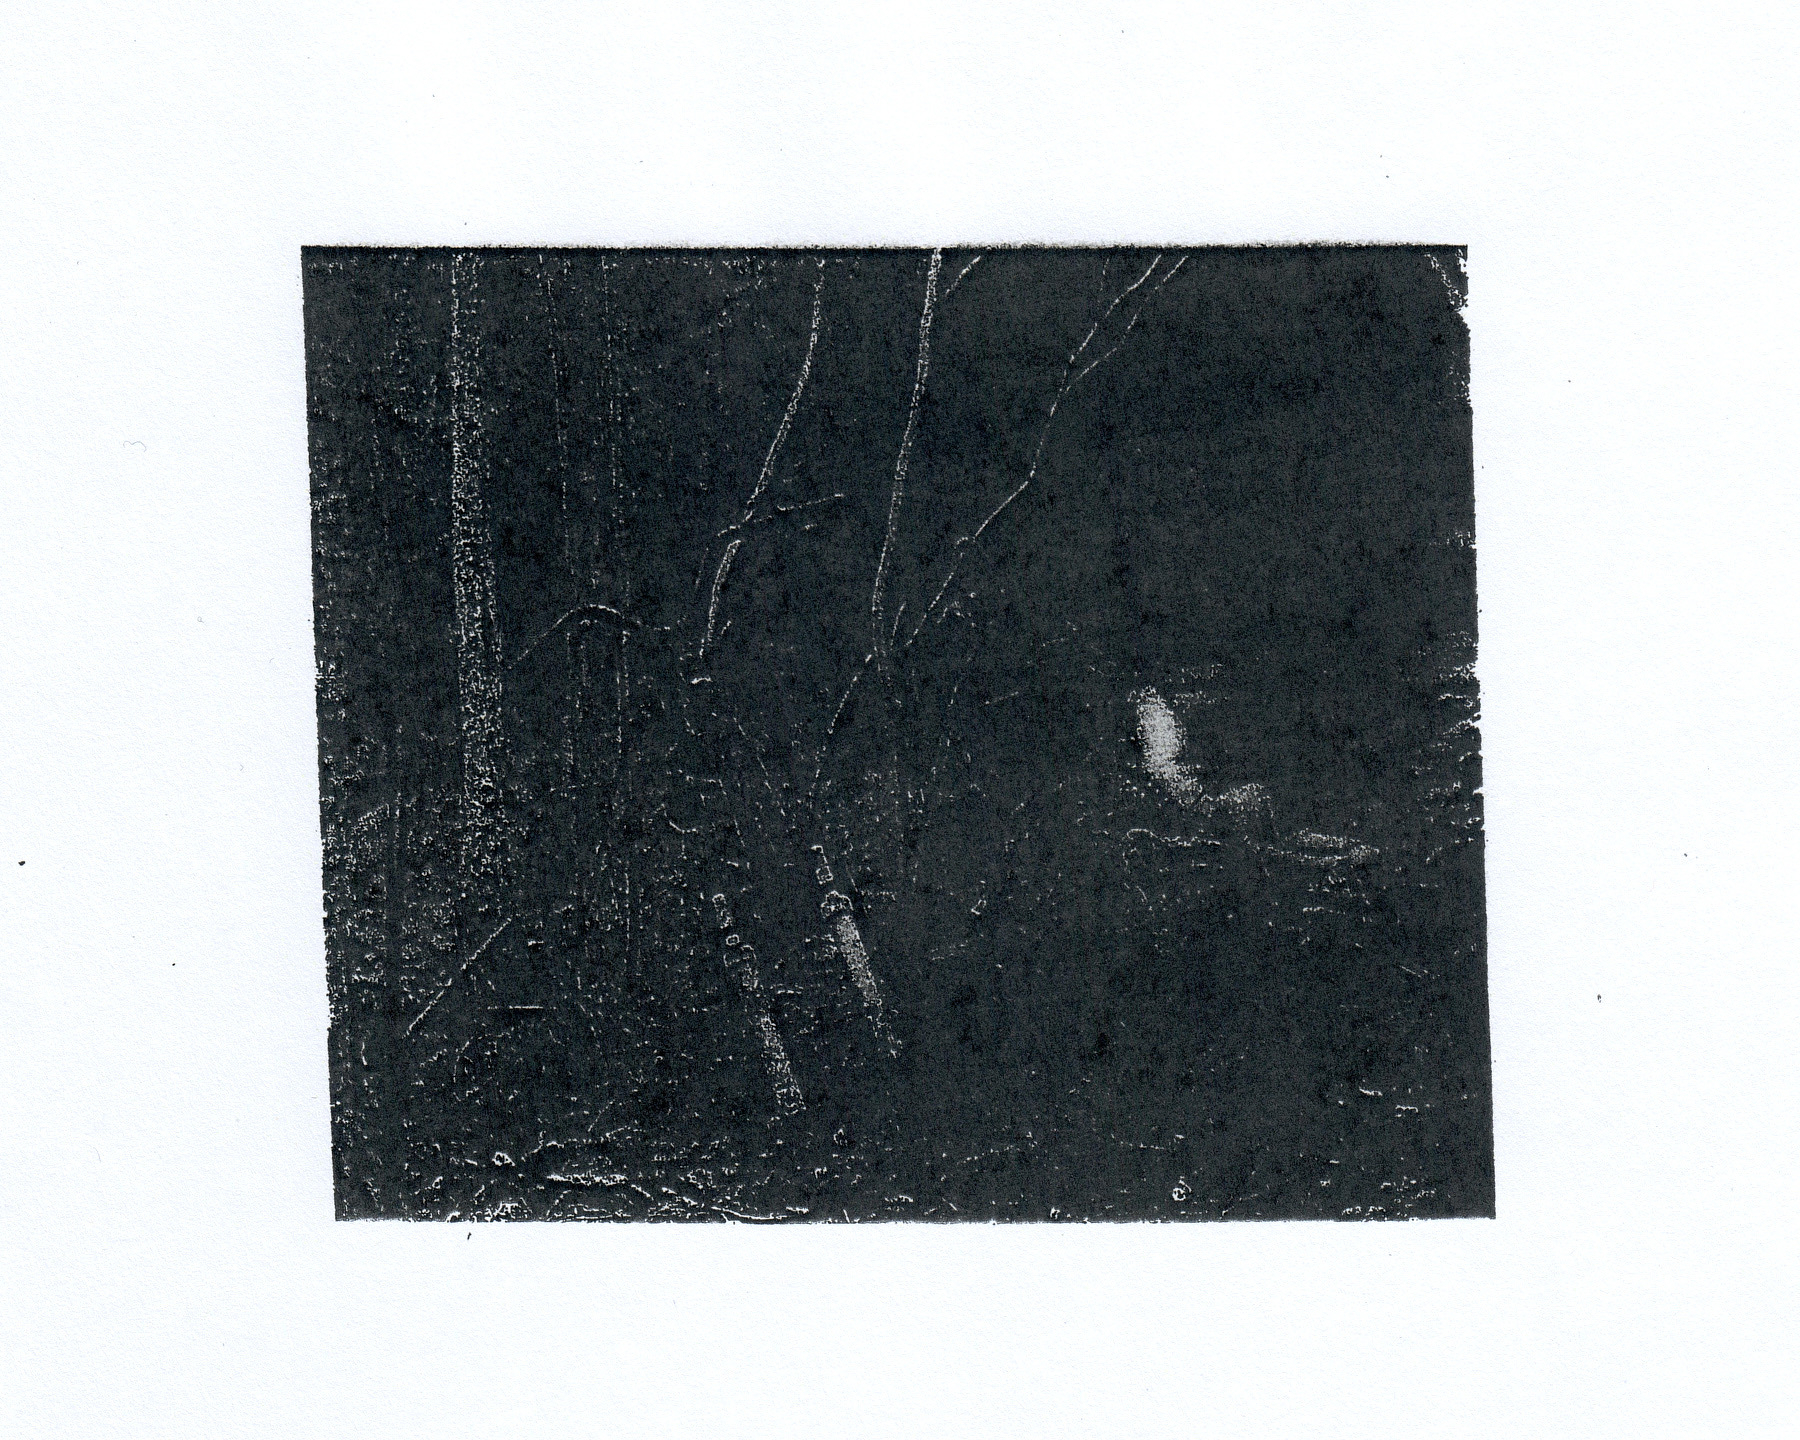
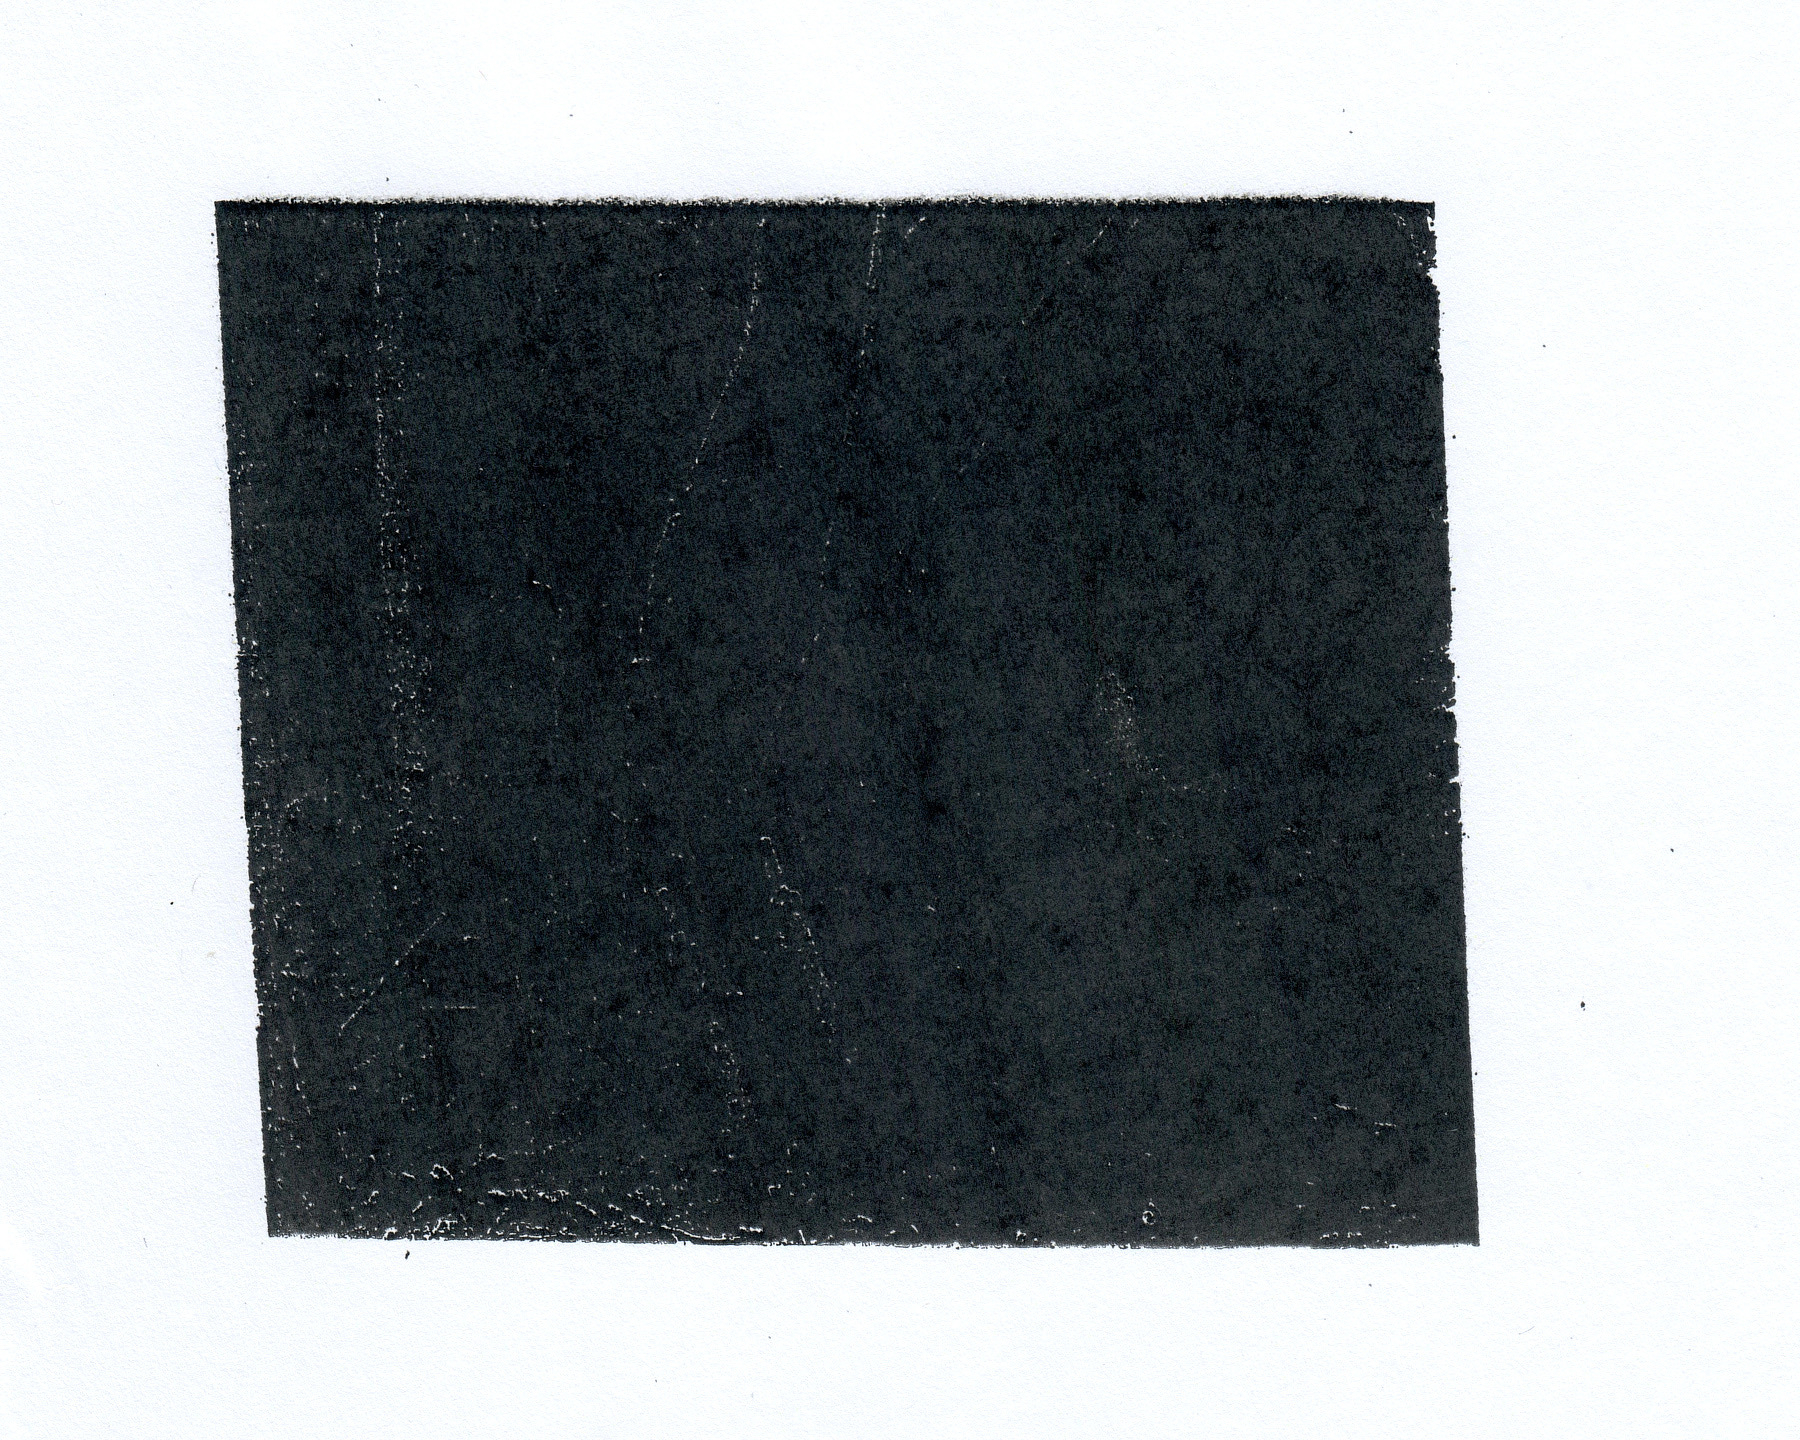
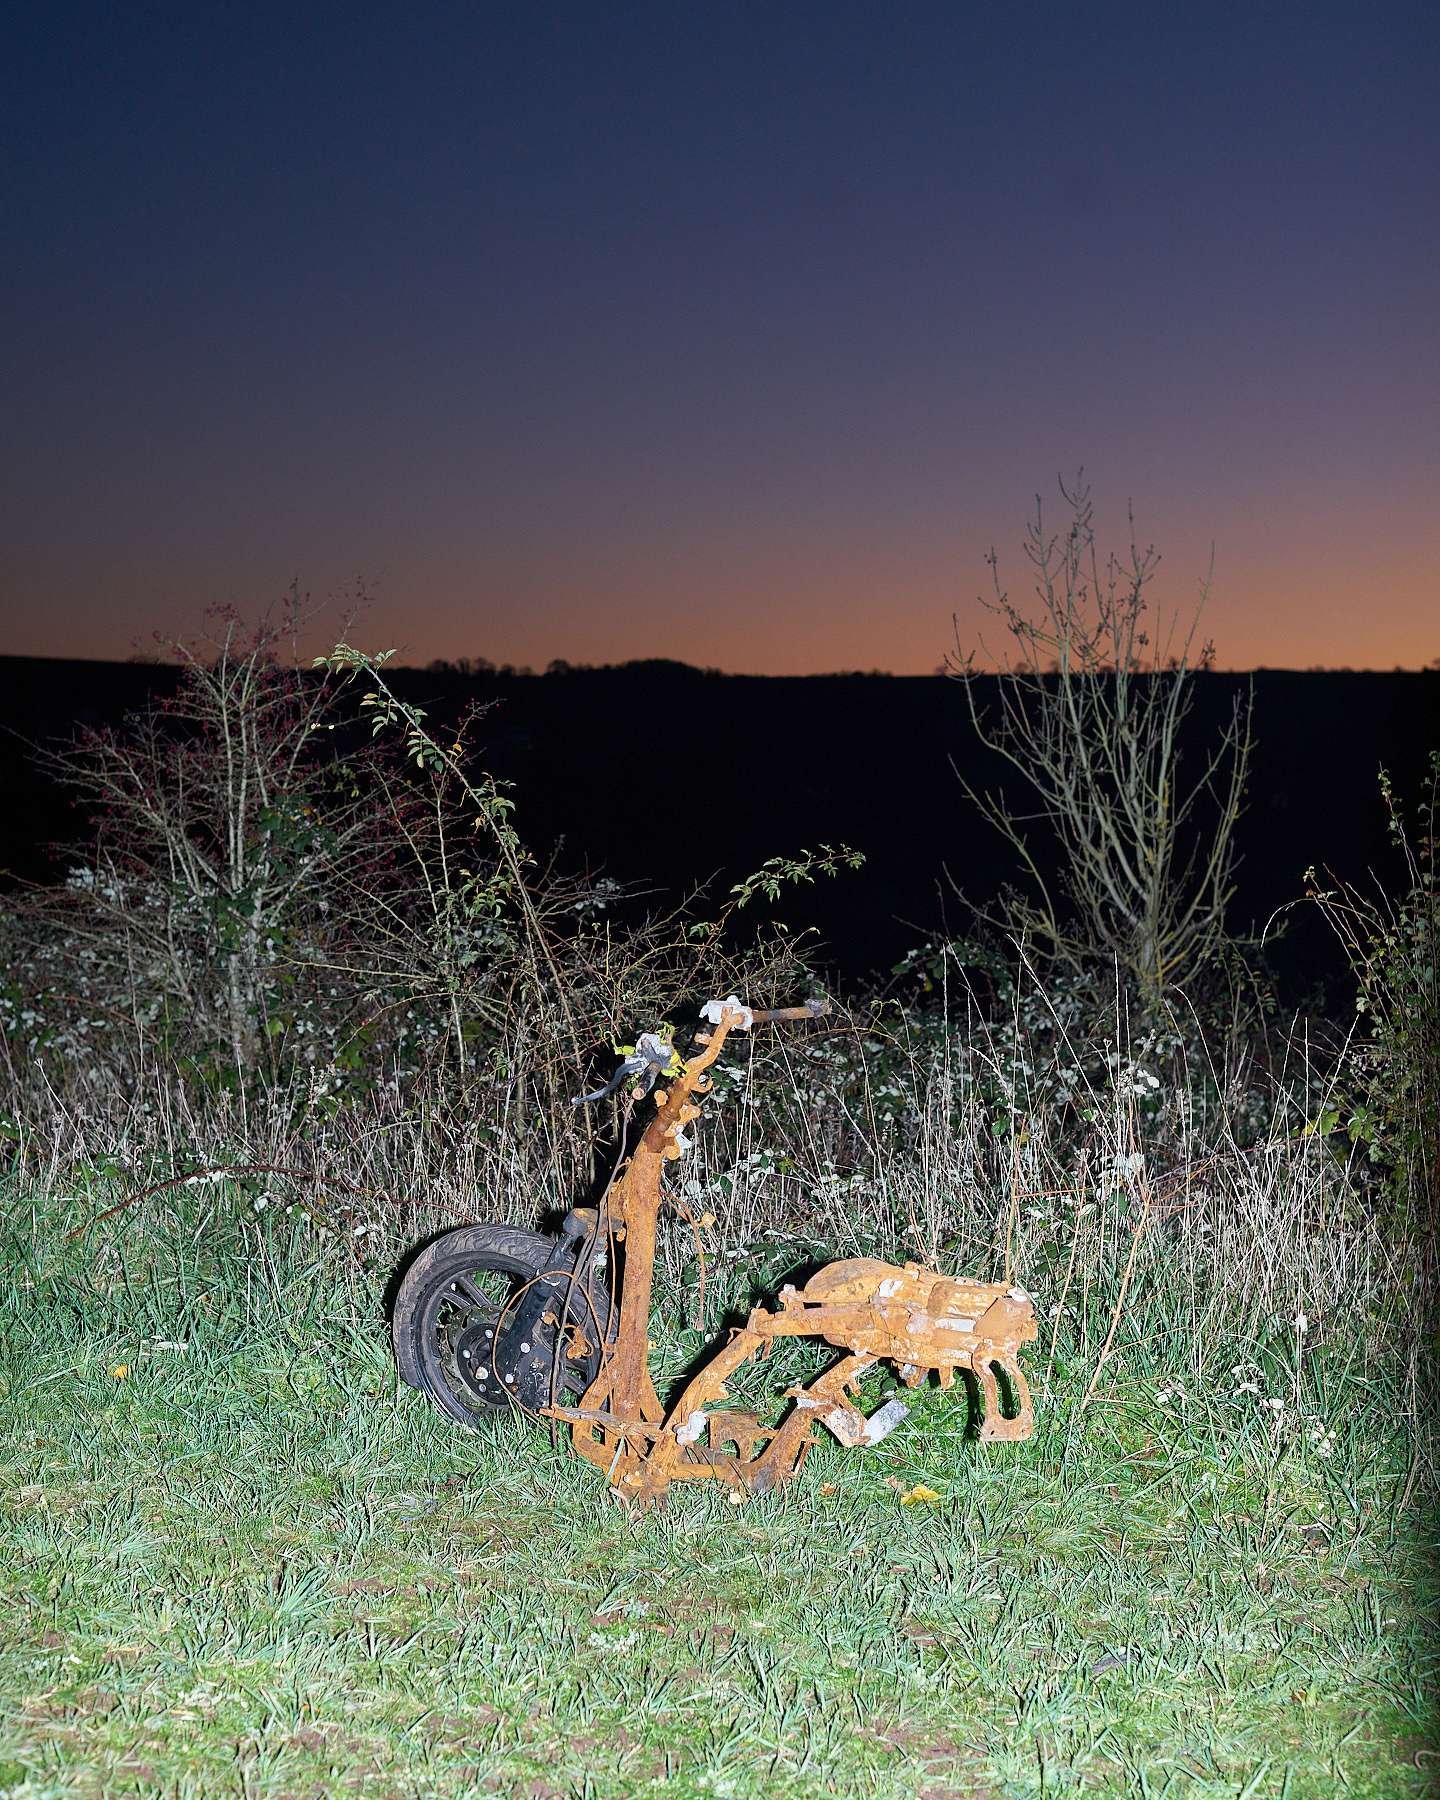
I thought what if I do something a little more hands on, and print and re-scan a photo to see how long it takes until it completely disintegrates. I was surprised as it took a lot less time than I had expected, within 12 frames it had gone from a photo of an abandoned motorbike to black smudgy box. I did post this sequence to instagram, and thought about uploading that repeatedly to see what would happen, but that feels a little too meta.
I do enjoy silly projects like this, enjoying the benefits of modern full frame sensors, nice glass and then taking the resulting crisp image file and deliberately sabotaging it, this time reducing it down to a grainy mess.
Start with the original file:
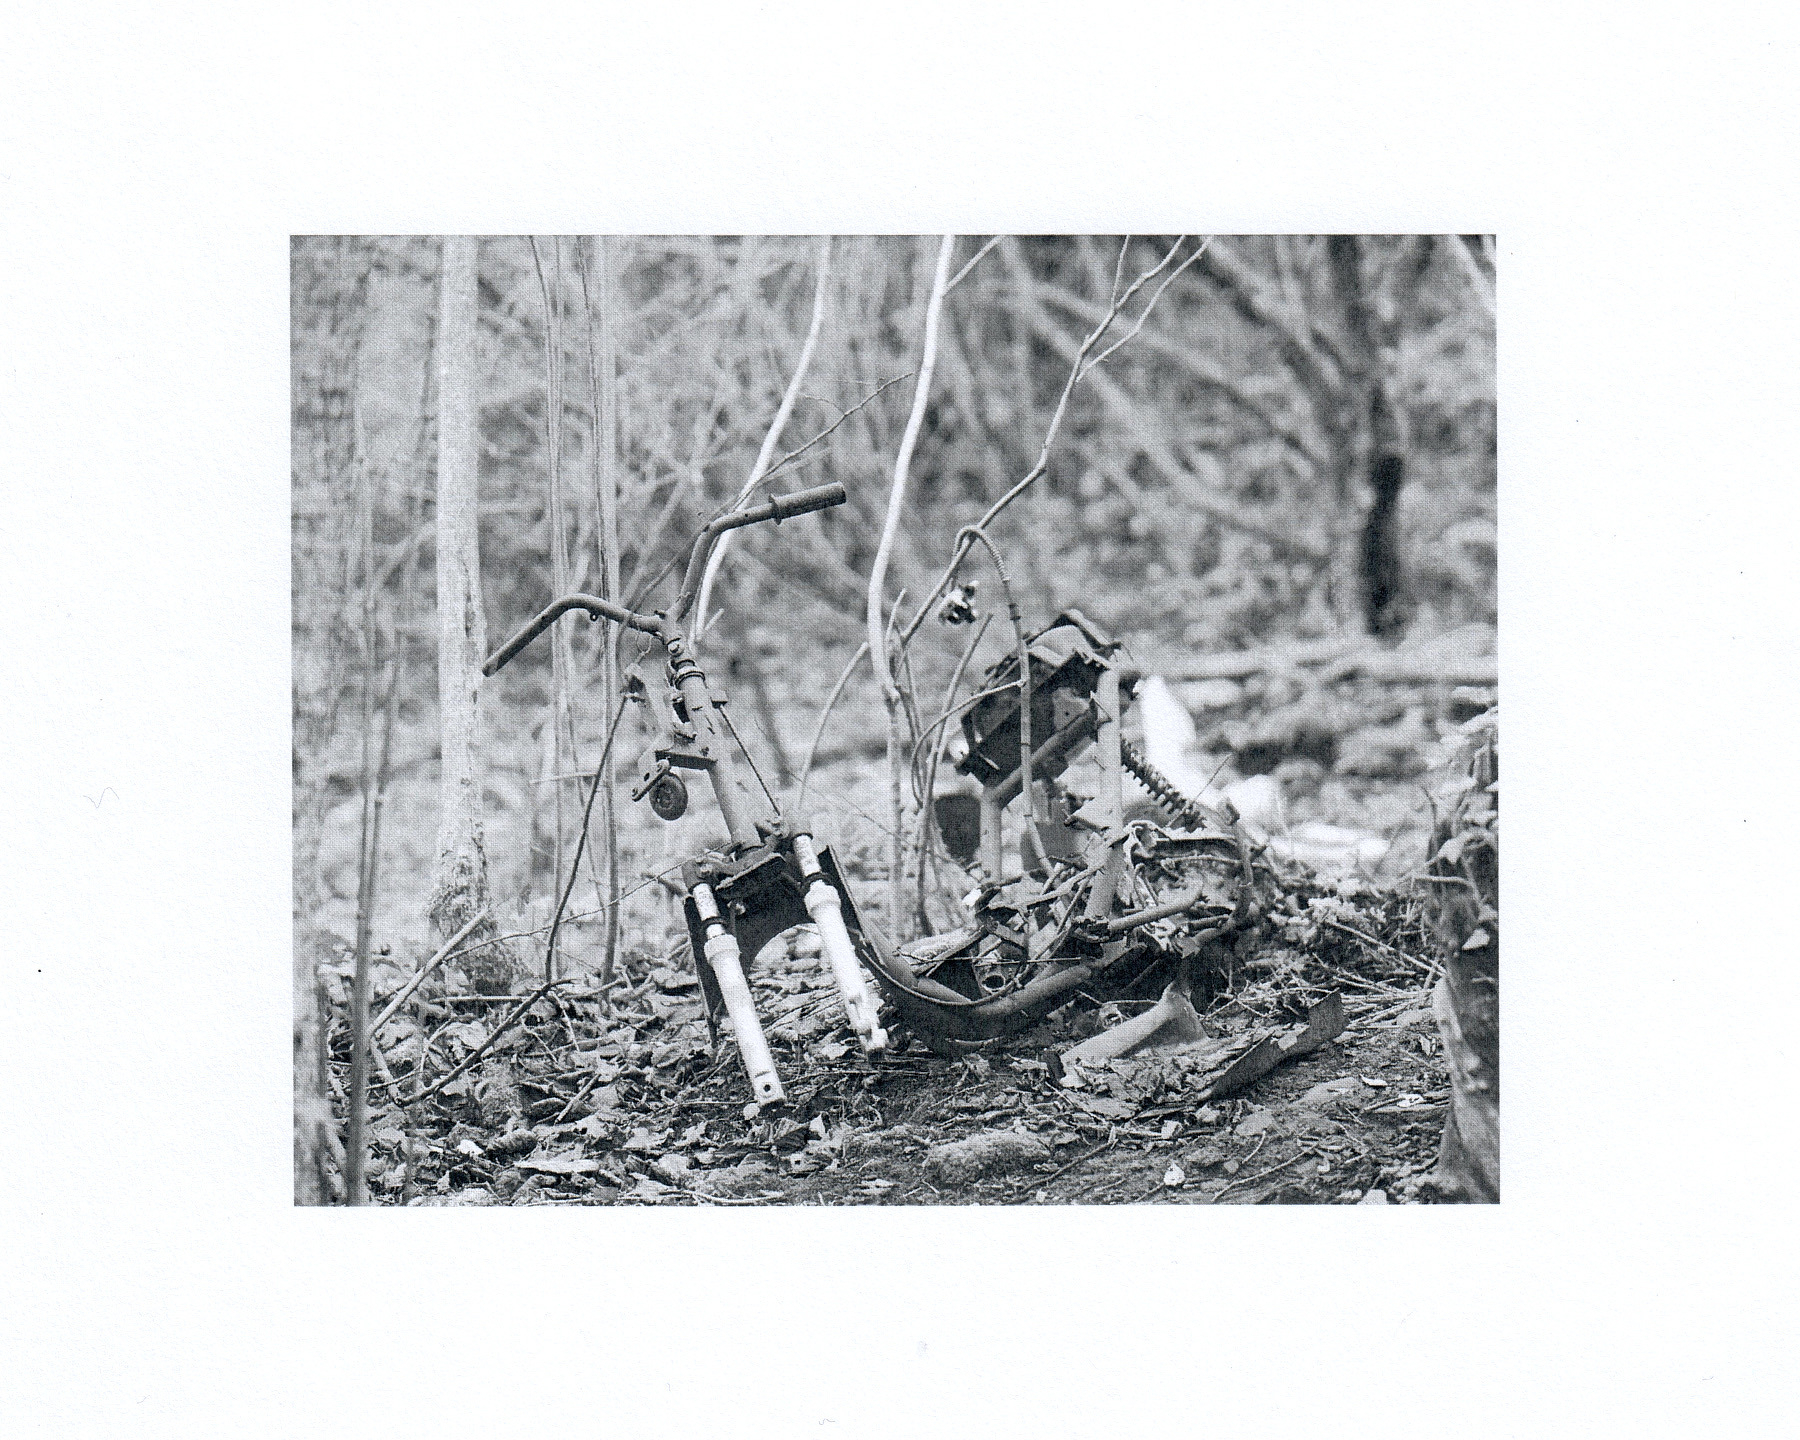
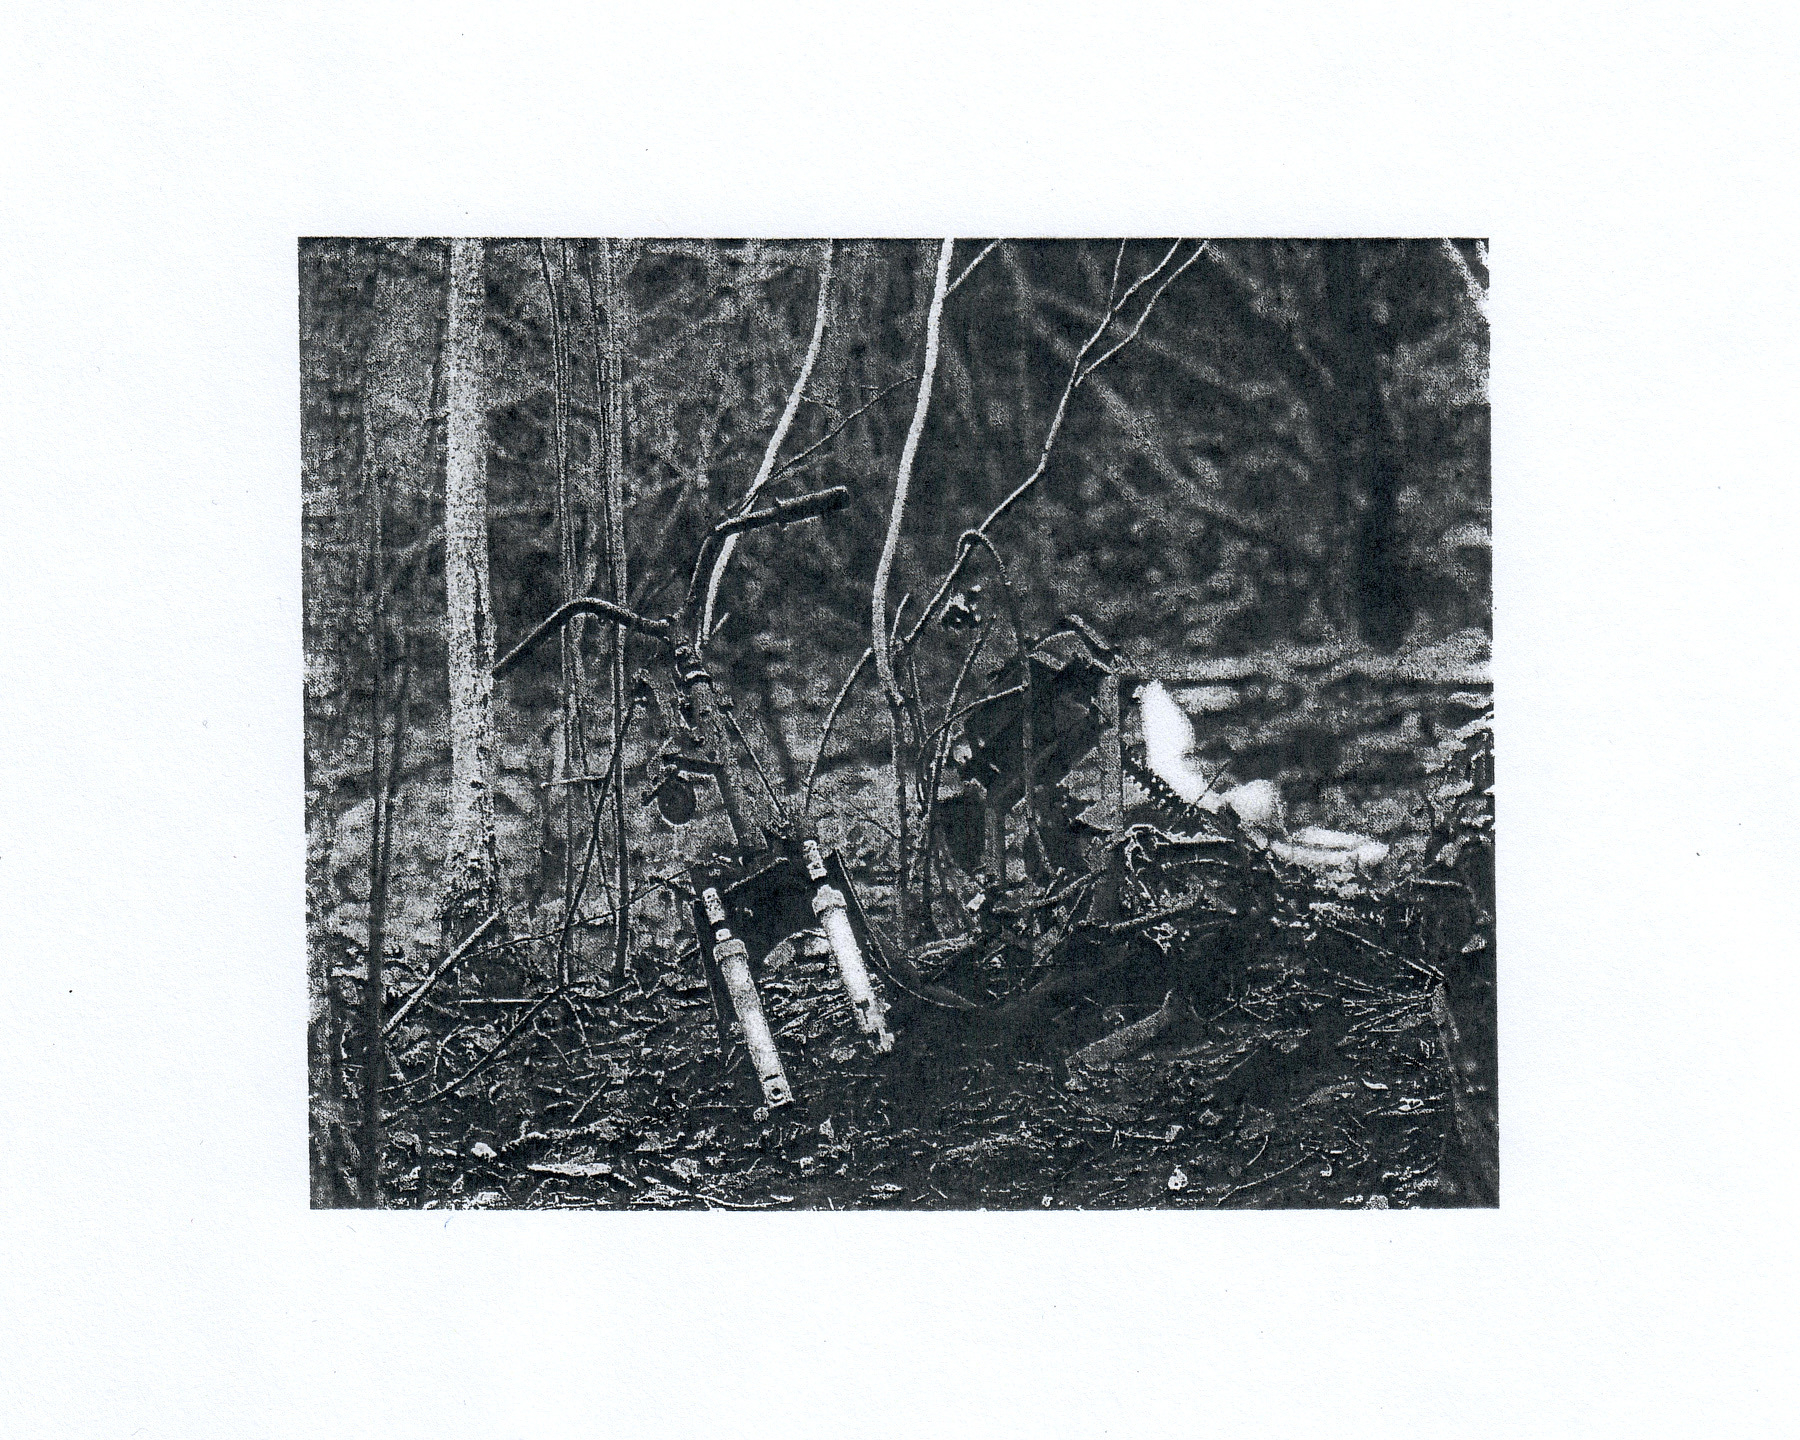
The exact same image after the first print and scan, you can already see it’s lost a lot of that digital crispness. These were all printed on a basic laser printer, to really highlight the lofi effect (and just because that’s the printer I had access to).
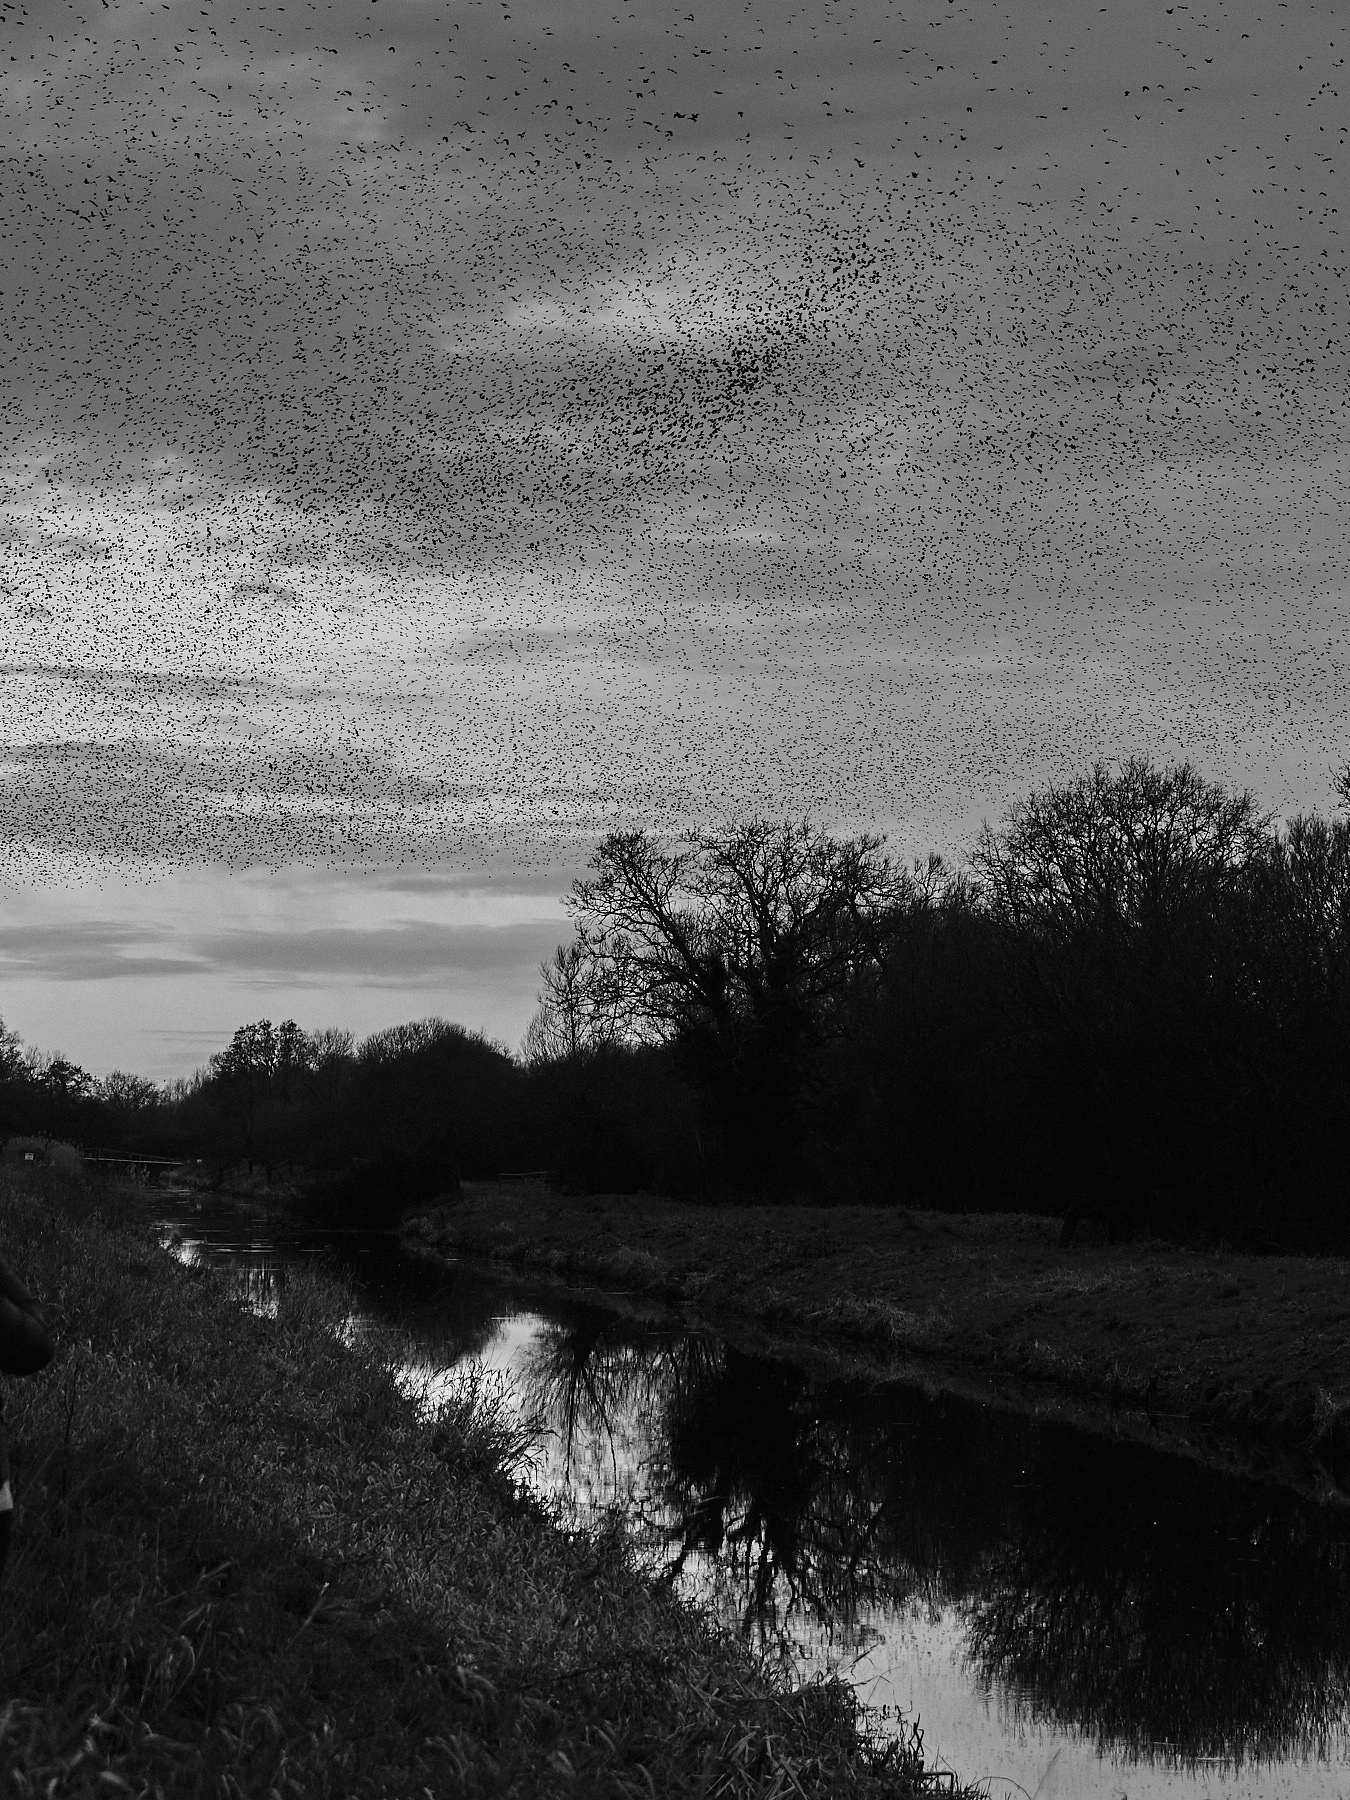
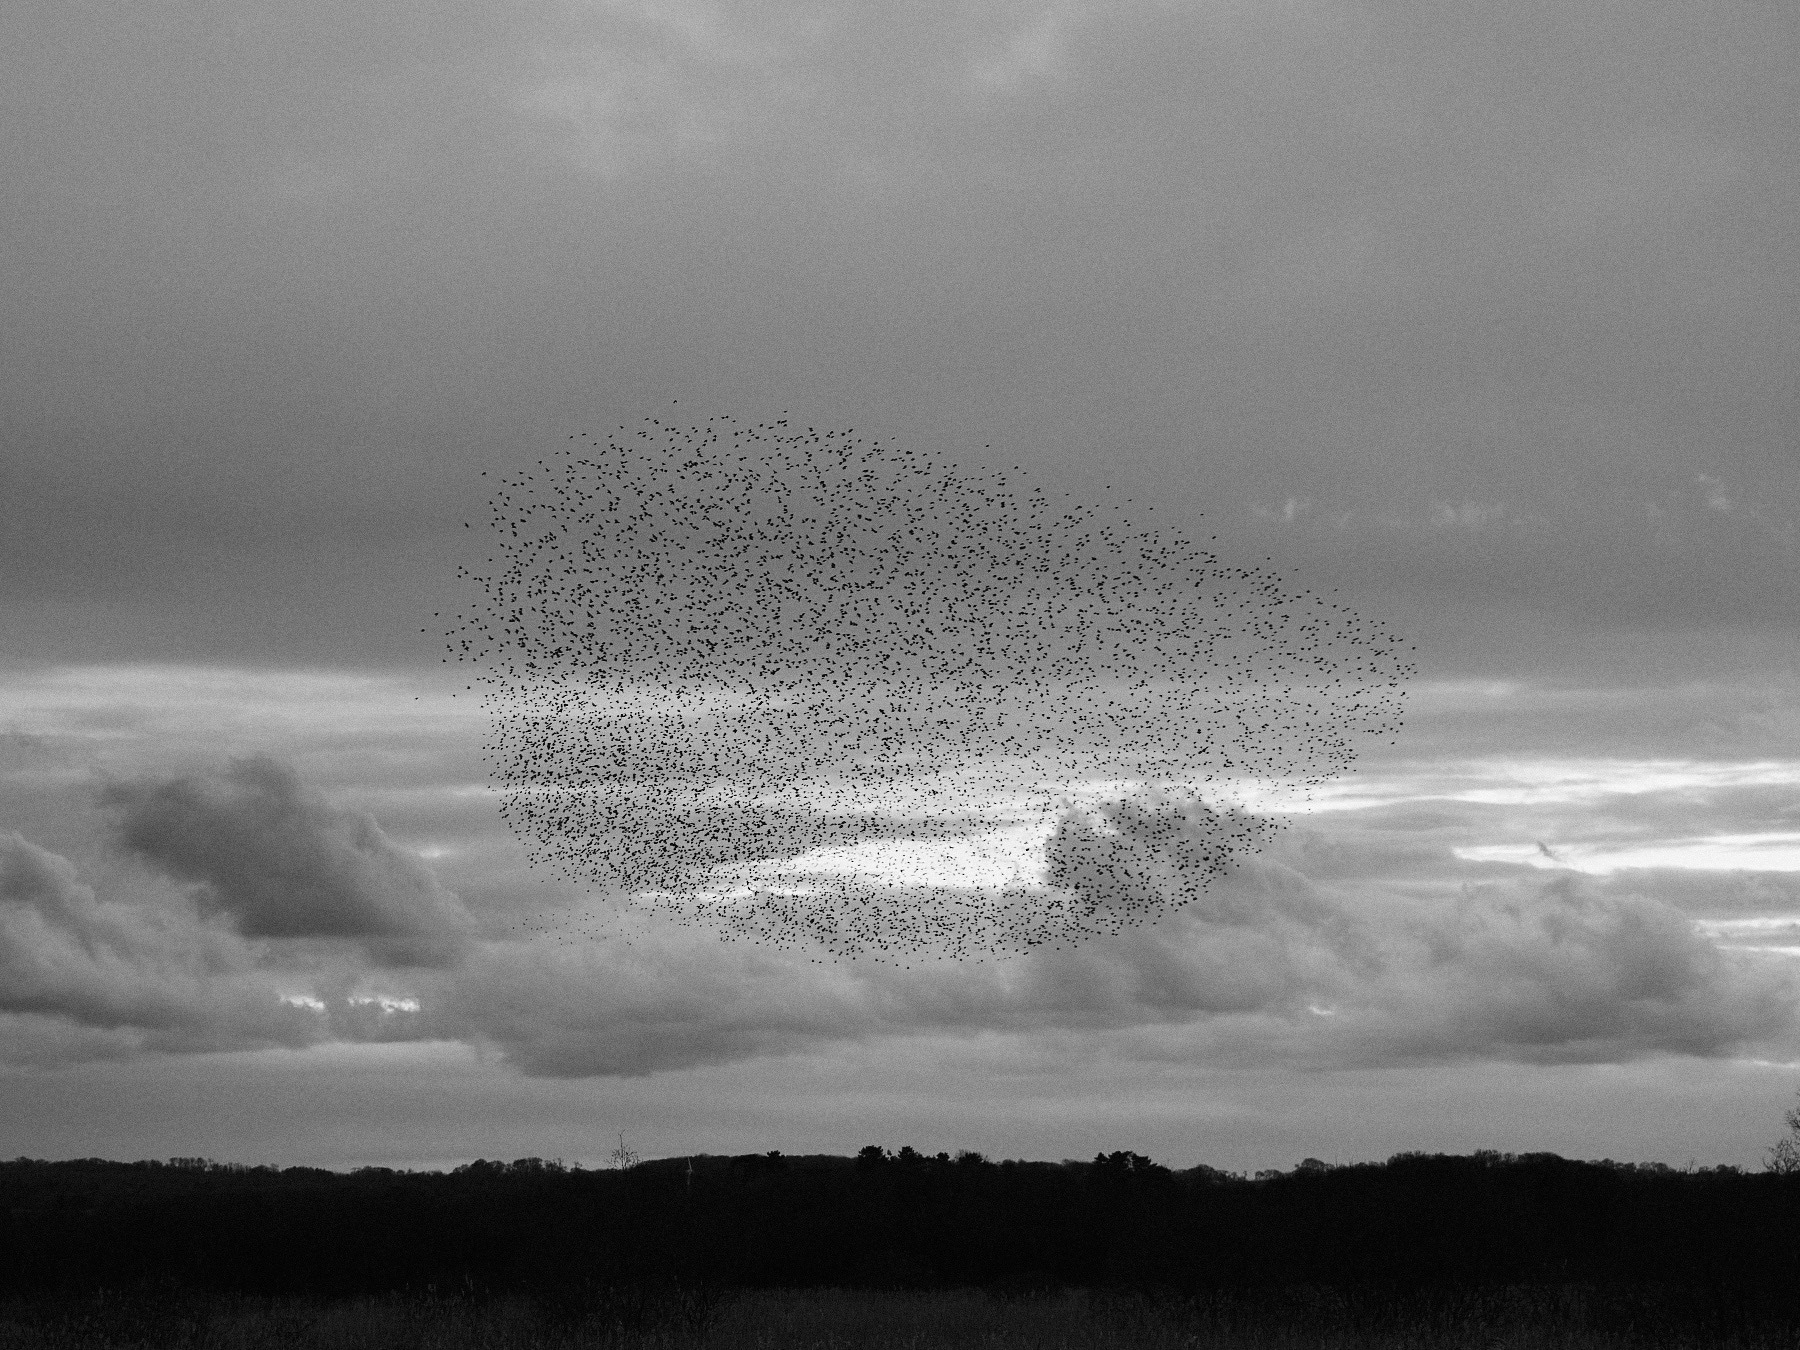
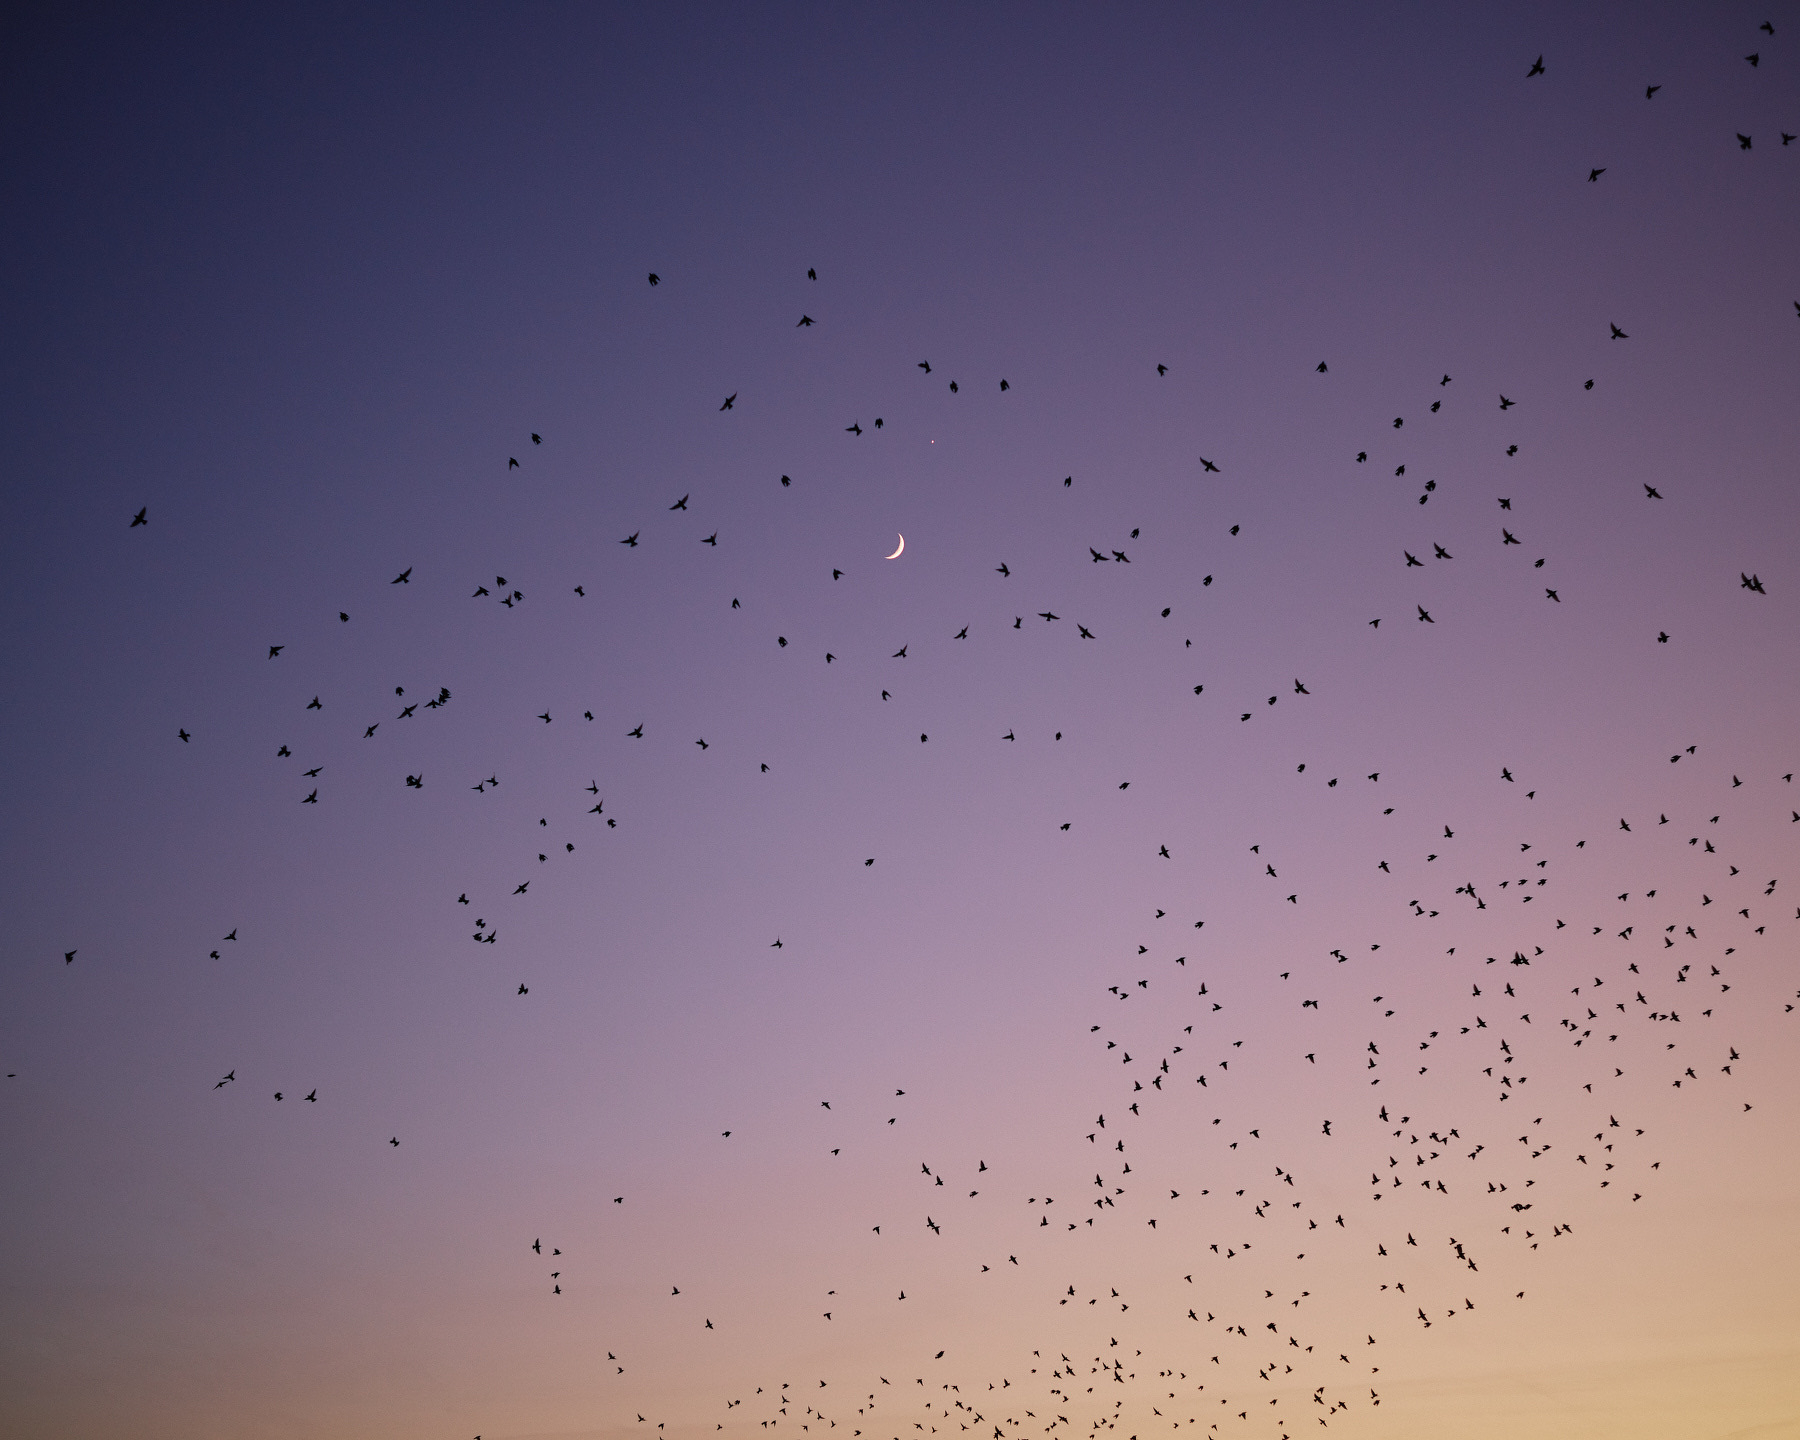
I try and get out to view the murmurations every winter, either at Ham Wall or Shapwick Heath (there is a phone number you can dial to find out where they roosted the night before). I’ve blogged about it previous visits, and it really is phenomenal in person. These are some images from a visit to Shapwick Heath from earlier on in the year.
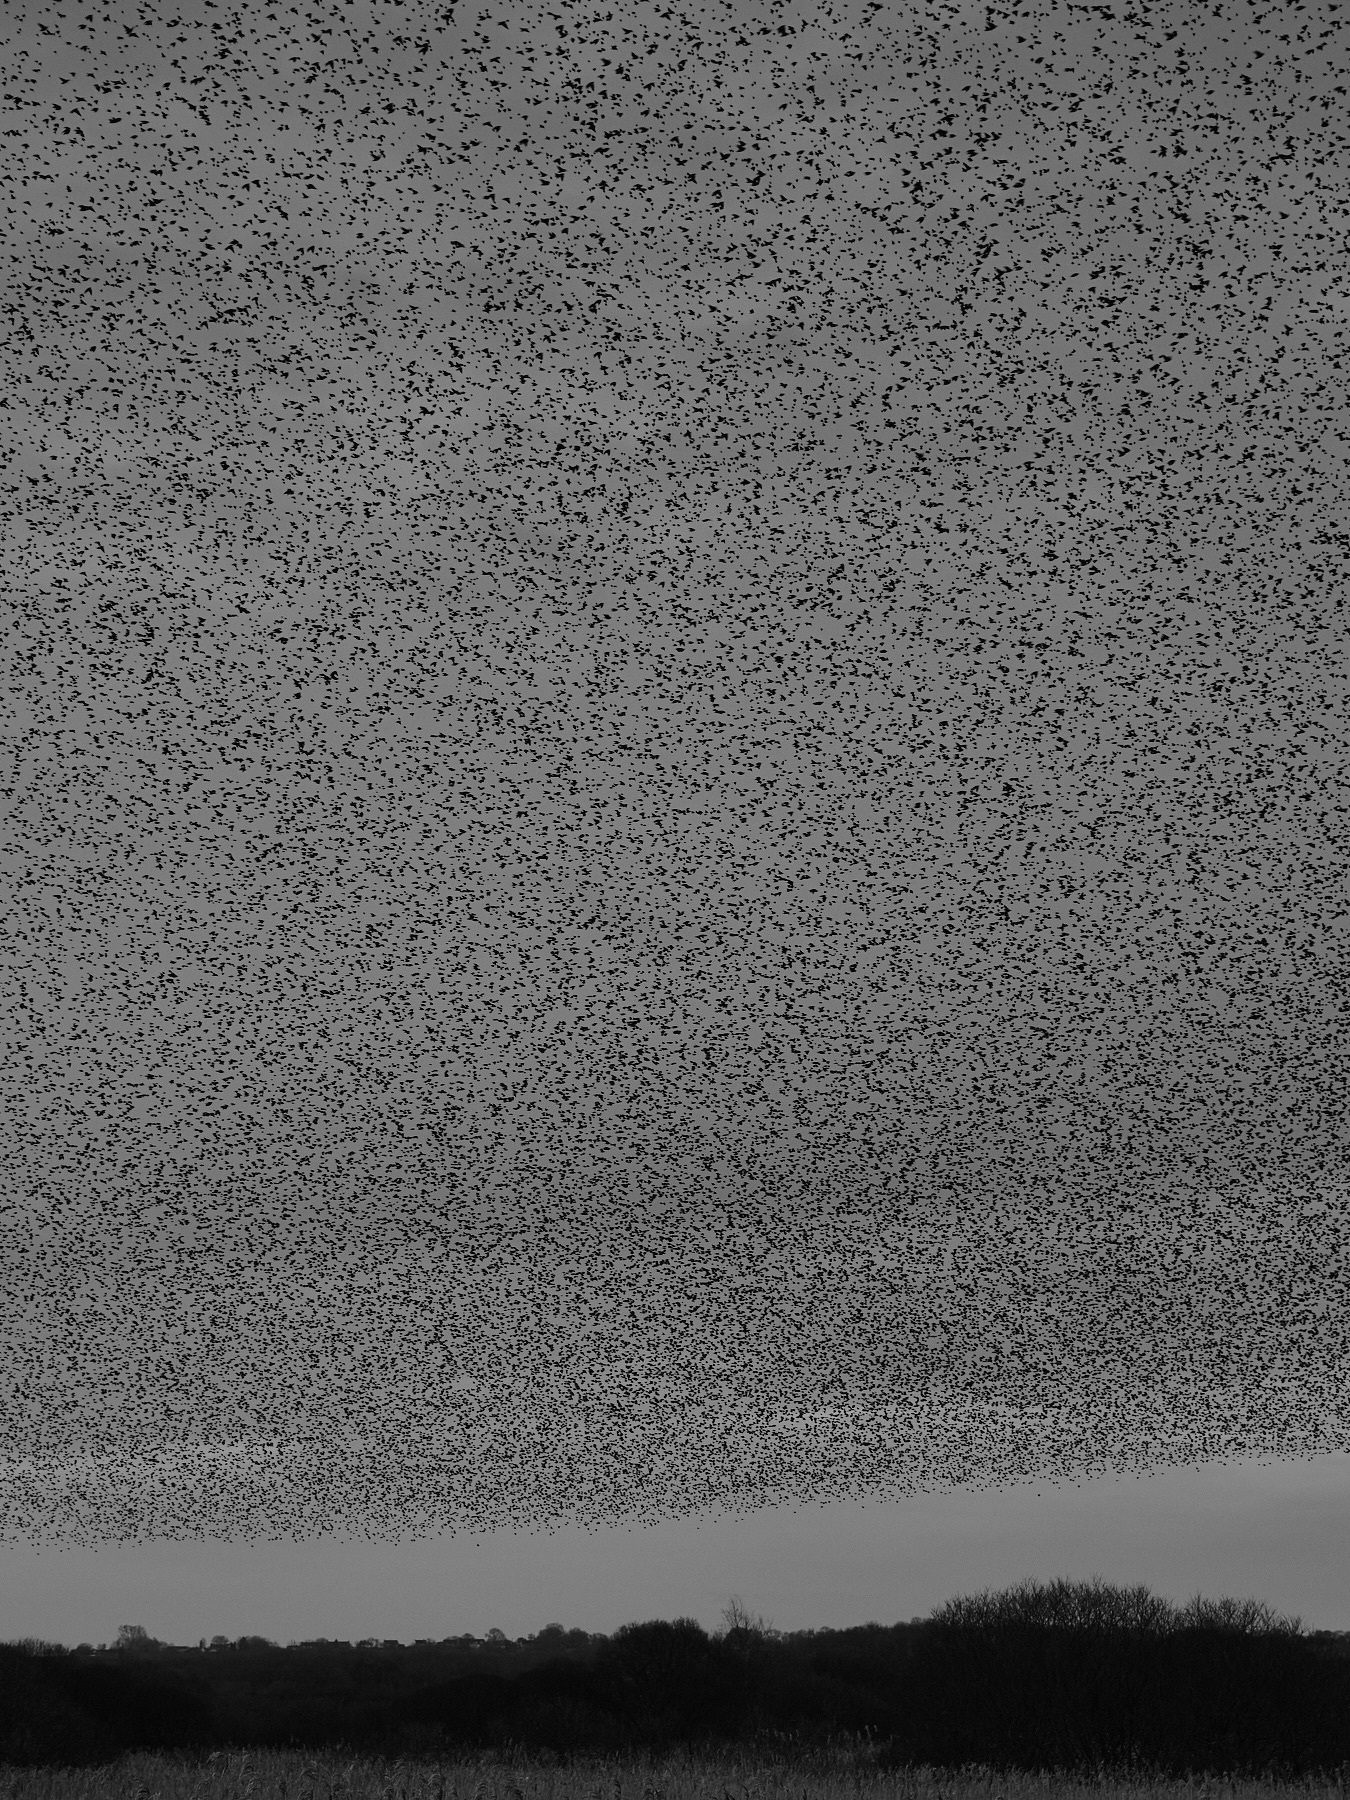
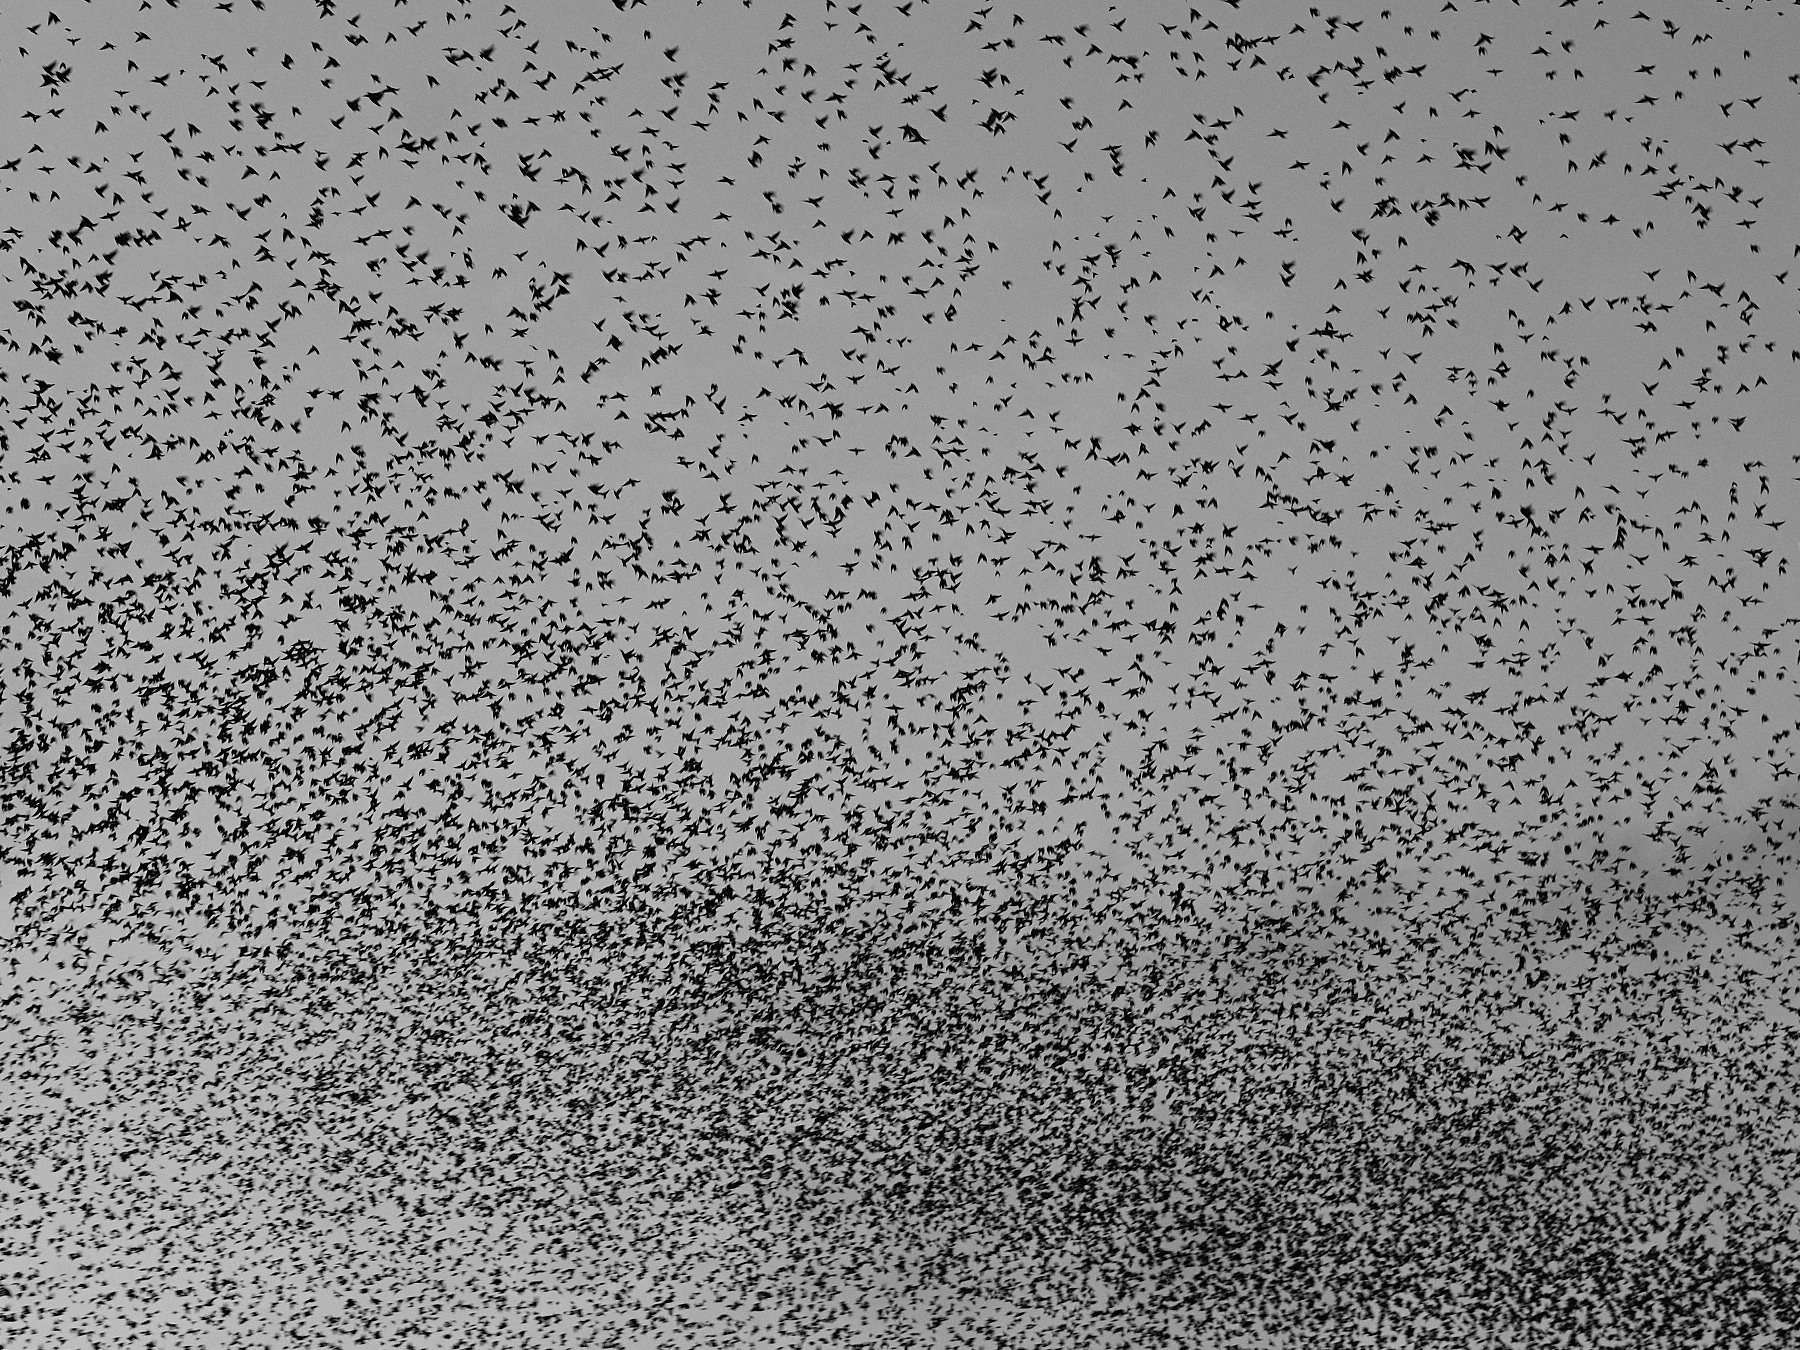
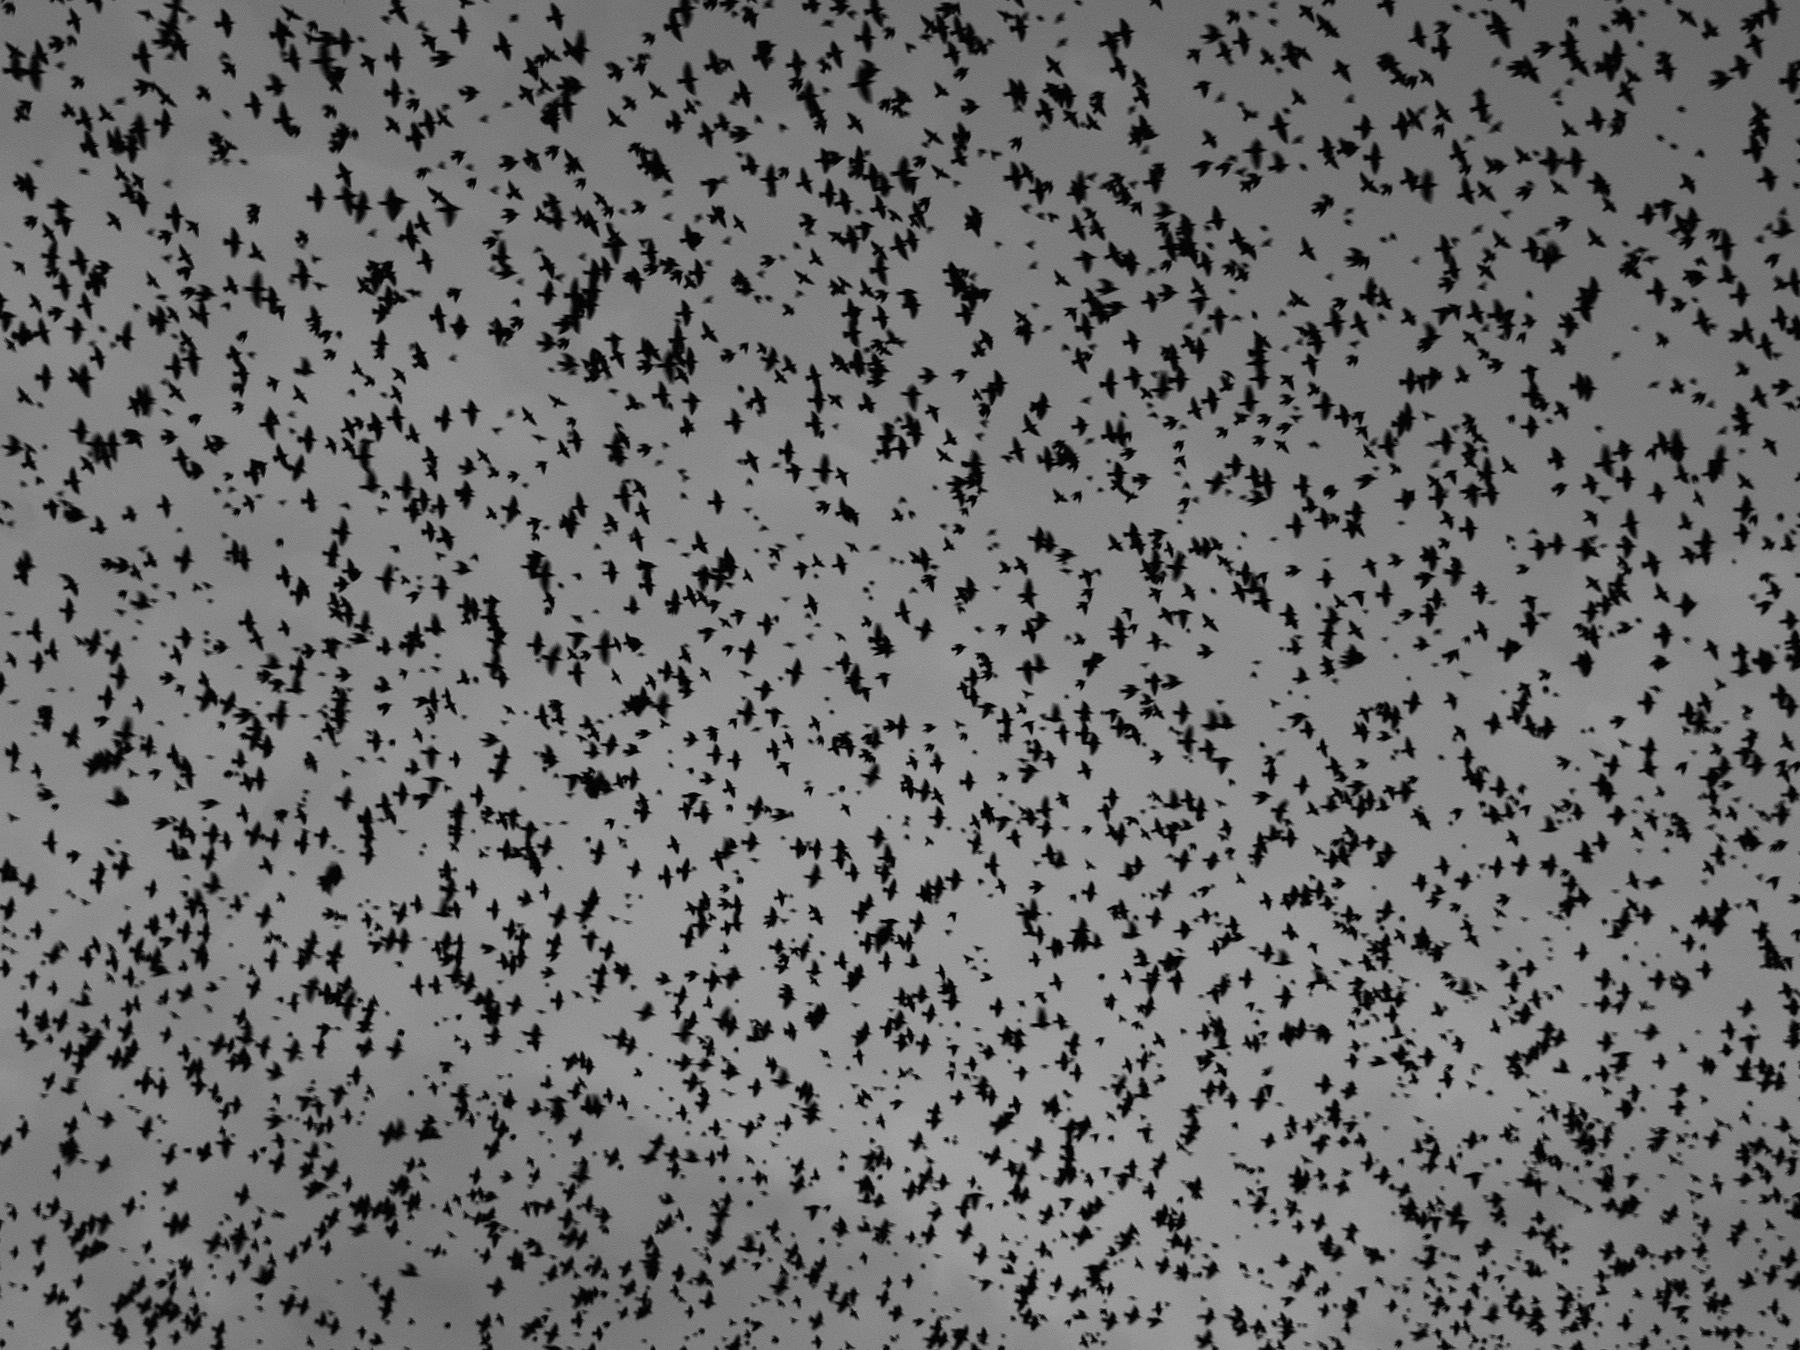
There is an unpredictability about each visit, they are wild animals so nothing is guaranteed. I visited twice this year, and the first time I saw some small murmurations, but from far away, and each time I moved, I still seemed to be in the wrong place. The second visit I hit the jackpot, as they were some of the best I’ve ever seen. They were flying directly overhead, thousands of birds all at once, in a thick constantly moving cloud. Often with different groups converging and seemingly flying in the same direction but also different directions at the same time.
Cropped in is the only way to really appreciate the scale and just how many birds there are in the sky at once.
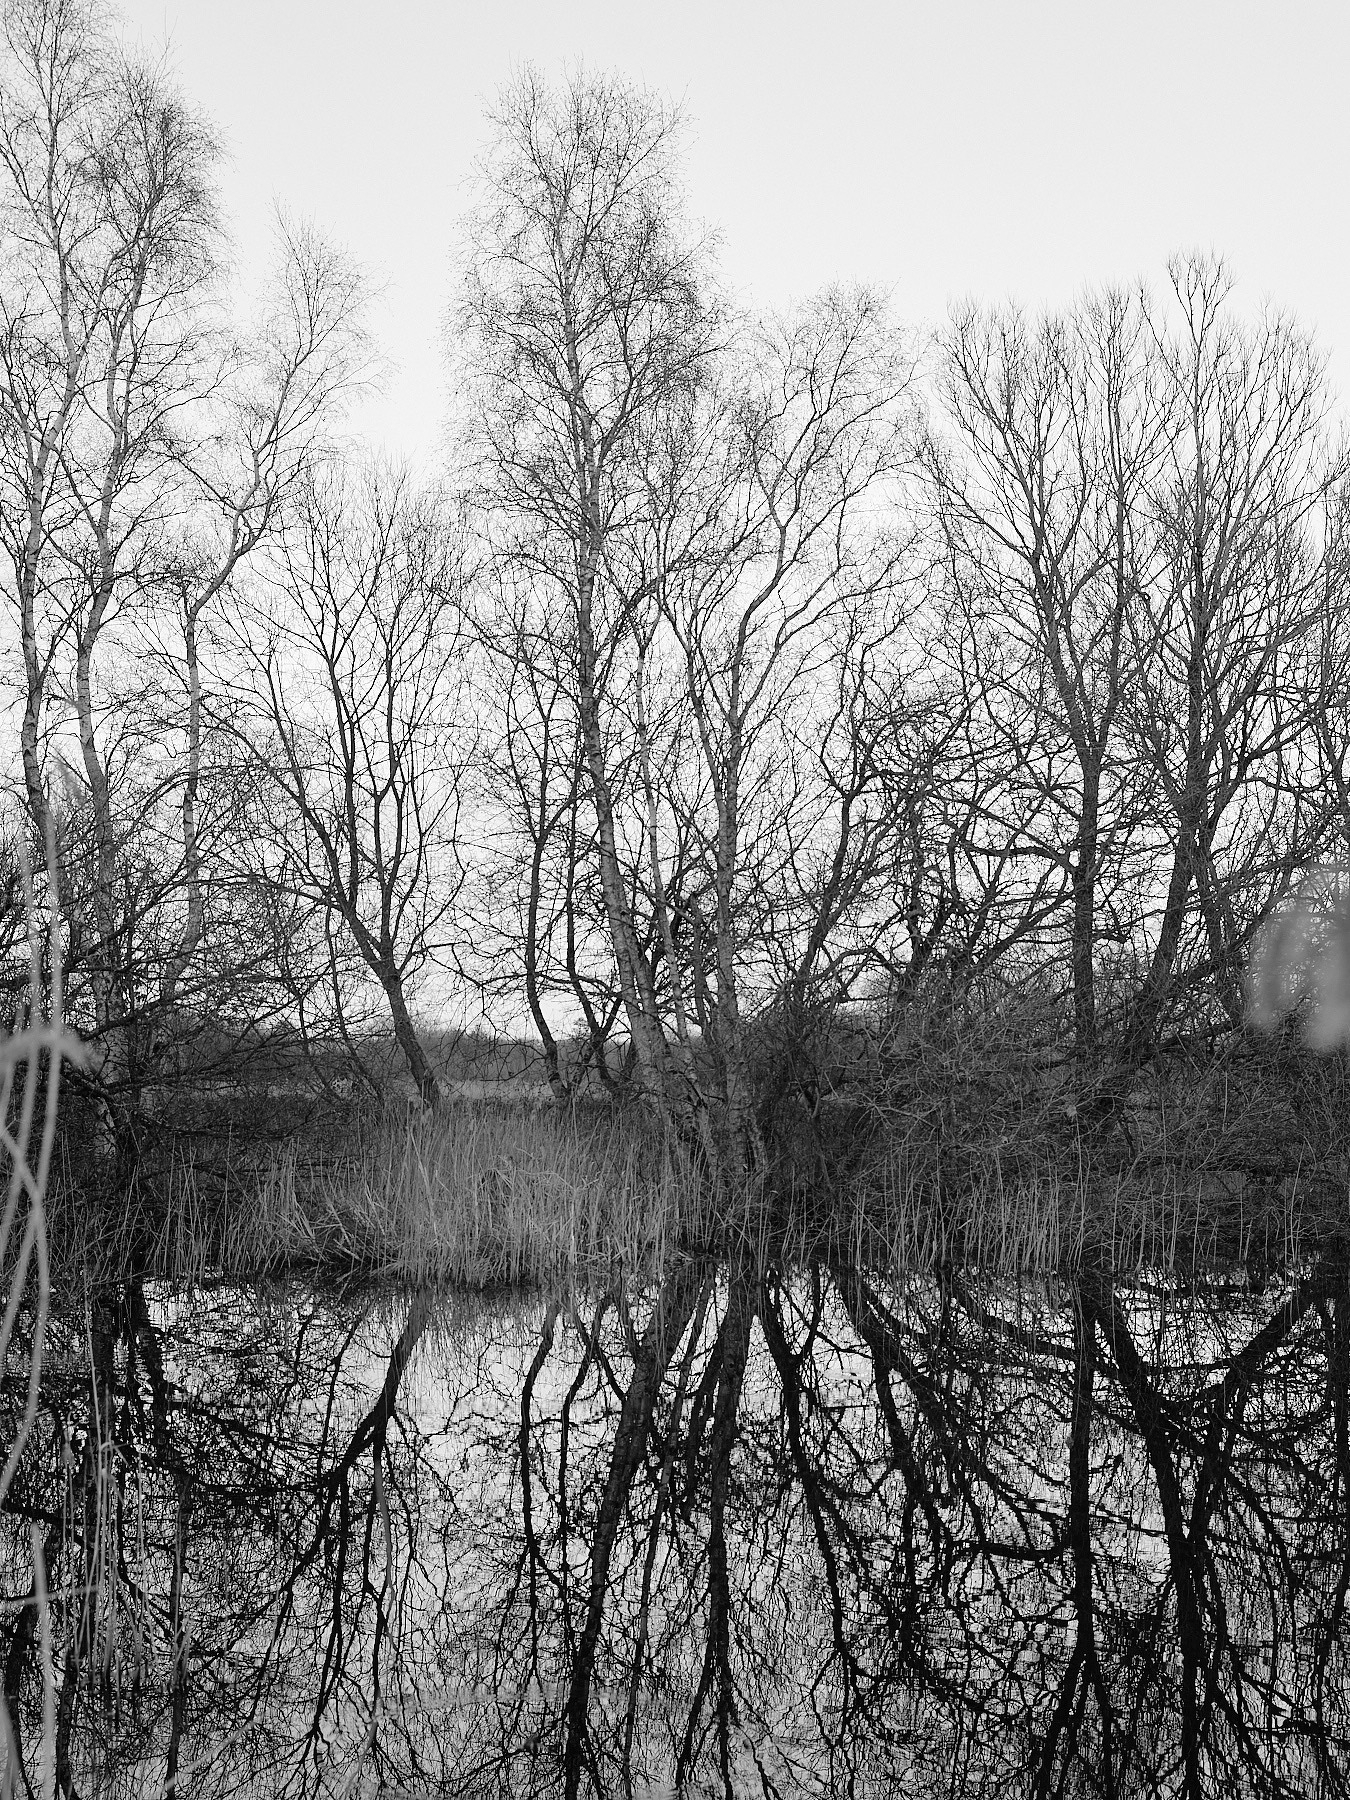
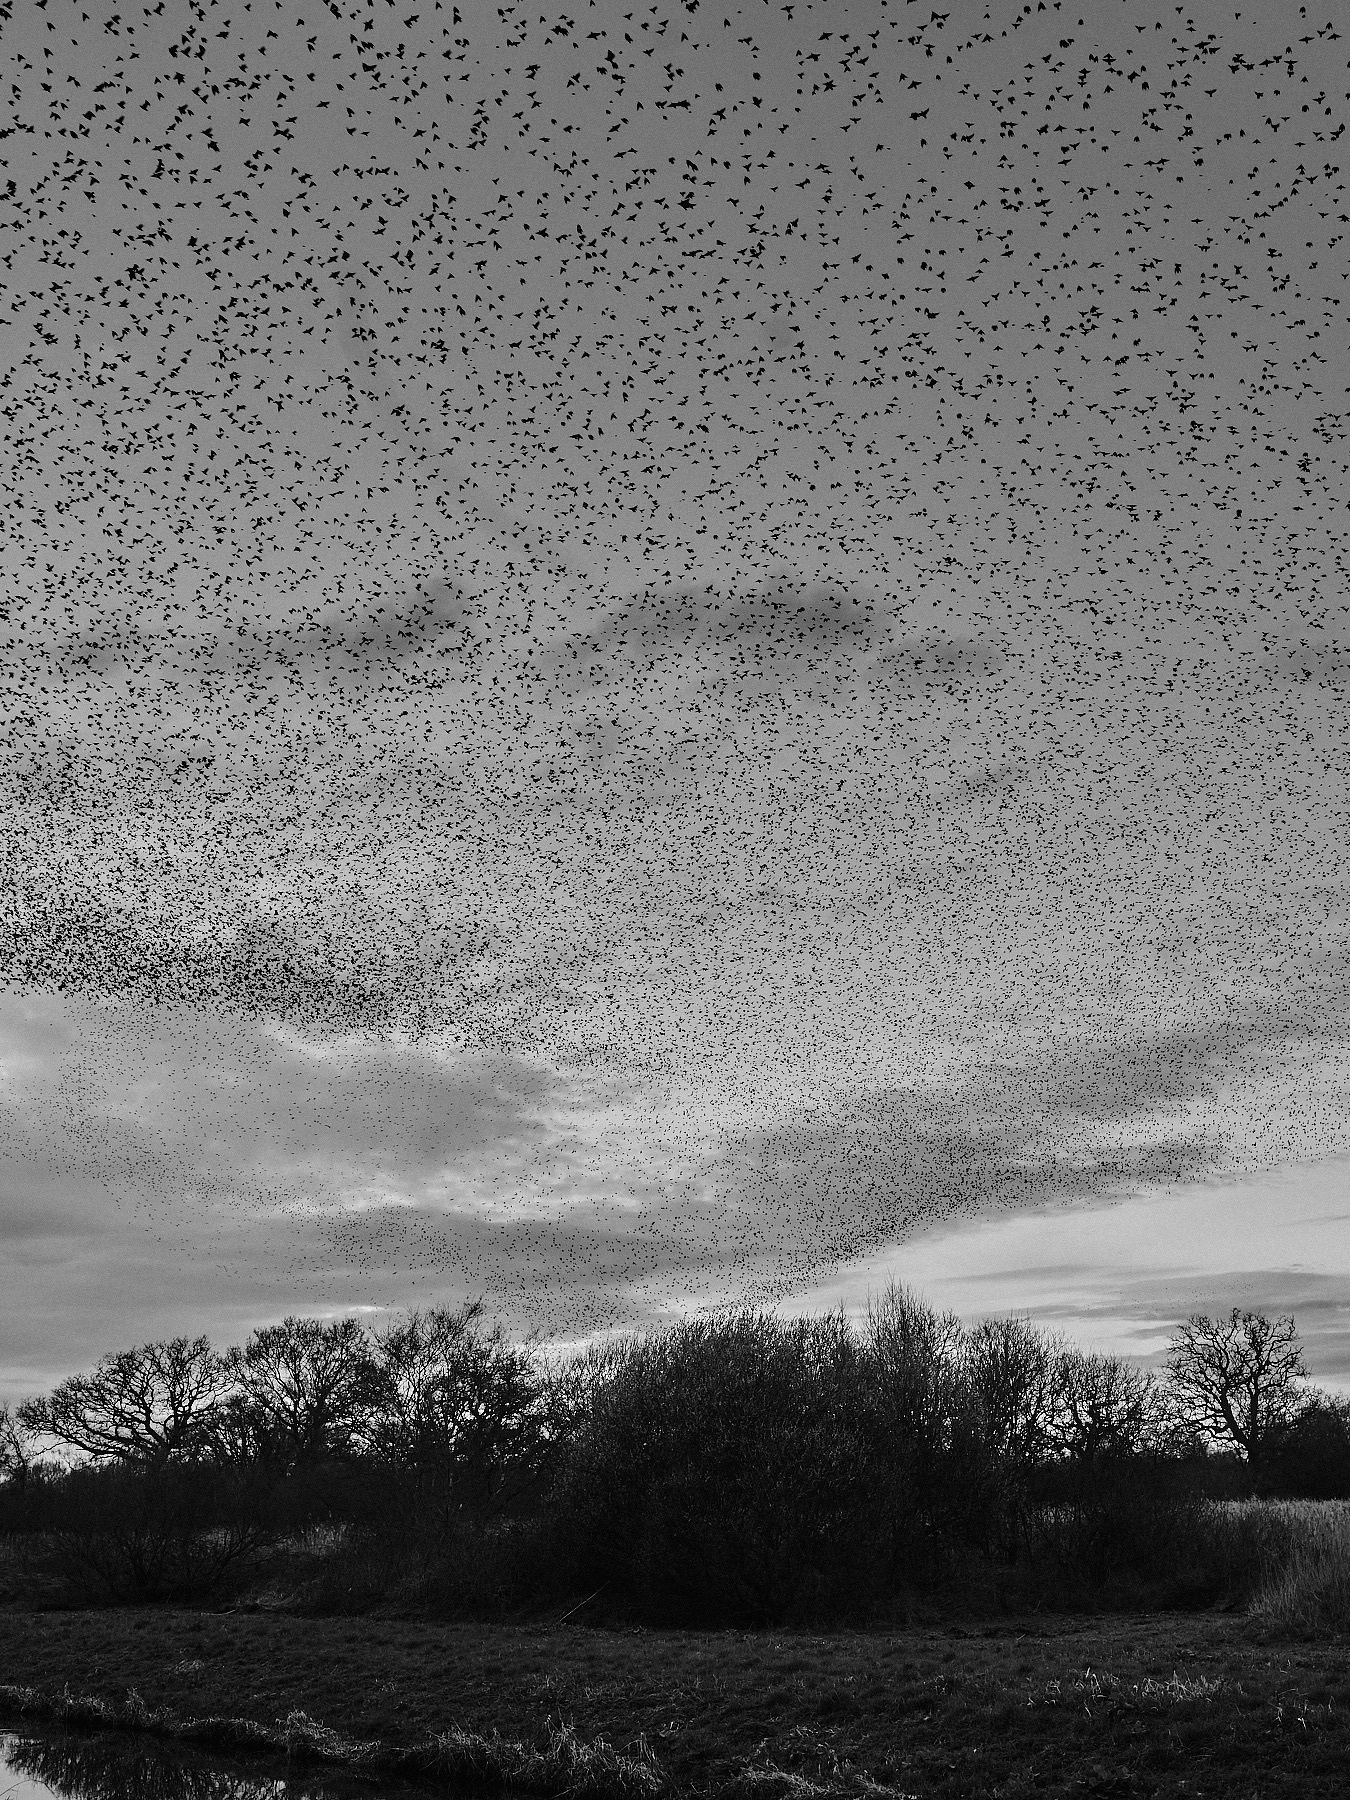
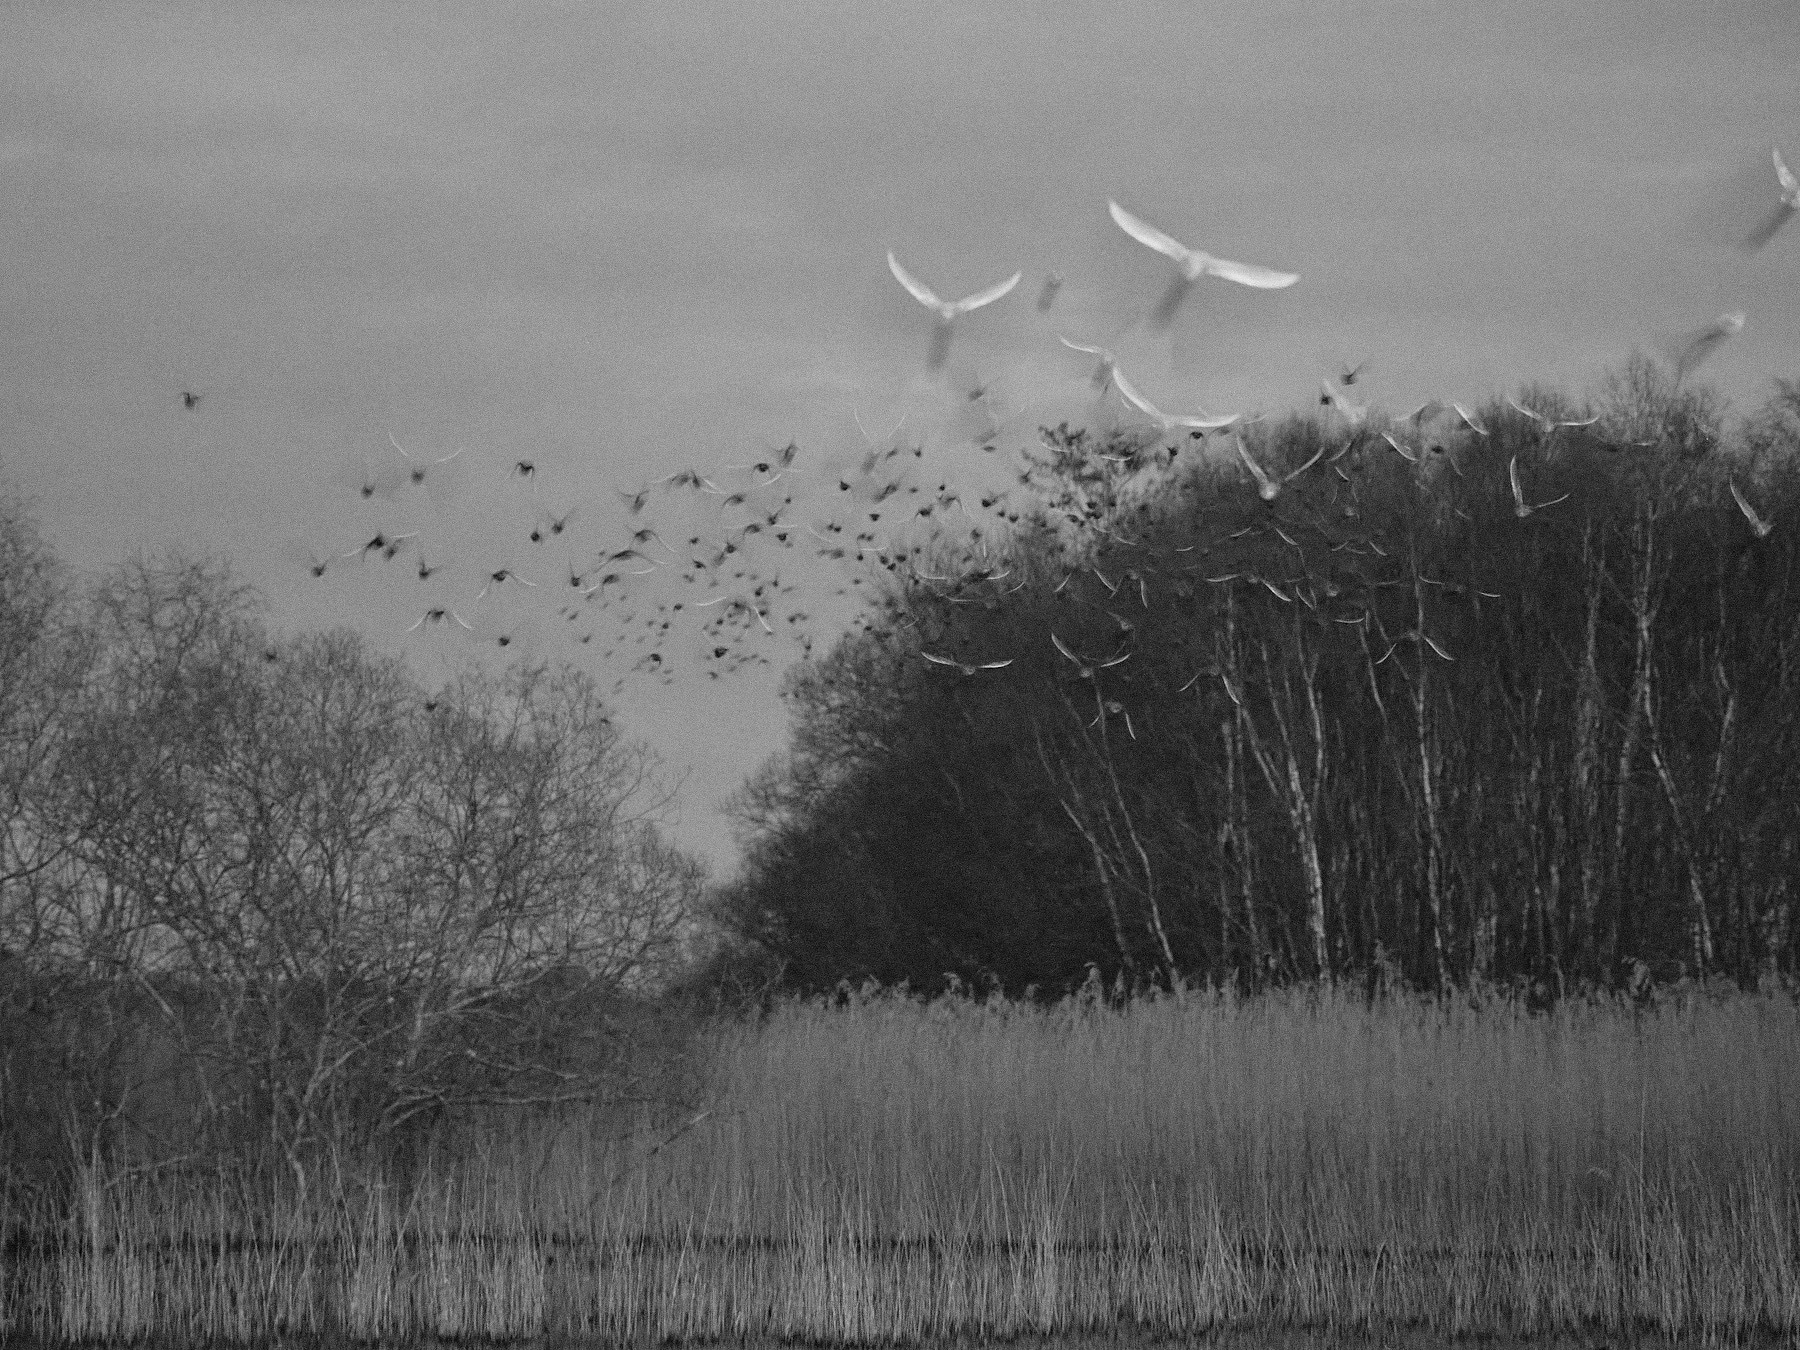
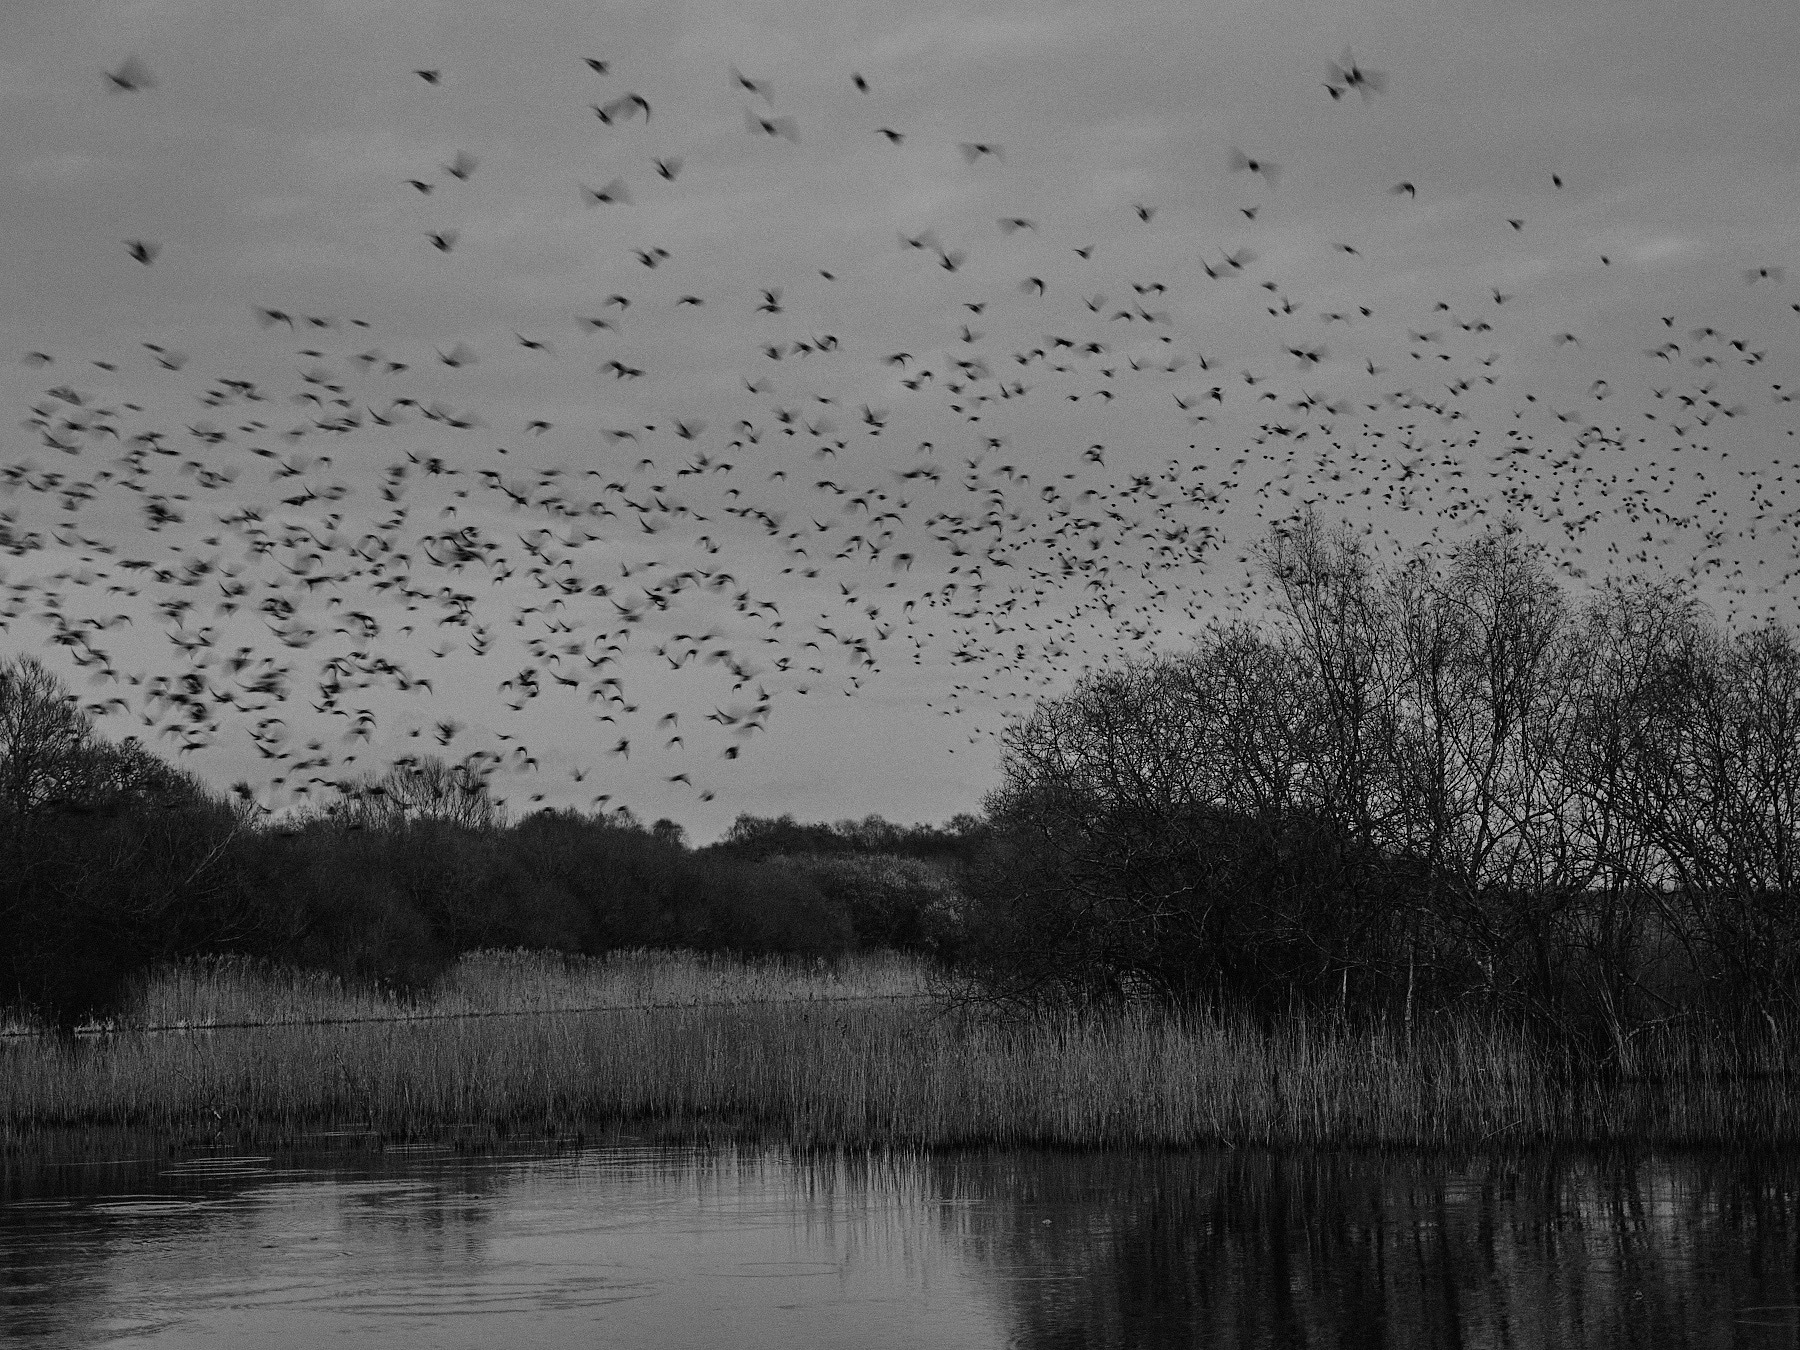
When I thought they had finished and I started ambling my way back to the car, I spotted some people next to a small lake off the main path so wandered over to investigate. I found the starlings were swooping down low from directly behind, before sweeping past the trees, and heading to roost. This felt pretty special witnessing them that close at dusk.
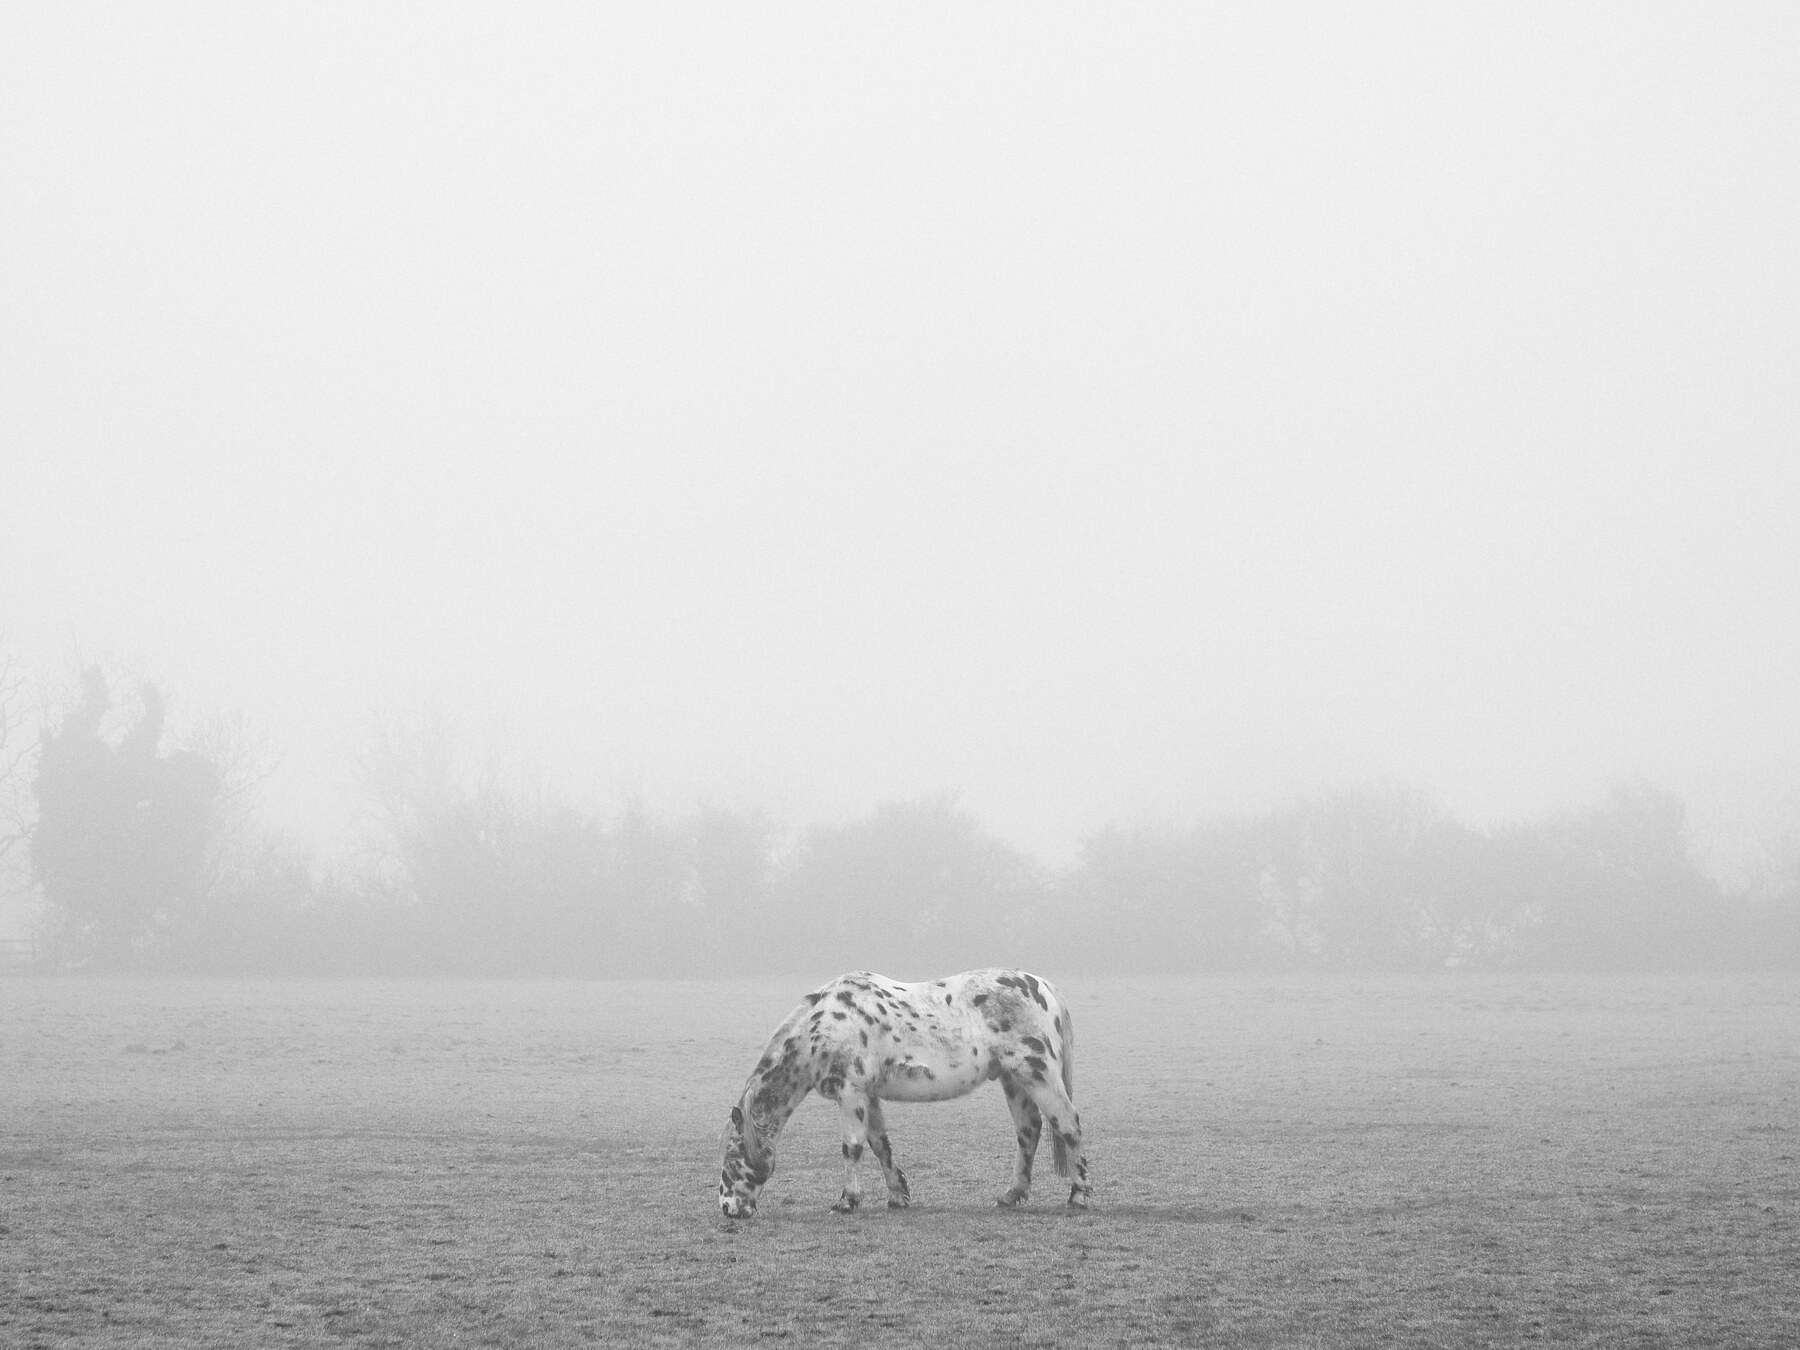
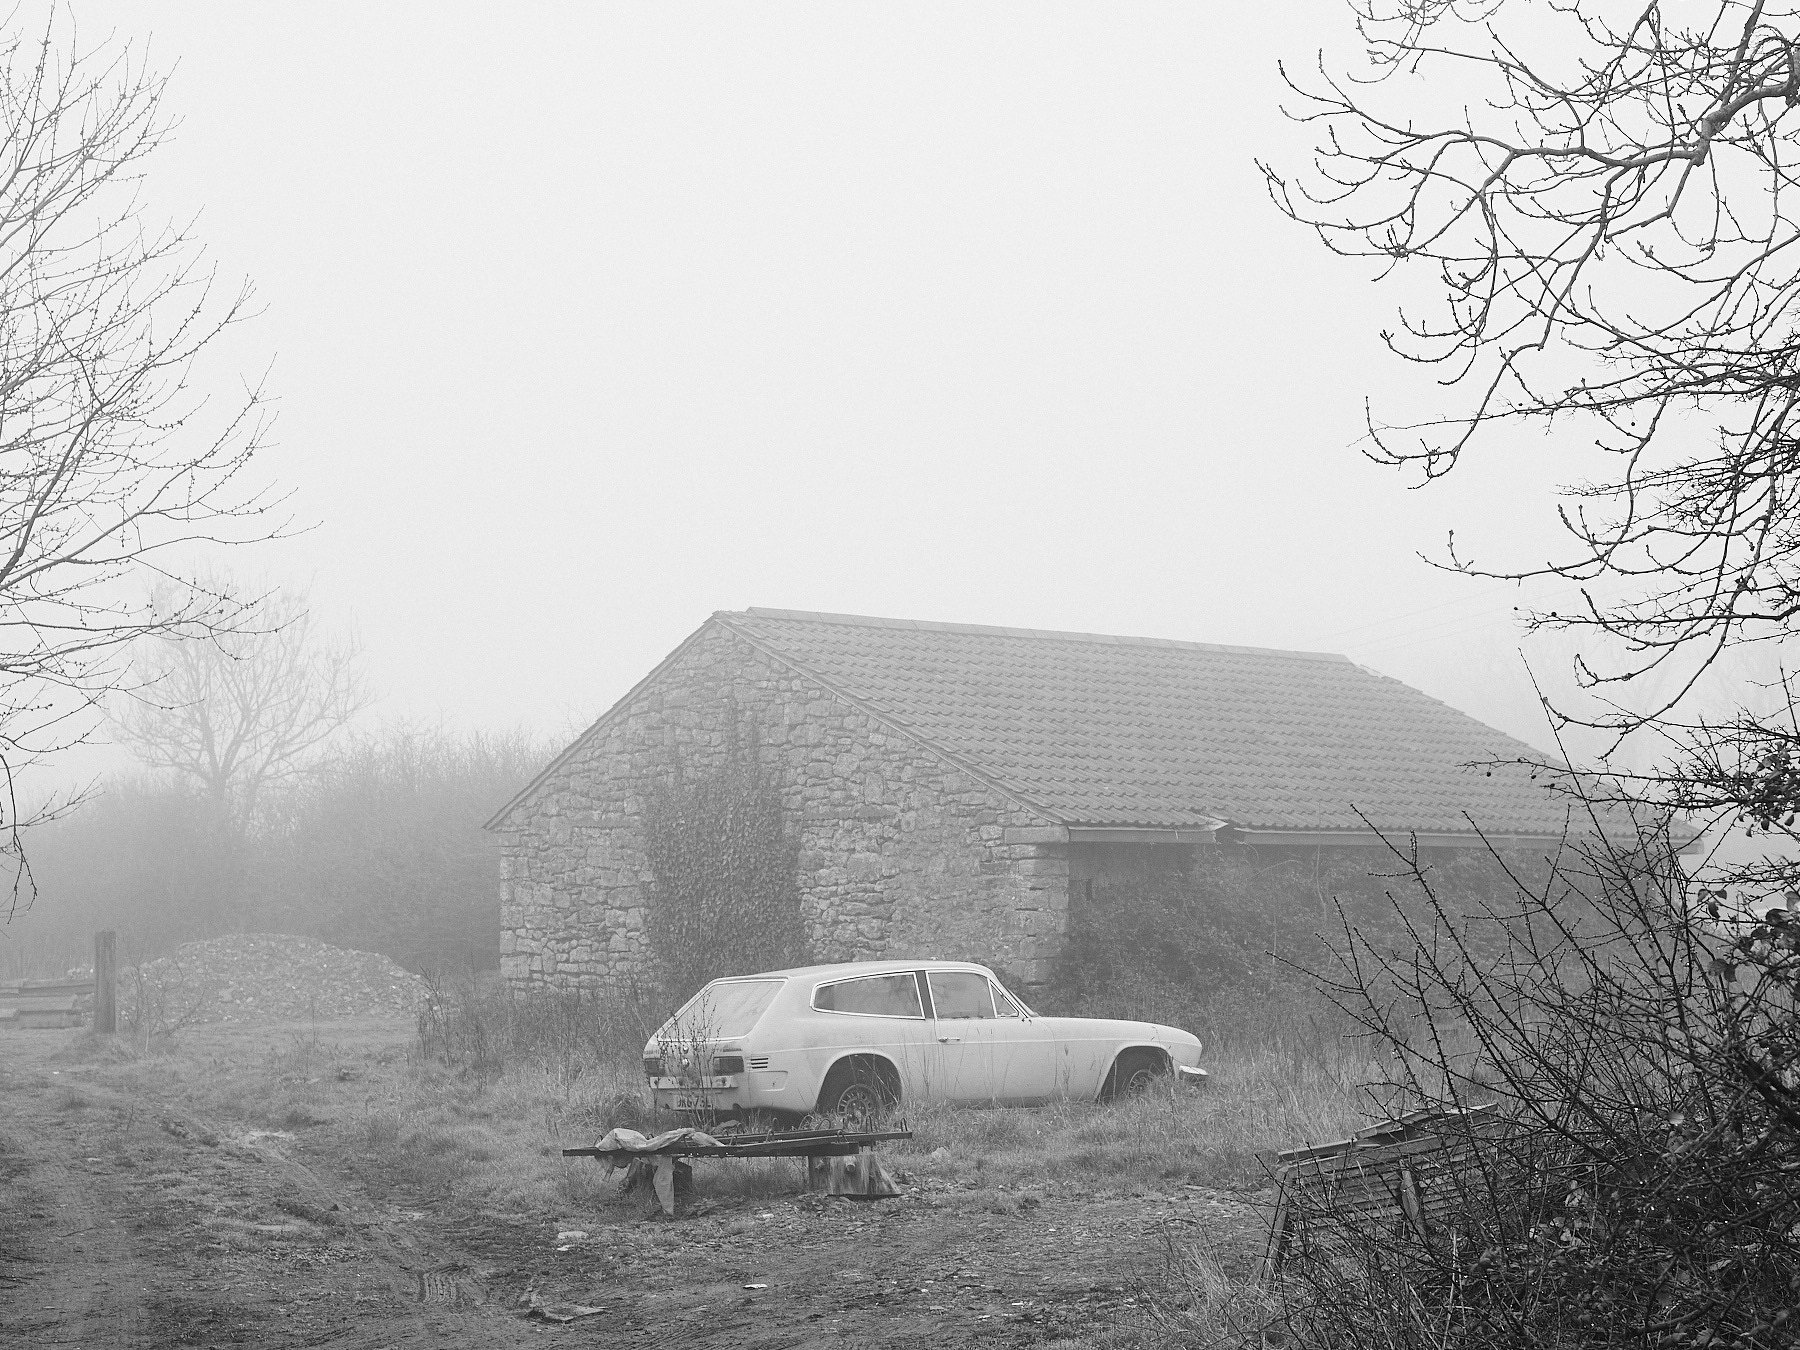
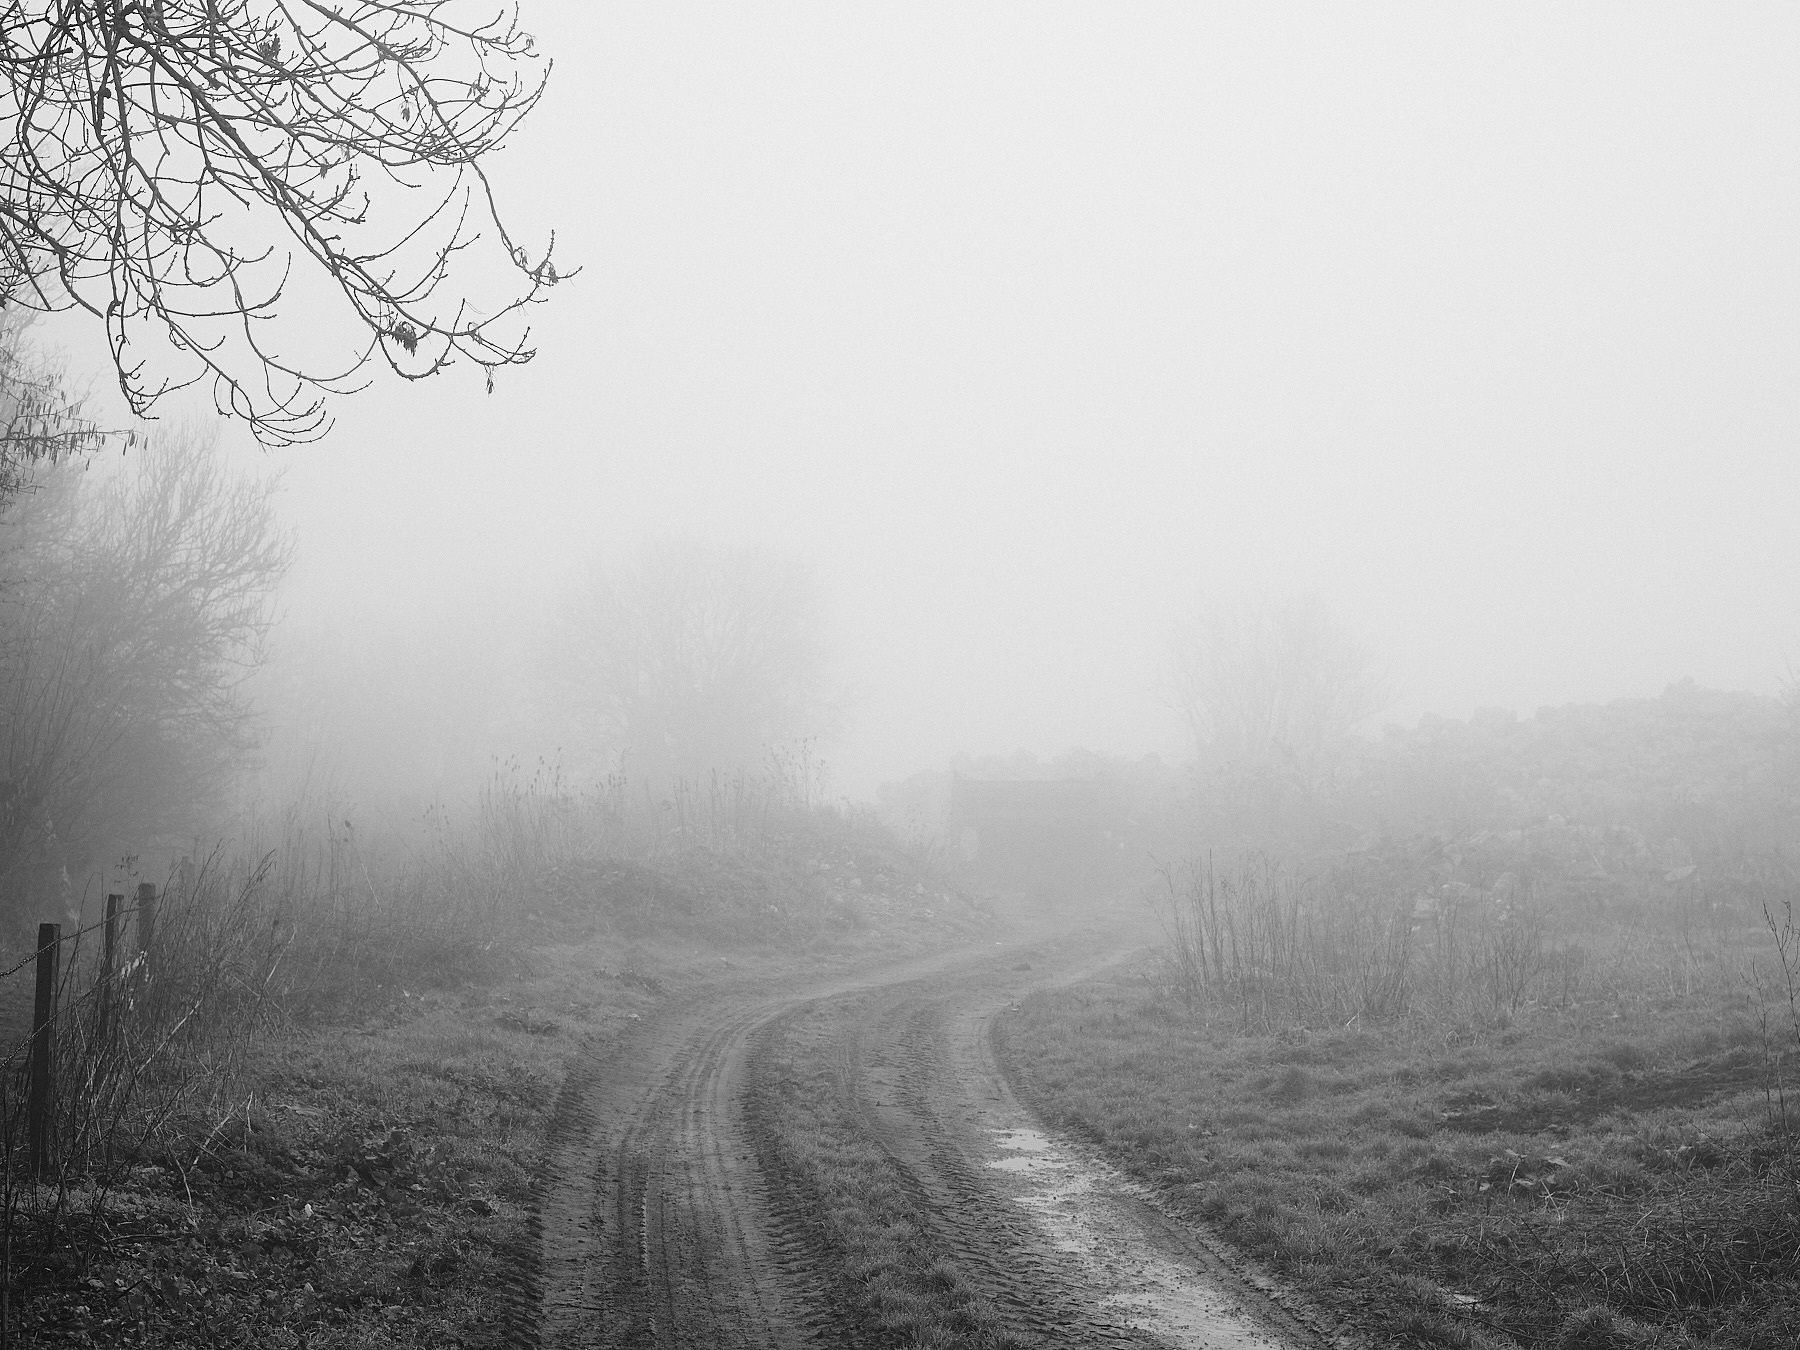
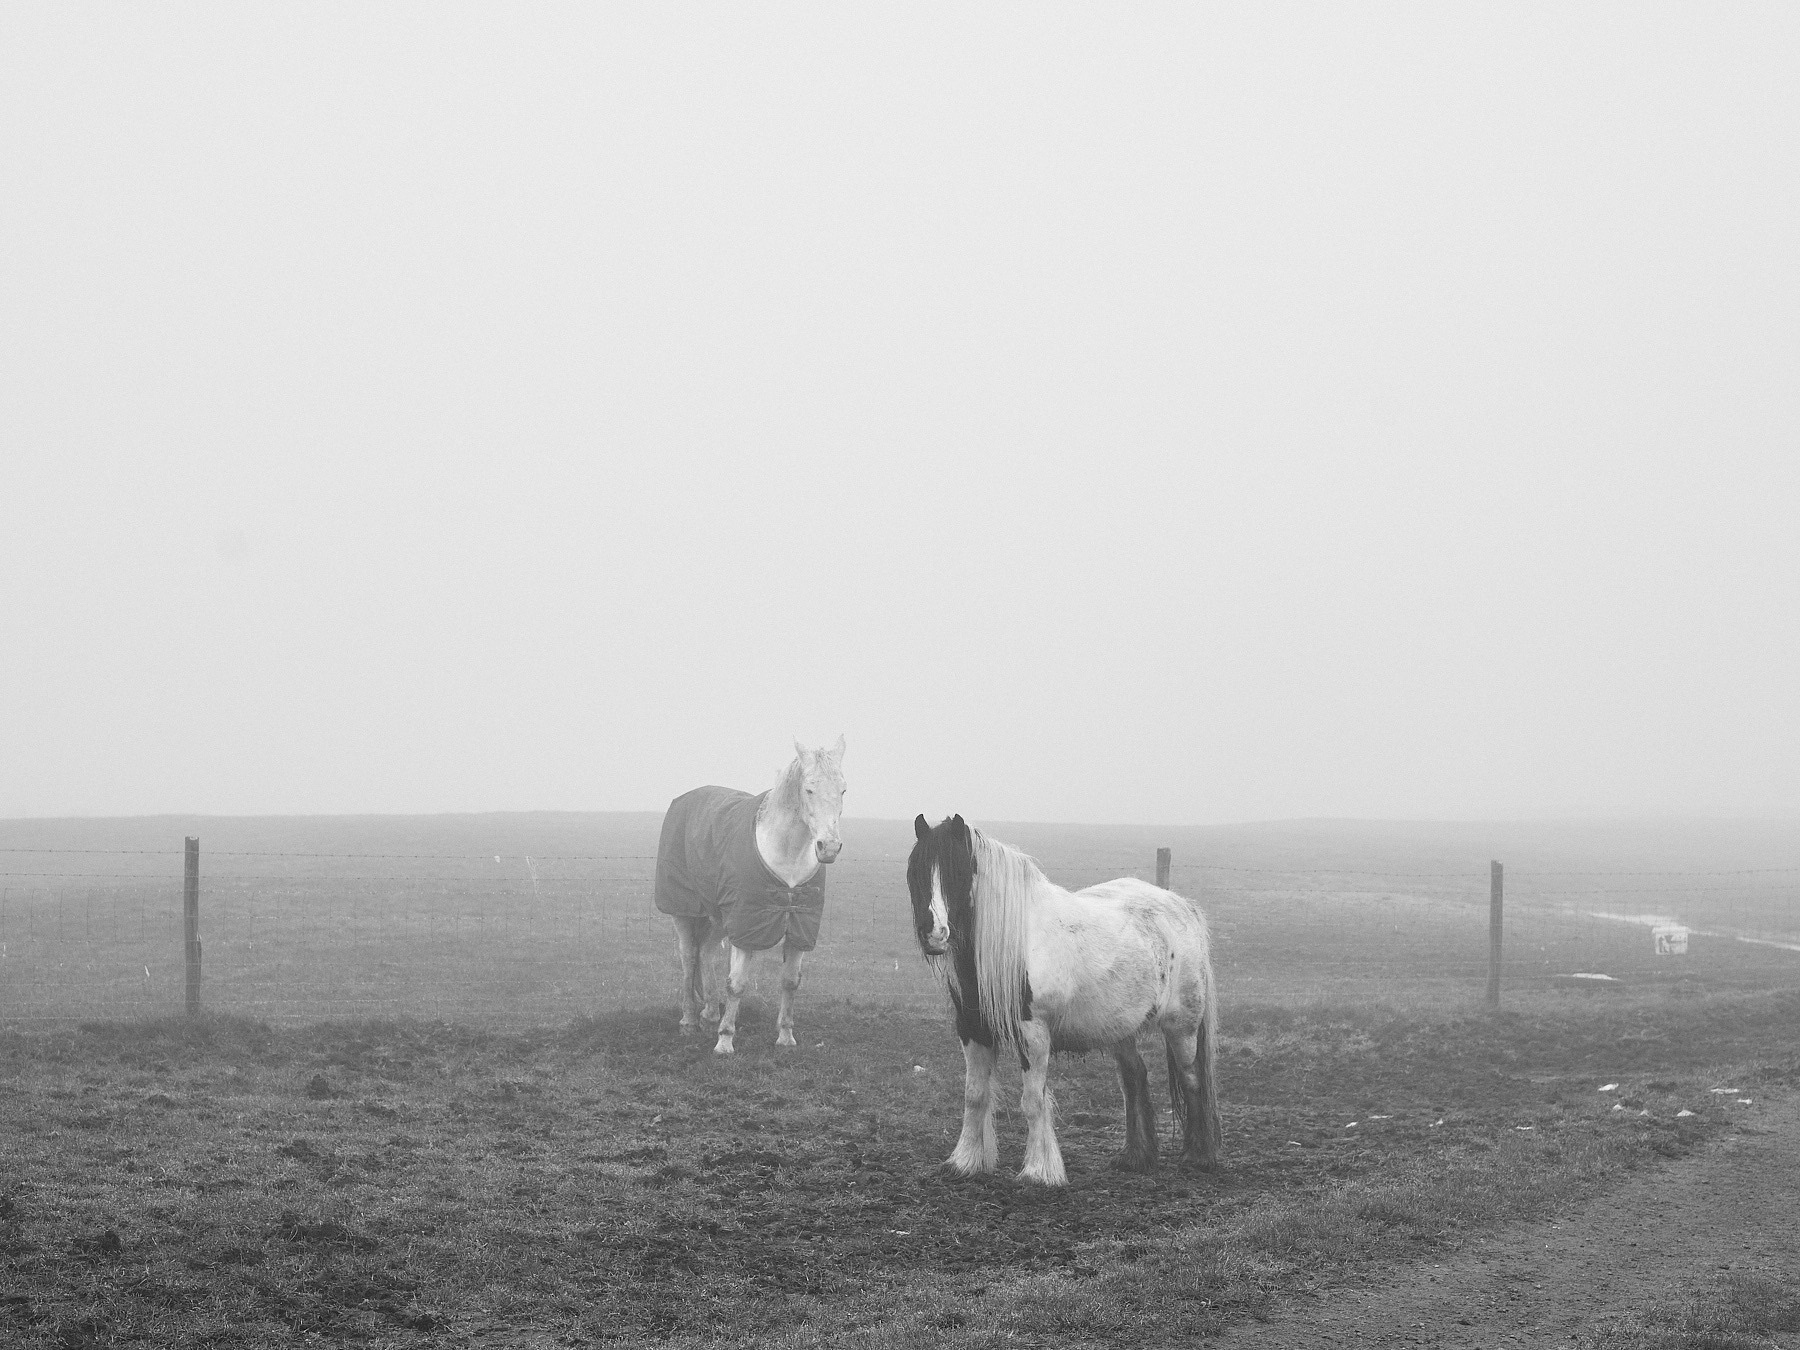
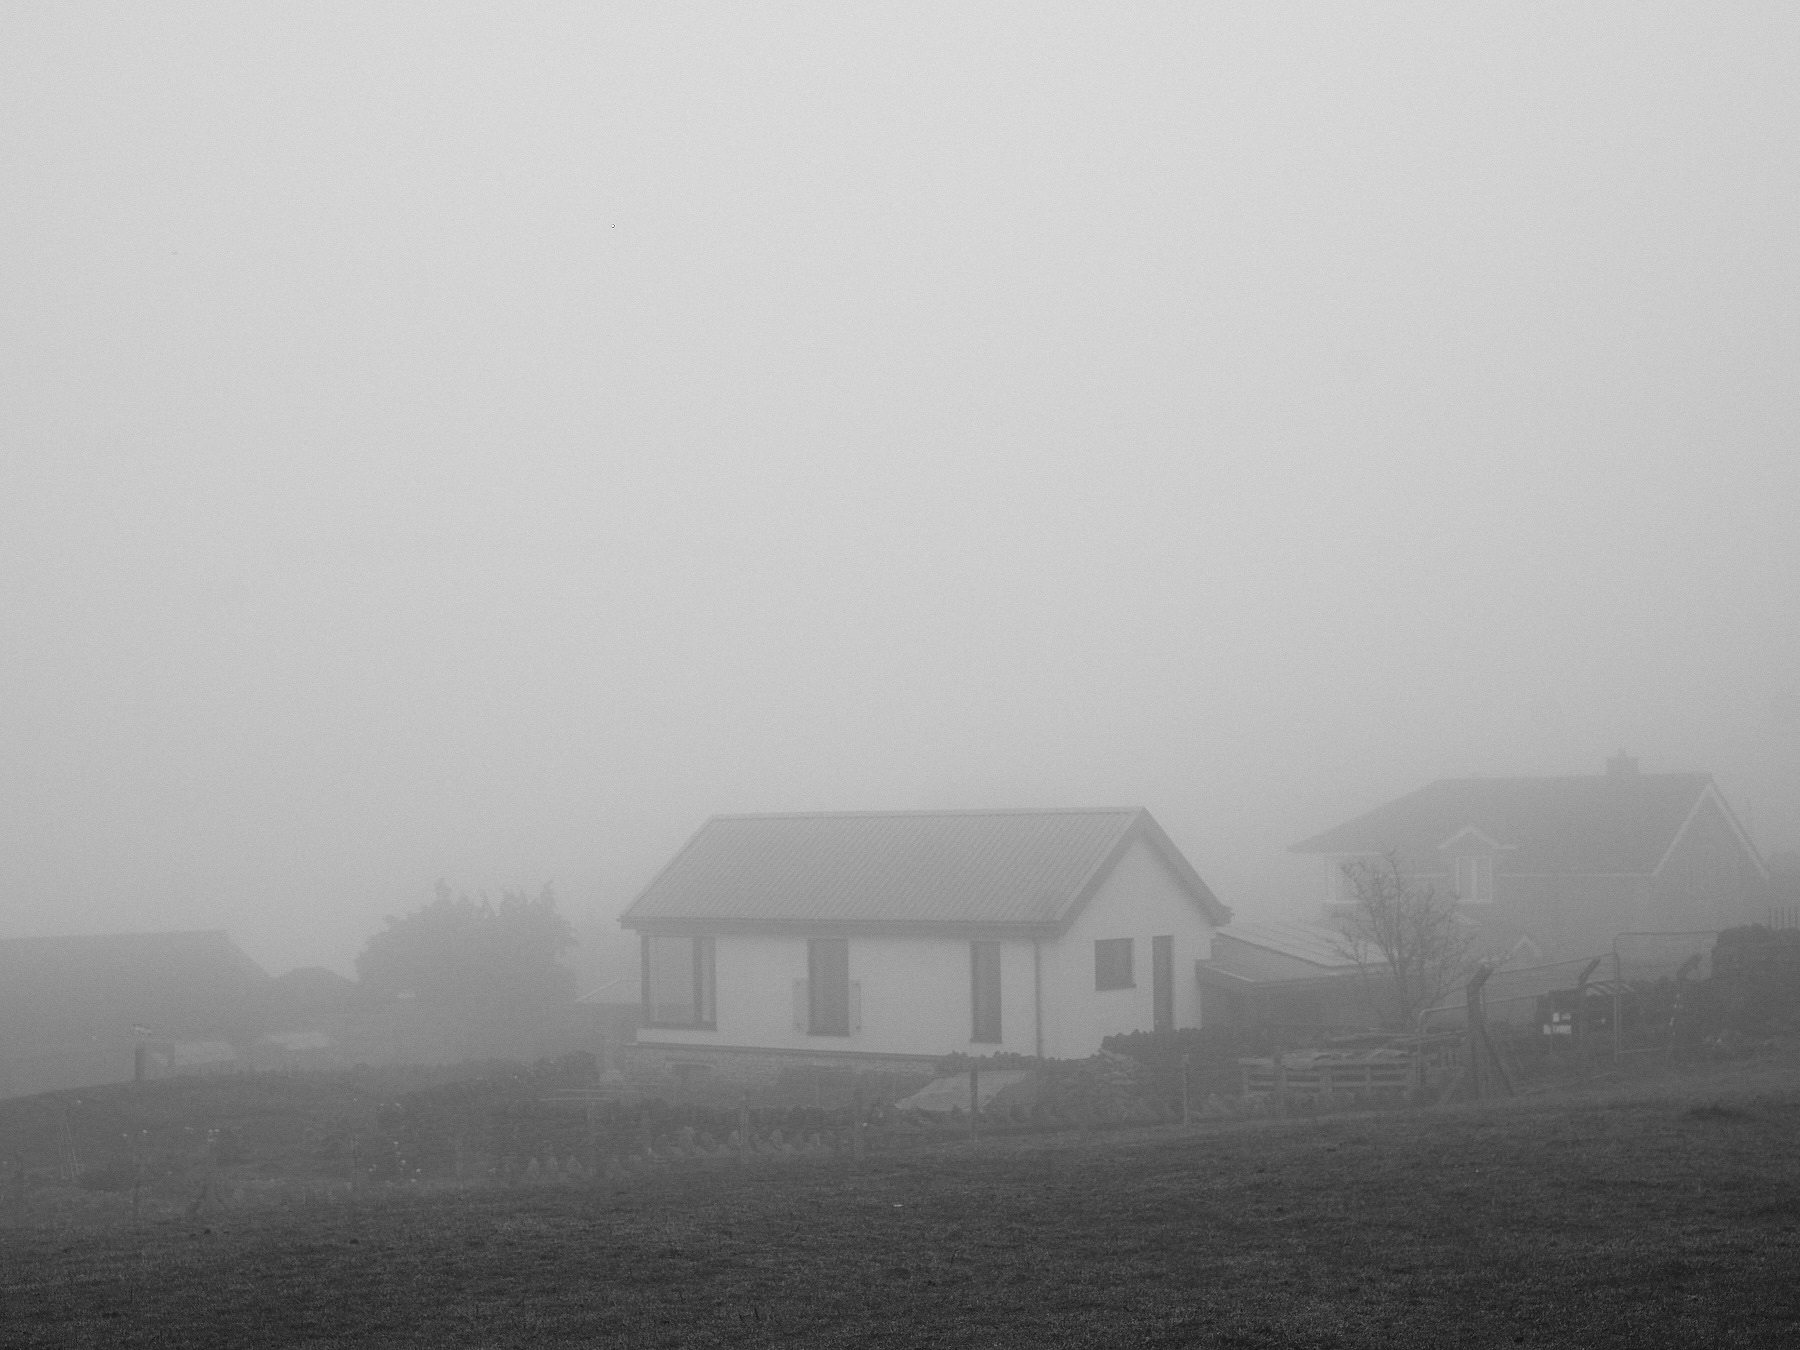
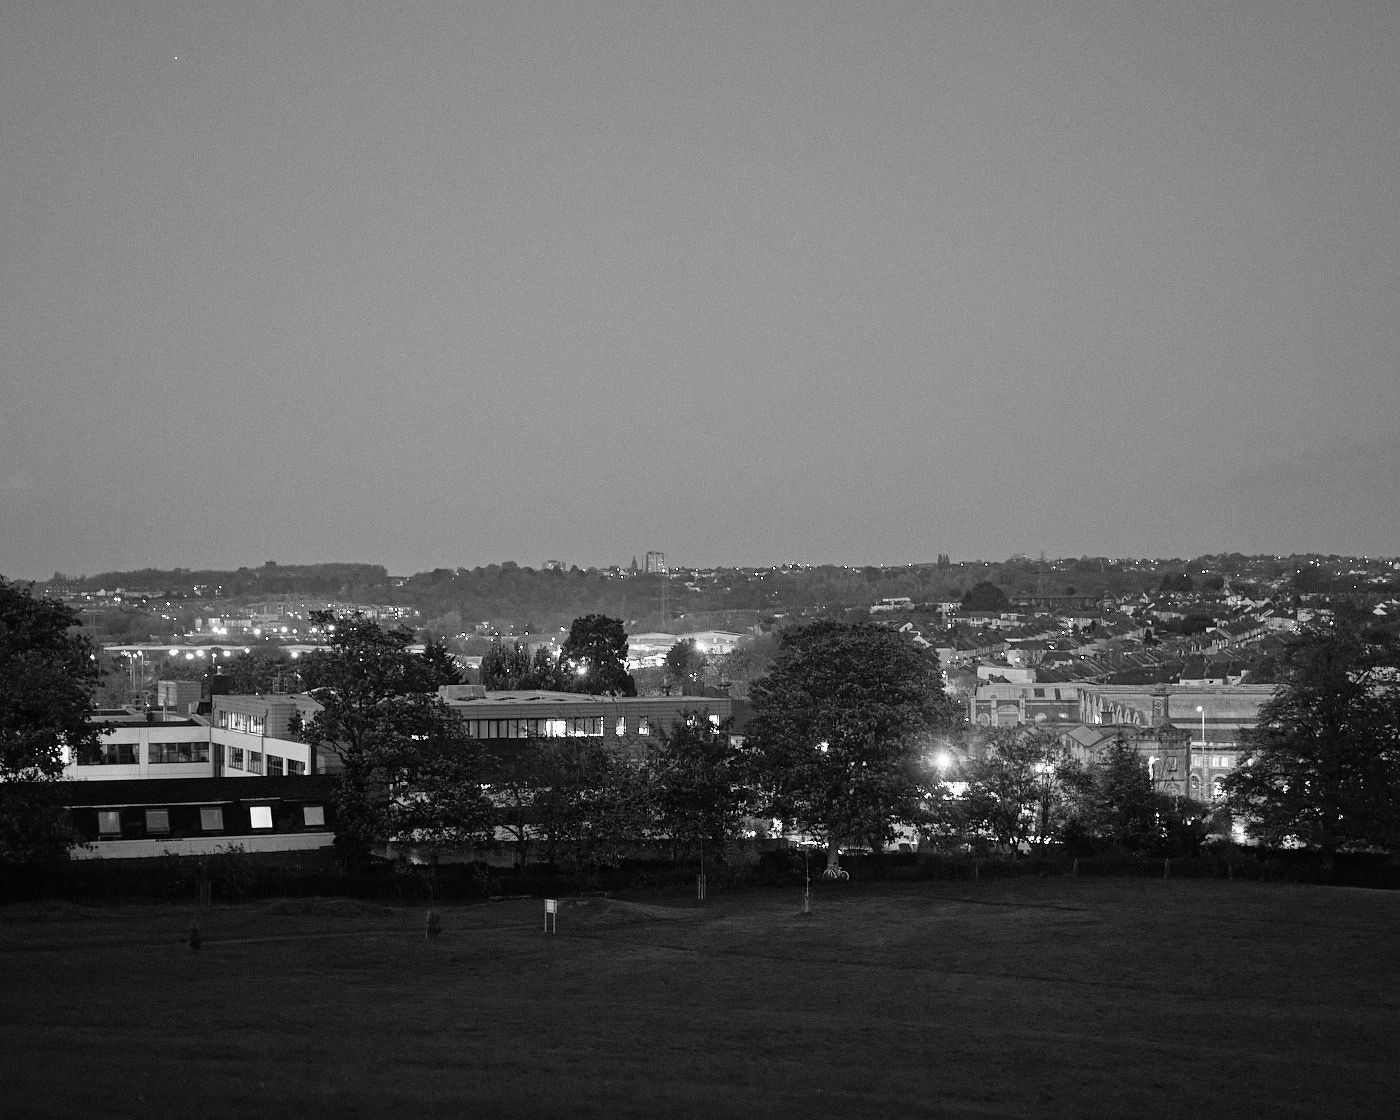
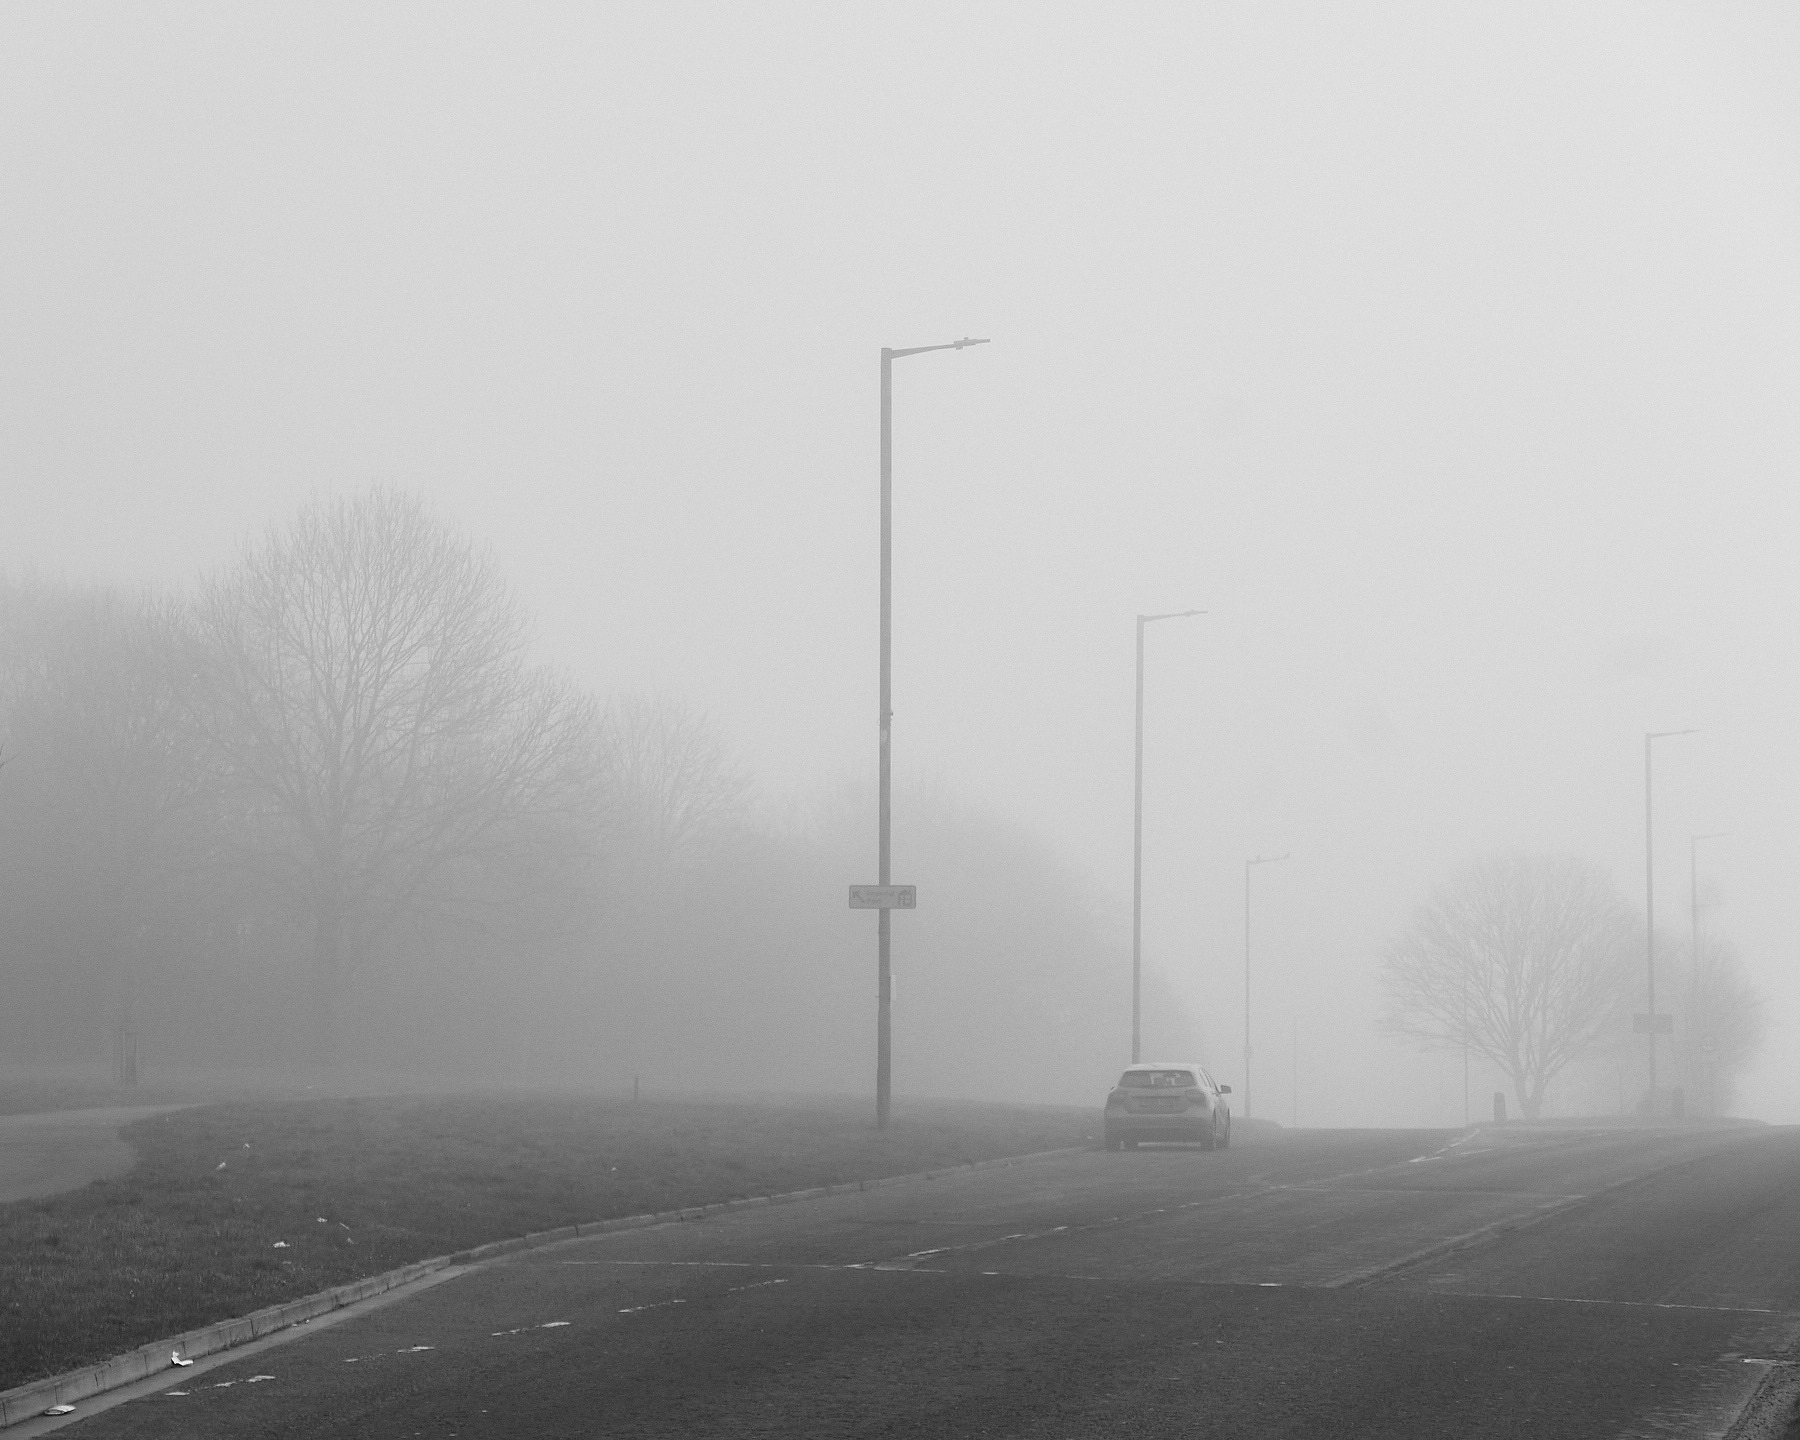
High above South Bristol is Dundry, the main hill that takes you up is windy and unrelentingly sleep. It’s been a while, but the last time I rode up it on my bike, I genuinely thought I was going to be sick. In the winter time it seems to have it’s own climate, when it rains it seems to stay wet and misty up there forever, and when it’s foggy it rolls in slowly and lingers long after it’s cleared just down the hill in Bristol.
I’ve been here quite a few times before in the fog so I didn’t want to just retread previous routes this time, as it’s easy to follow a familiar path, and end up taking the same photos as that I’ve taken before.
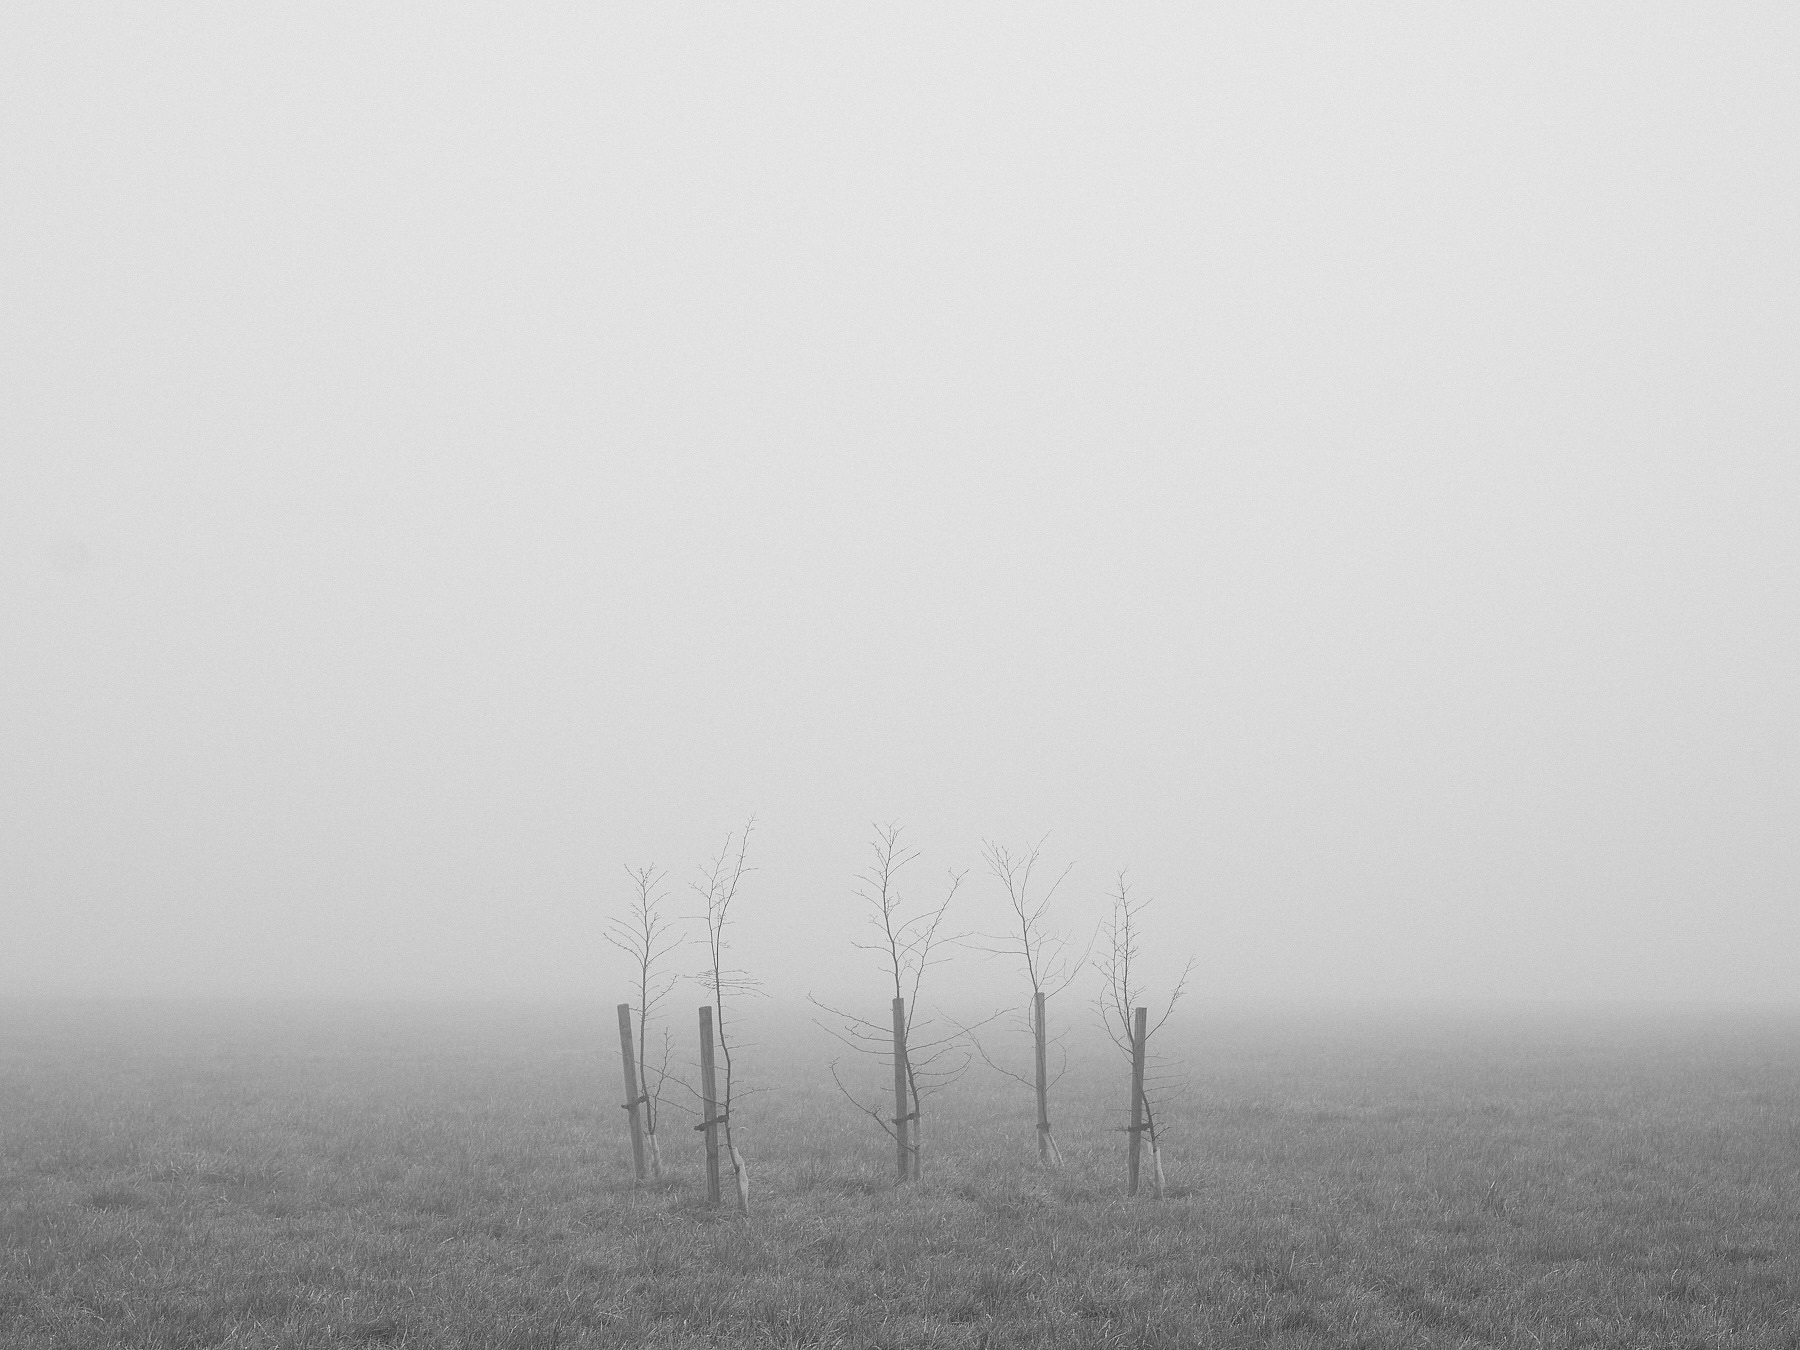
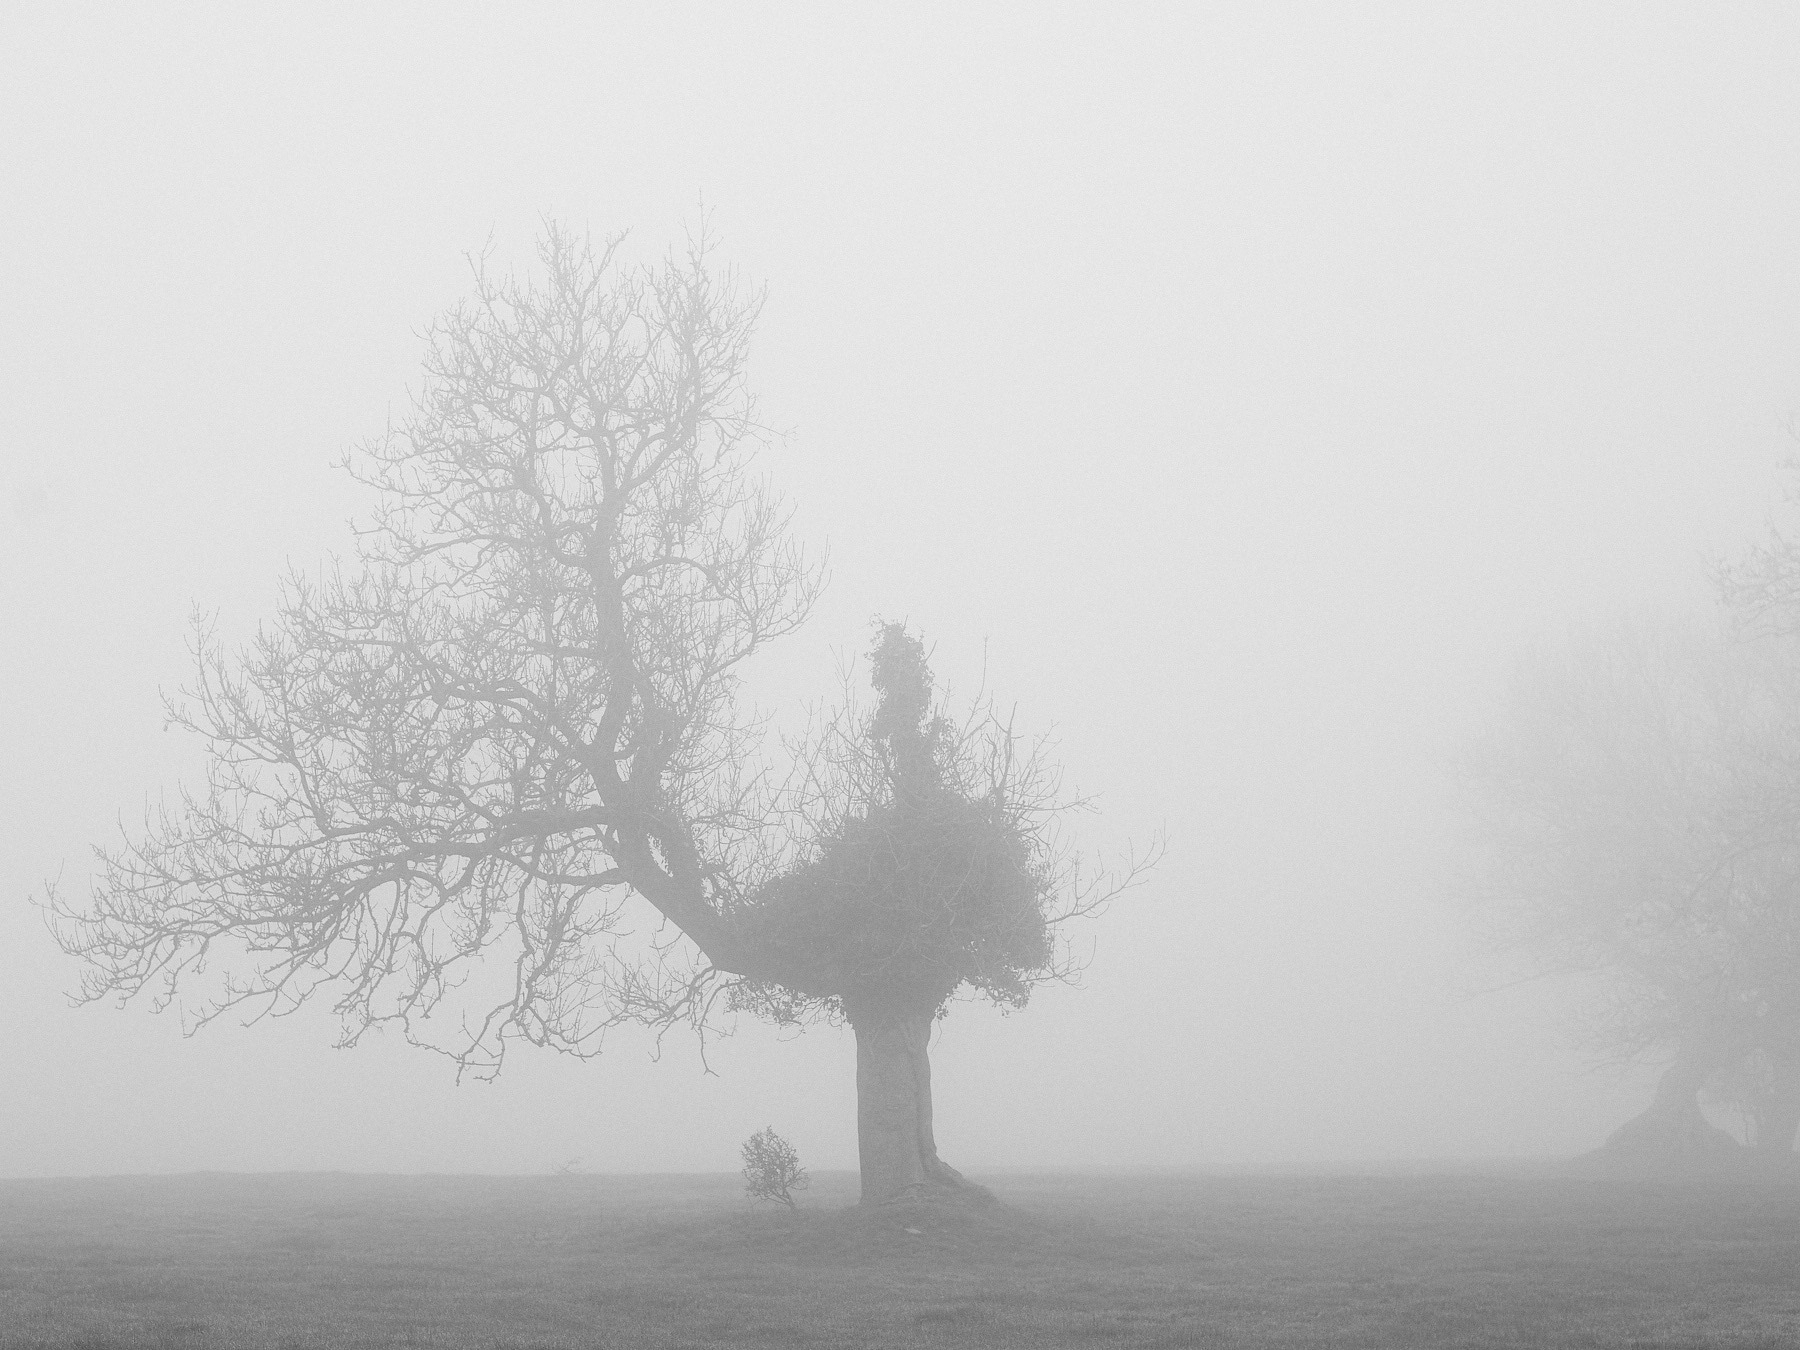
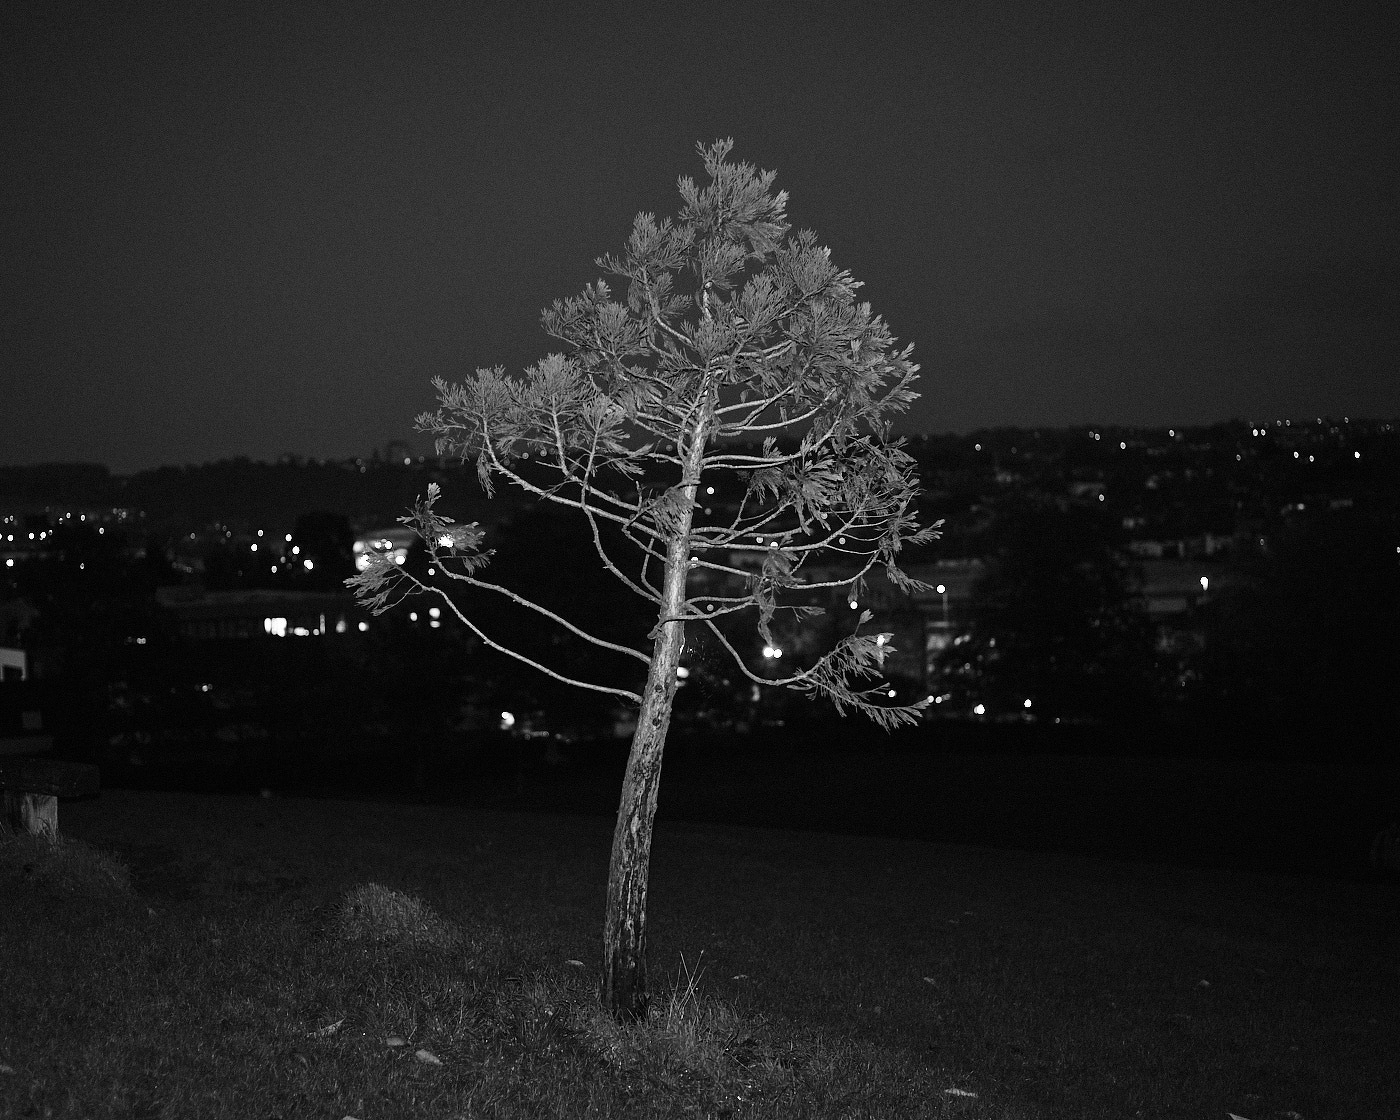
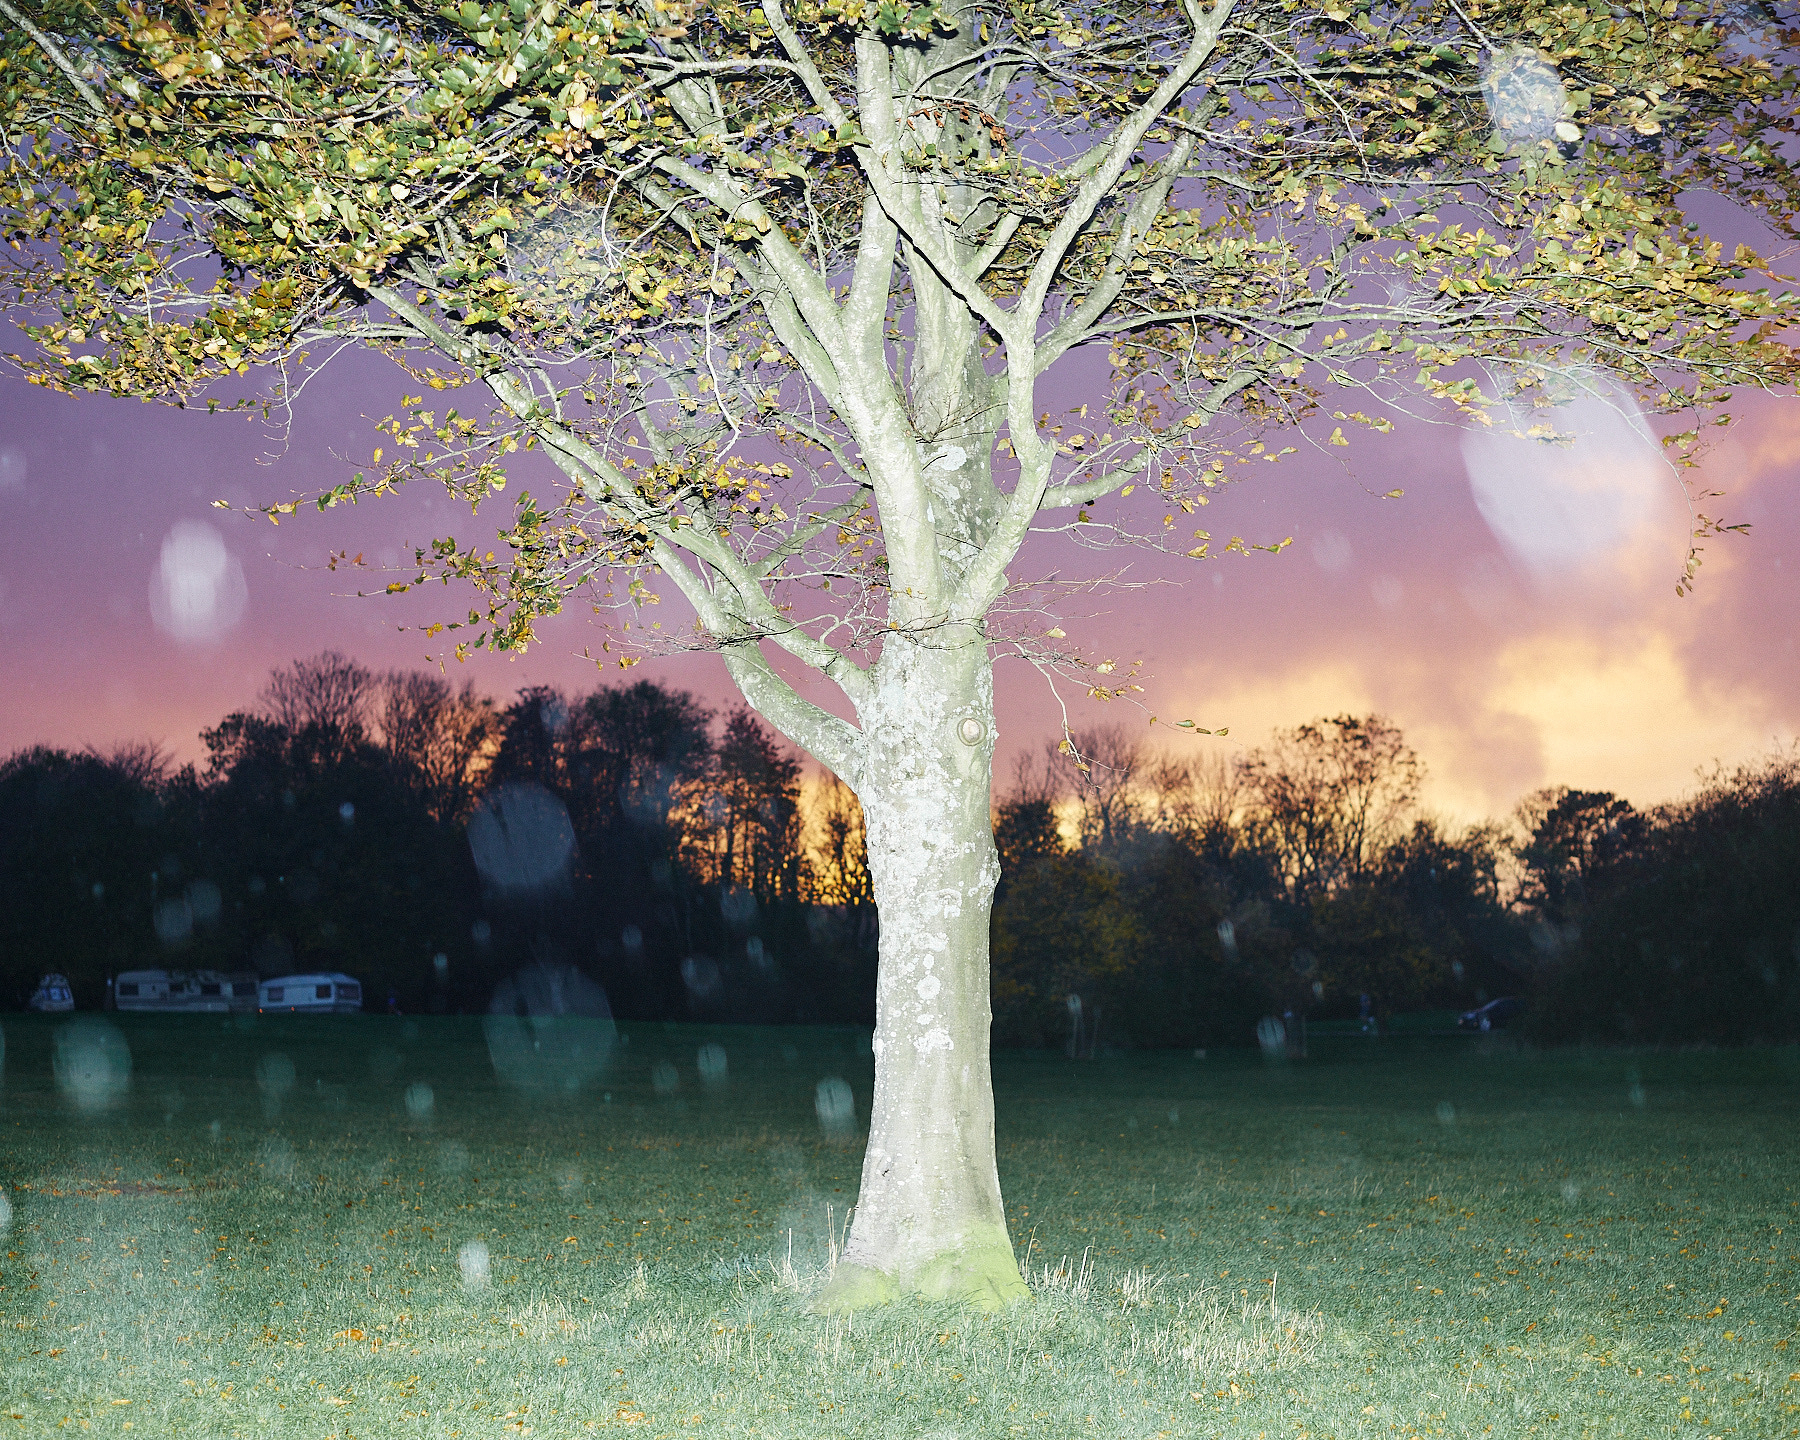
It’s easy to go straight for the obvious in the fog - and I’m not saying I haven’t done this again - but this time I did at least try to find something a little more interesting. There is a solitary tree in the field right at the start of the path, and it took every ounce of willpower to resist getting another photo of it, lined up in the centre of the frame surrounded by negative space.
Now I have still taken that photo, but this time it was a different more interesting looking tree, which I consider as progress.
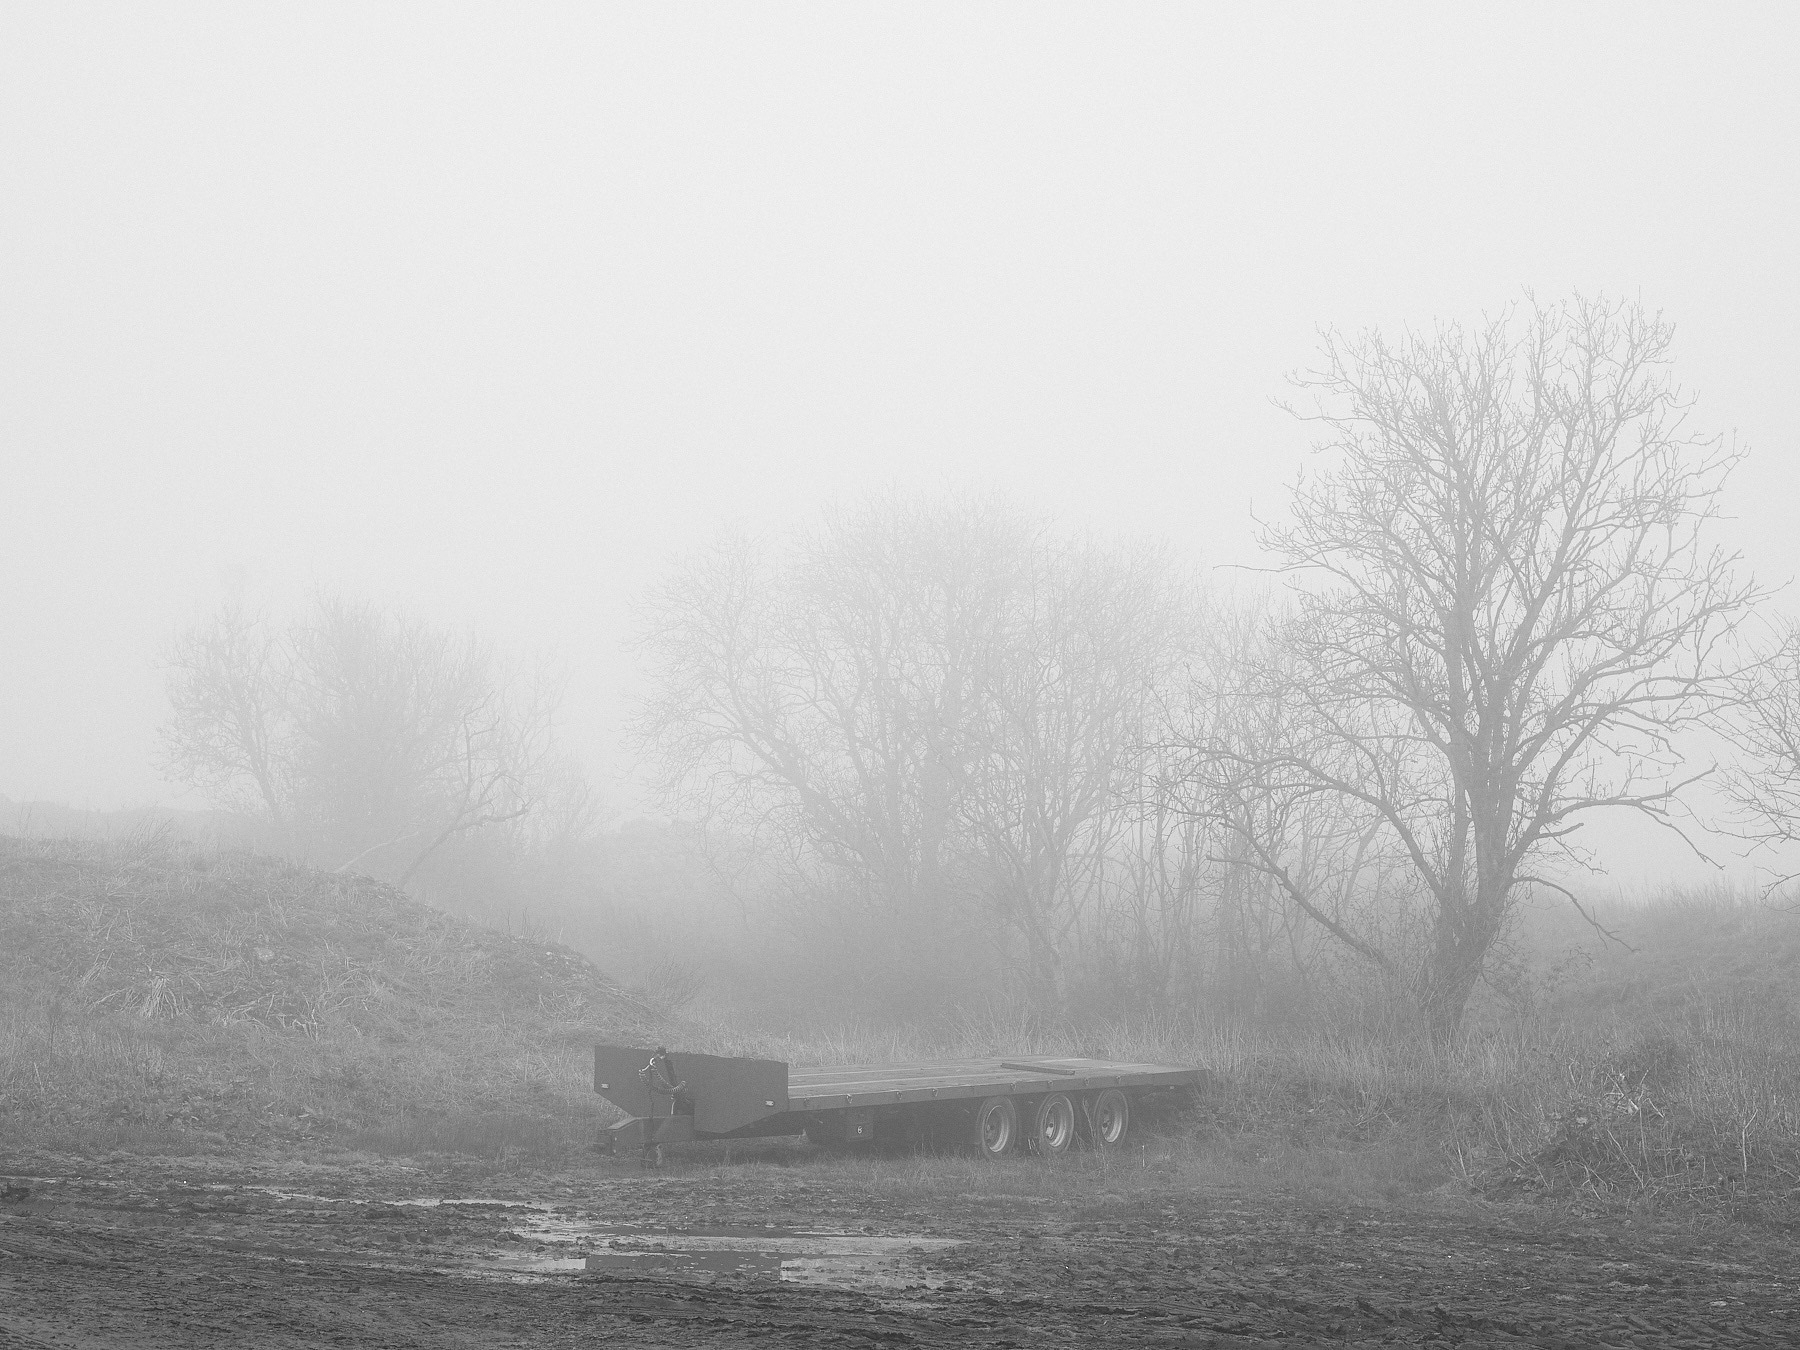
I tend to overthink these things, so with that in mind I needed to remind myself that I’m taking photos for fun, this is just a hobby and it’s not meant to be serious, and if some of these photos are a bit basic, then who cares at the end of the day?
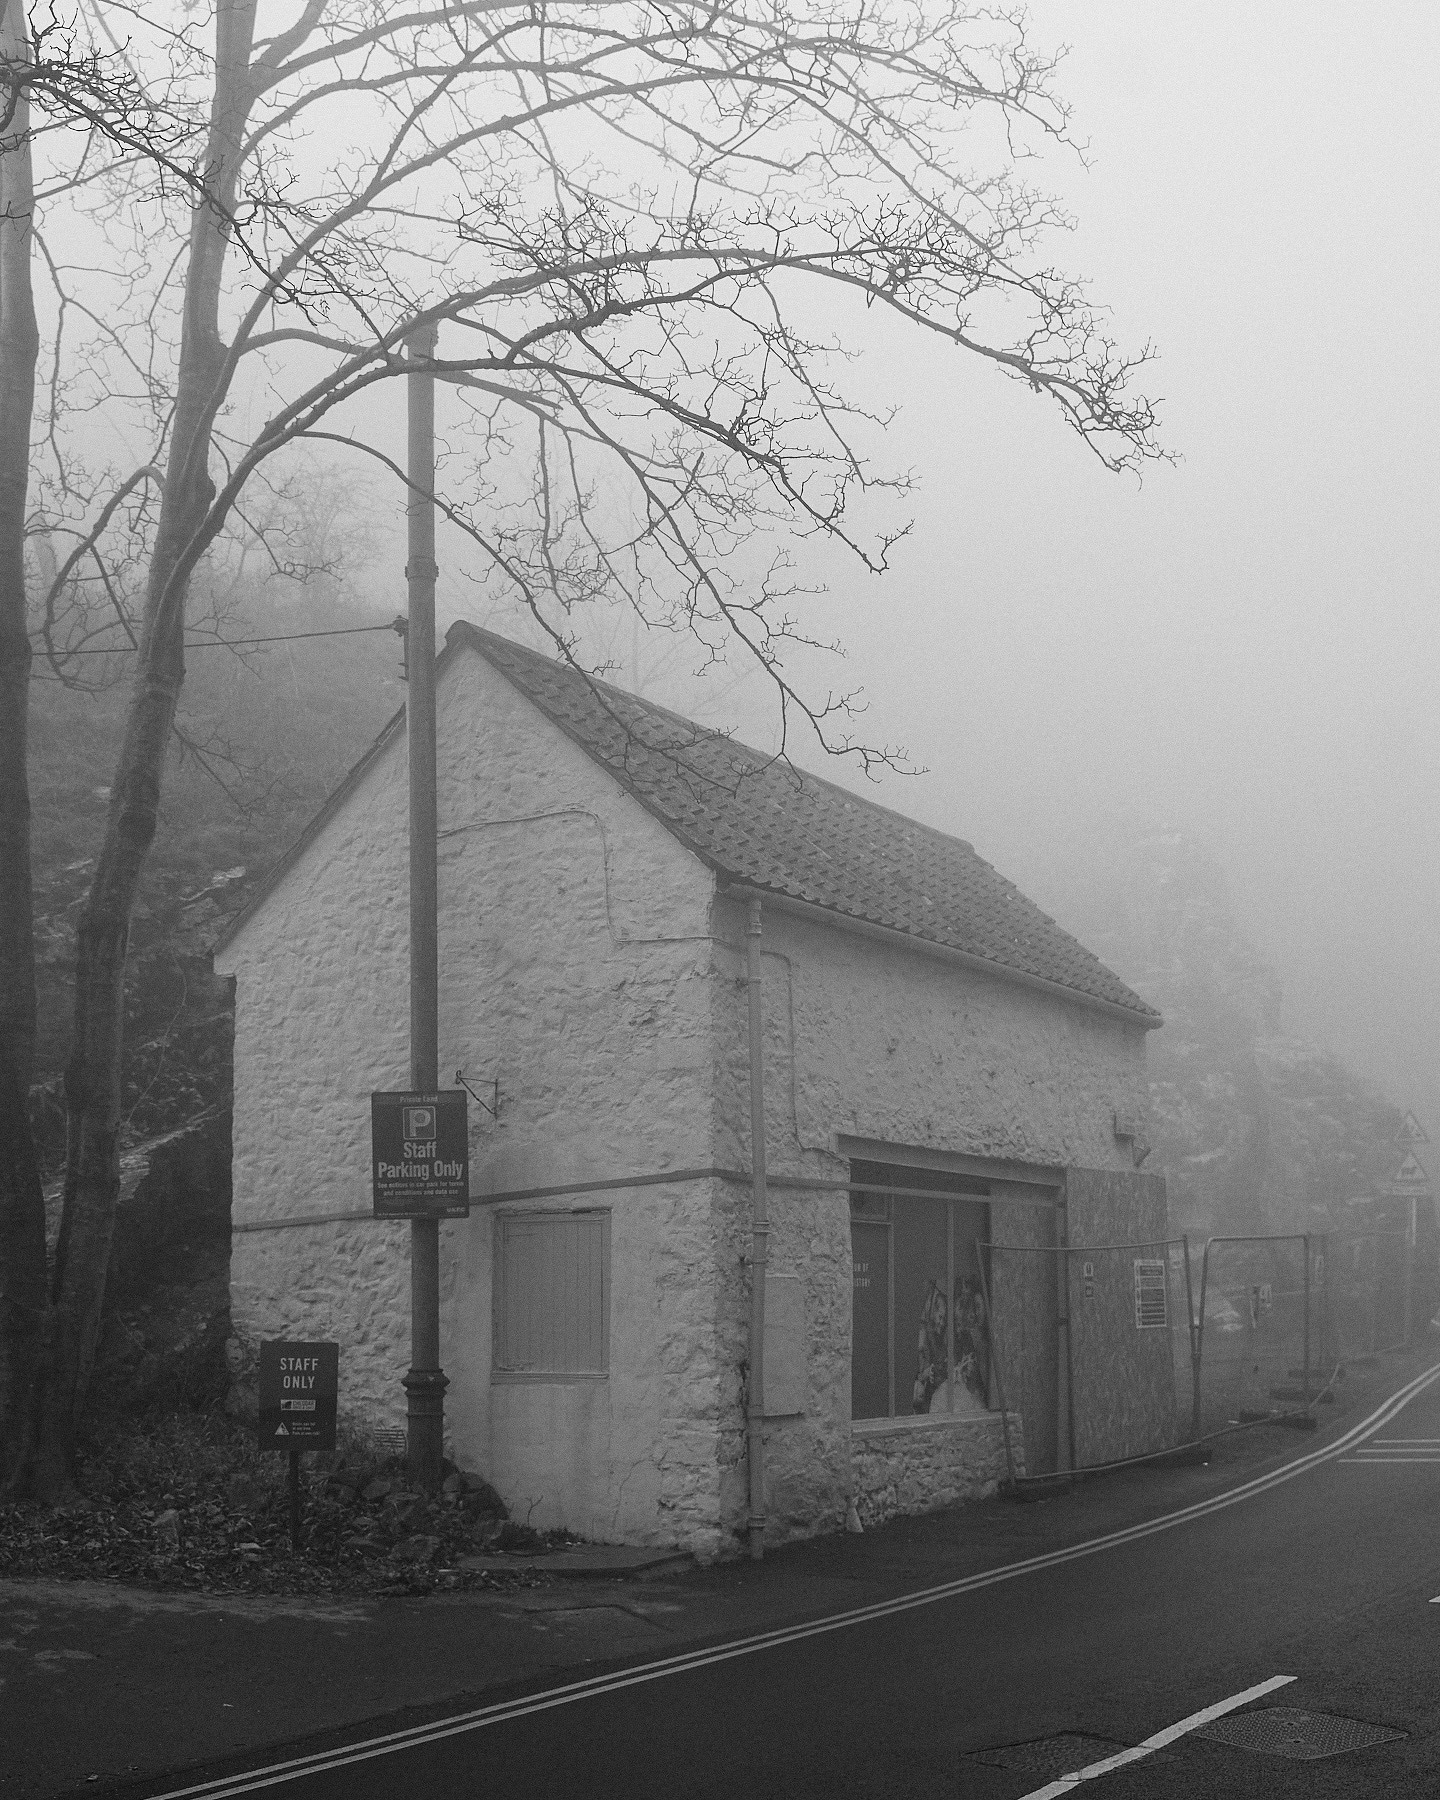
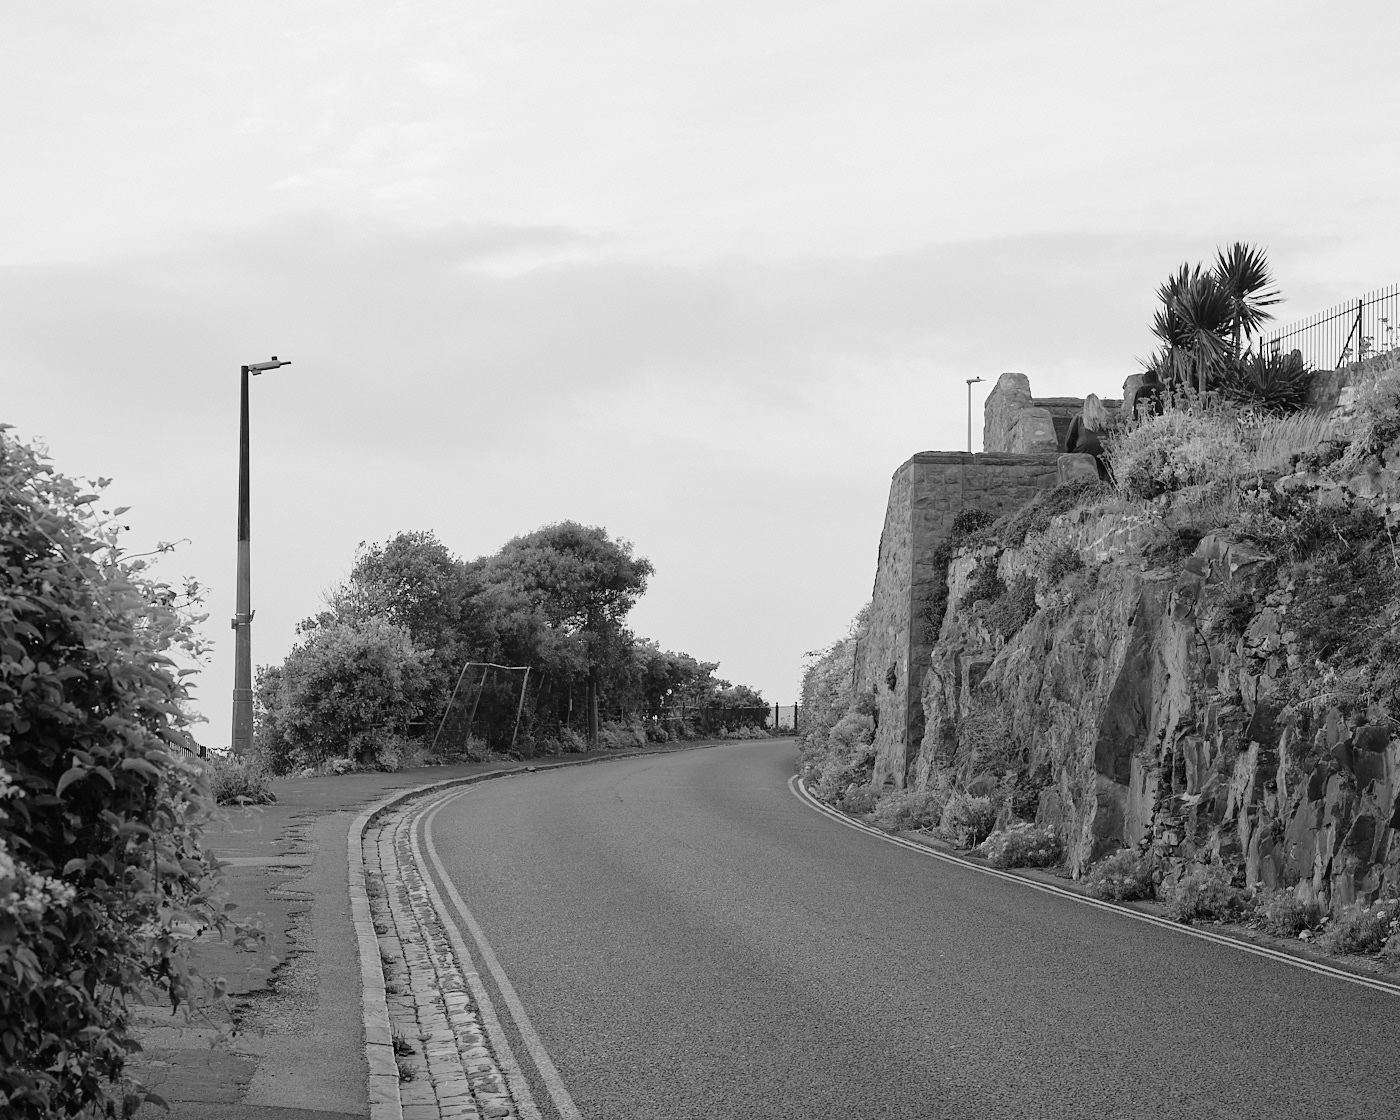
I’m sure like a lot of people who grew up in the west country, their first memory of Cheddar Gorge was almost certainly a school field trip, vague memories of coach journeys, rock formations and learning about cave aged cheddar, which give it an odd familiarity as an adult.
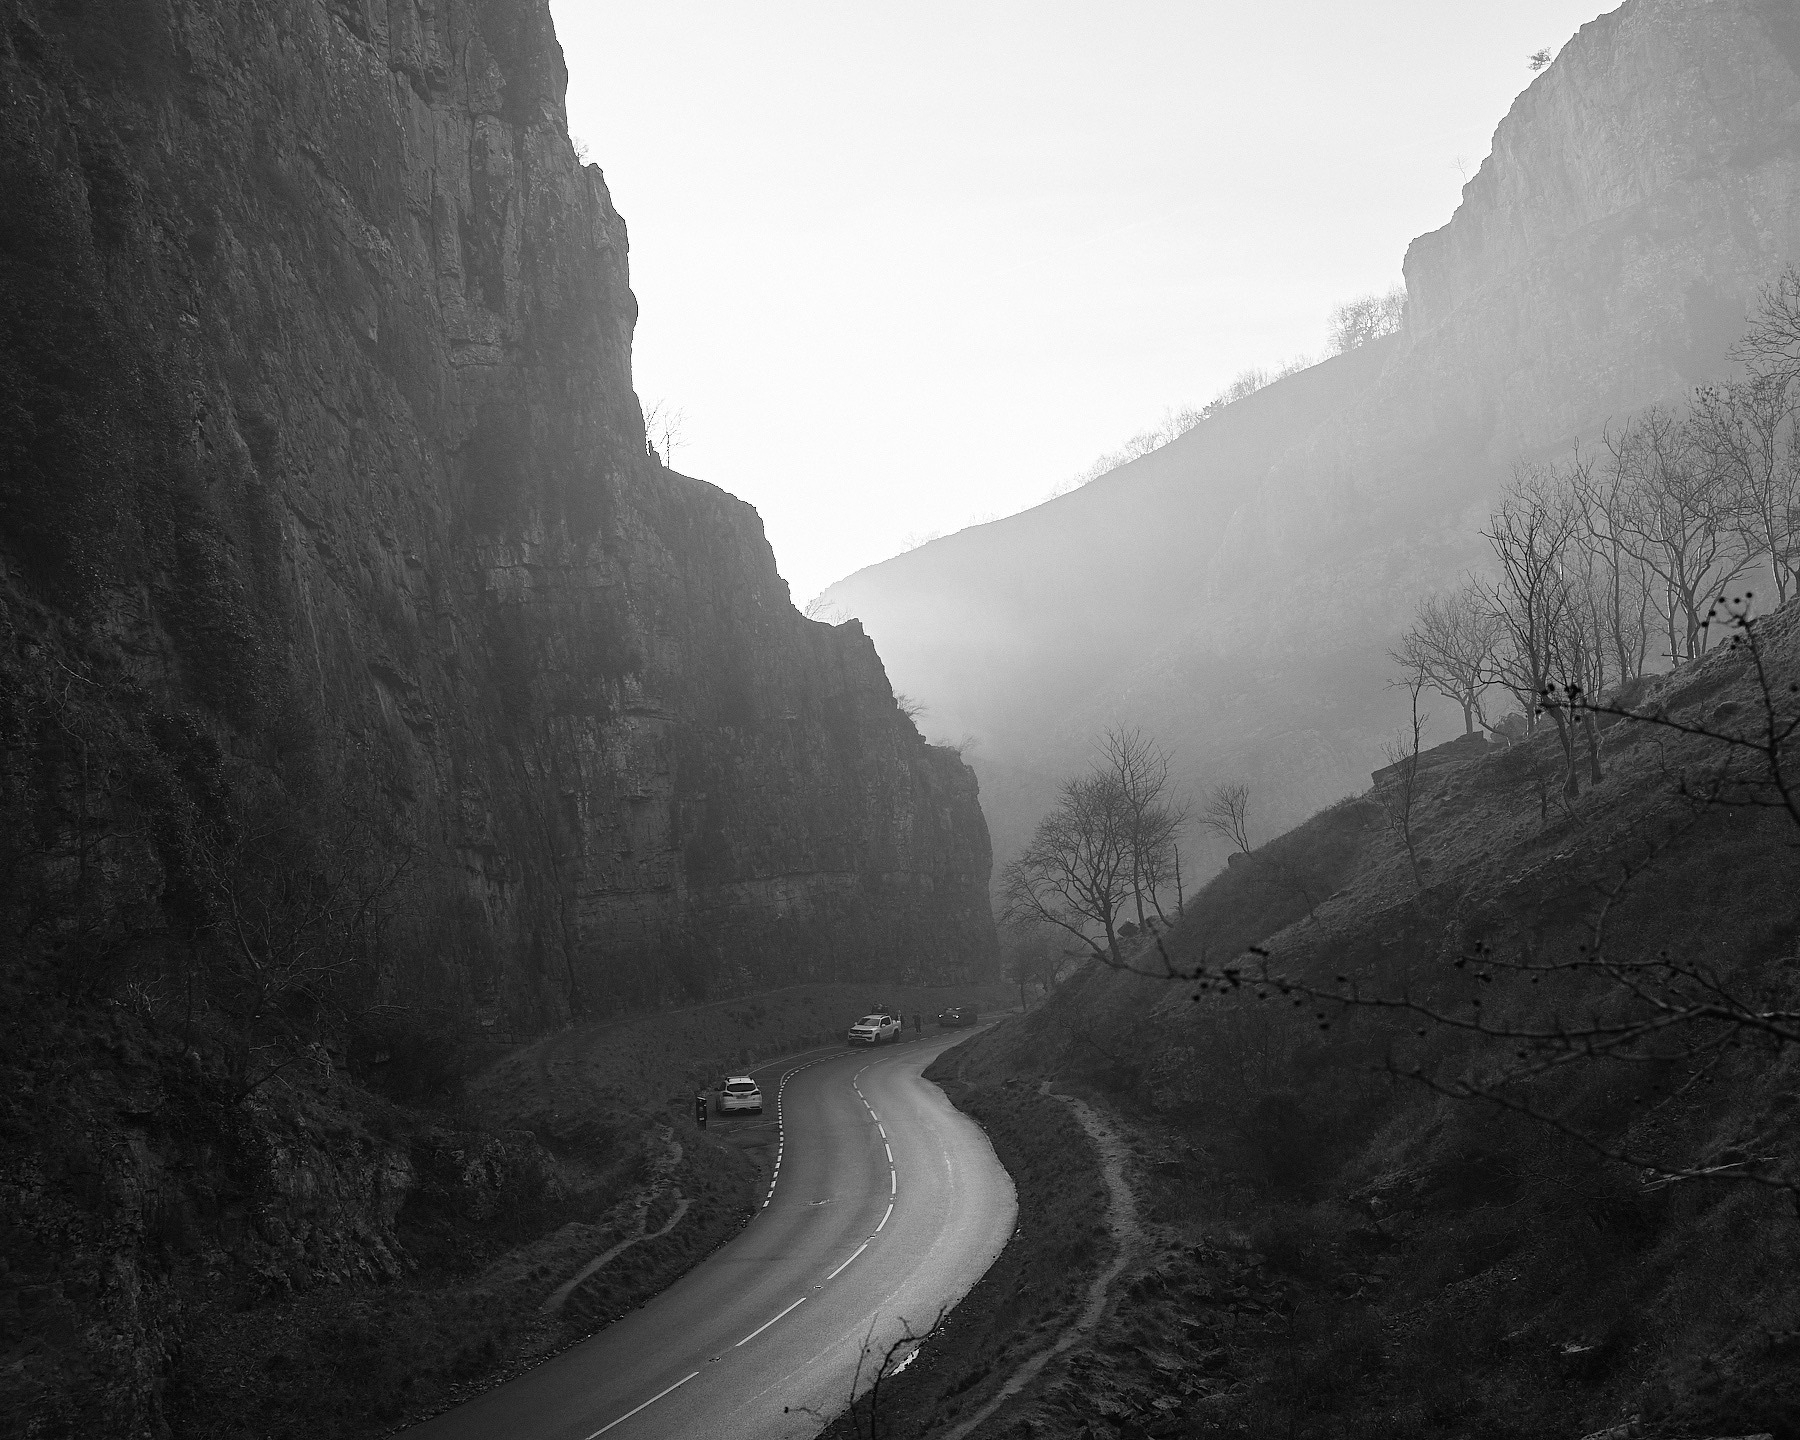
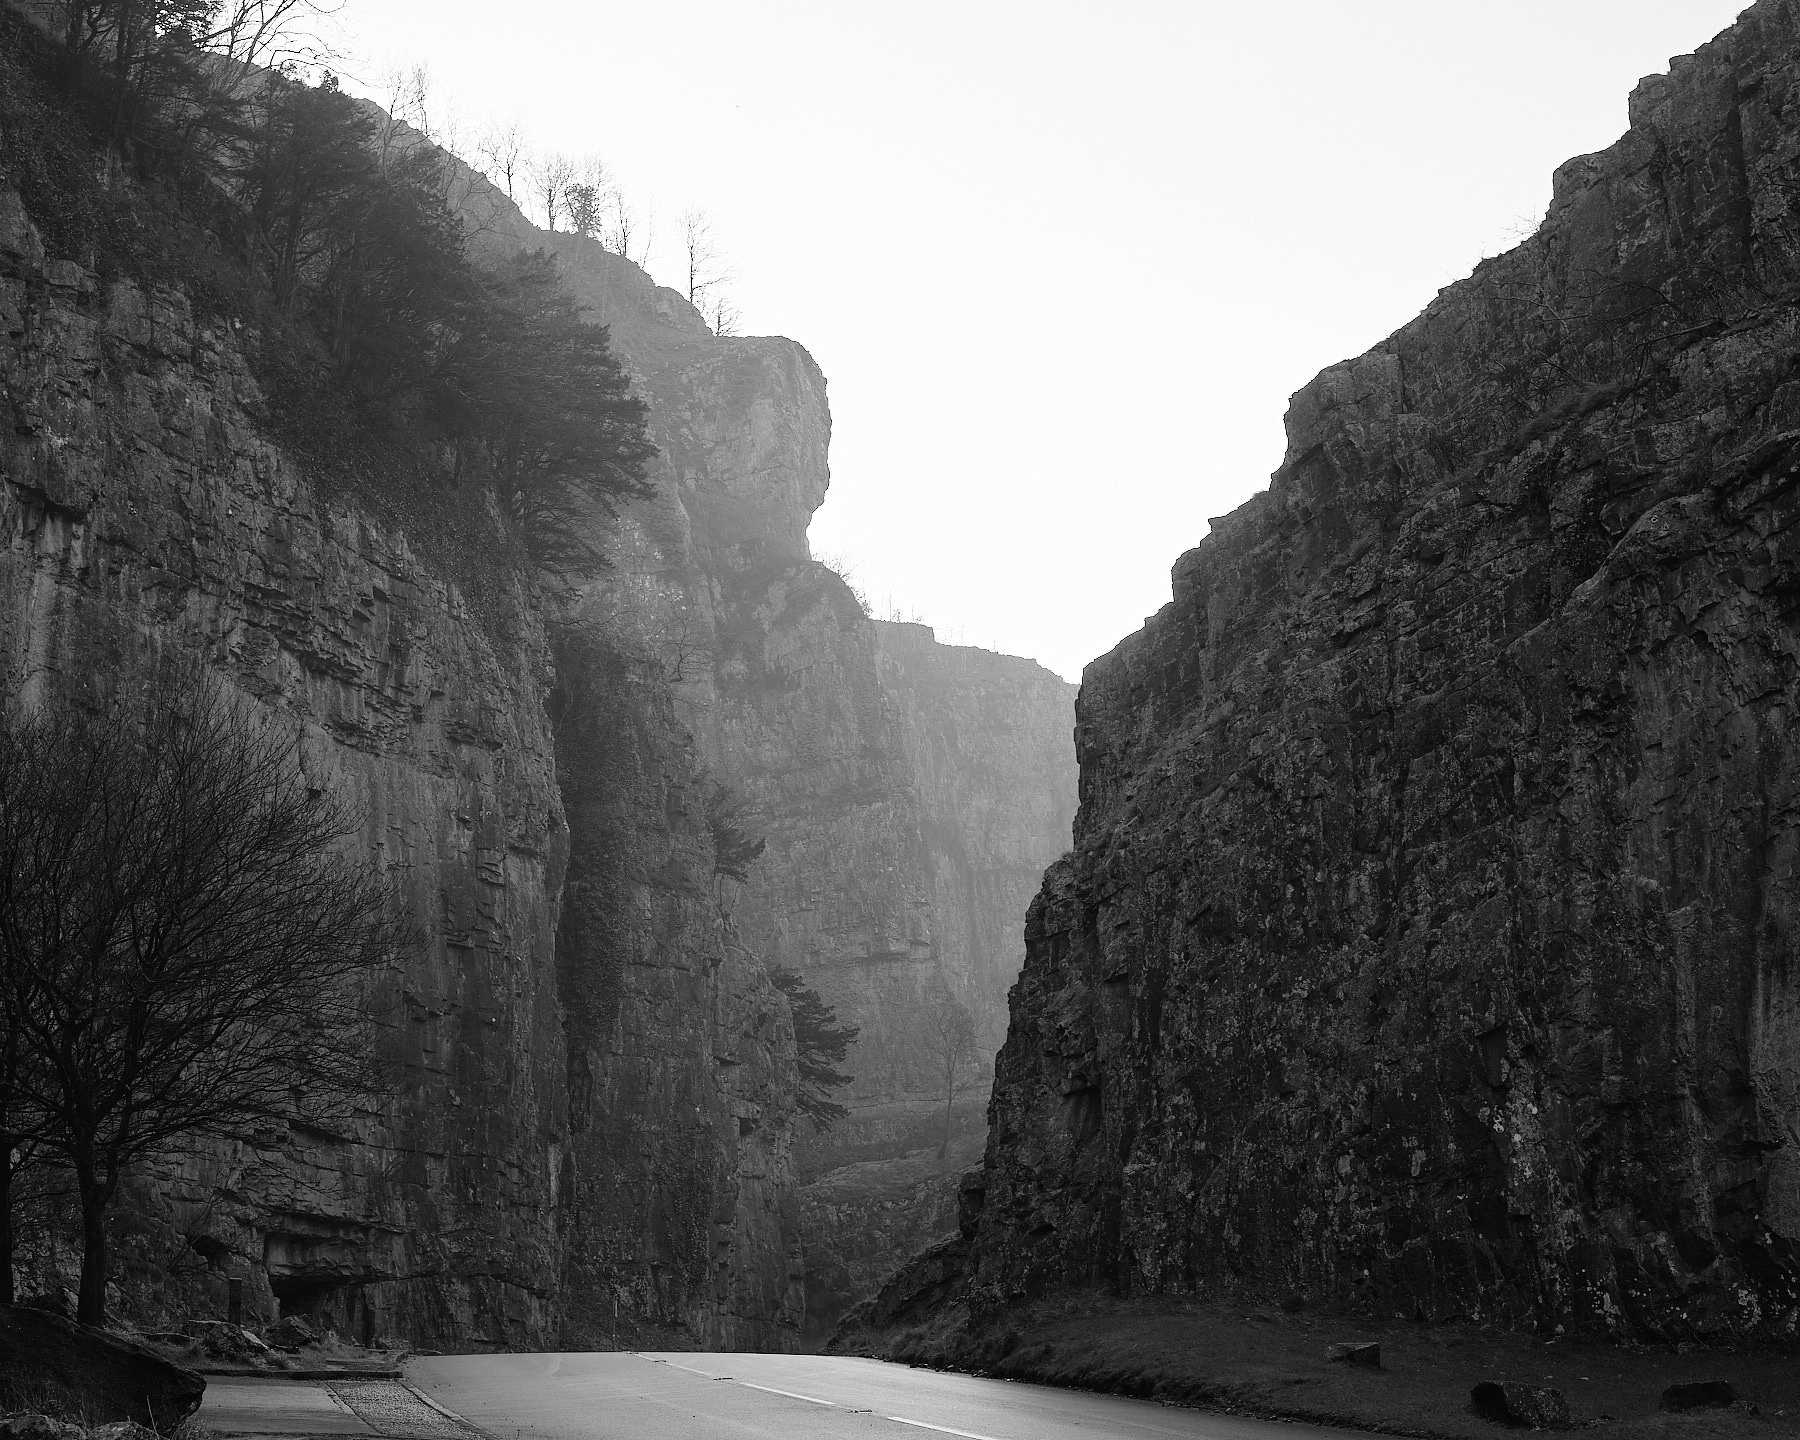
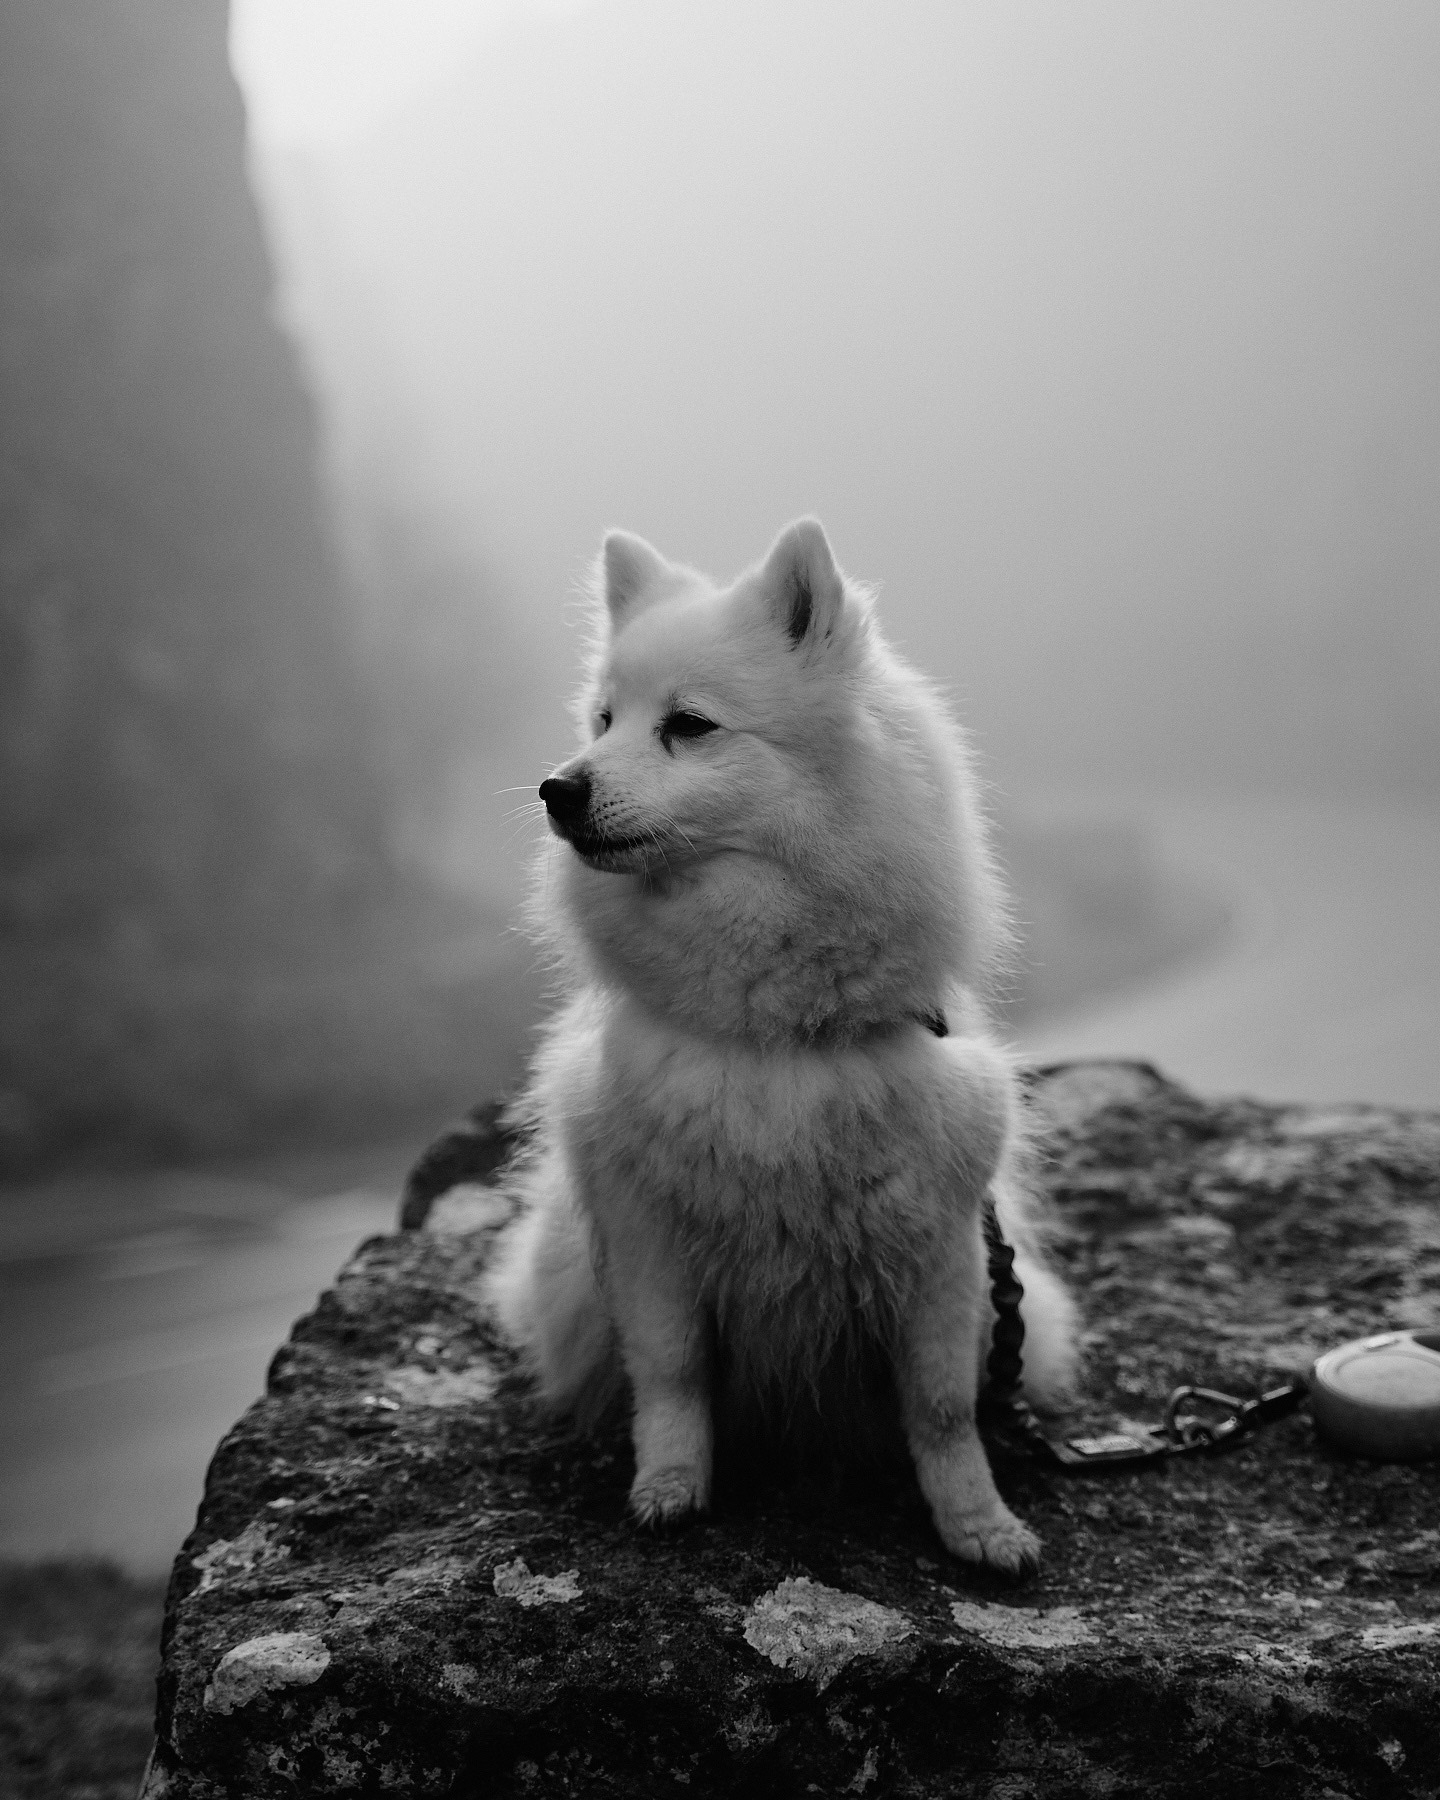
It’s a great location, and it’s nice and close to me in South Bristol, so it’s one of my regular dog walking routes. It’s very photogenic, the tall cliffs, sliced by a narrow winding road. I can never resist taking photos, even though I know it’s already been done a million times, as a quick search on flickr will prove.
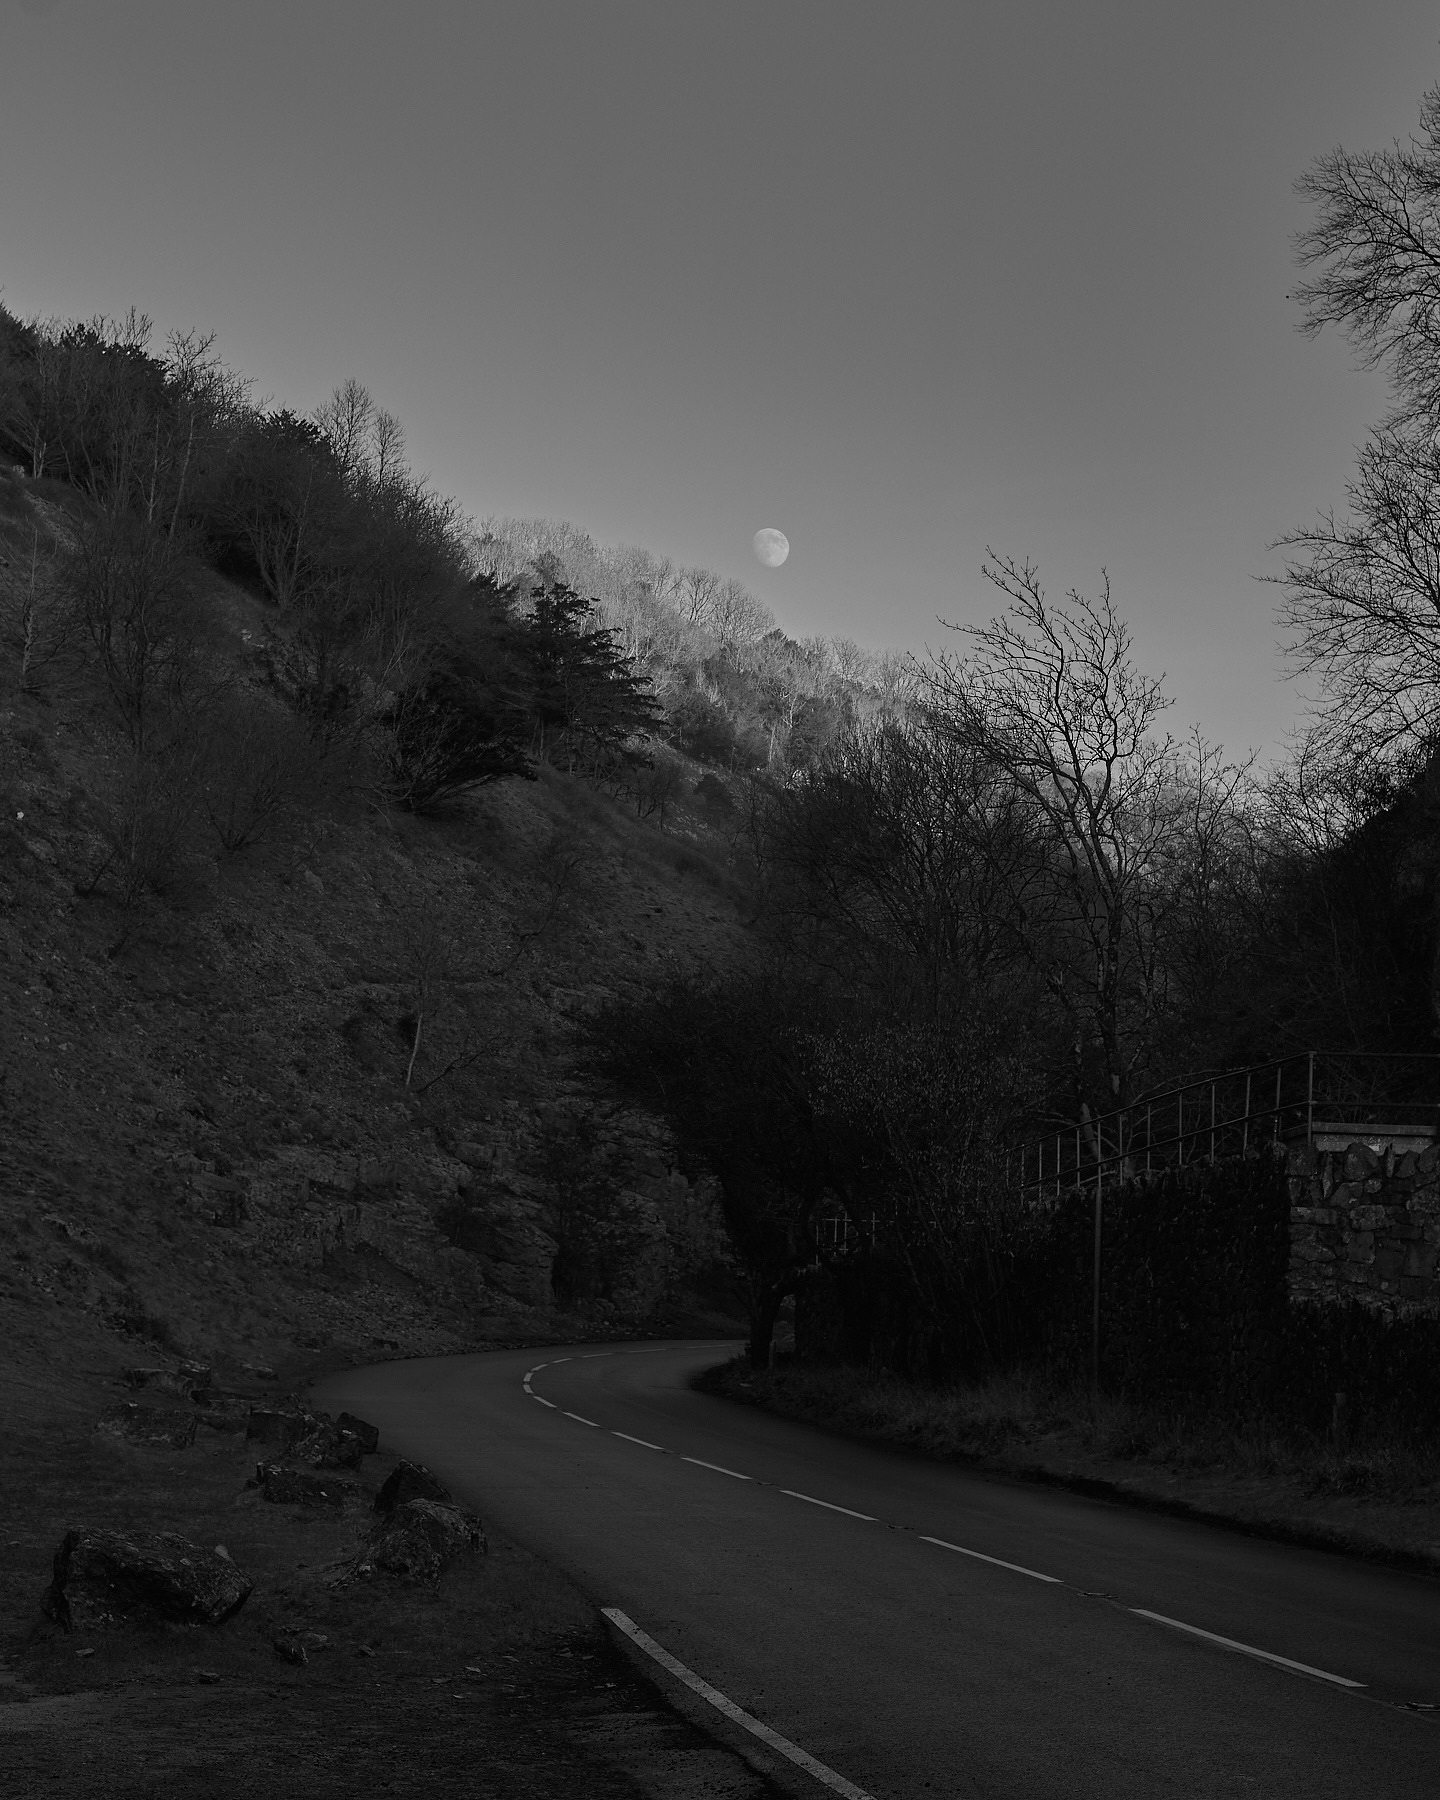
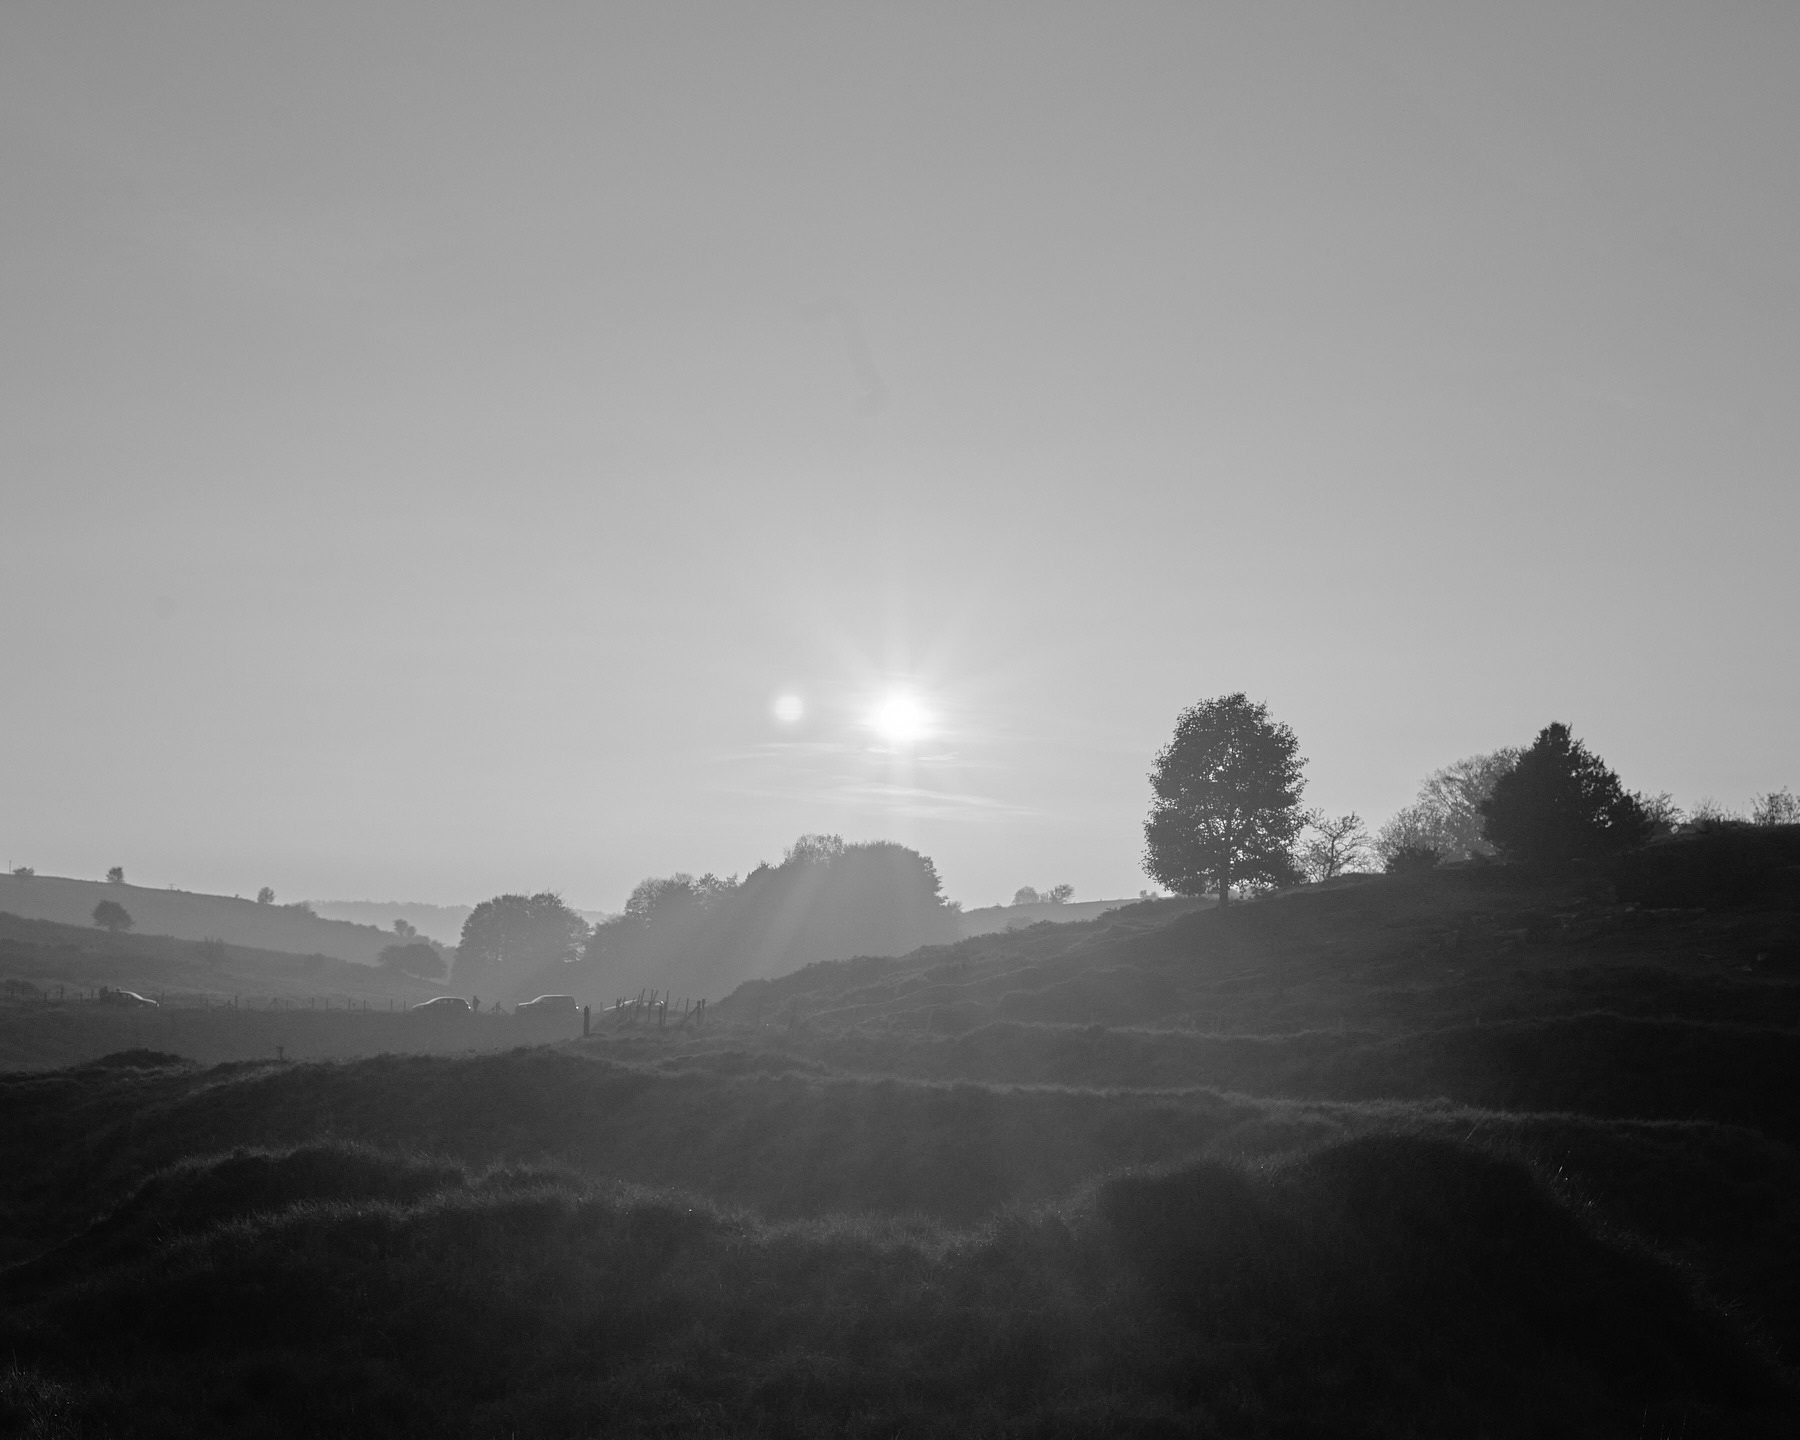
These photos are from December last year; there was a period in between Christmas and New Years with bright sun and clear blue skies, but also bitterly cold. I knew there would be some good opportunities during golden hour. But I couldn’t believe my luck when that setting sun turned gave way to a creeping fog which slowly worked its way up the gorge.
Bright sun and clear skies, this is how it looked when I first arrived.
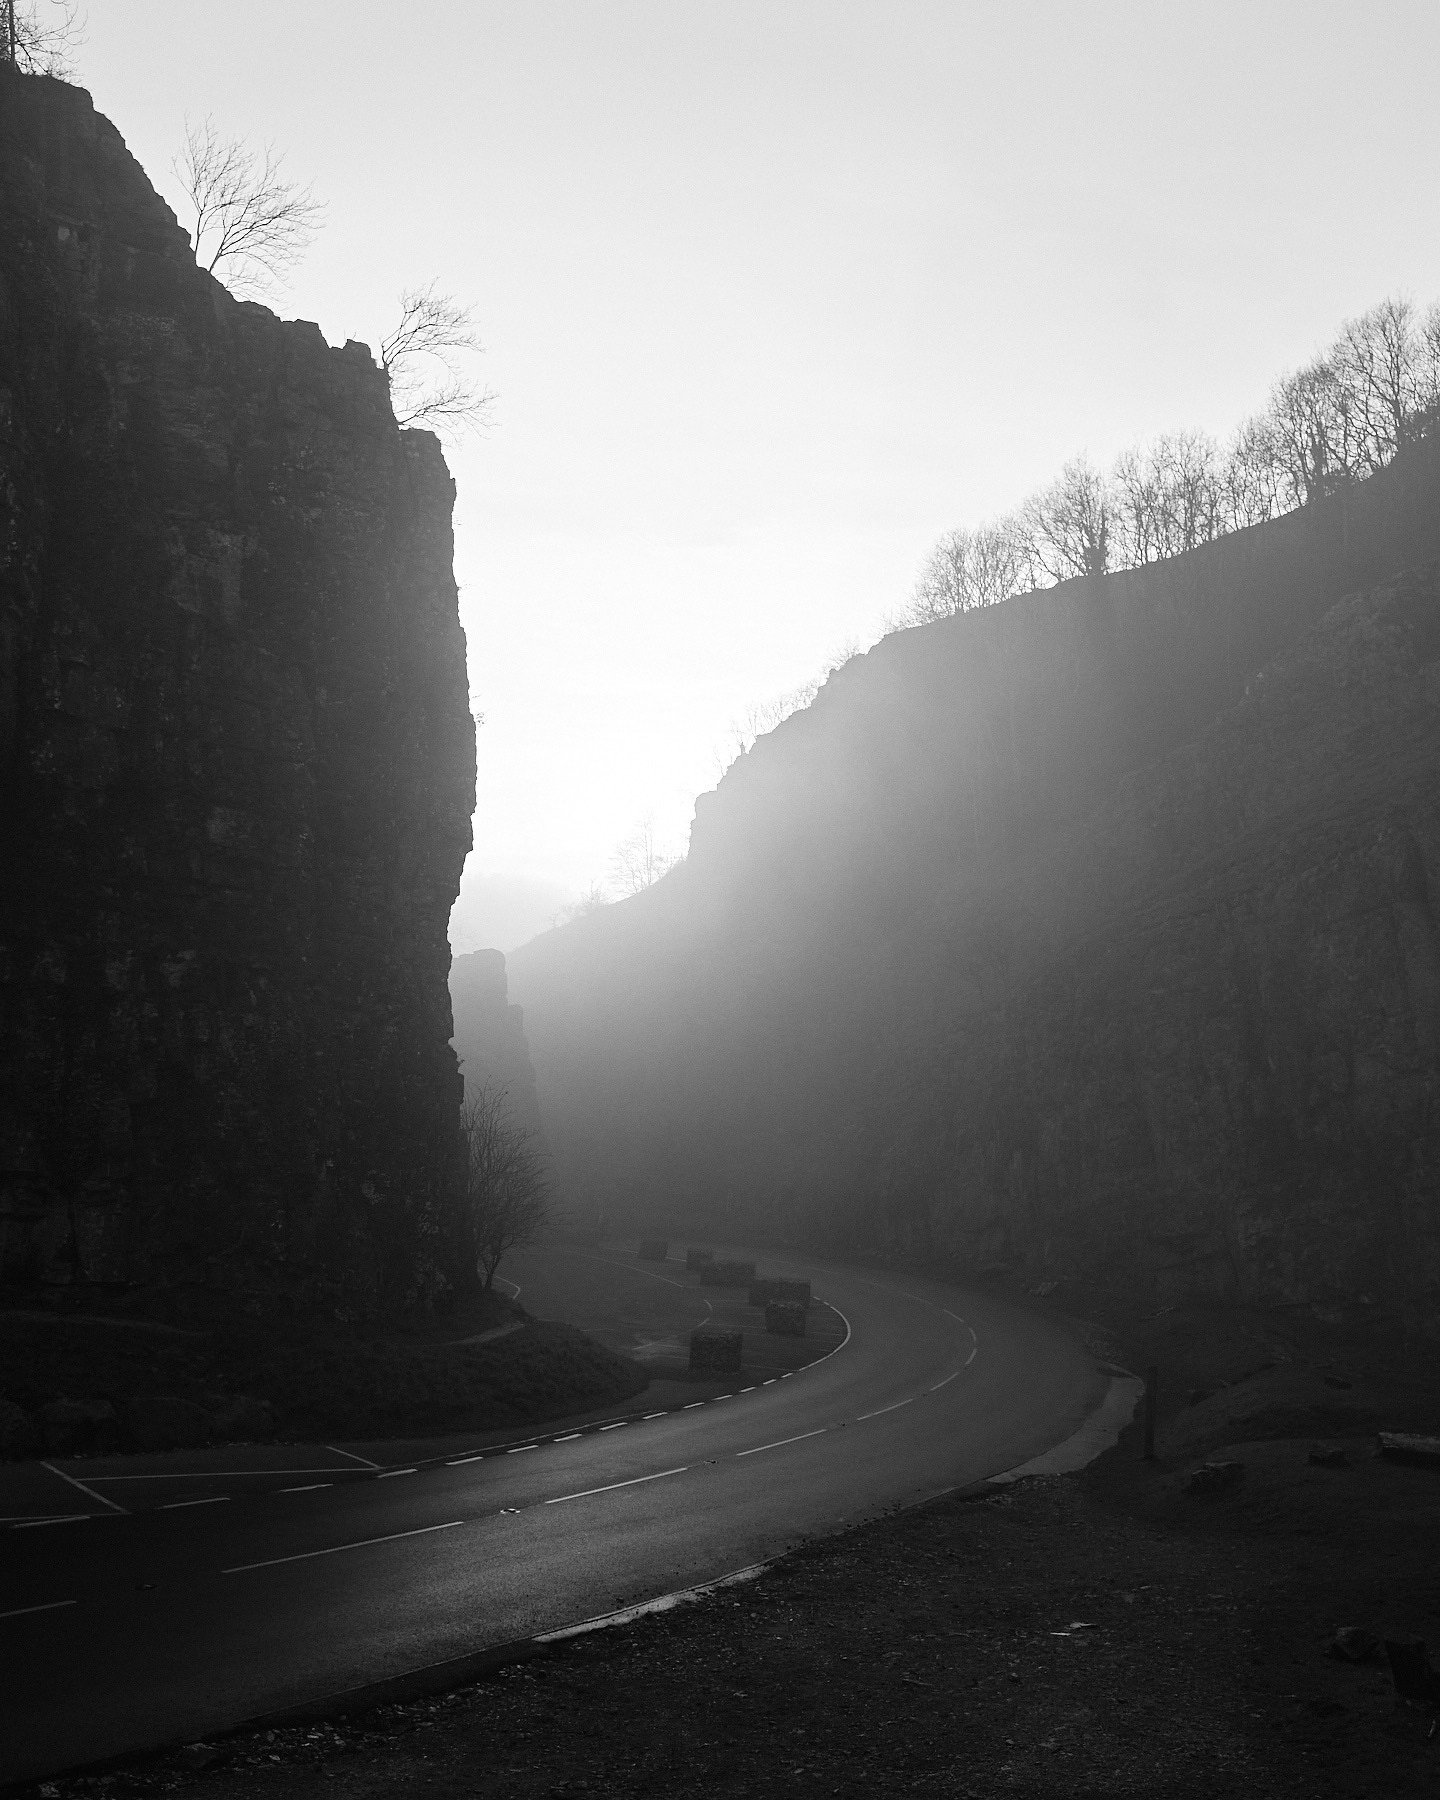
I’m torn in these perfect conditions, I don’t know if I’ll ever visit again in the fog, so I don’t want to miss any potential shots, the conditions make everything look so mysterious and ethereal it’s hard not to get carried away. But on the other hand, I know each shutter press is another photo that needs to be sorted, edited or potentially deleted later on. Sometimes the idea of having hundreds of very similar images to wade through, just fills me with dread. Some people love the process of editing, but I just want to get it done as quickly as possible.
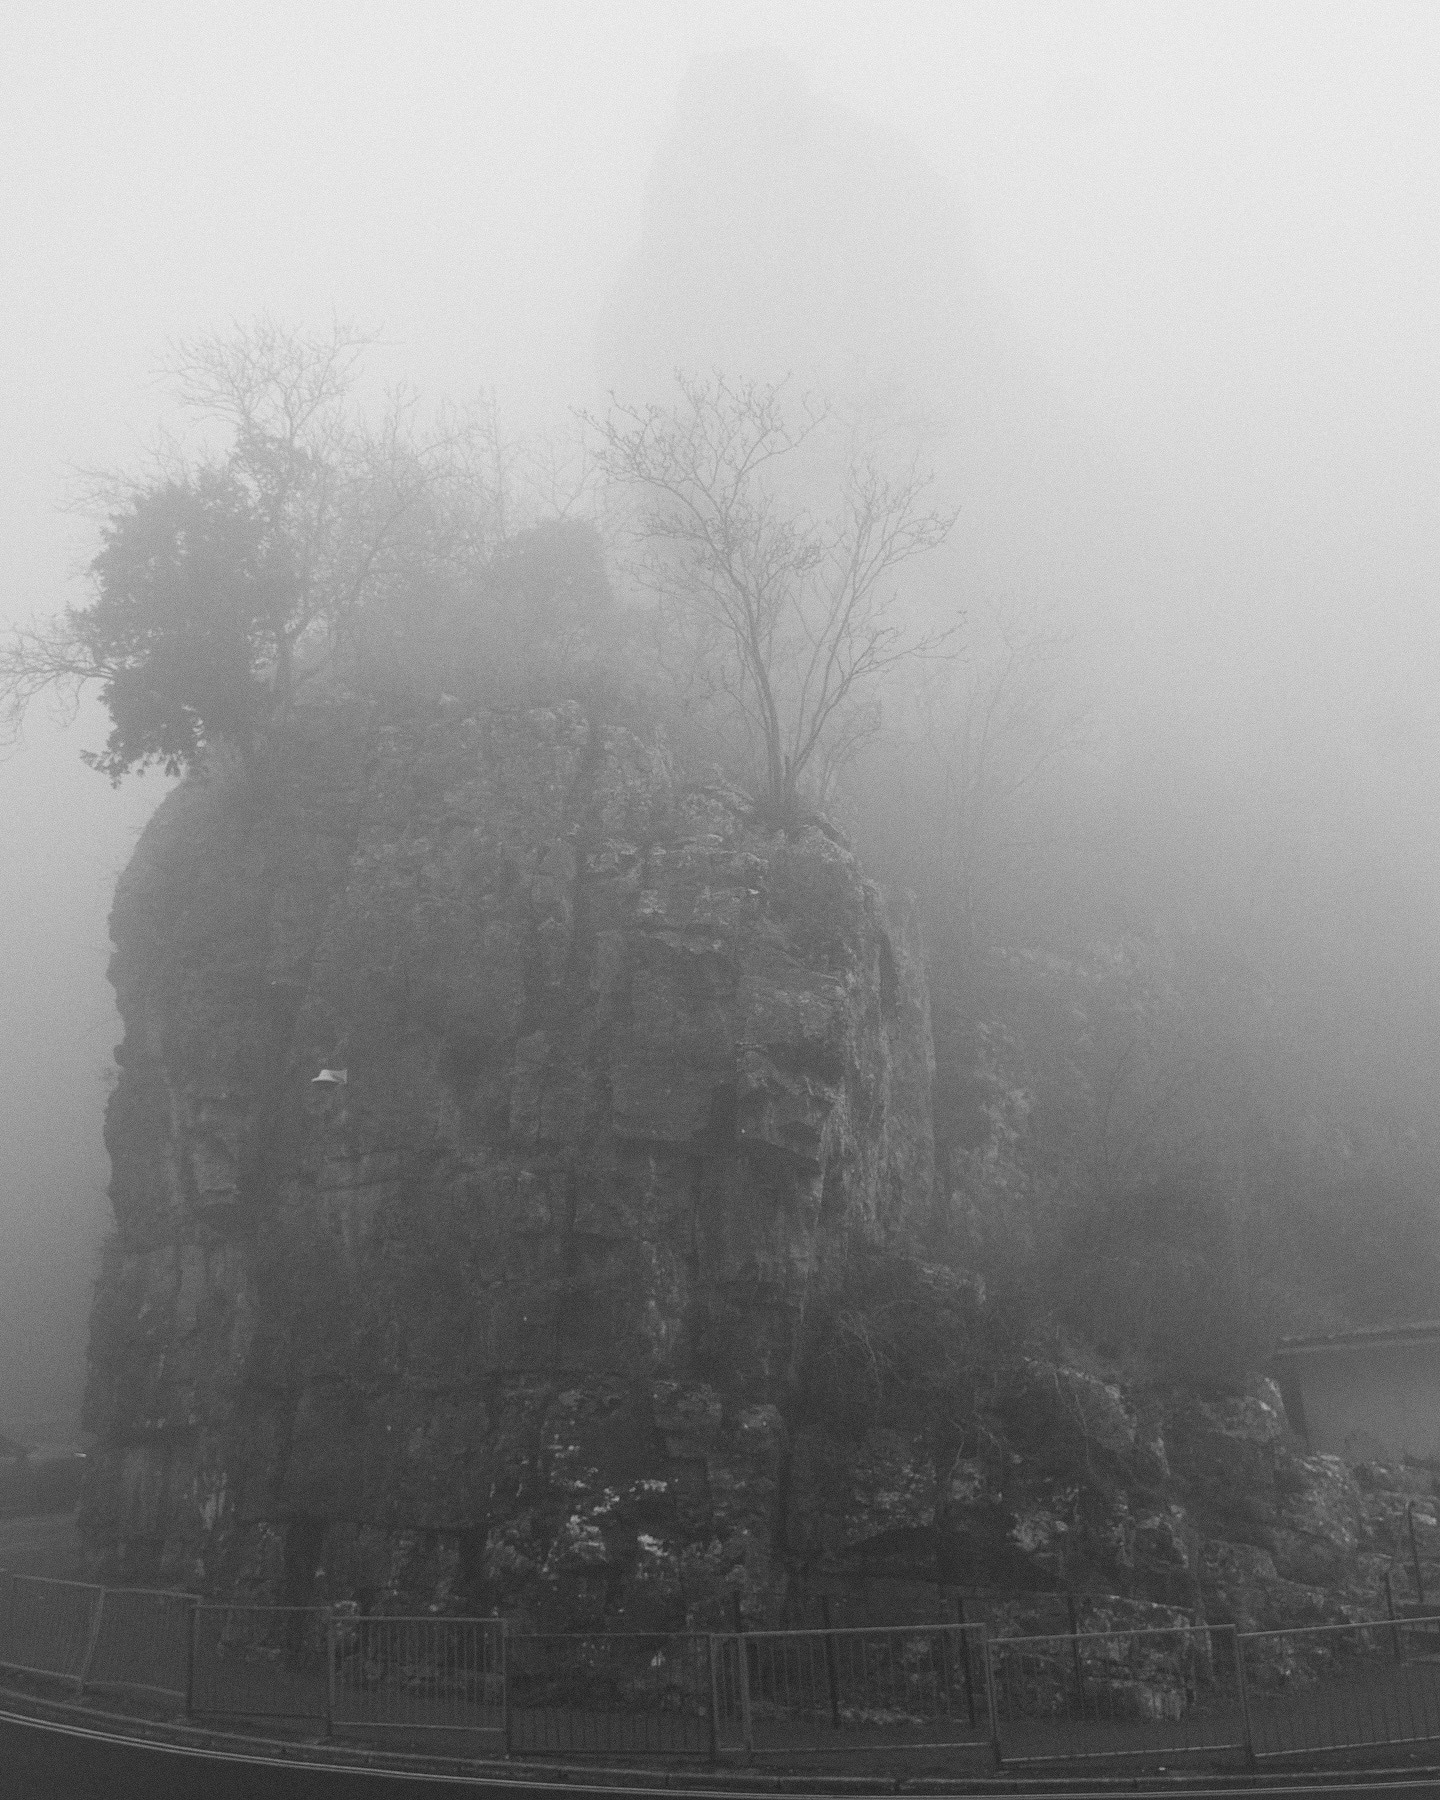
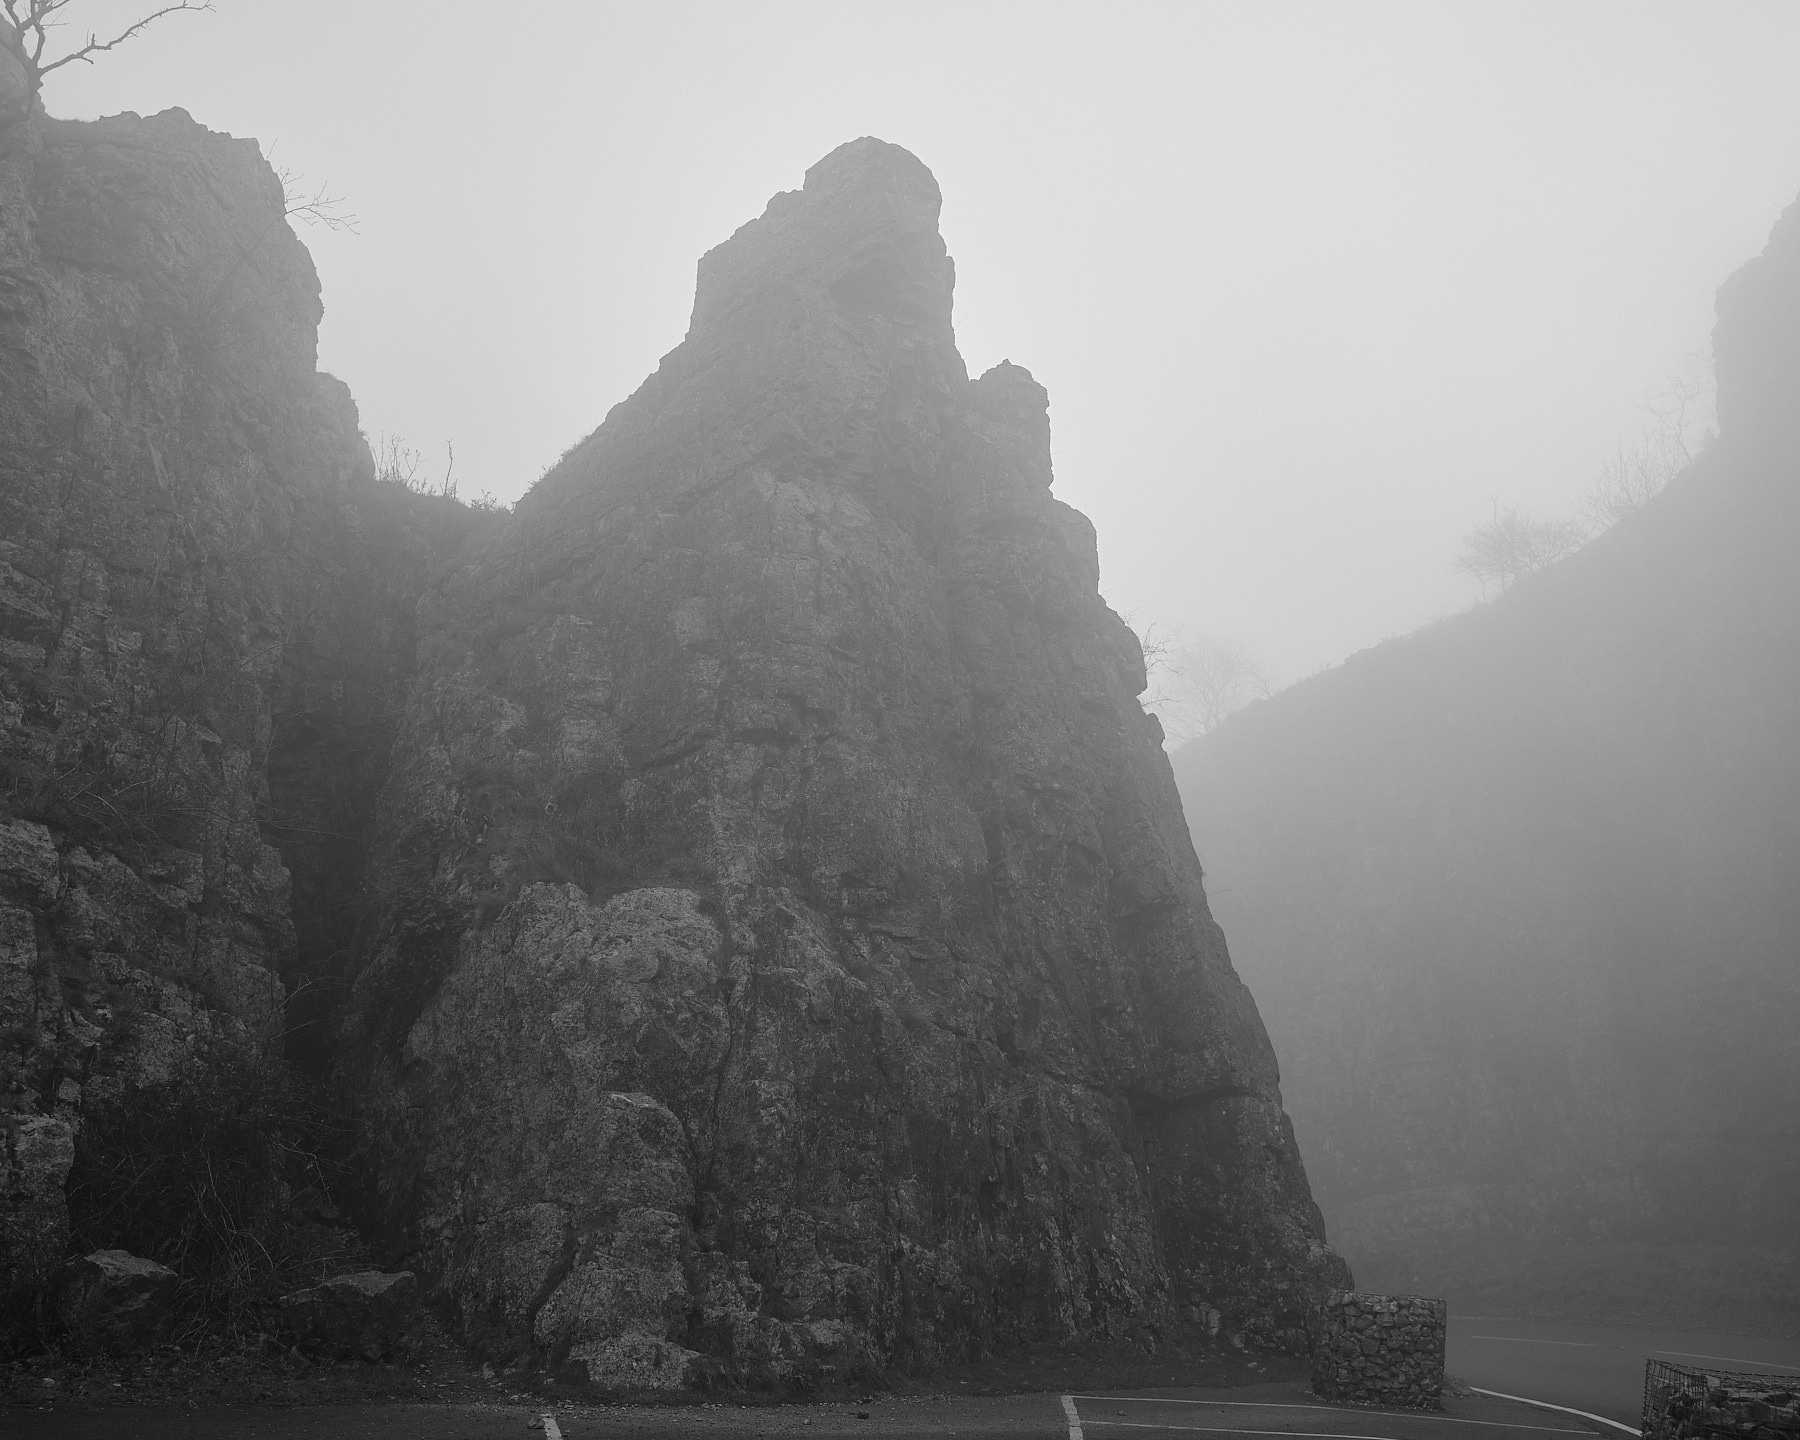
I spent a while at this spot with the jagged triangular shapes, as I really liked how they looked in the fog, which also helps to hide all the other distractions. Cheddar Gorge is a beauty spot, but it’s also built for tourists and visitors (myself included) which means necessities like car parking spaces throughout the gorge, but the painted lines and traffic calming blocks are too distracting, and I spent most of my time on this shot trying to find angles which minimise them.
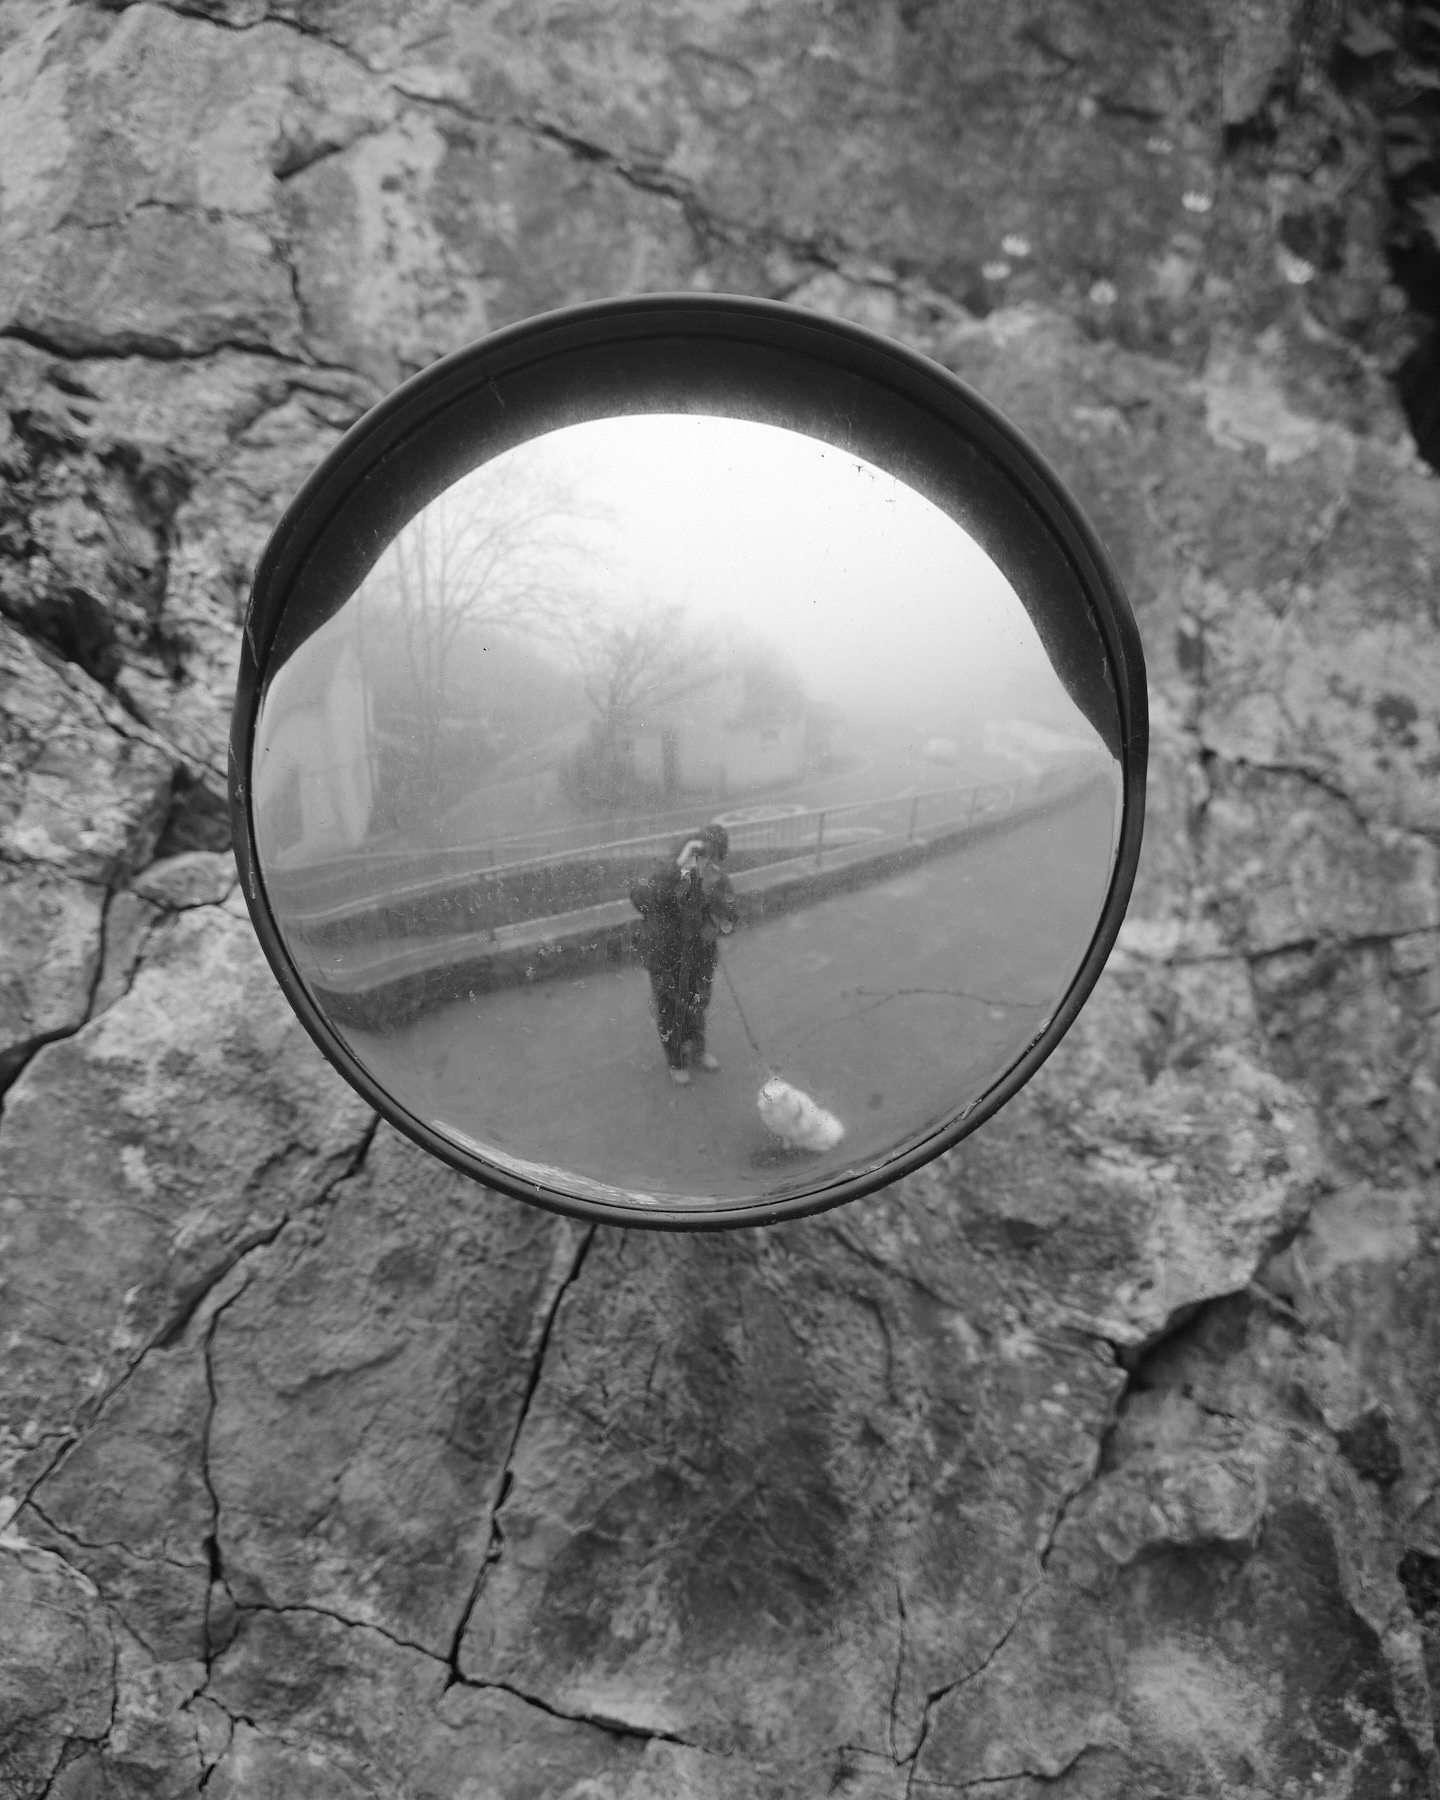
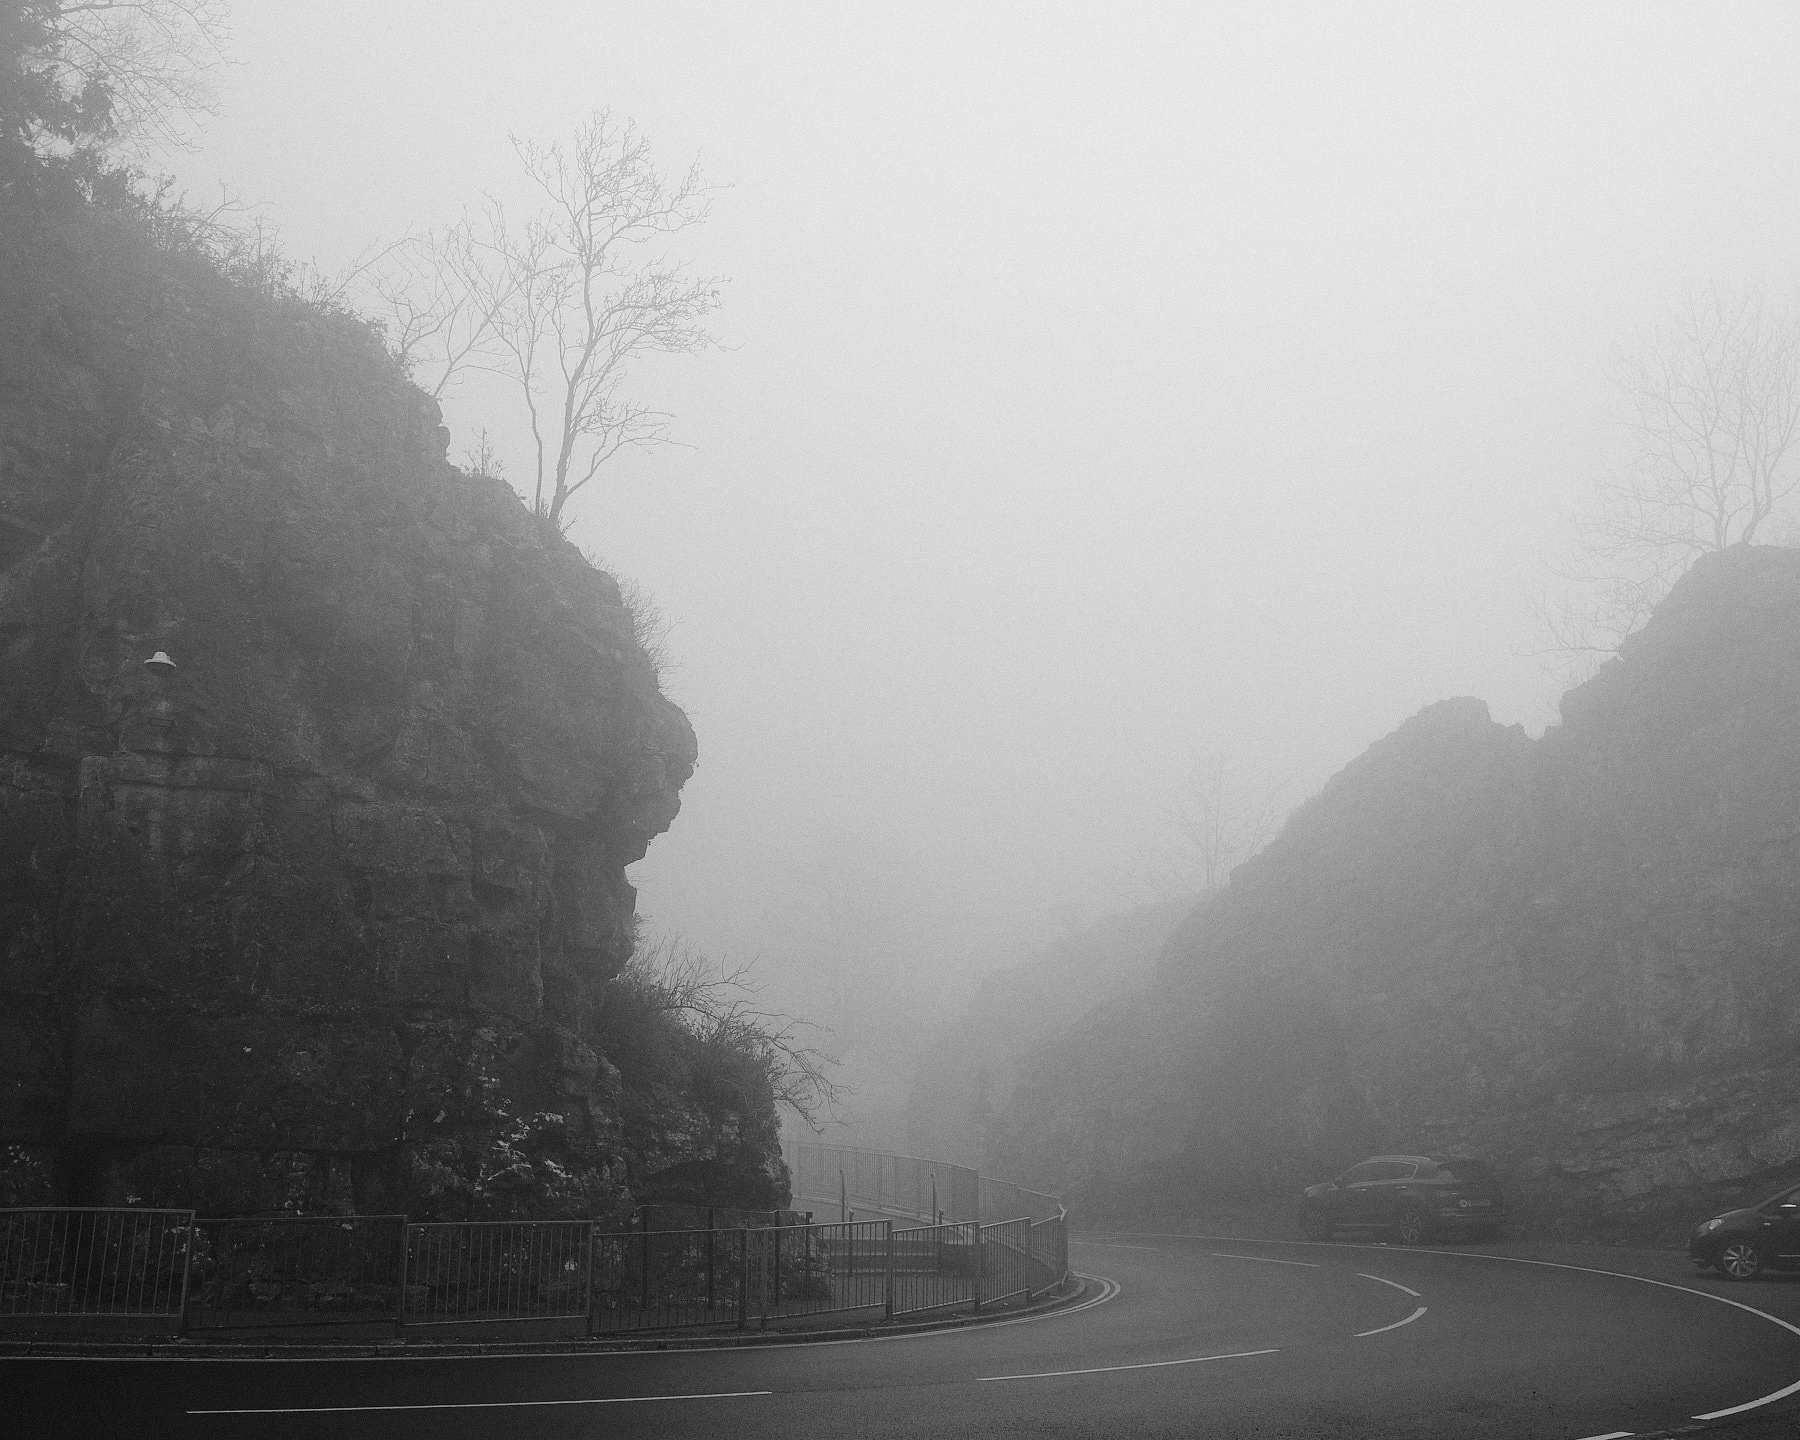
I’ve tried to avoid any cars or people in the shots where possible as well, partly for the same reasons as above, and partly because that’s always my preference. This did mean there was a lot of standing around in the cold, patiently waiting for people/cars/dogs to move out of the frame, while I tried not to look too awkward just standing there until they leave.
Hopefully this is a relatable story about photo gear. I bought a diffusion filter a couple of years ago after seeing a post on instagram, I took it out a of couple times to have a play around, shot a few photos, and then it went back in a drawer where it lay forgotten until recently.
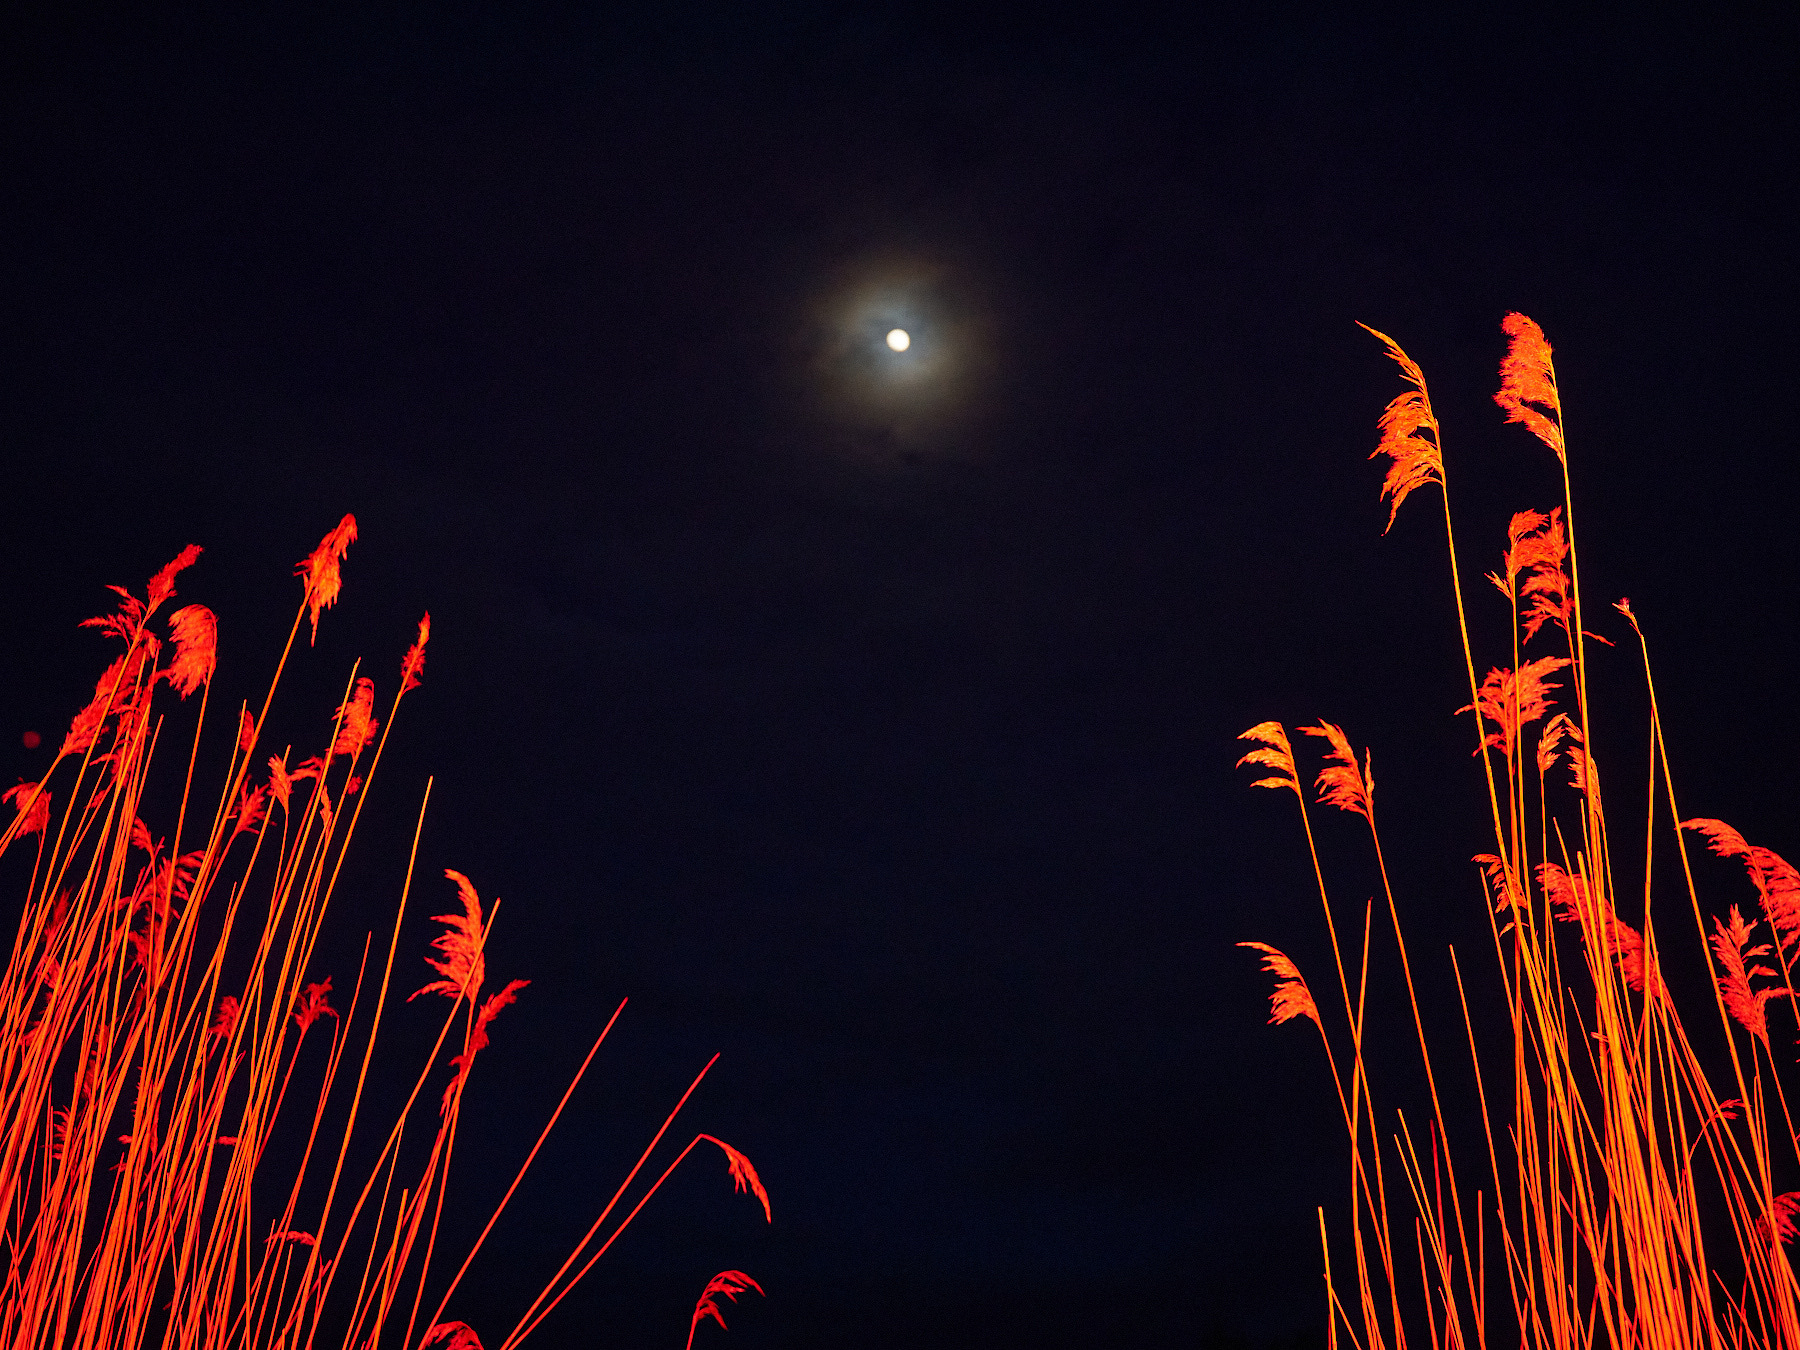
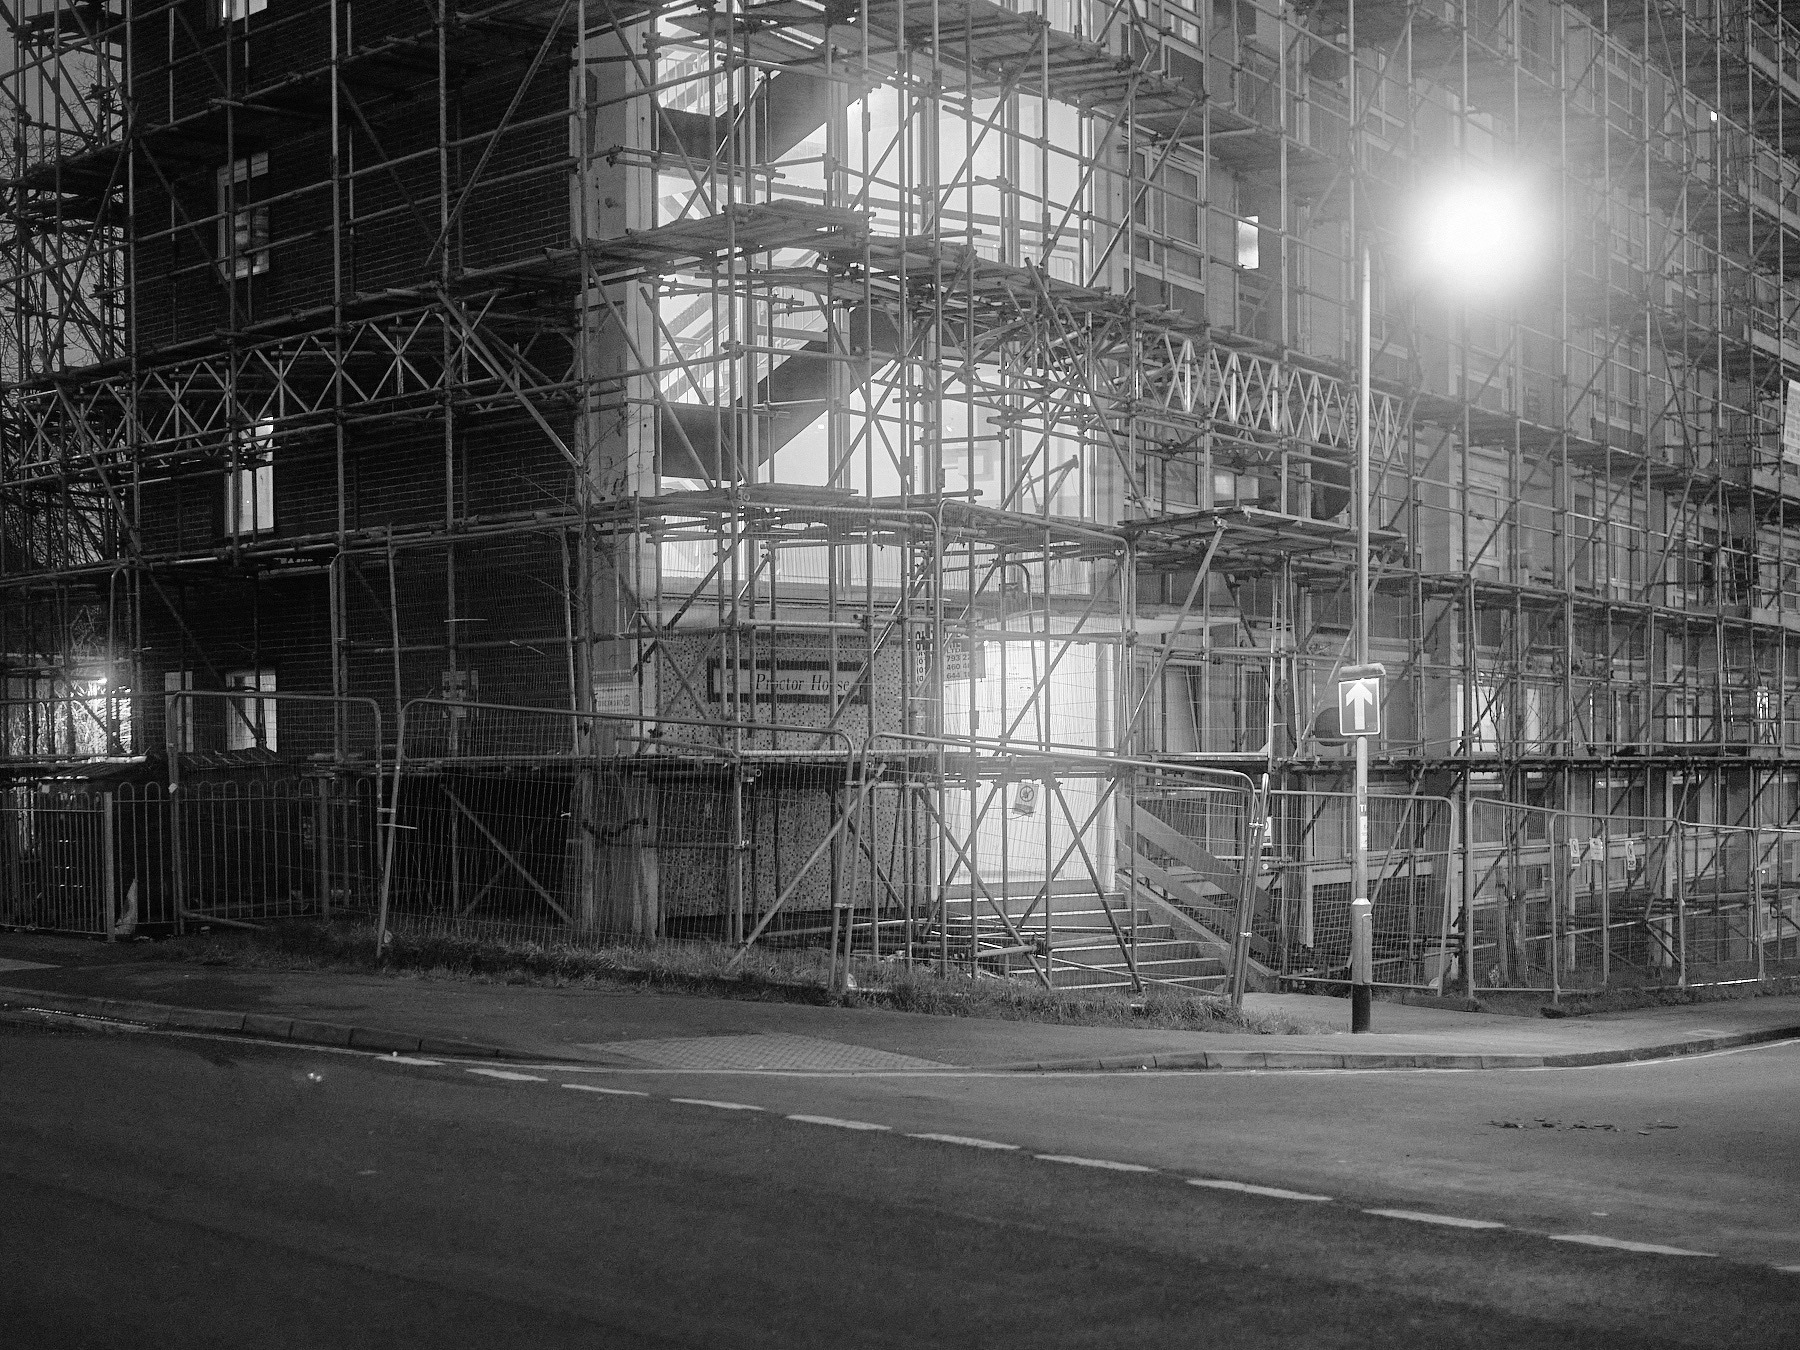
Now I’ve remembered it exists (I probably saw another post which jogged my memory) I’ve been using it again, and I’ve taken enough images for a little blog post. A diffusion filter provides that touch of softness and creates this hazy glow around light sources. This sounded perfect to me, the potential of an ethereal cinematic look, and hopefully a way to mask that ultra sharp clinical way that digital sensors render lights at night, and the big sun stars that are created.
So far I’ve tried to avoid stars by shooting wide open at f/2, which works pretty well, but is limiting when it comes to depth of field. A lot of the time I’m shooting wide open anyway, because I’m shooting handheld when I probably should be using a tripod.
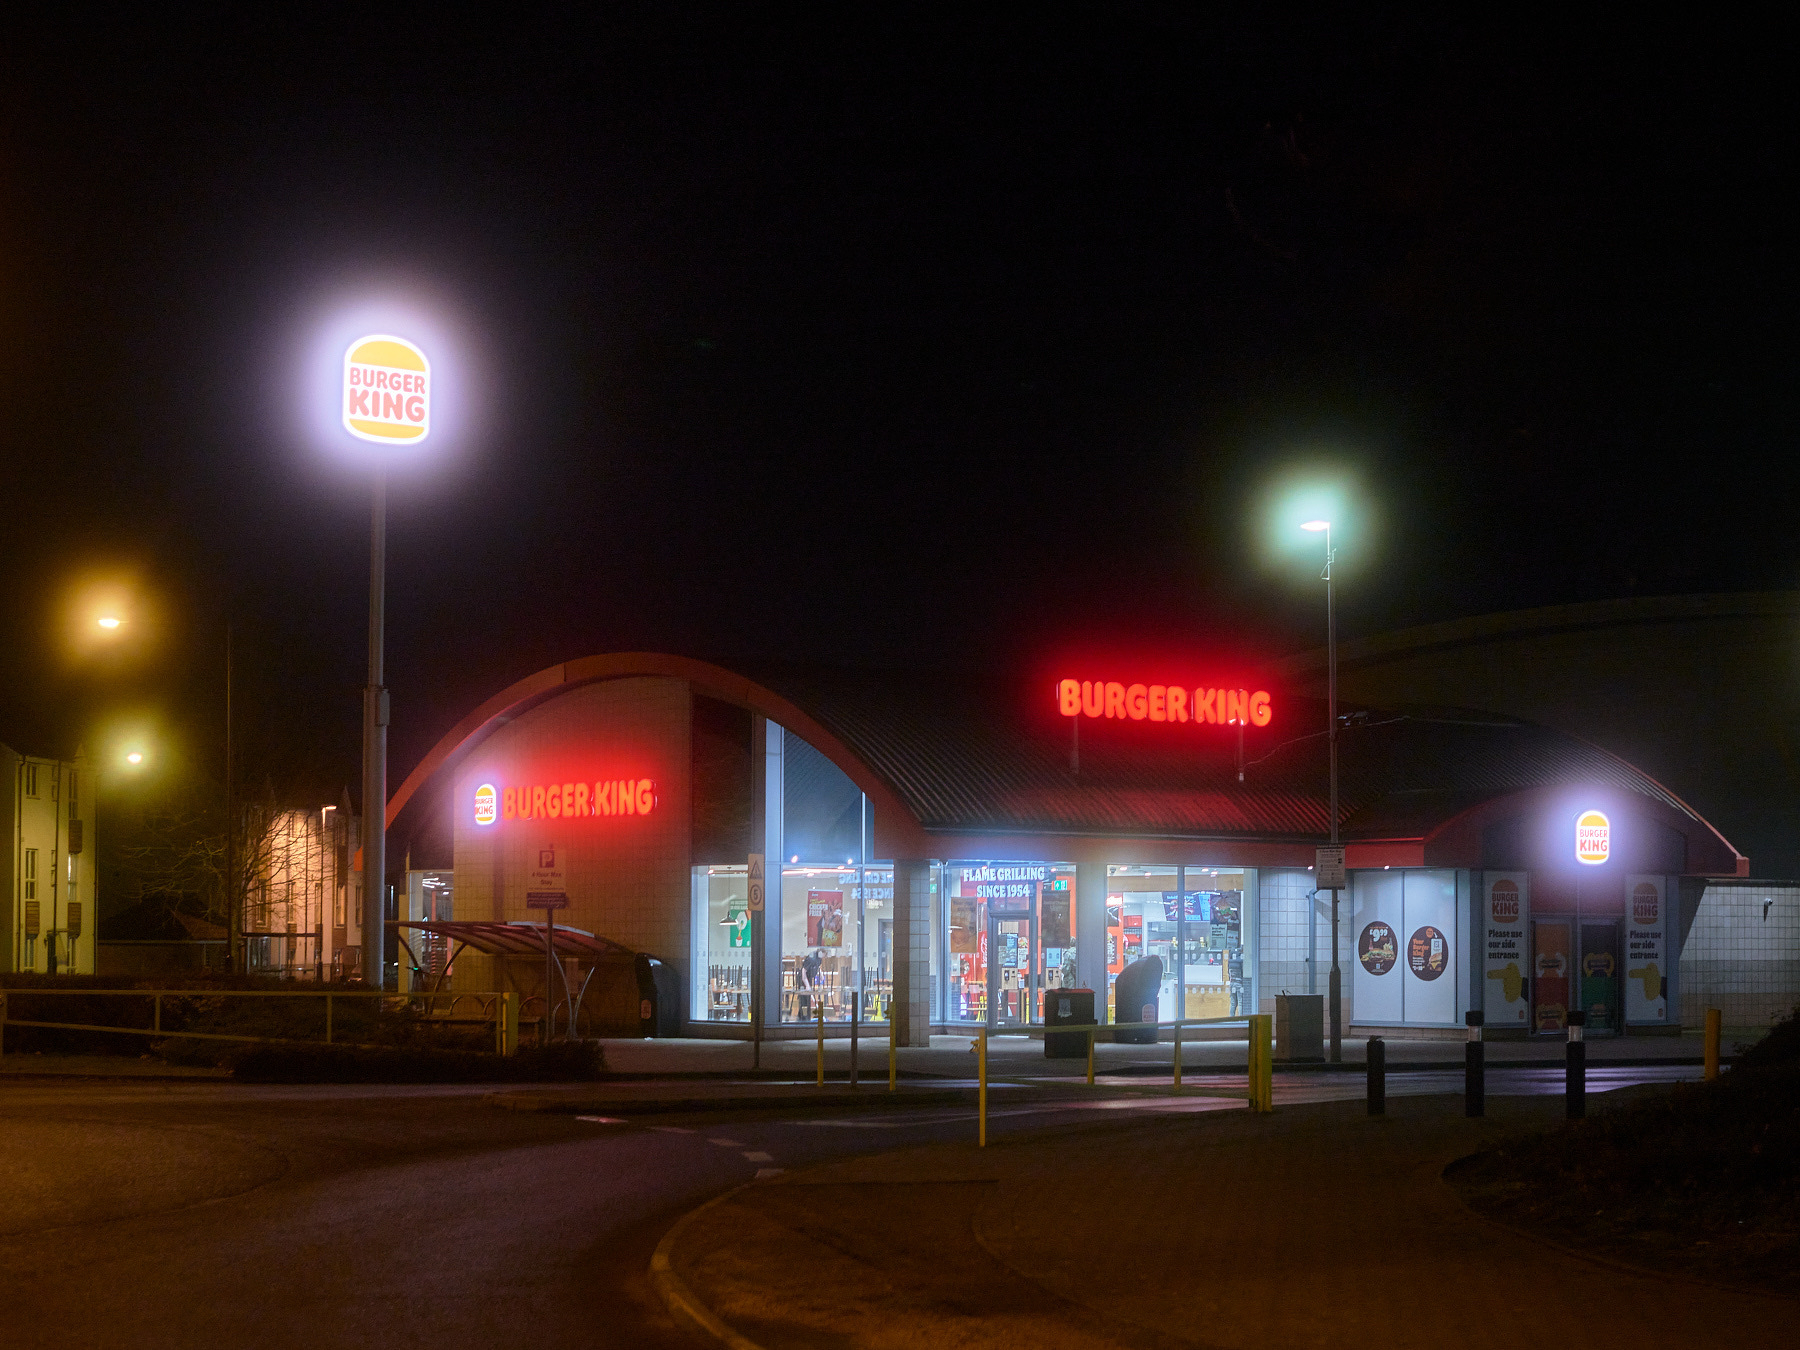
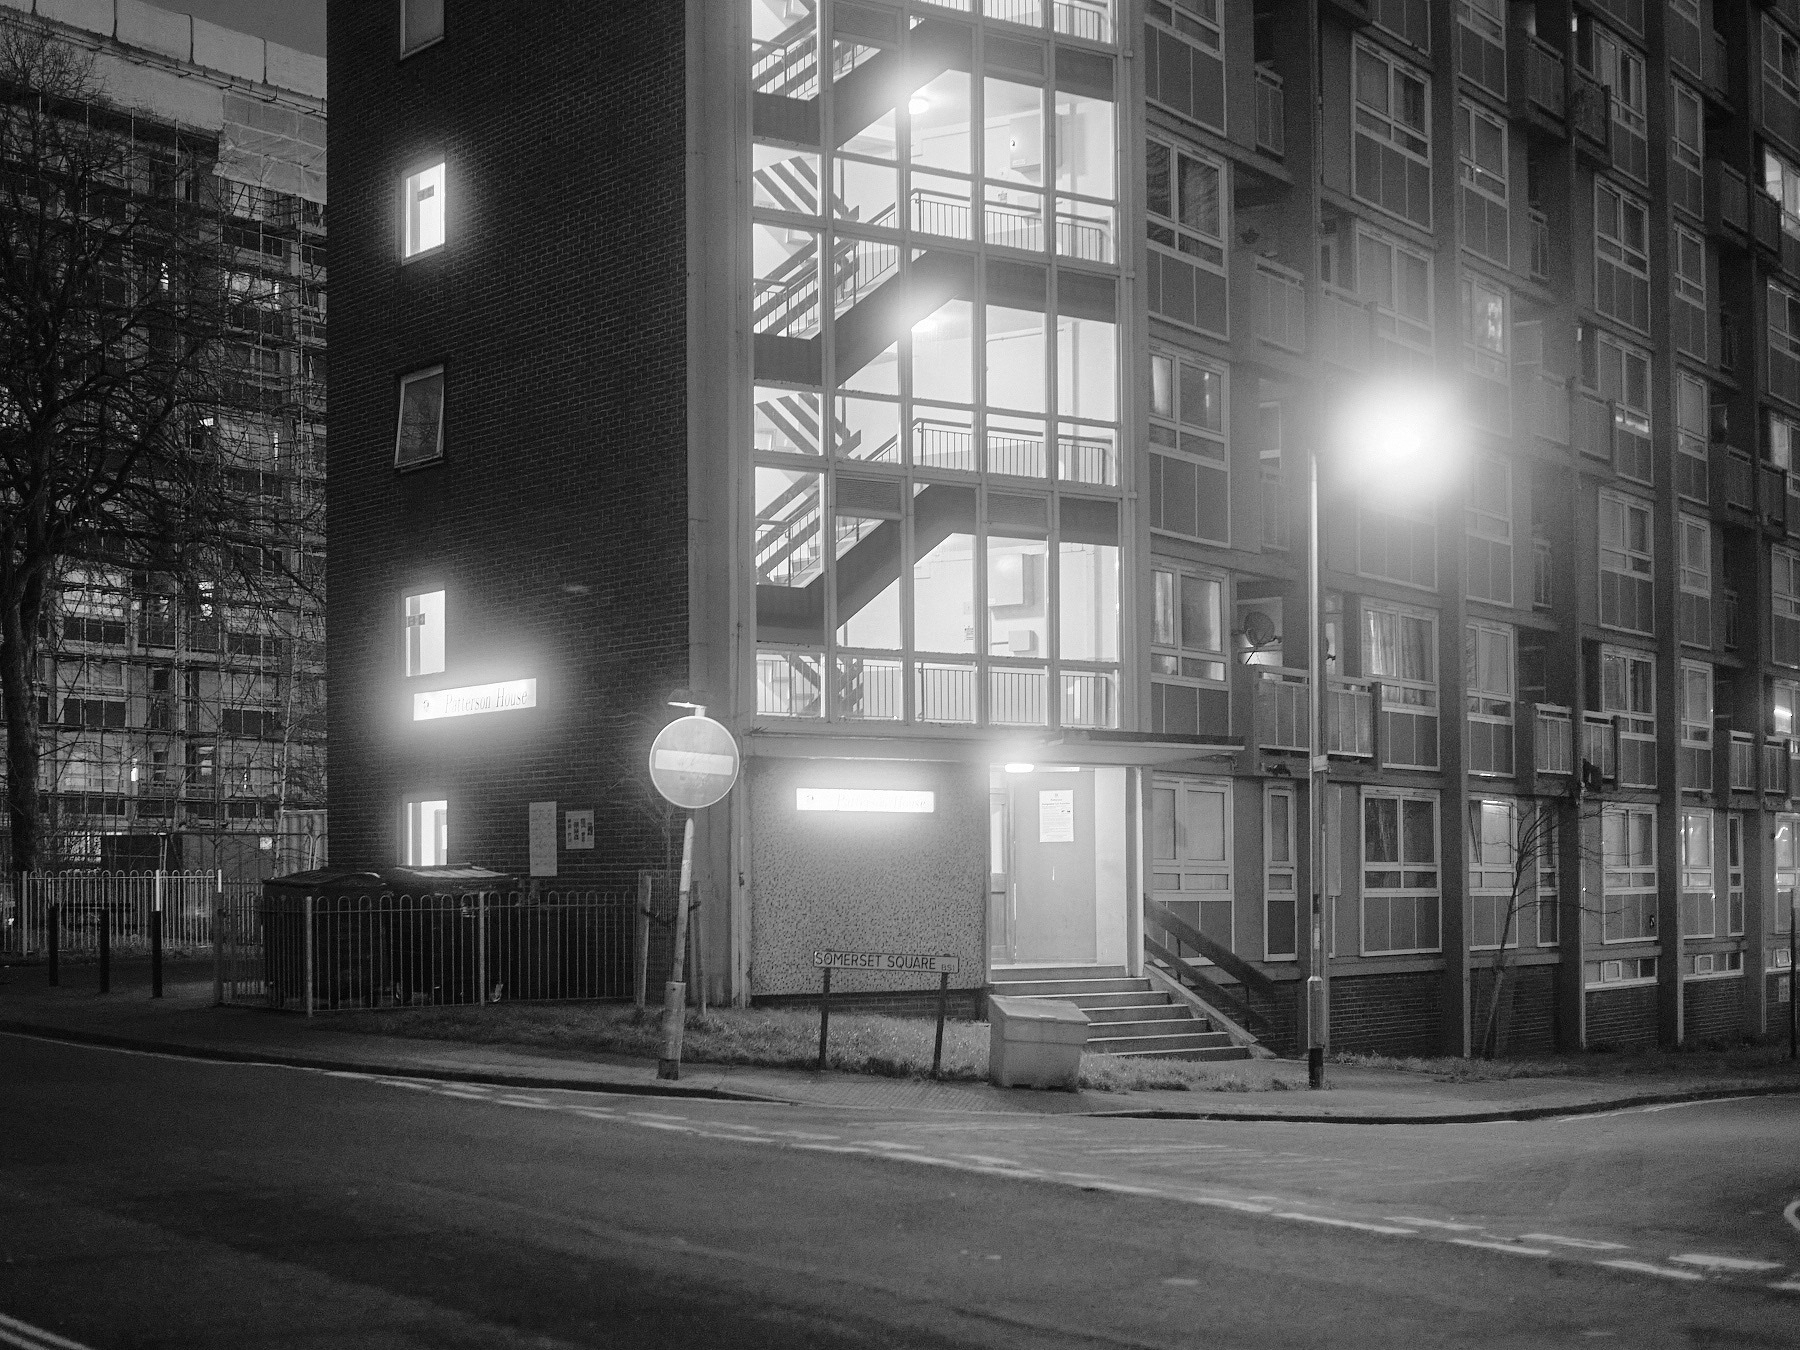
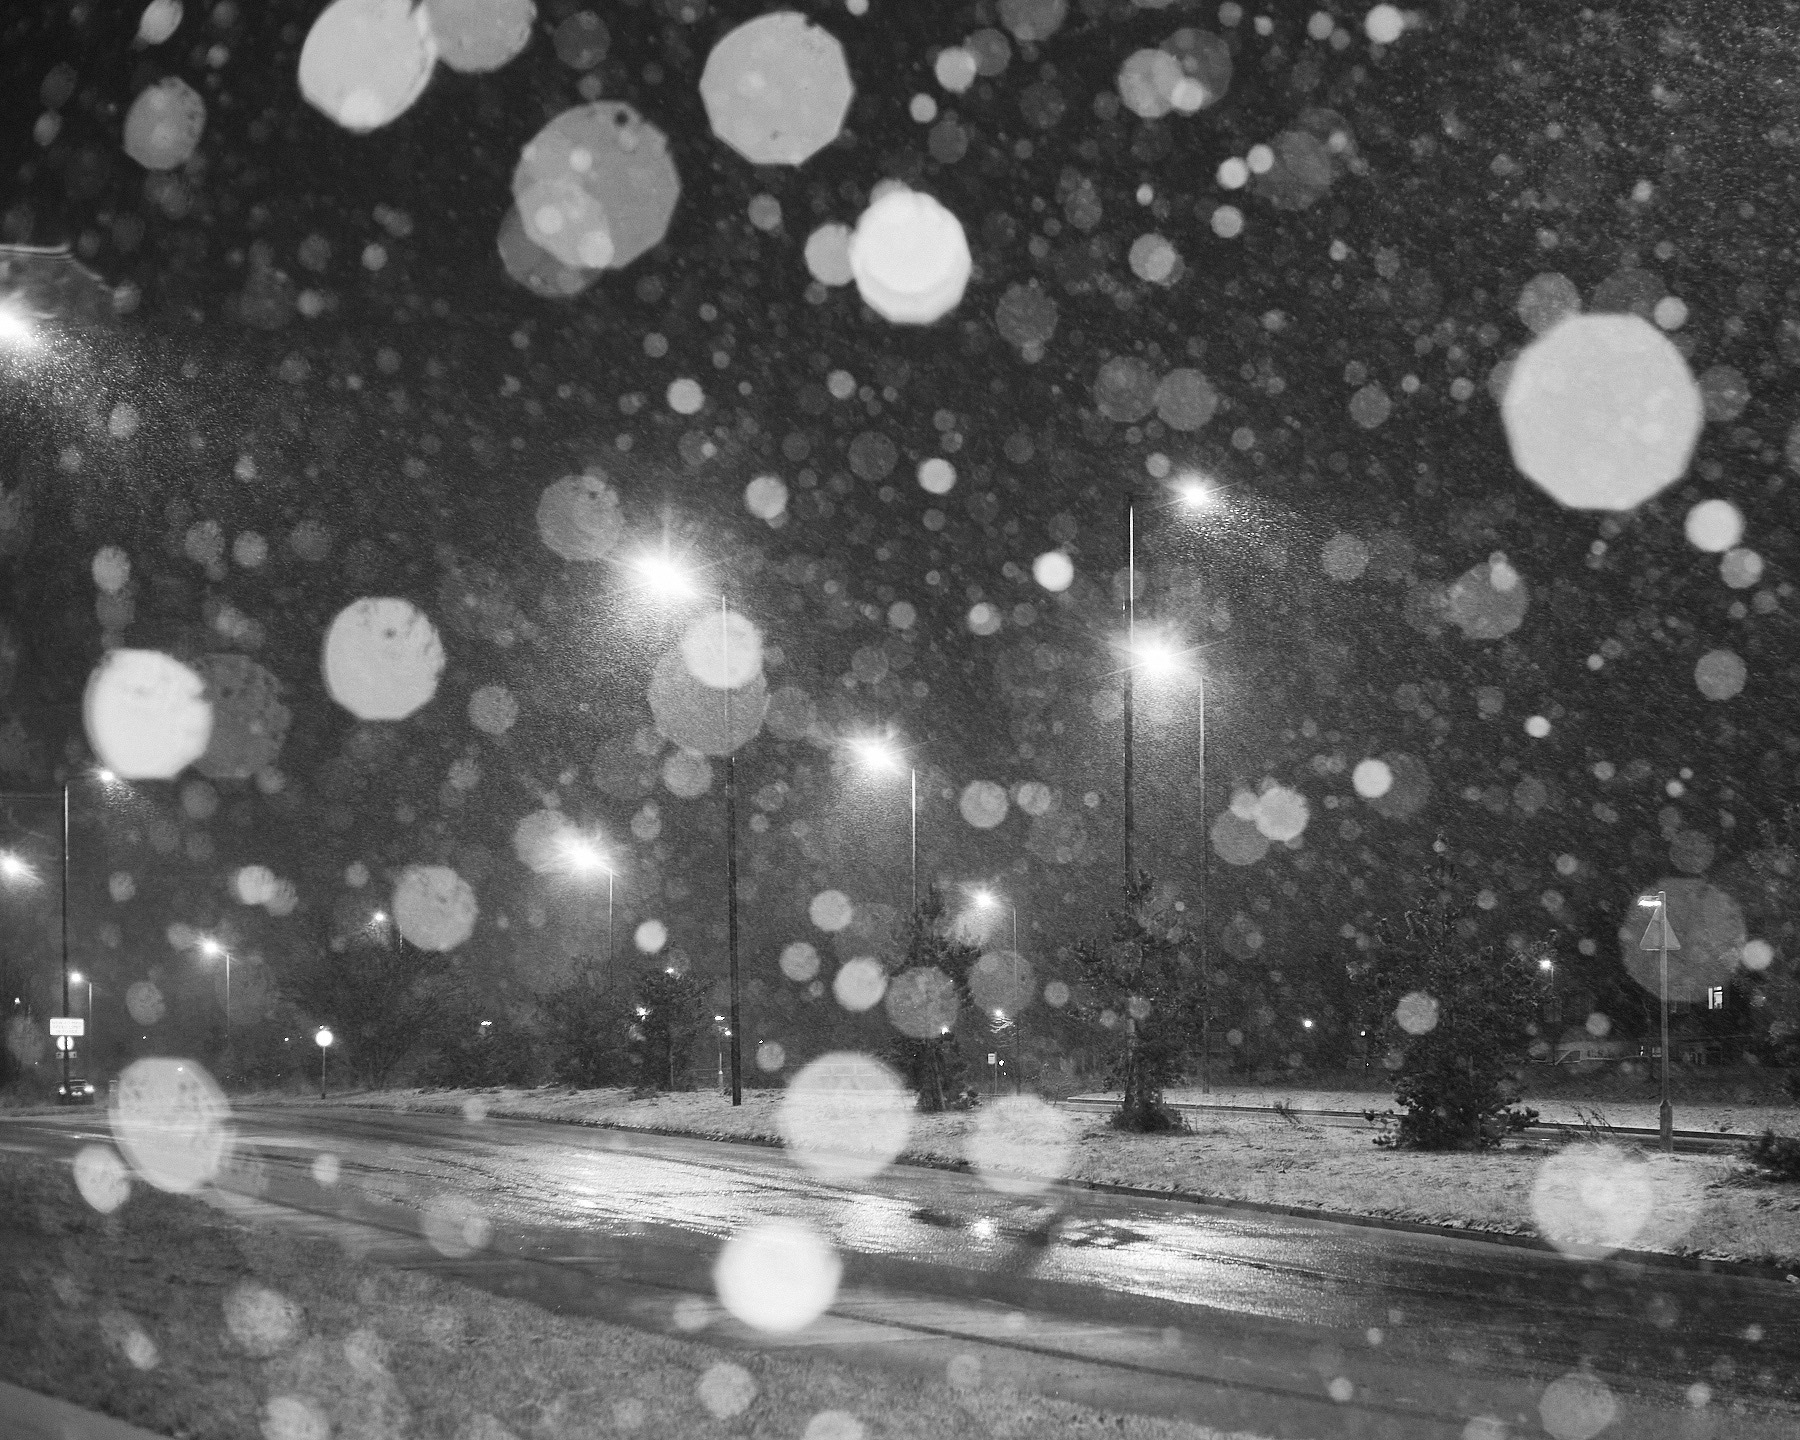
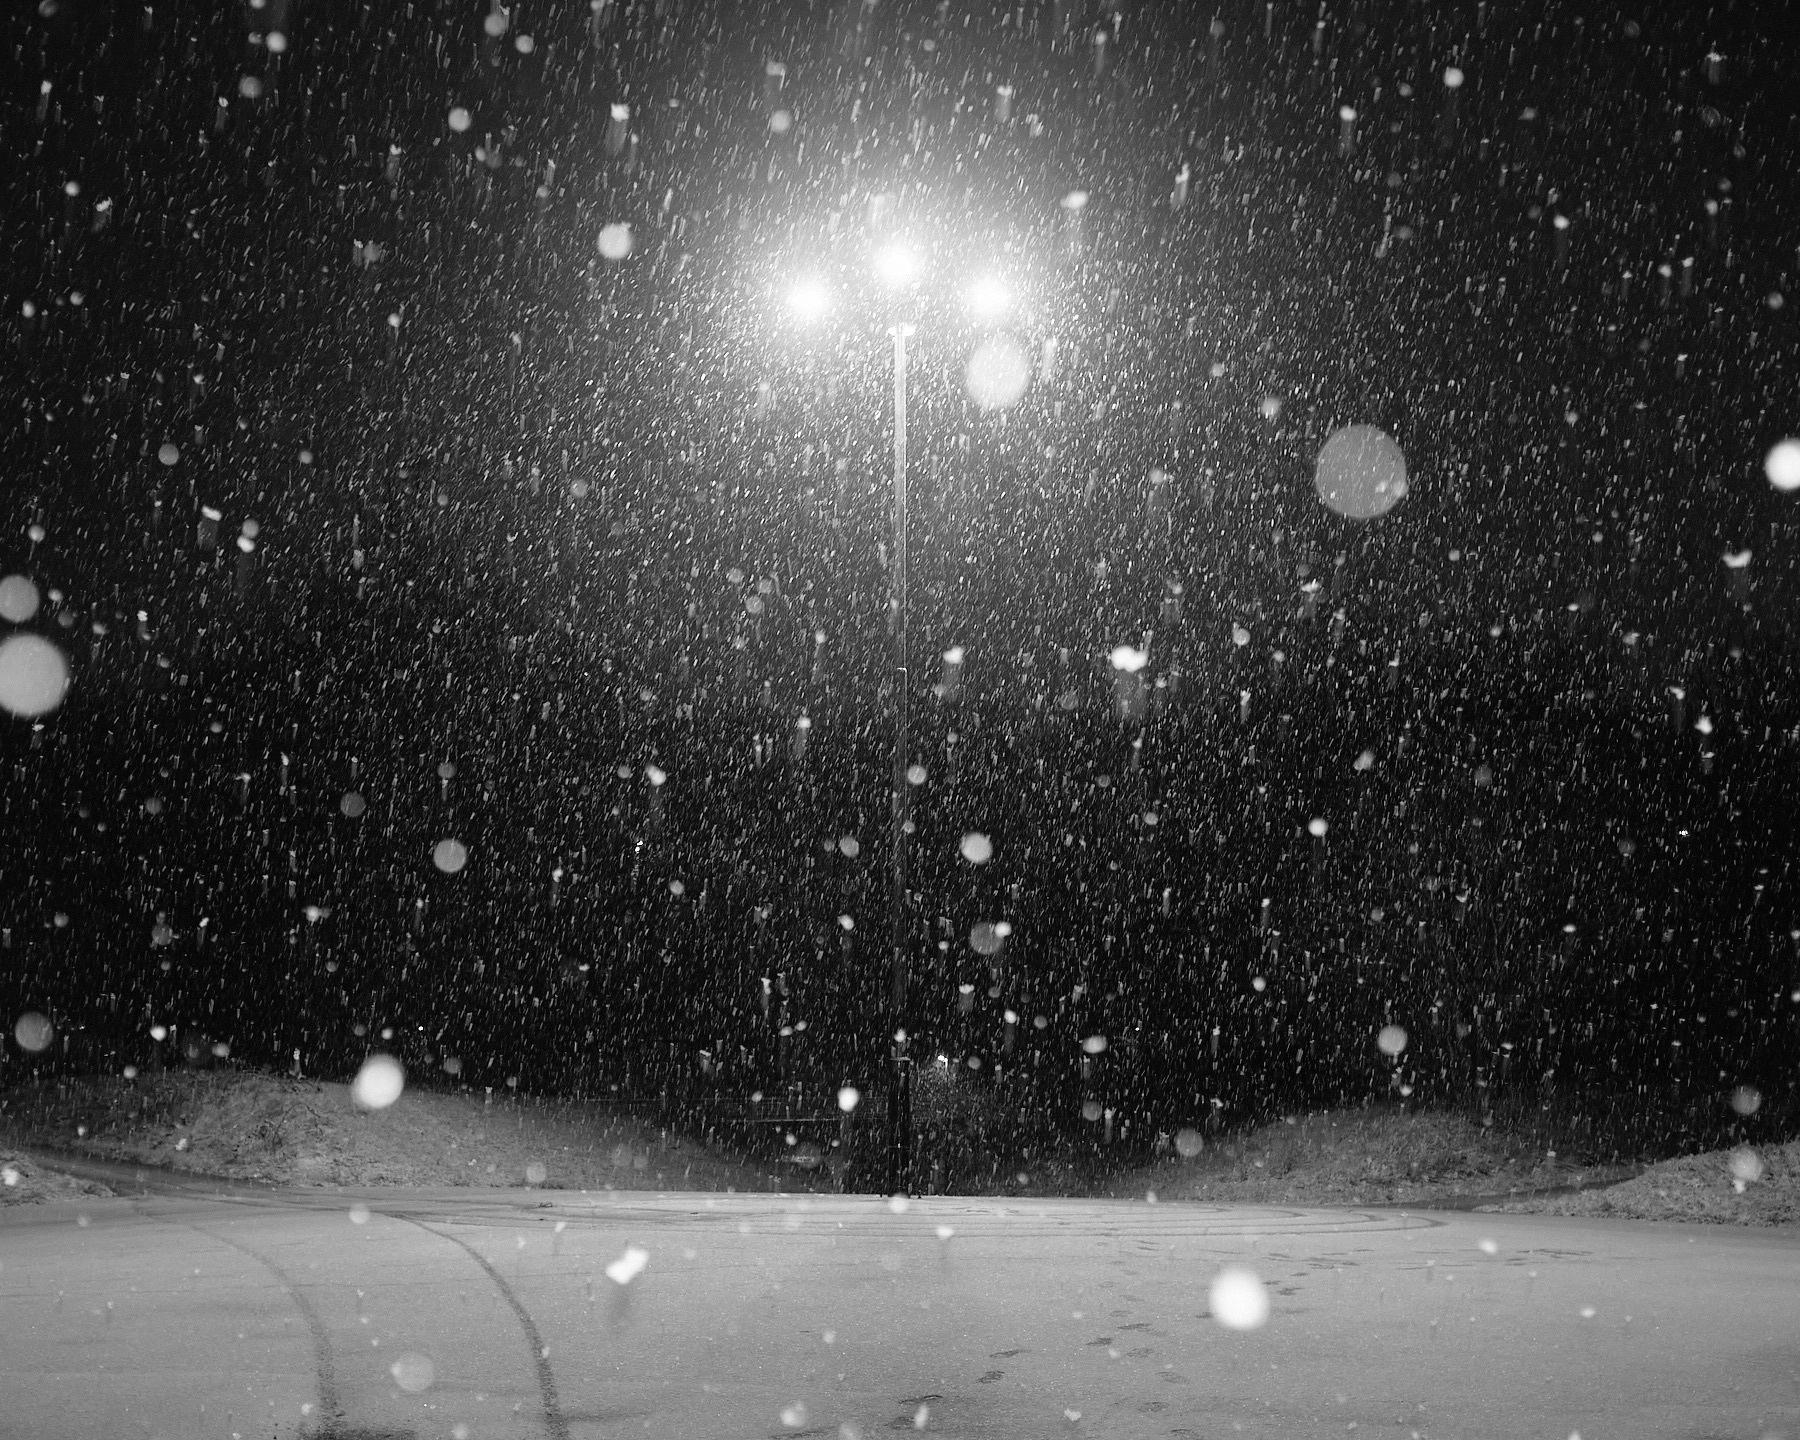
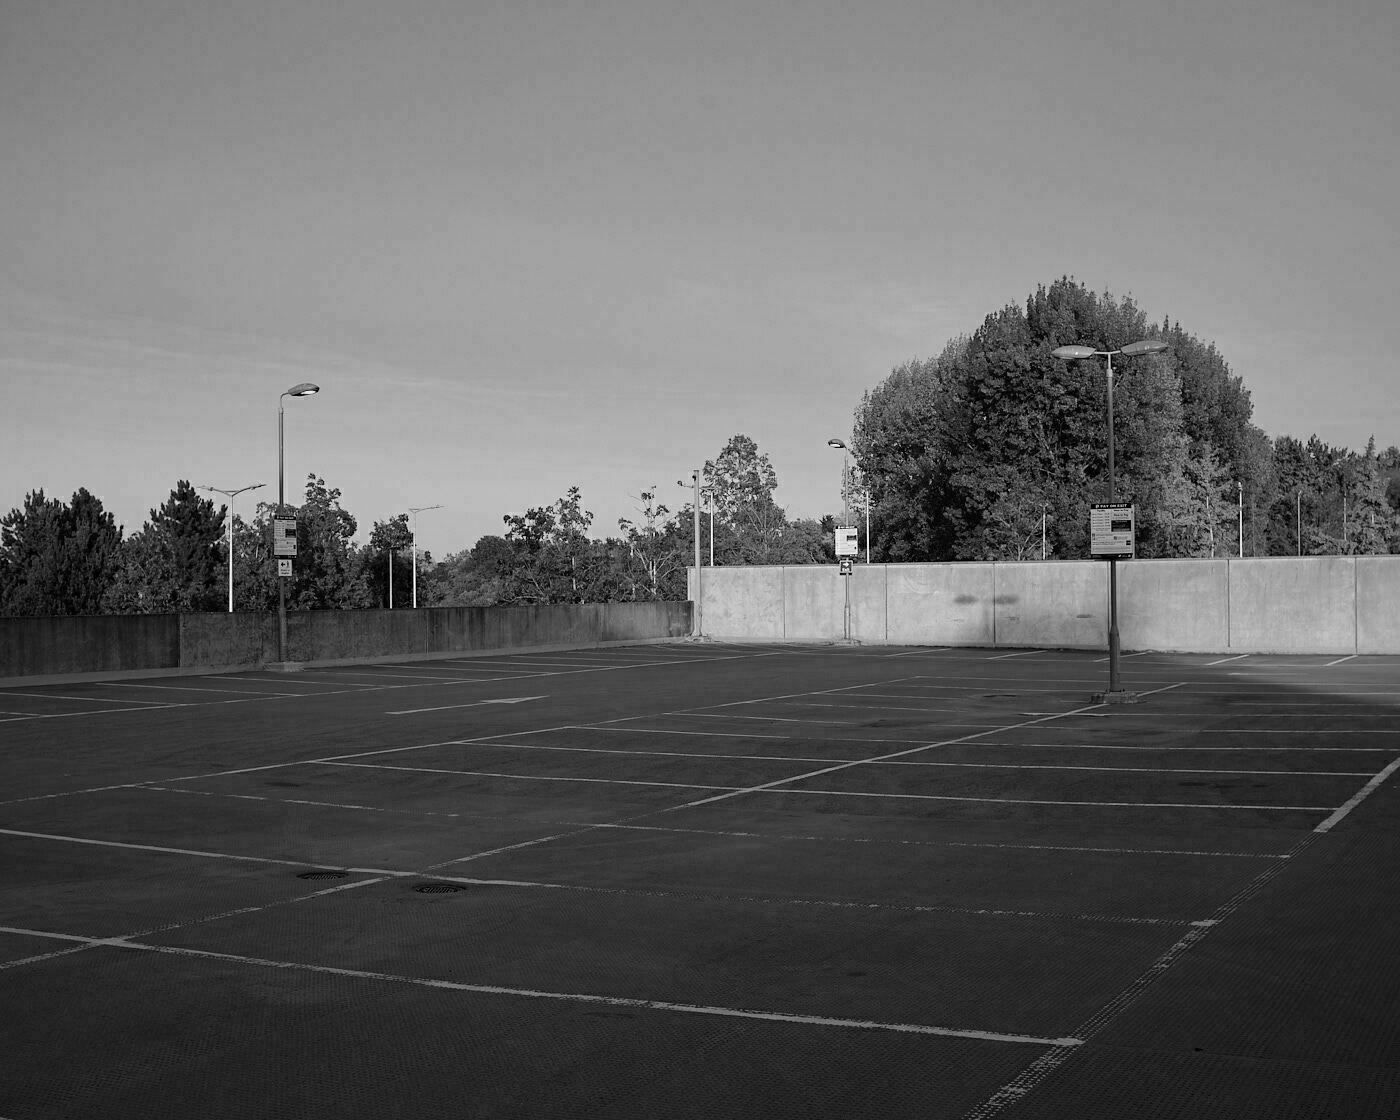
I needed to take some test shots for comparison, so headed to my local retail park as it has a big empty car park with lots of street lamps, an abandoned cinema and no one else around.
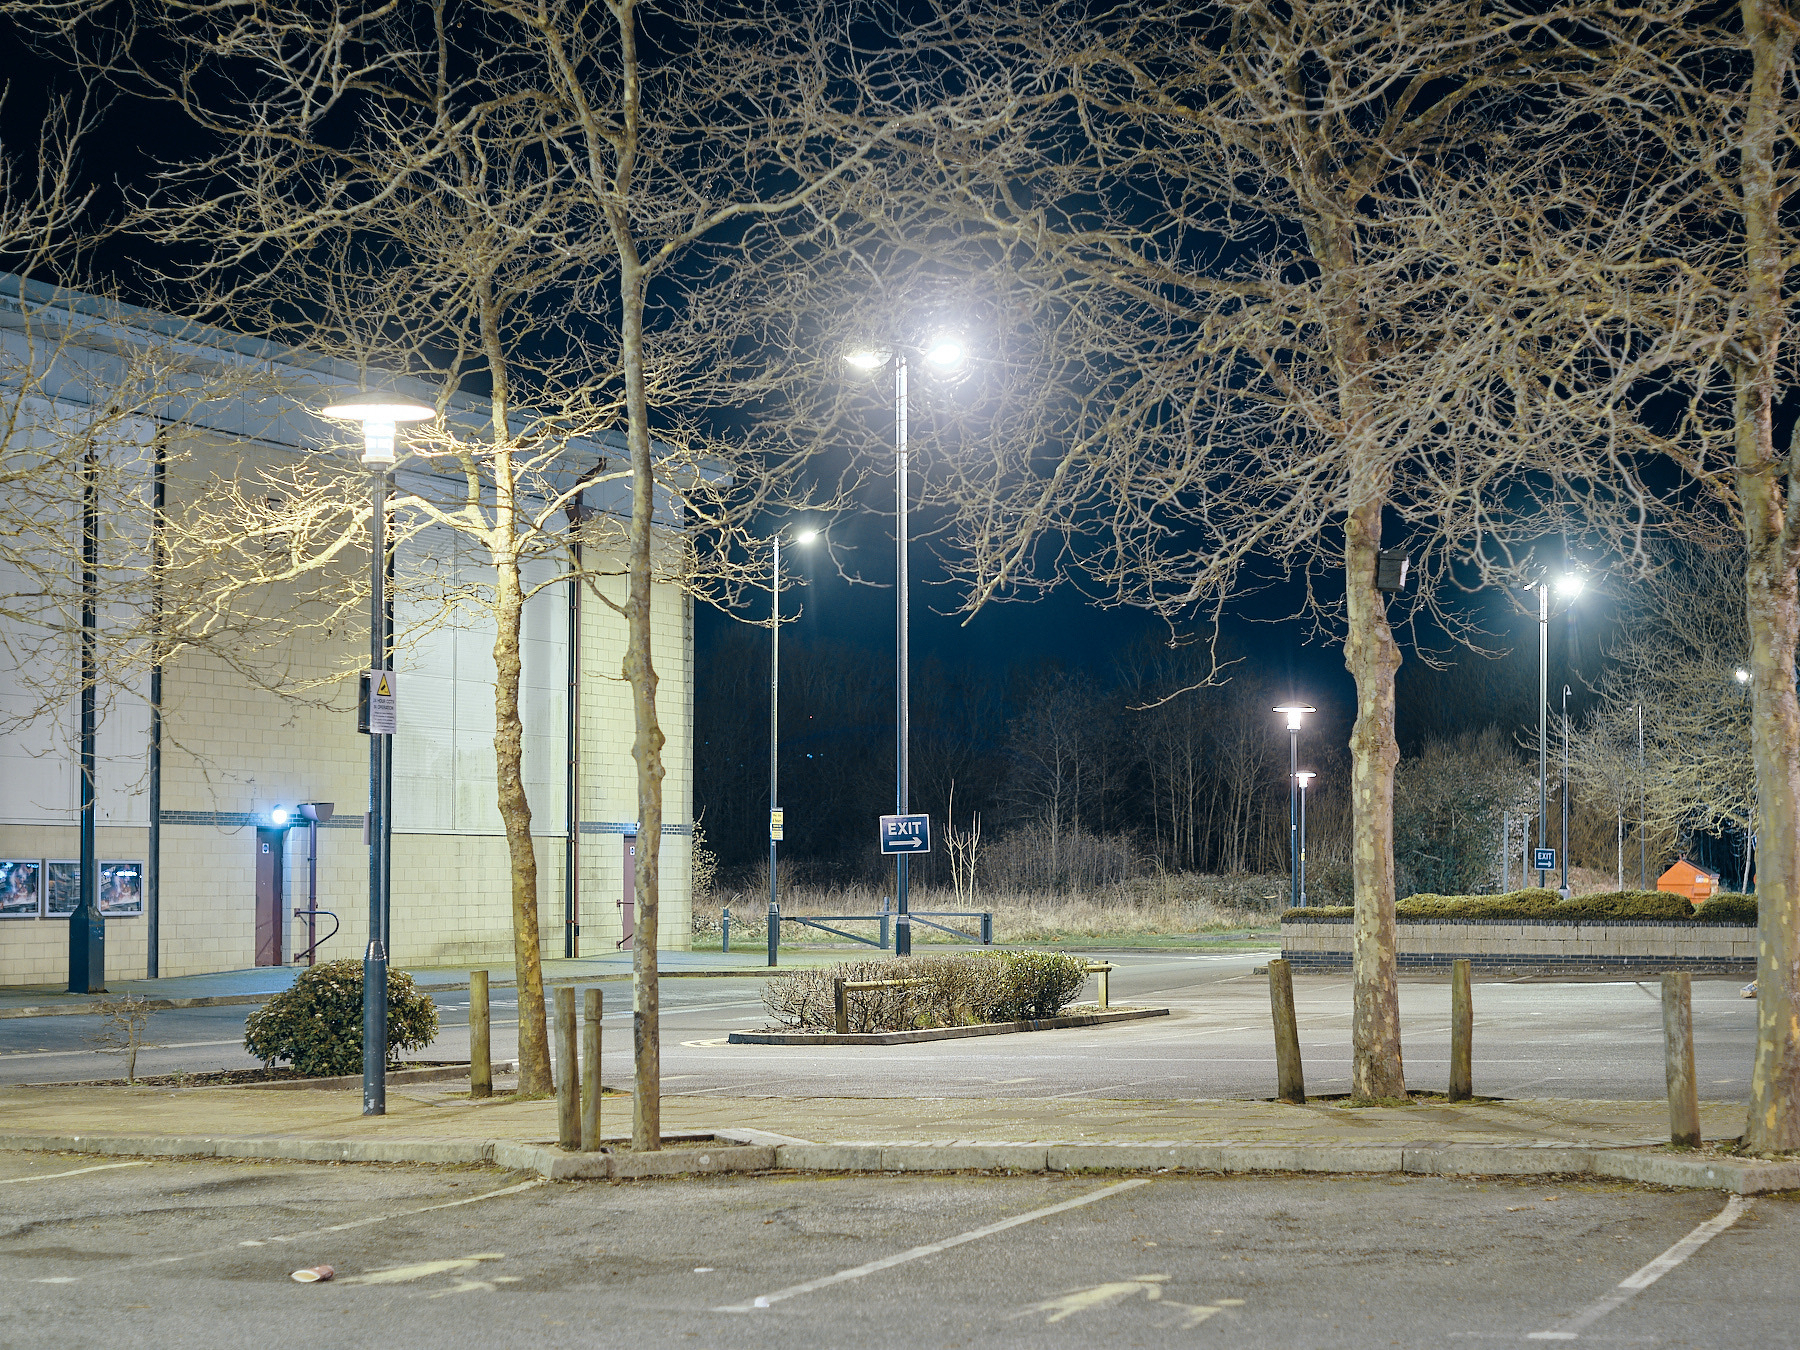
No filter at f/2
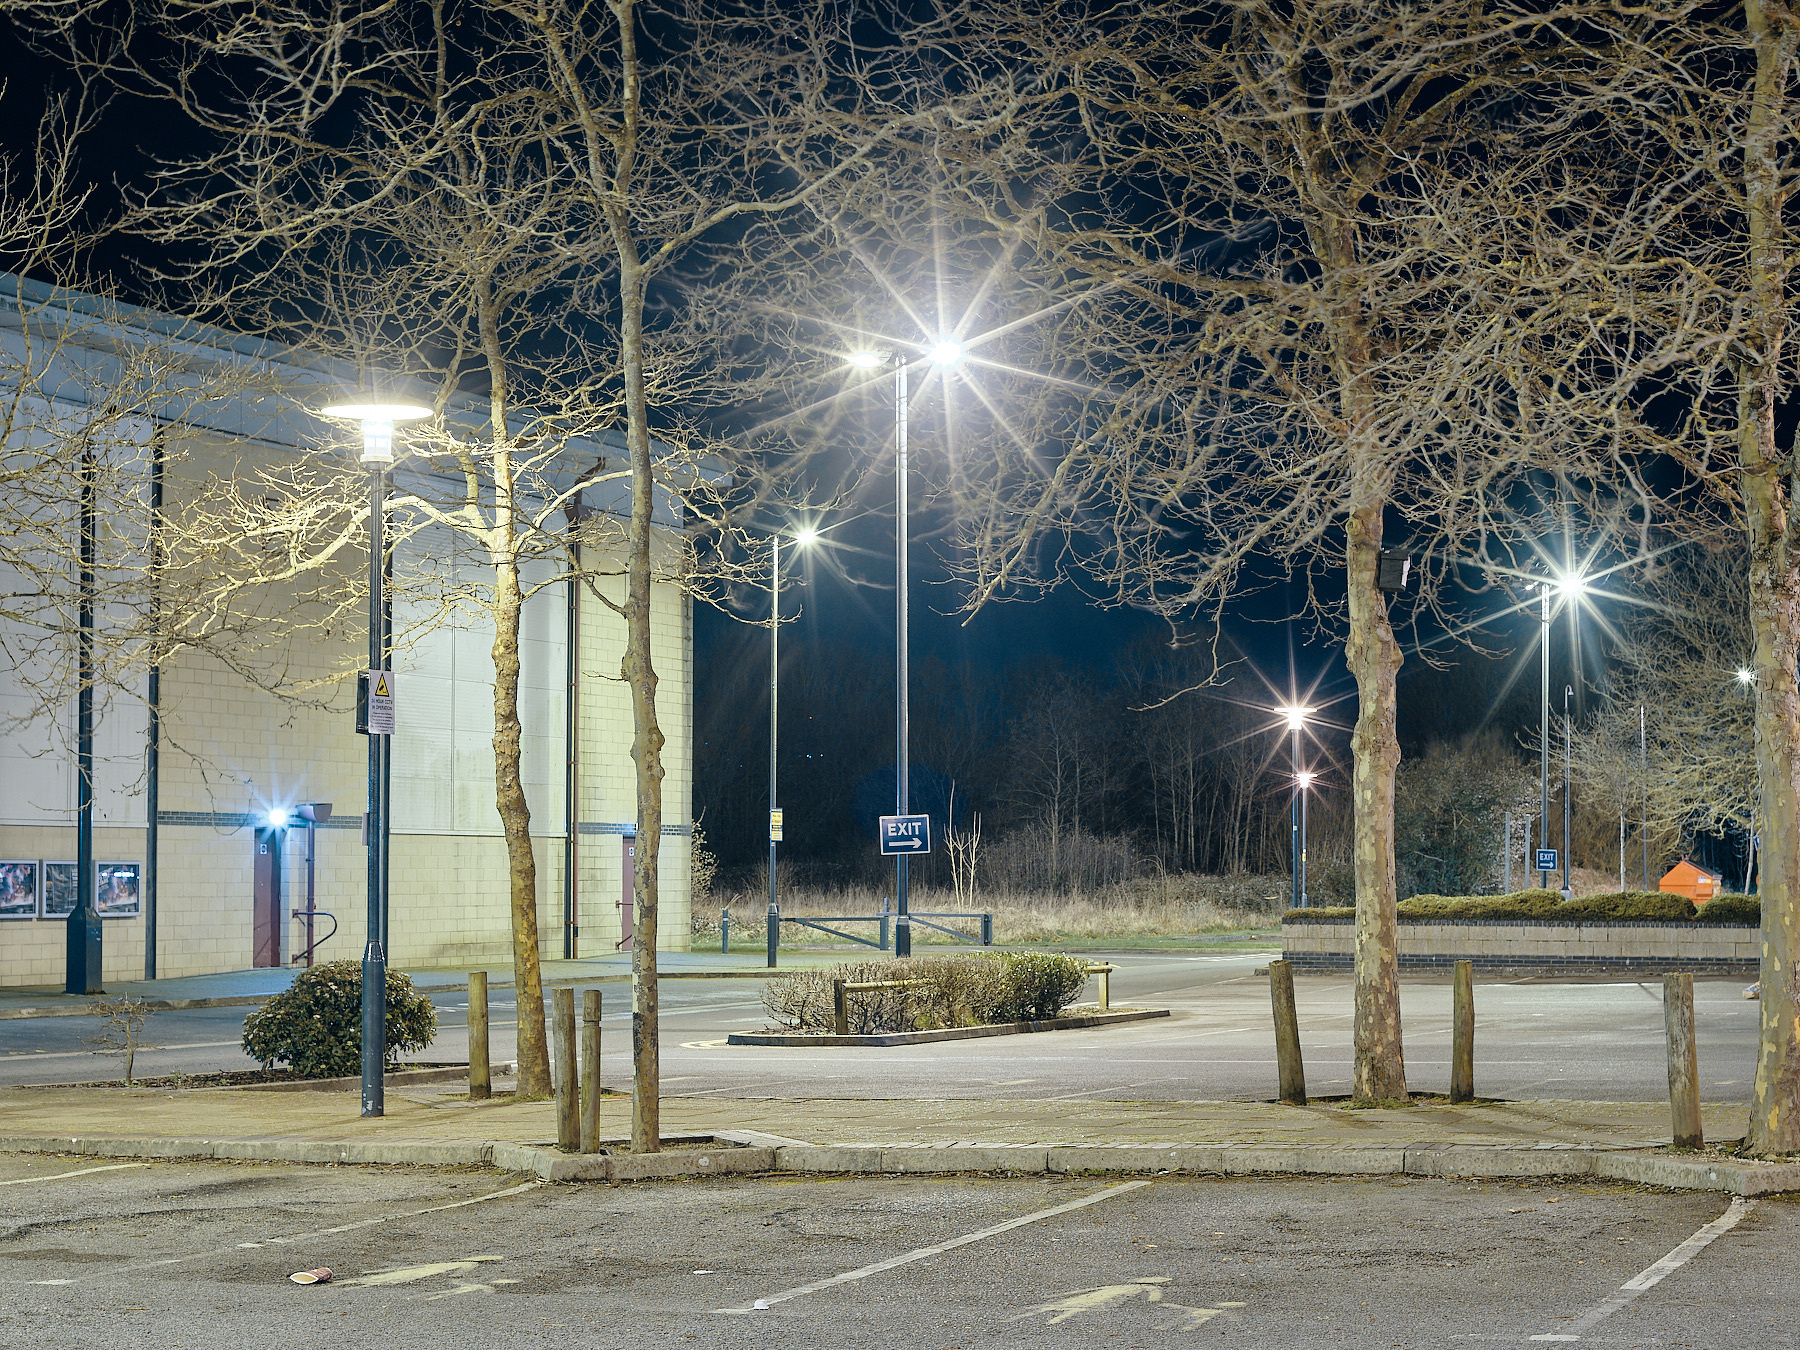
No filter at f/8
Look at the size of the stars in that second photo, they are enormous, they look ridiculous, once you see them that’s all you notice. The trees towards the front are slightly soft, that’s the compromise I’m willing to make. Now lets see if the diffusion filter can do anything about this.
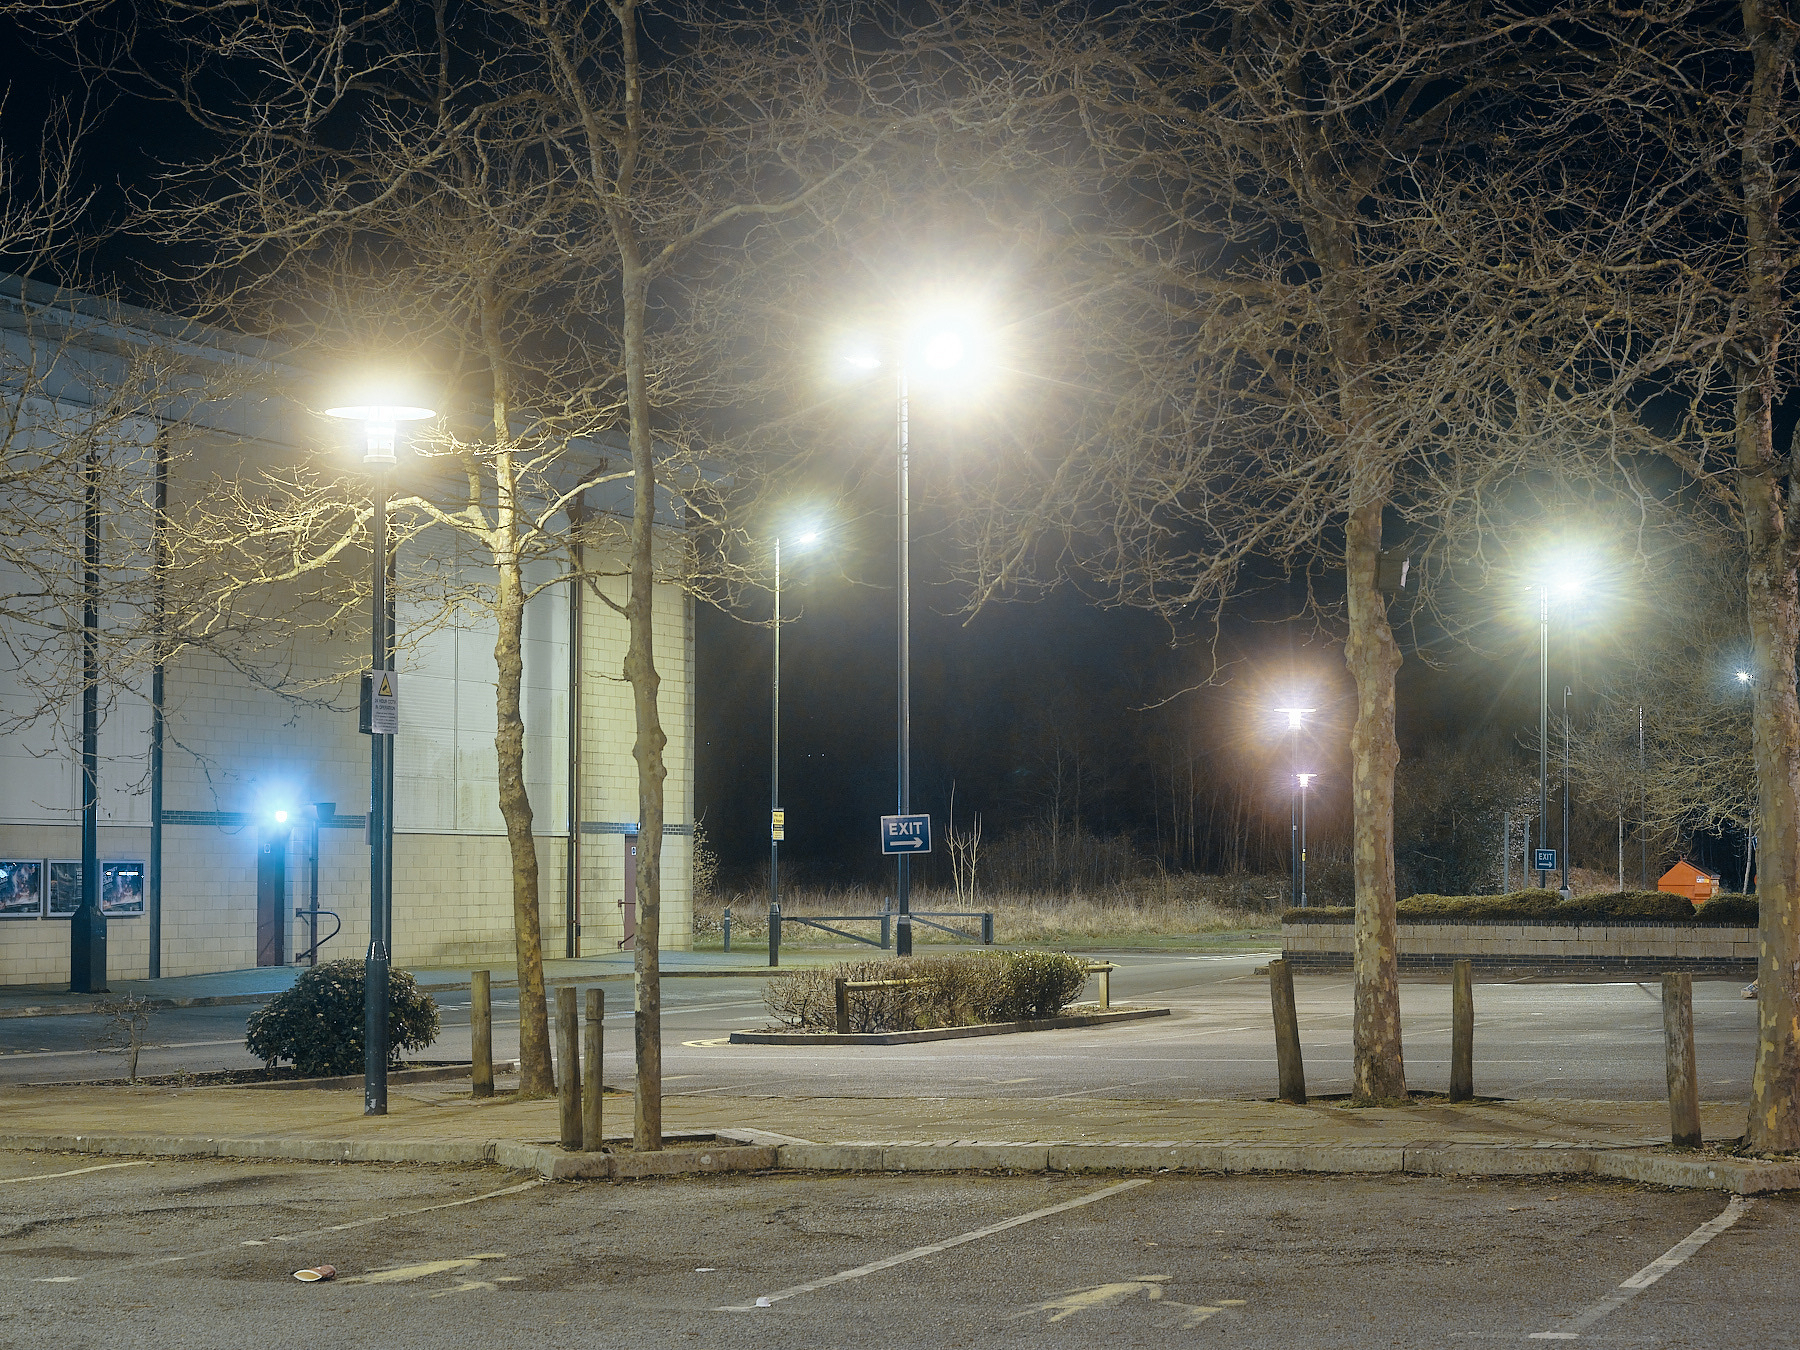
Diffusion filter at f/2
Diffusion filter at f/8
Short answer, no. All it does is mask them a bit in a slightly hazy glow, but they are definitely still there. Not only that, but after all the complaining about the stars in the previous shot, I would be ignoring the elephant in the room if I didn’t talk about the way the filter has turned these street lamps into giant glowing orbs.
It’s definitely a pronounced effect, so much so, that I found it impossible not to blow out the highlights. I thought I had dialled in enough extra exposure compensation, but evidently not (side note I read an article from someone who was an anti EC dial evangelist that blew my mind, I don’t understand as I use mine all the time)
The filters come in different strengths and this isn’t even the maximum. This is the 1/2 strength option, based on these shots anything stronger would be way too much, every photo would have been engulfed in a cloud of hazy dreaminess, the photographic equivalent of producing every future record like it’s loveless by my bloody valentine.
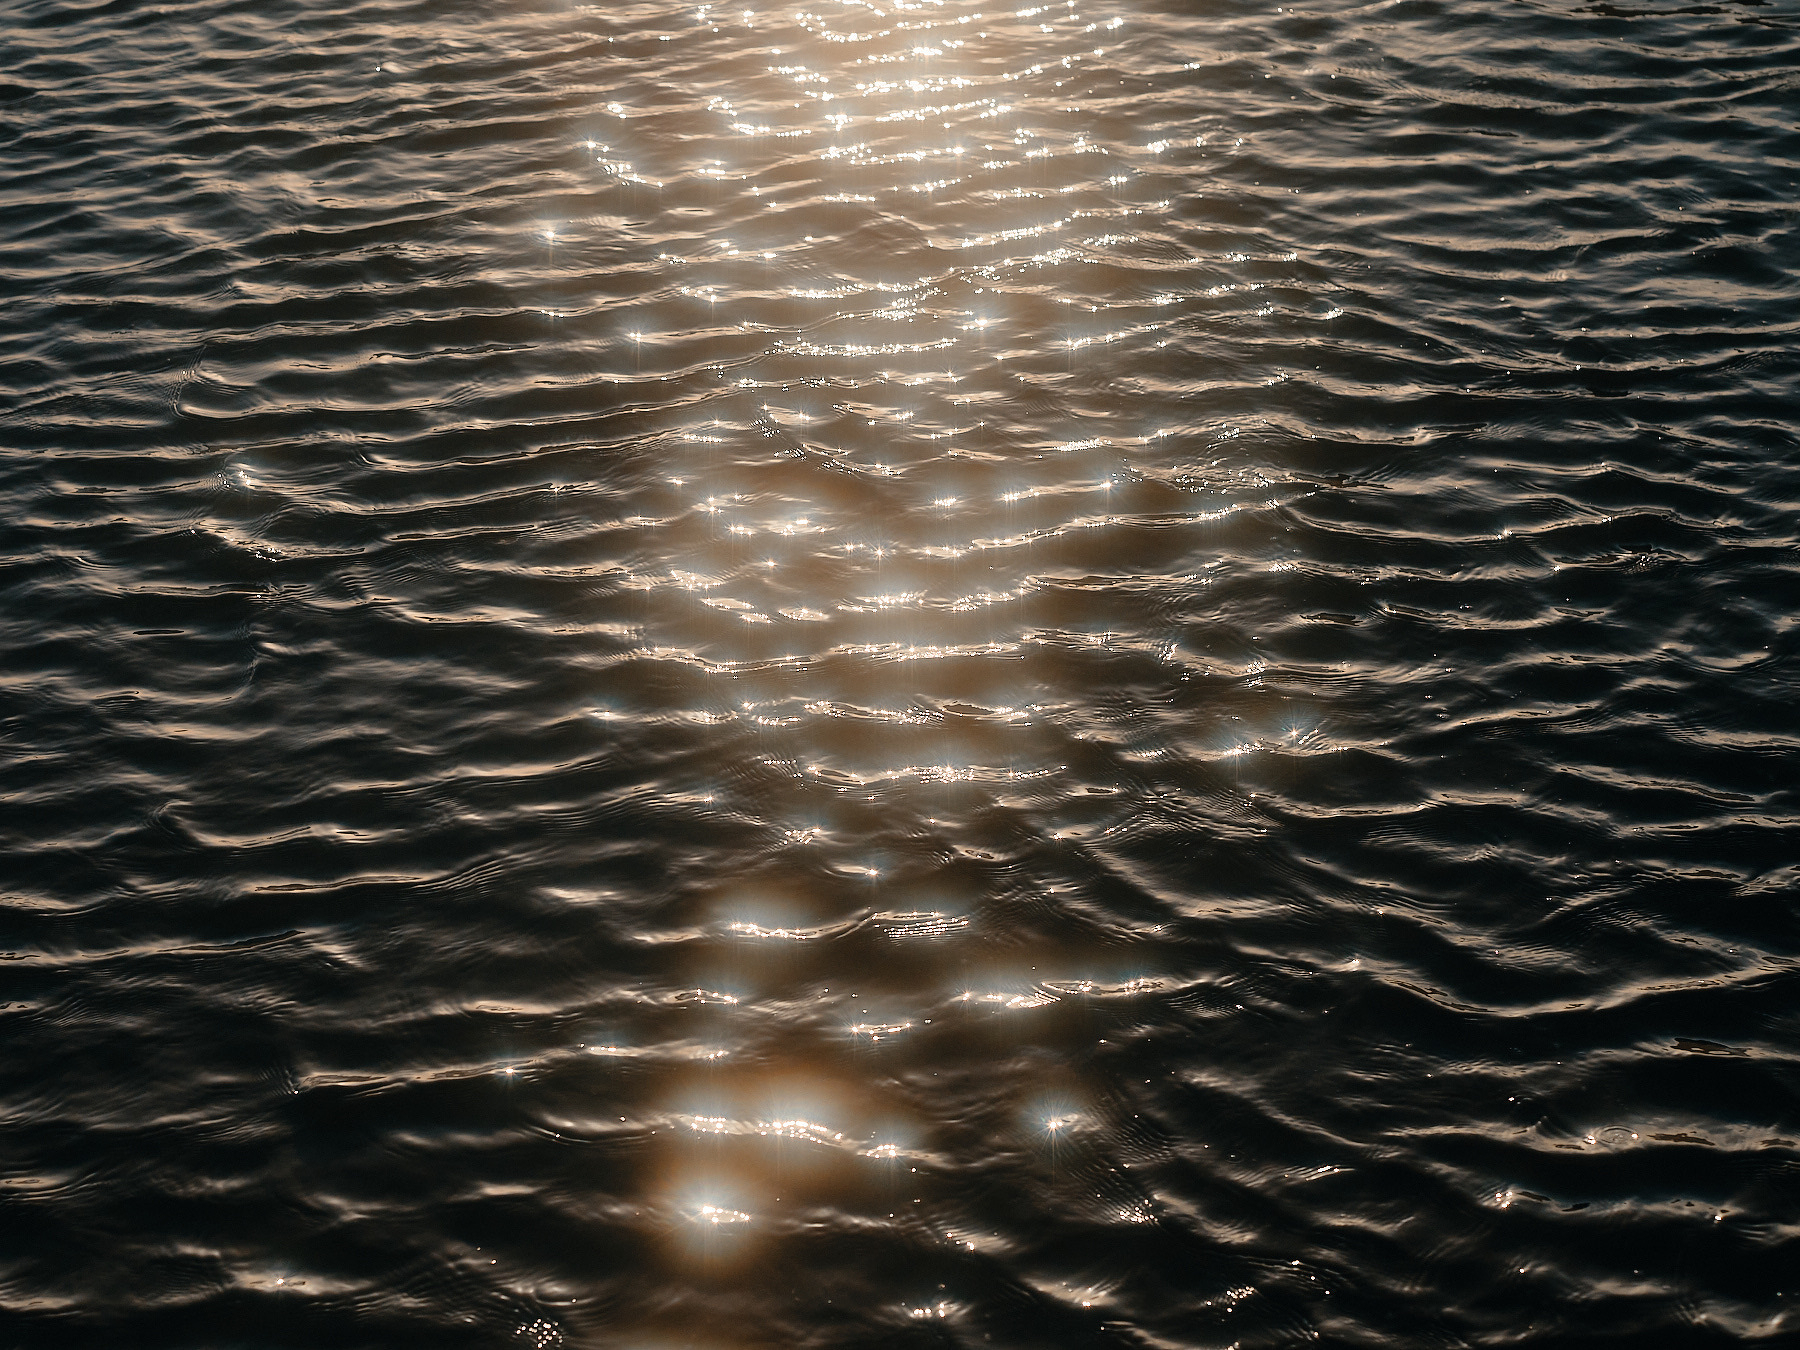
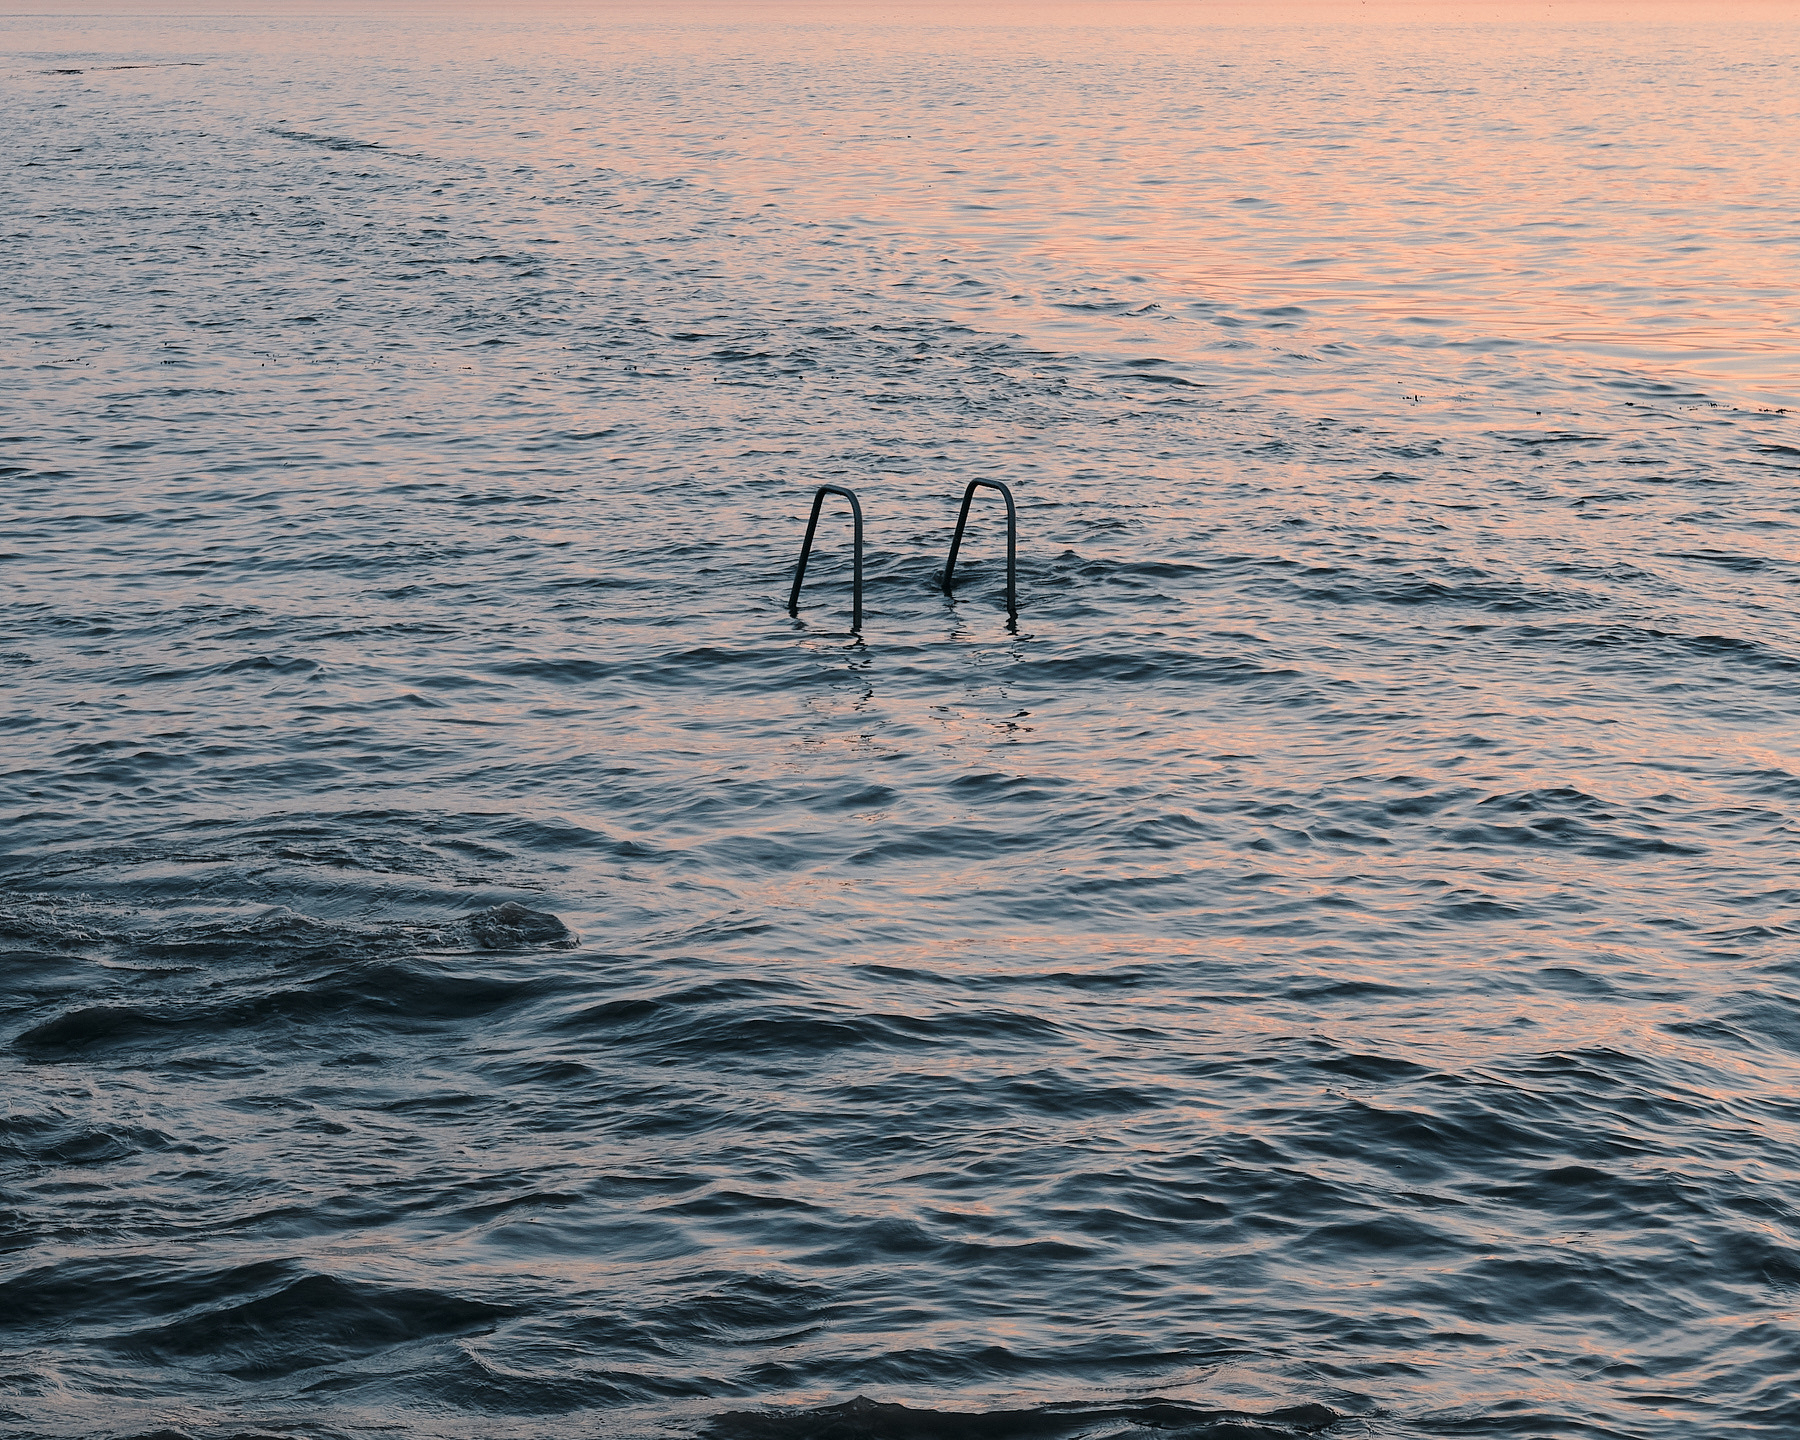
I’ve not really tried it too much in daylight yet, to be honest I was worried it would look a bit cheesy and shit. I brought it along one evening during golden hour, and tried a couple of the sunlight reflecting off the waves, and it gives is a nice glow, but would start to look gimmicky quite if used on every shot.
I do like this filter in small doses, in the right conditions, usually lower contrast scenes as it starts to get dark - think blue hour, rather than pitch black - and used in moderation to enhance the available light, not be used in all situations as a substitute for the right light.
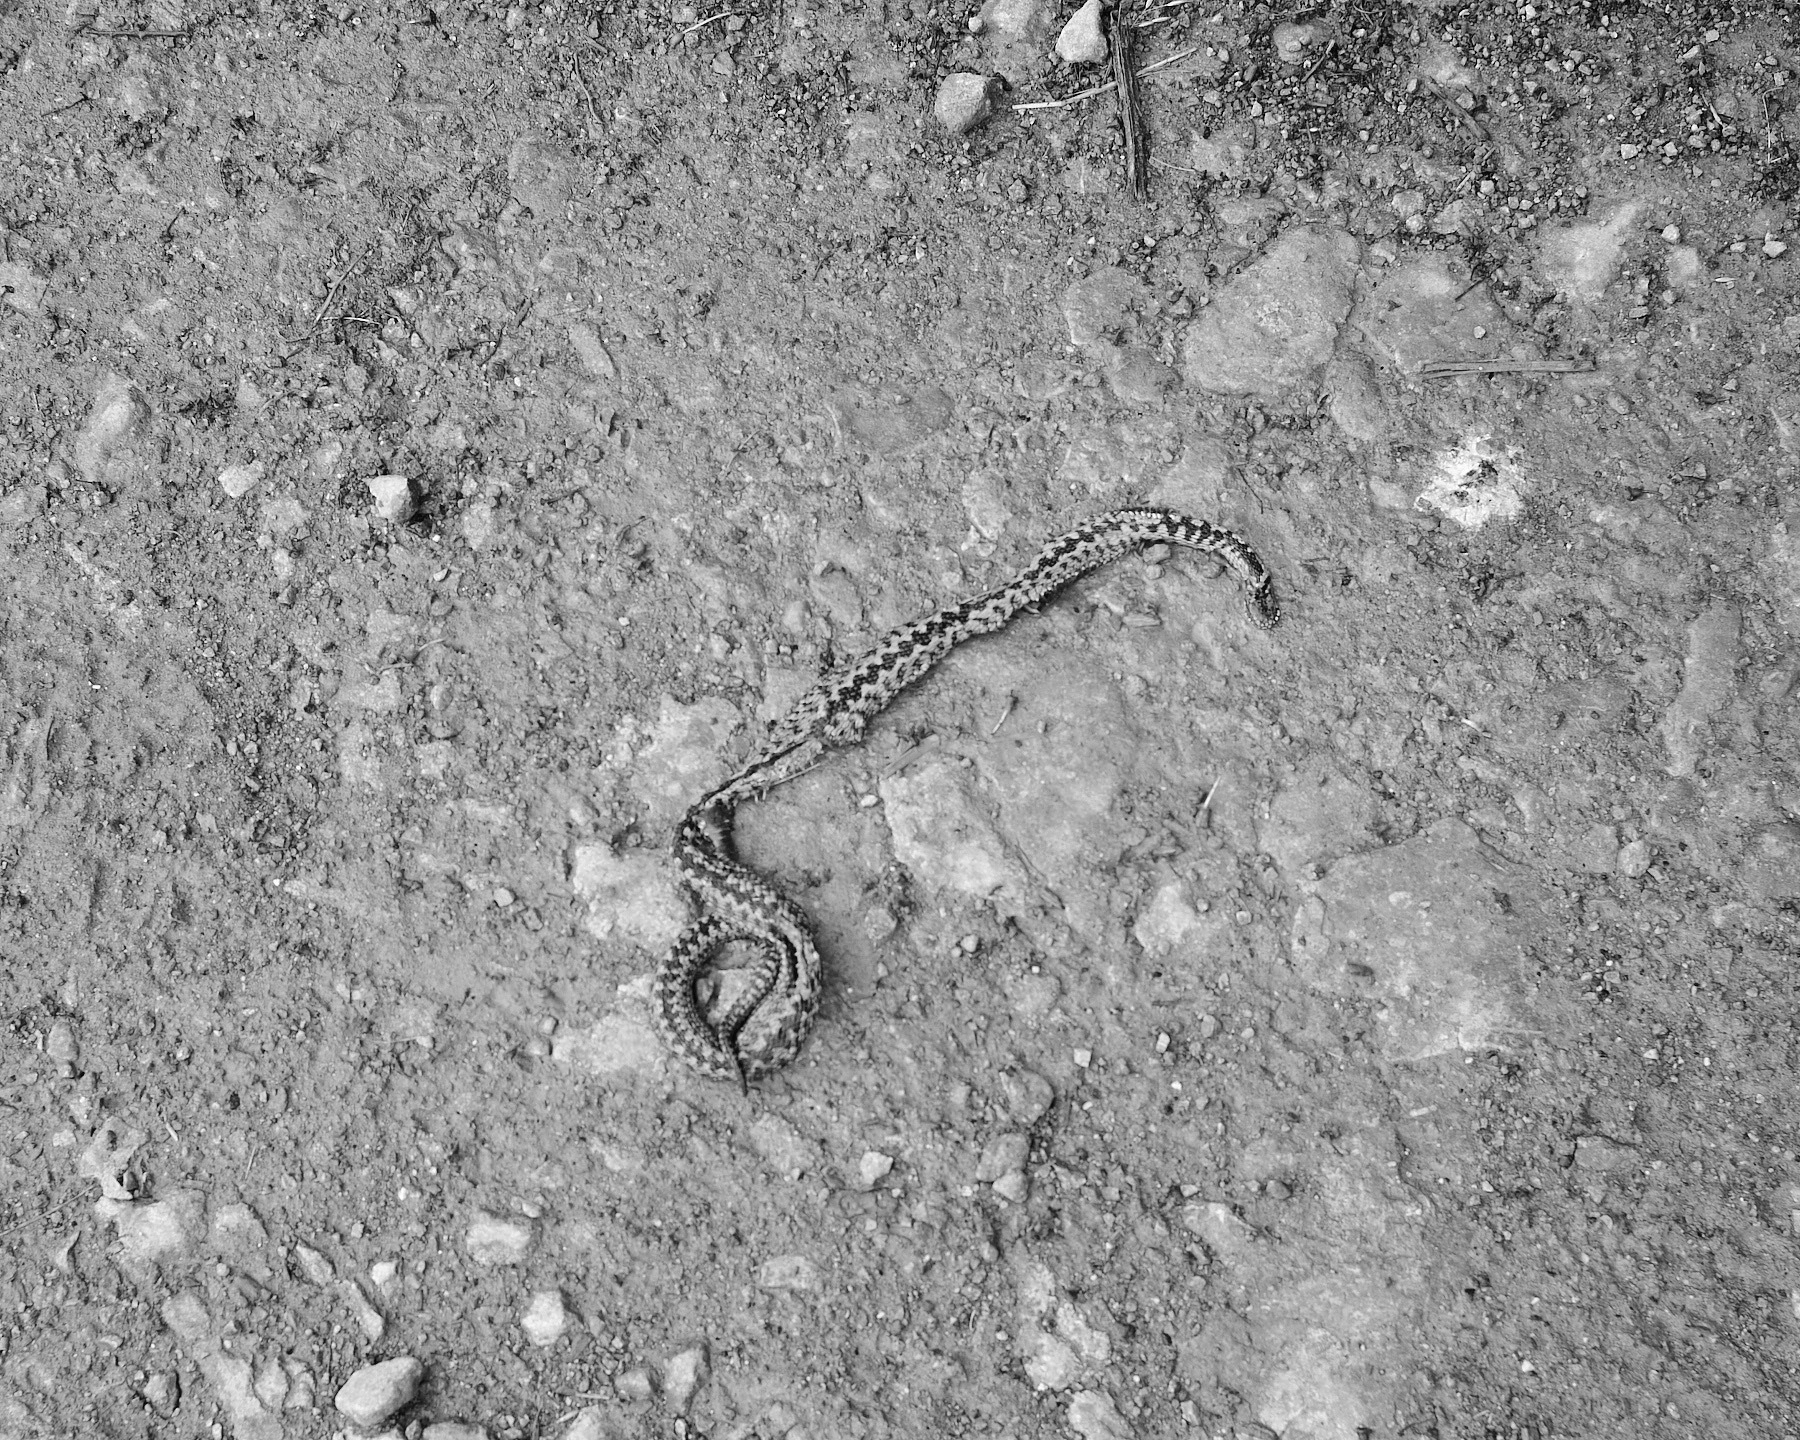
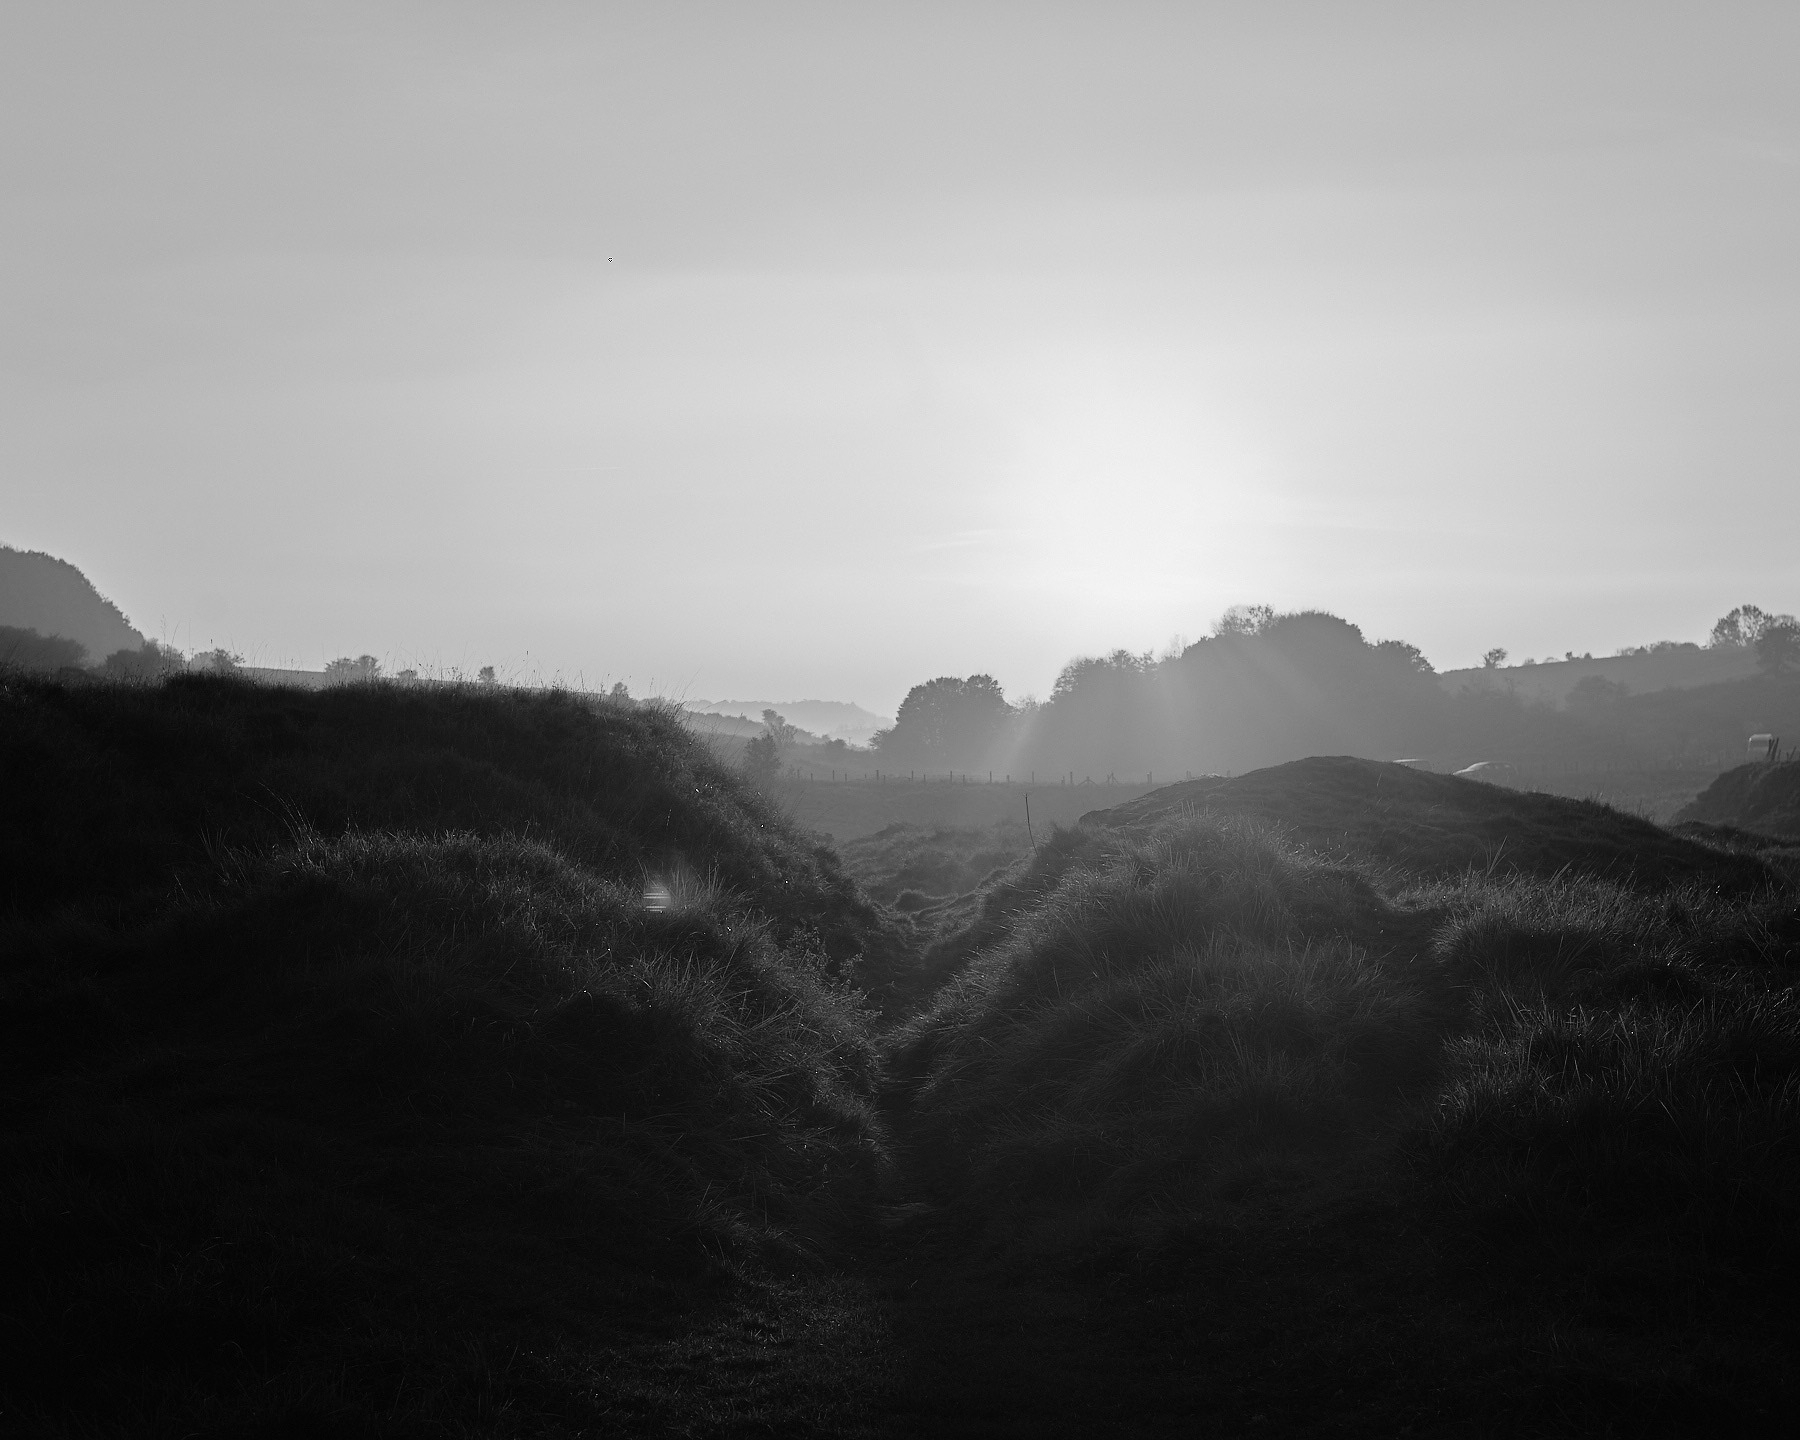
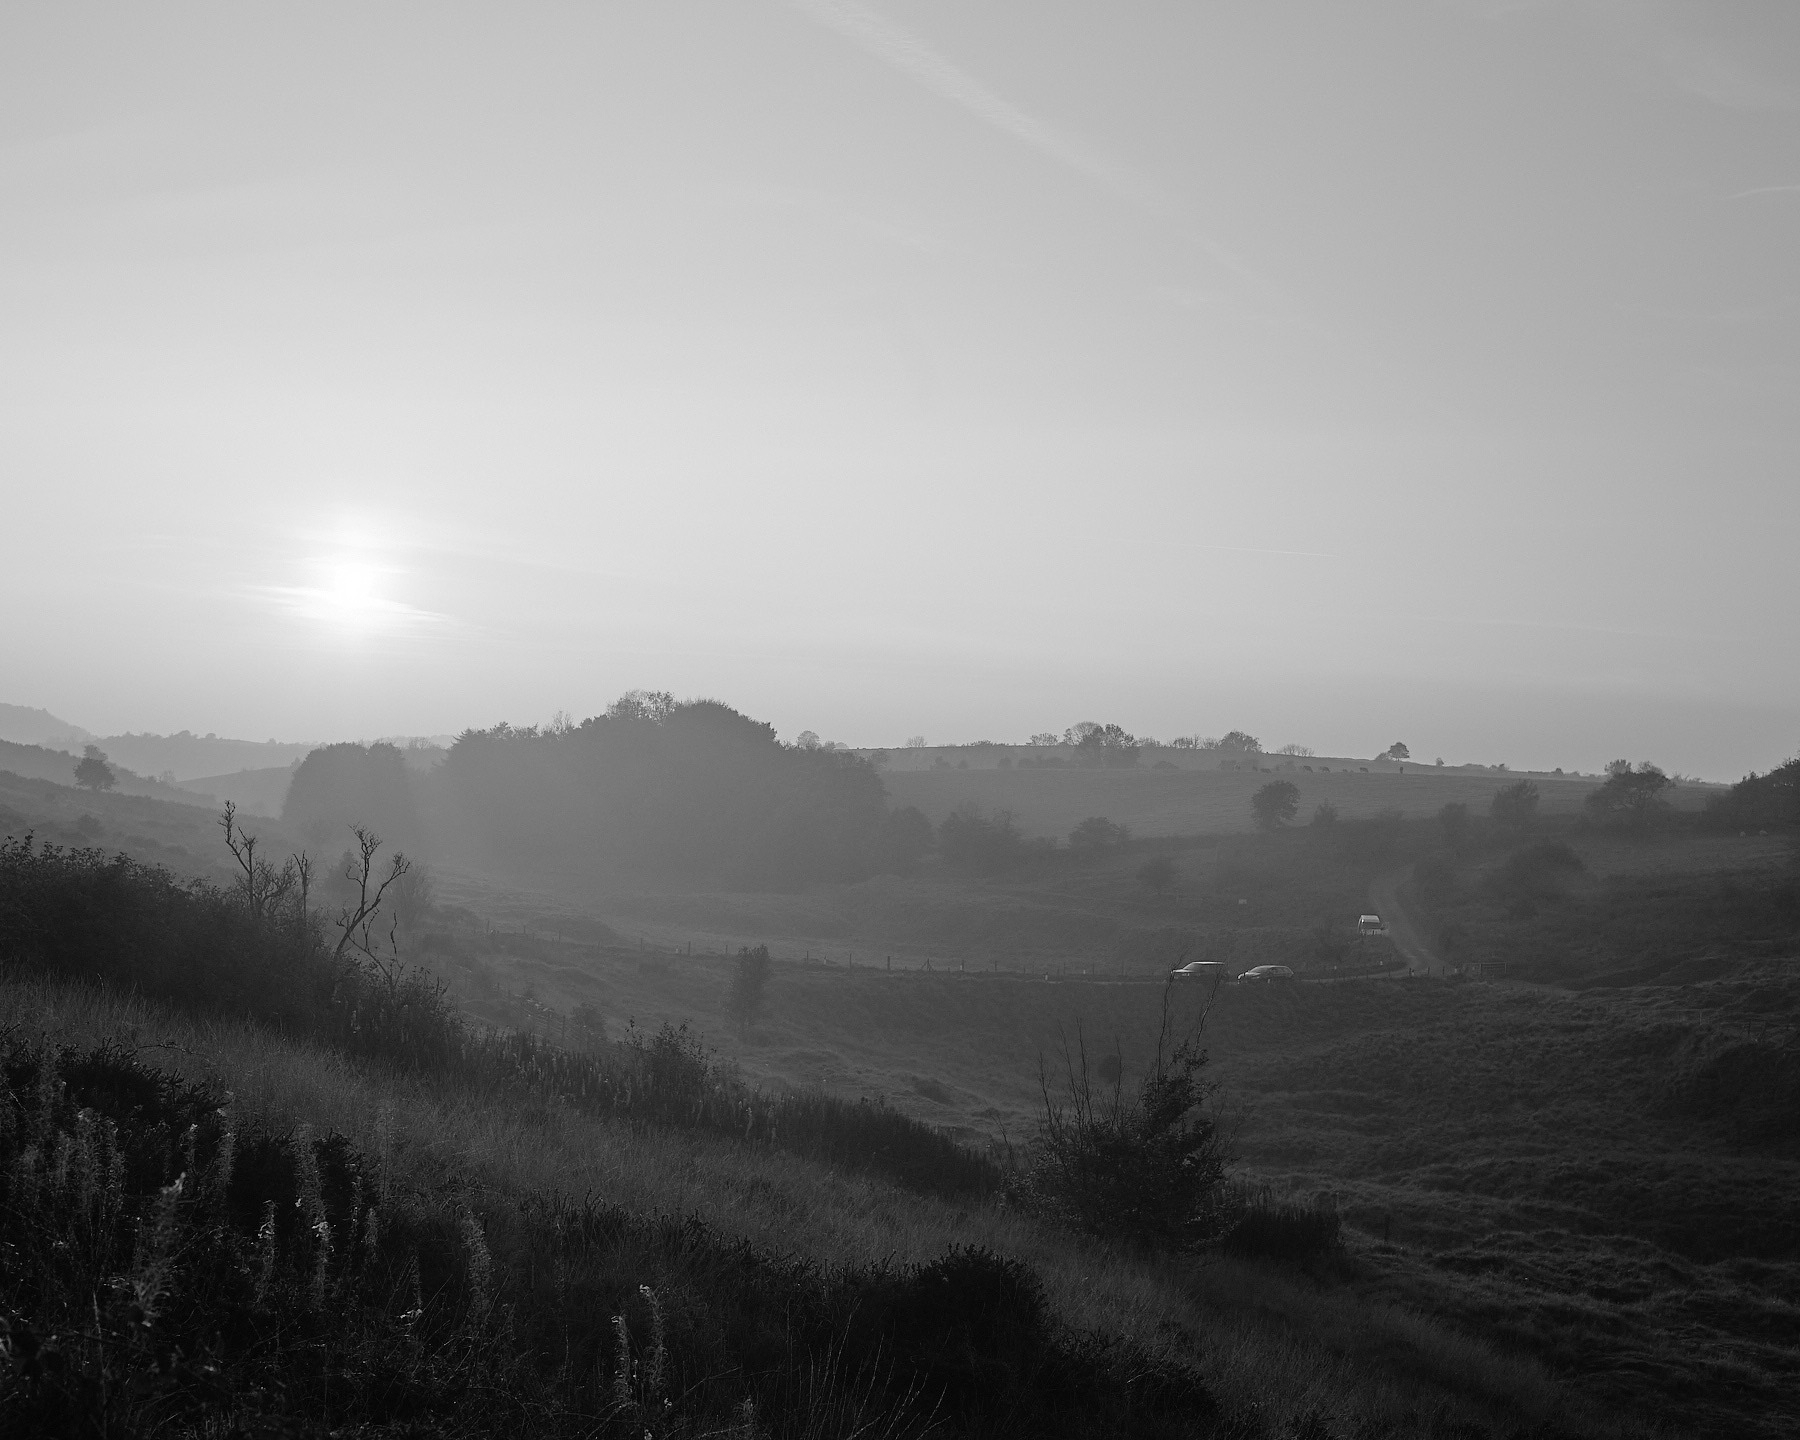
The first time I visited this location was by pure happy accident, I plugged in the details for somewhere else, but the sat nav took me here.
It felt strange seeing a dead snake, it’s so rare to see one at all in the UK, this location is one of their key habitats
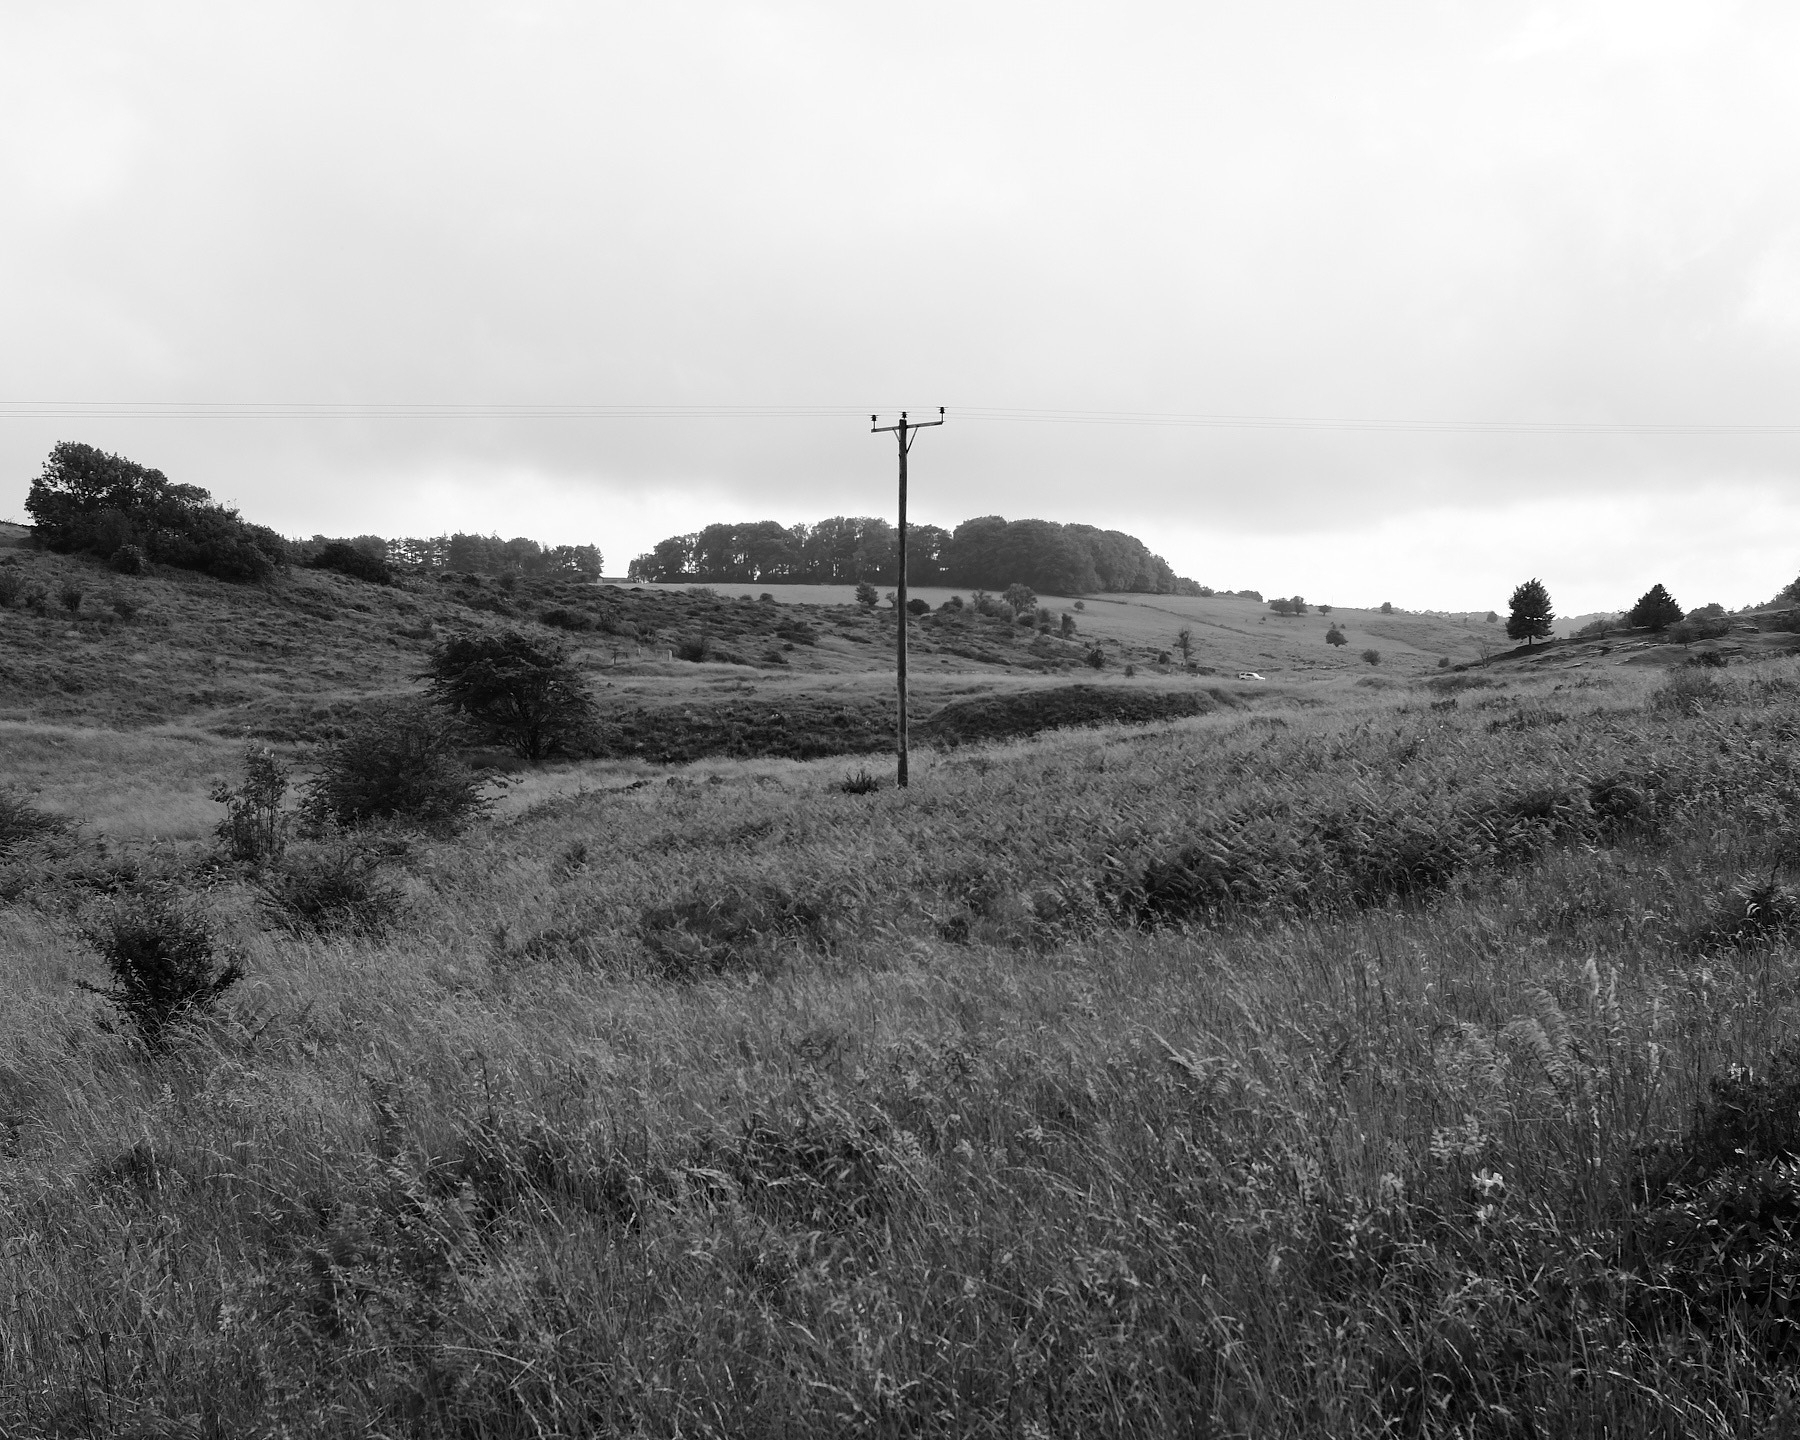
For some reason I’m convinced this is an old iron age fort, that’s completely wrong, it’s an old lead mine. The problem is, even though I know that’s wrong, I can’t stop myself from thinking it. When I came to upload the photos for this blog I spent ages looking in vain for the Blackmoor Reserve folder, but couldn’t find it, and that’s because I saved the folder as ‘iron age fort’ instead.
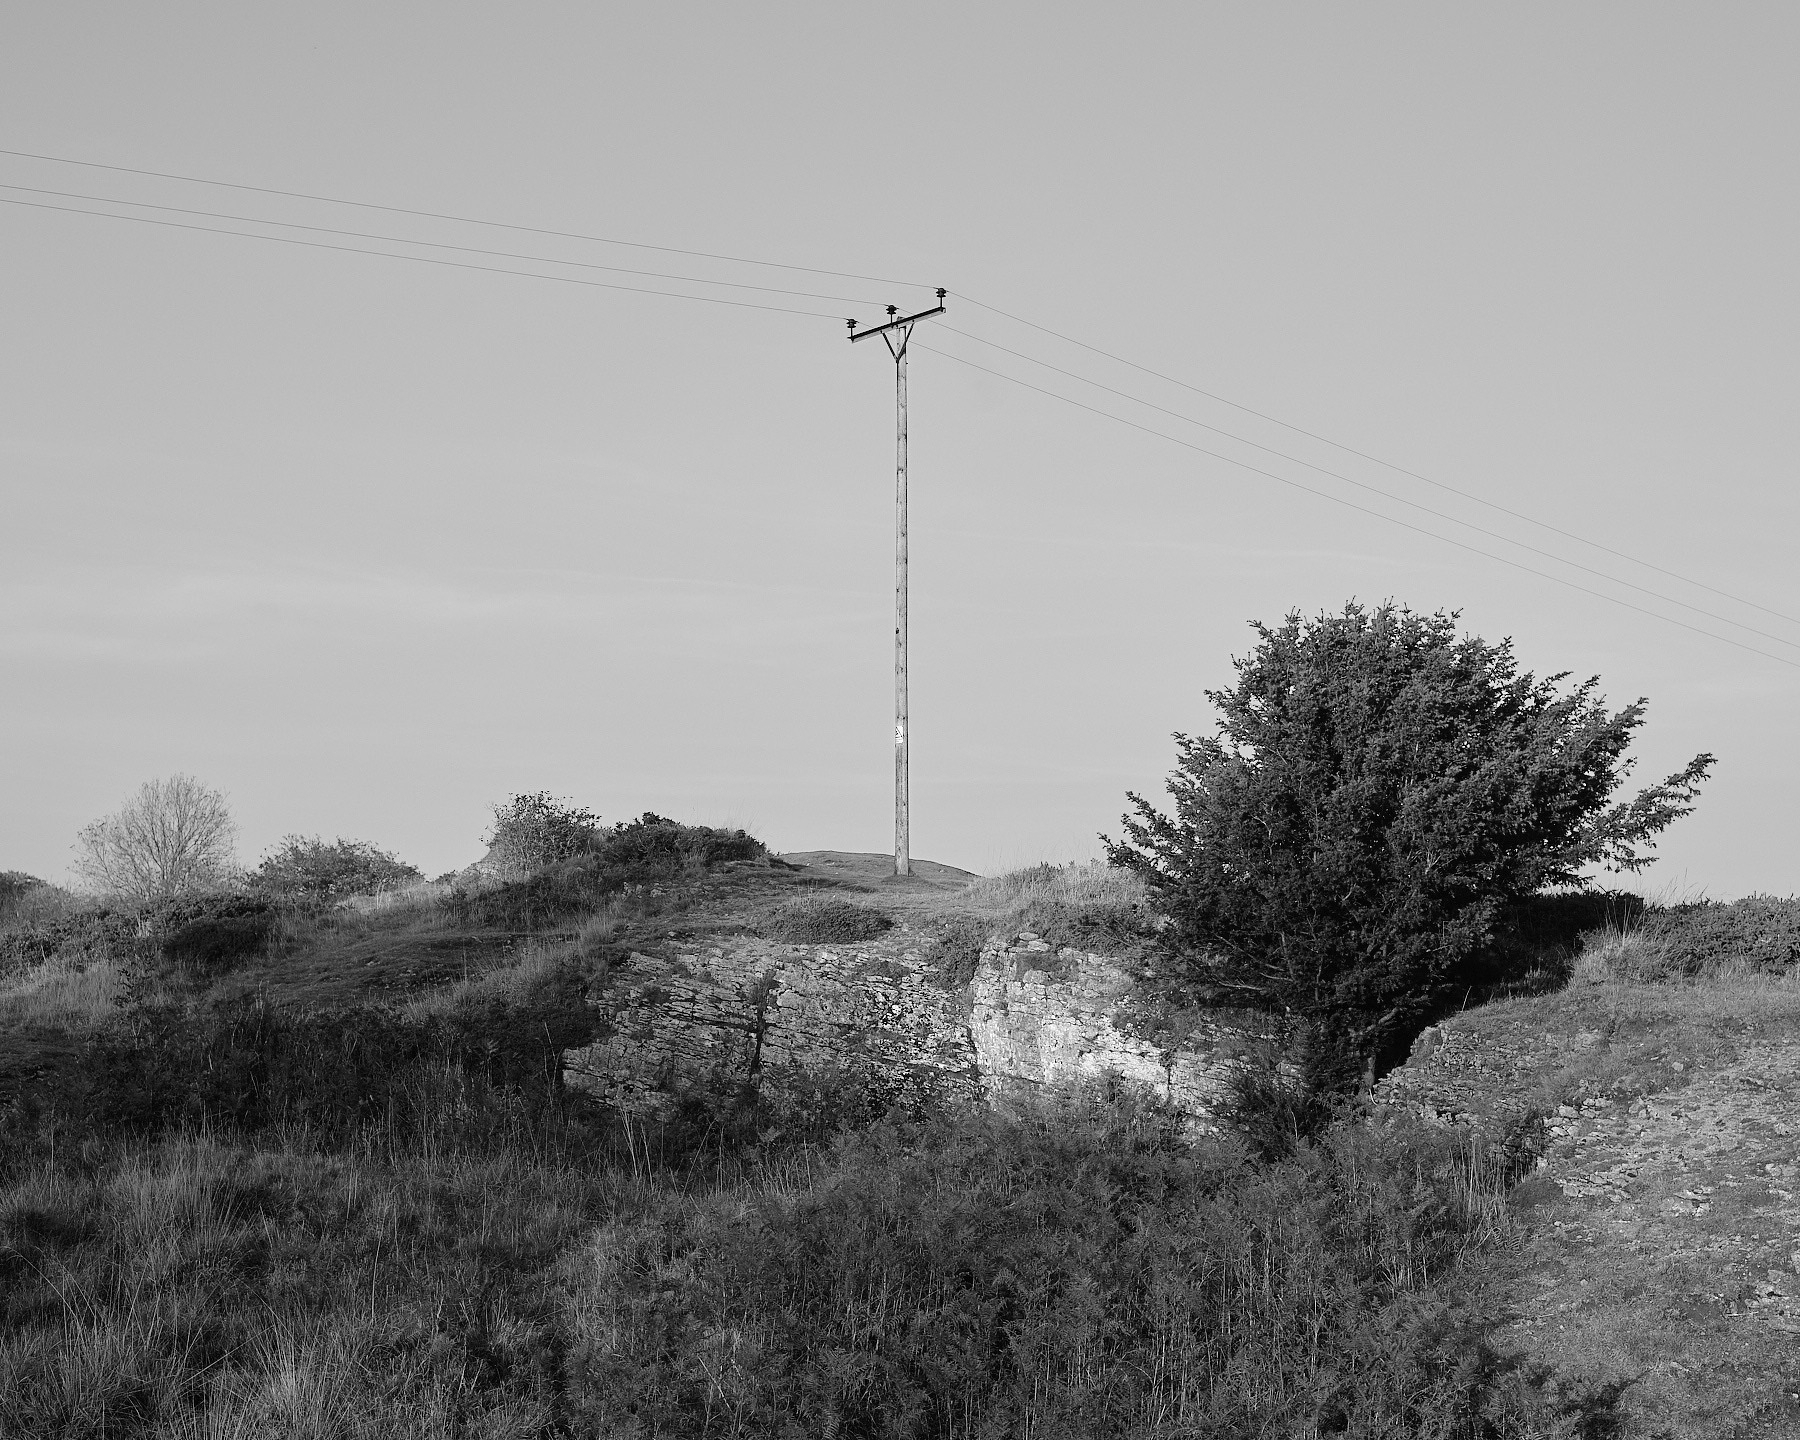
On my latest visit the weather couldn’t have been more perfect, early evening golden hour sunshine, which turned into a hazy glow as the sun lowered towards the horizon.
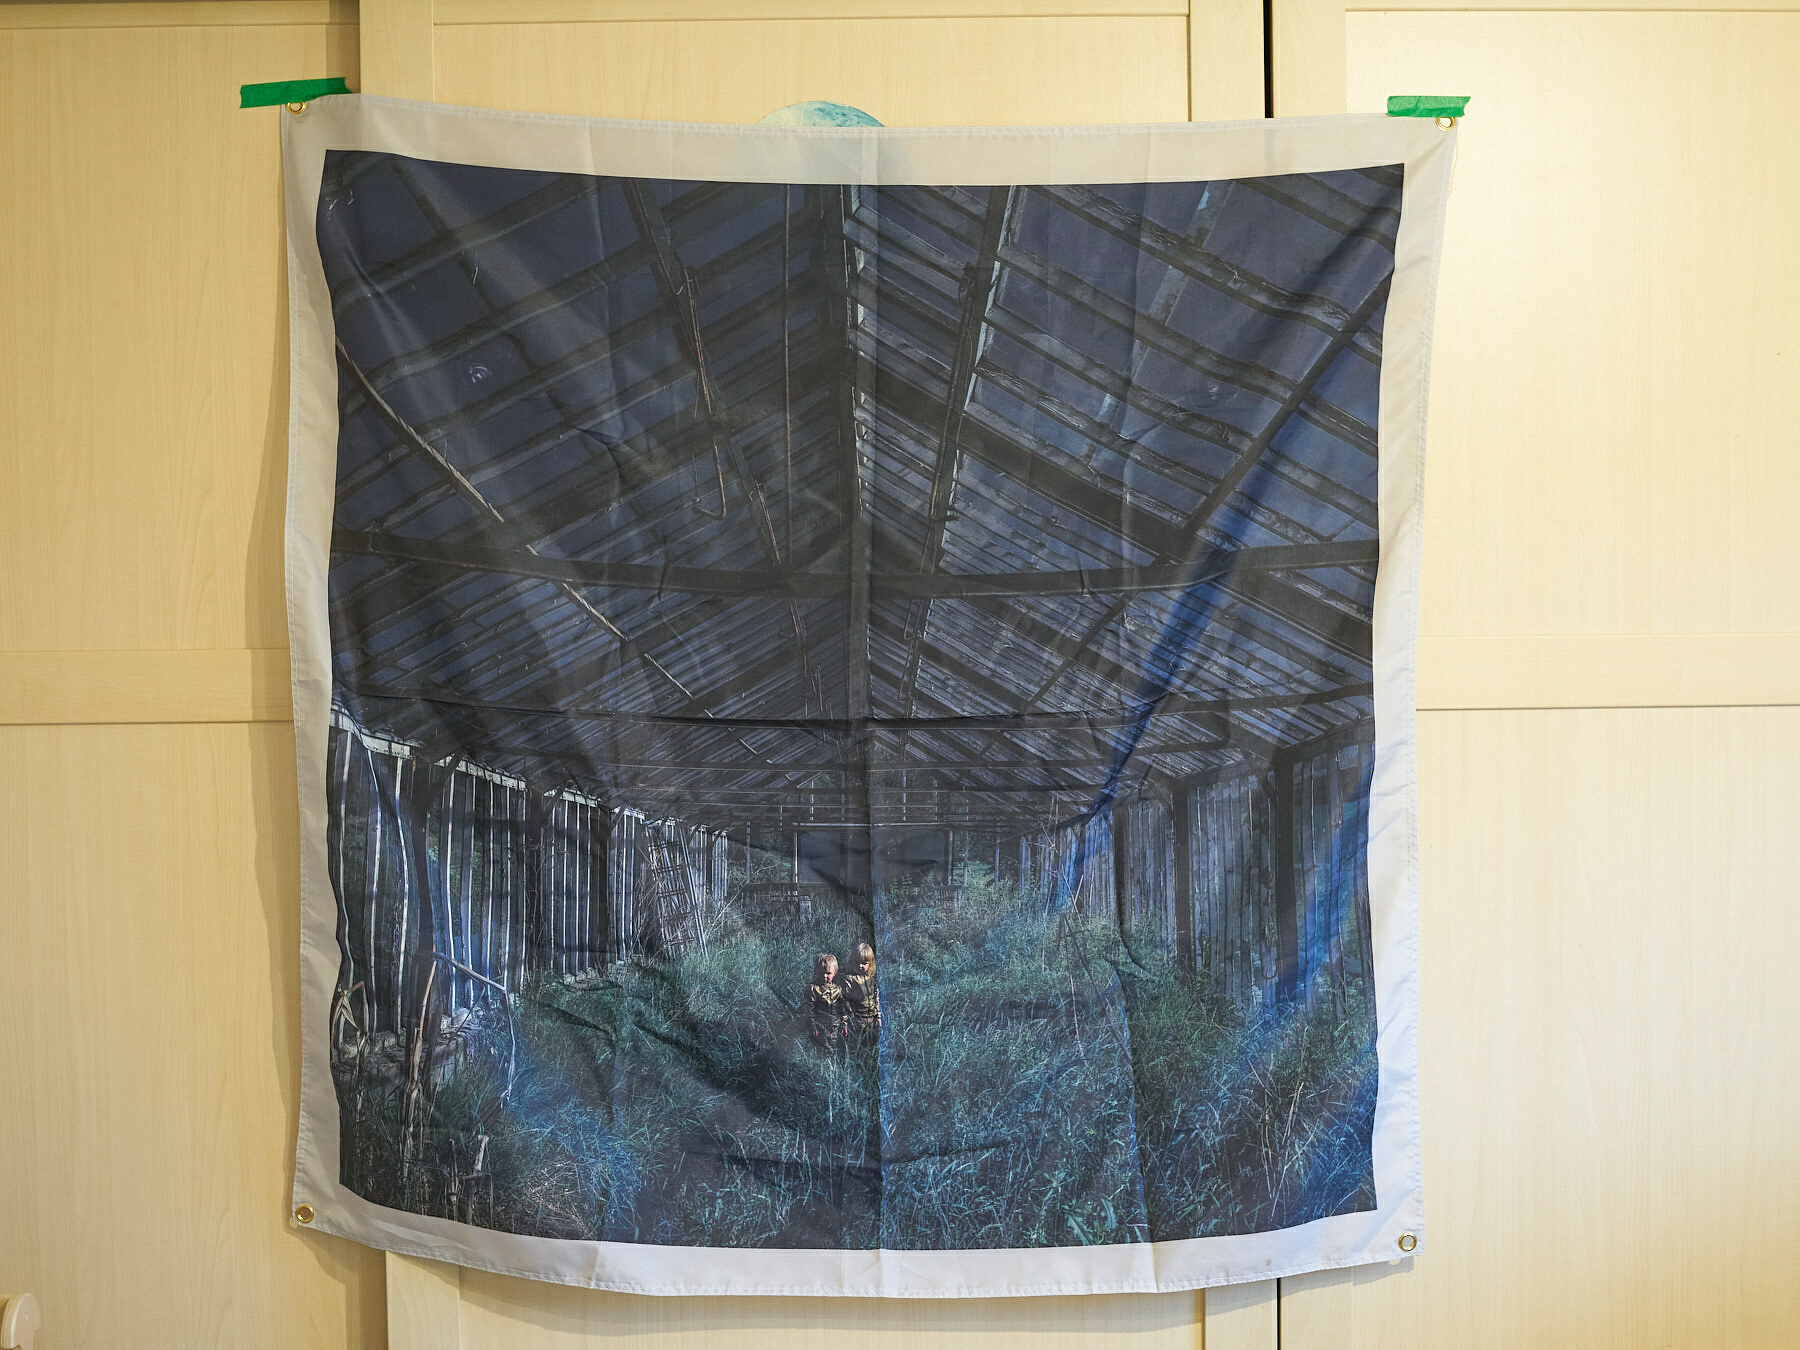
A follow up on my previous blog post about this location. I thought about this location a lot in the intervening years, but despite a desire to return at dusk, it took me 5 years to actually do it. I’m not sure what my excuse was, a mixture of waiting for the right conditions/timings, as well as good old fashioned procrastination.
A constant reminder was the album artwork for The Dealer by Foxing, which uses a photo taken by Juuso Westerlund as part of his golden boys series. Great album and photo, it’s atmospheric, and also unsettling.
This shot is from 2023, I happened to be nearby, but couldn’t get there before it got dark. It was pitch black when I arrived and I didn’t fancy going in by myself to have a walk around, so I shot this through the fence. Shame to only come away with one photo, but I was relieved to know the greenhouses were still there.
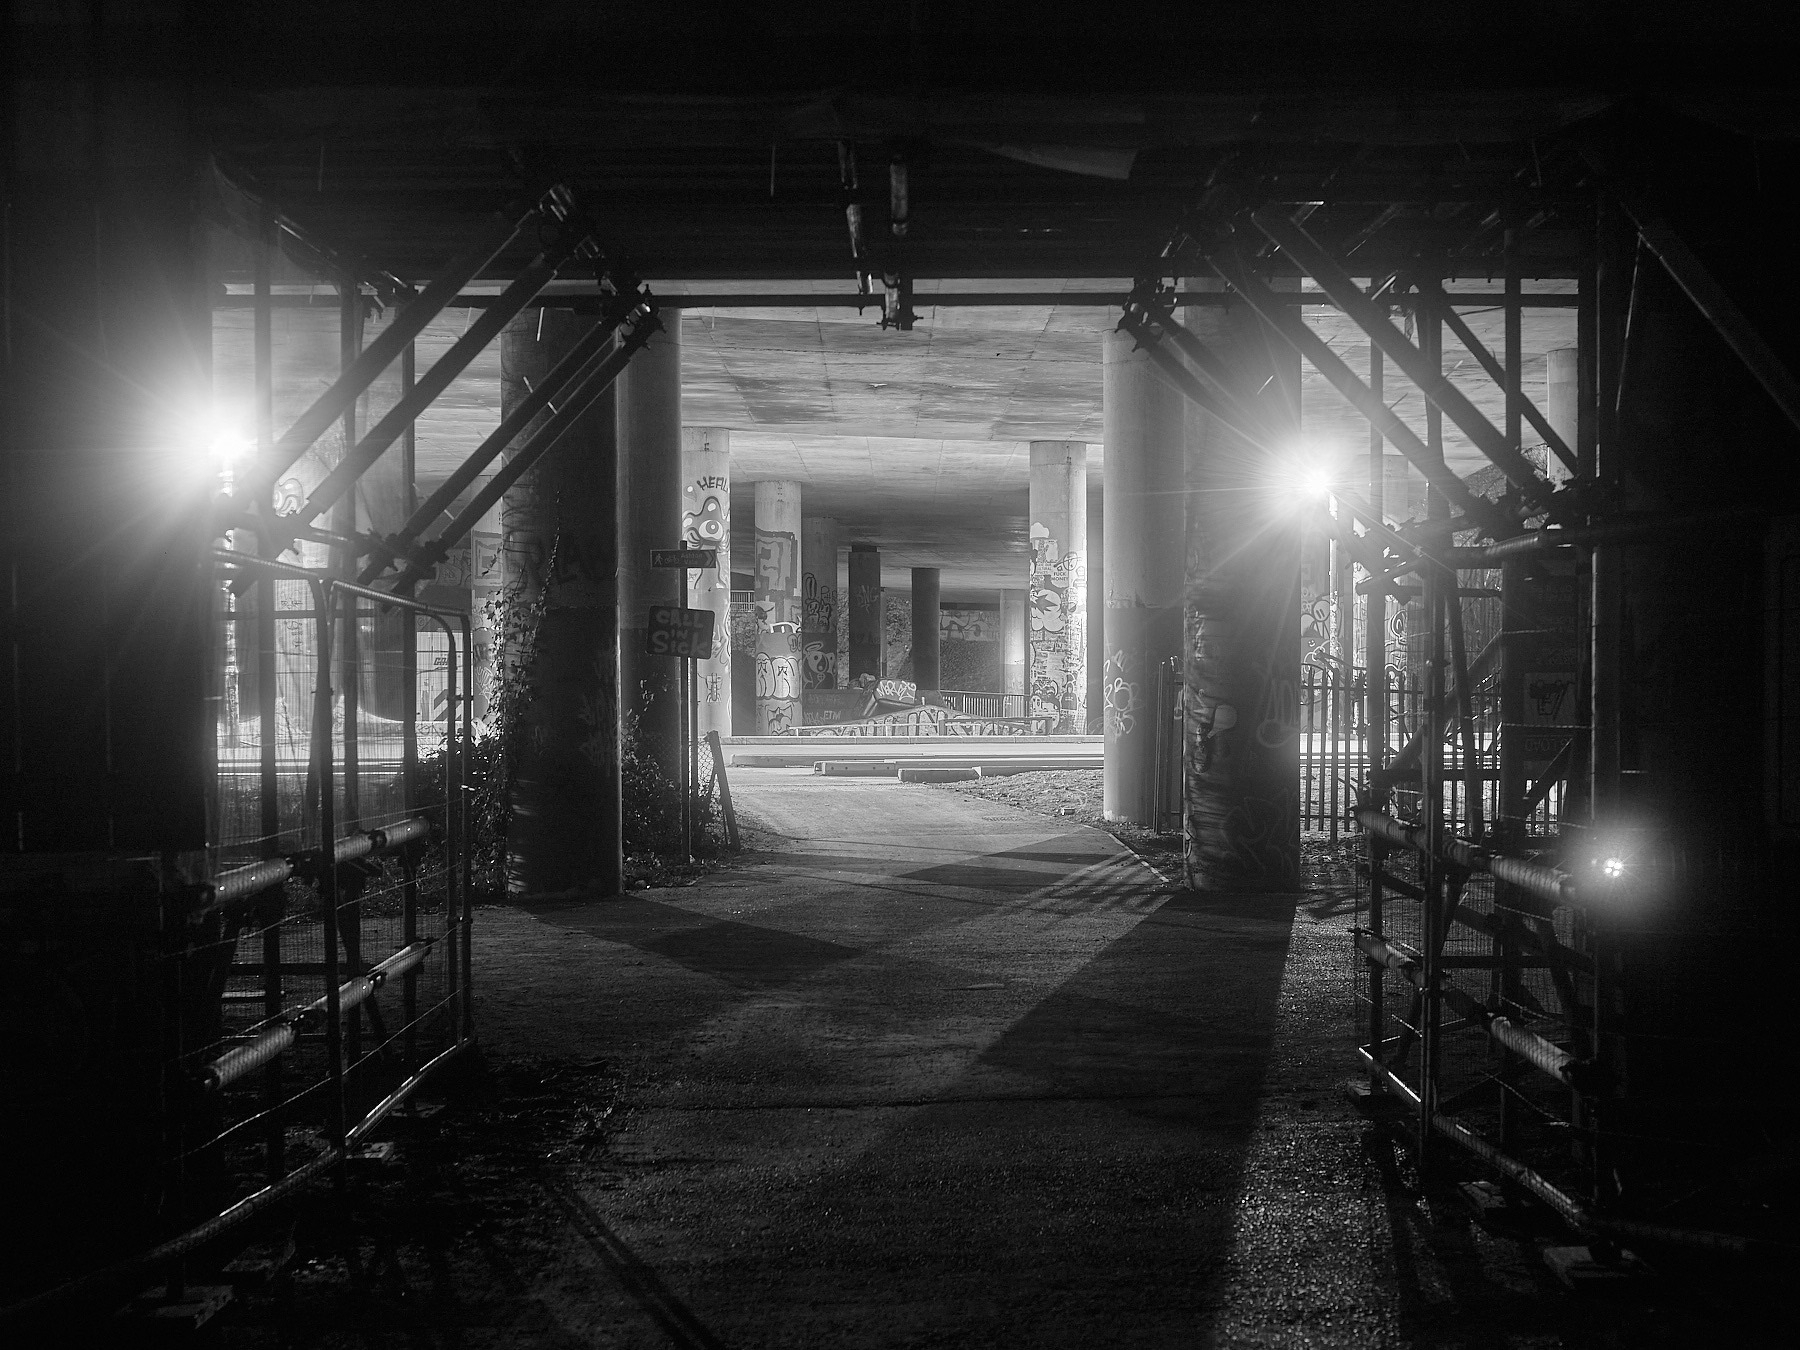
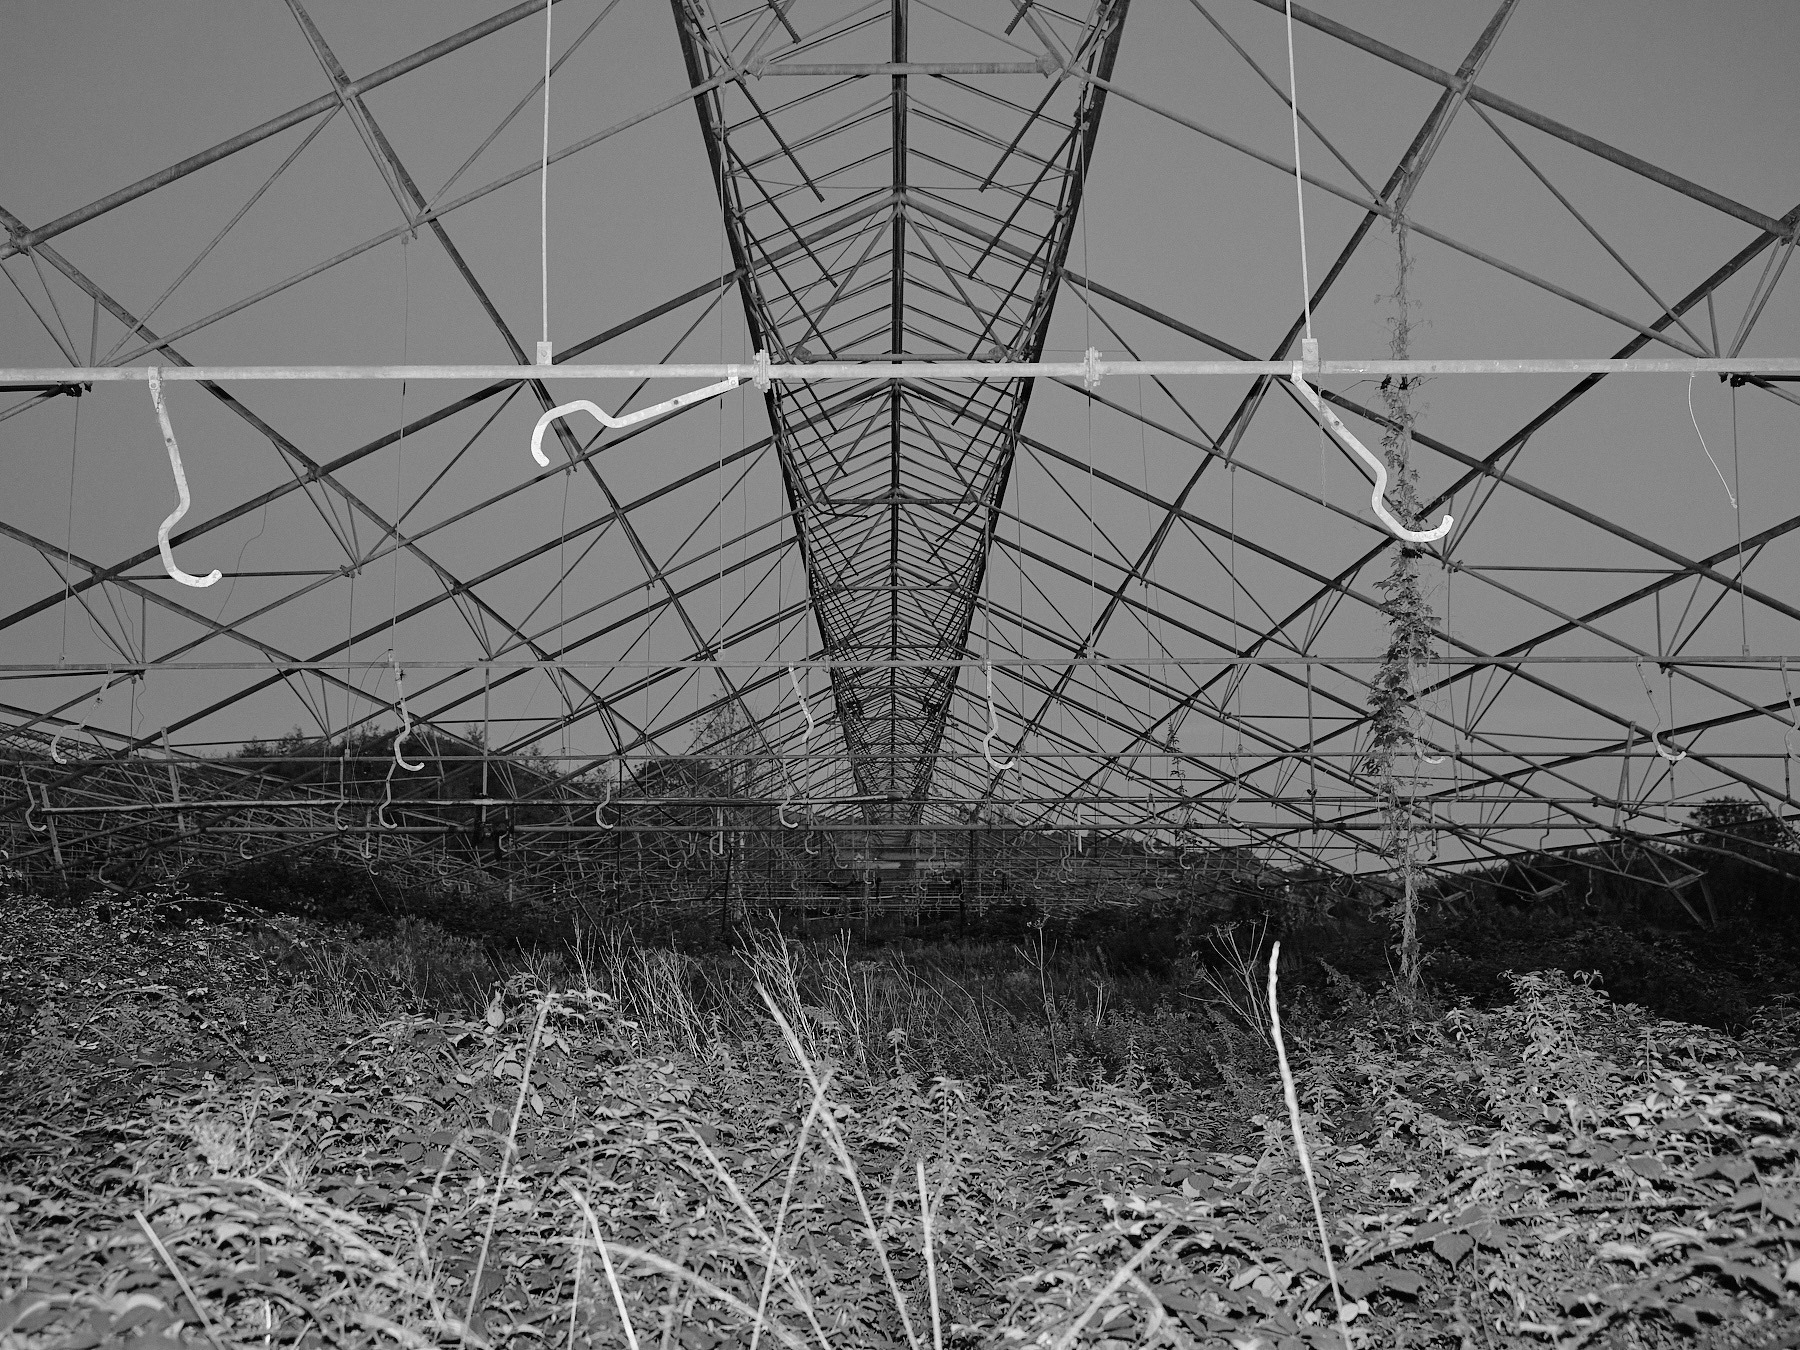
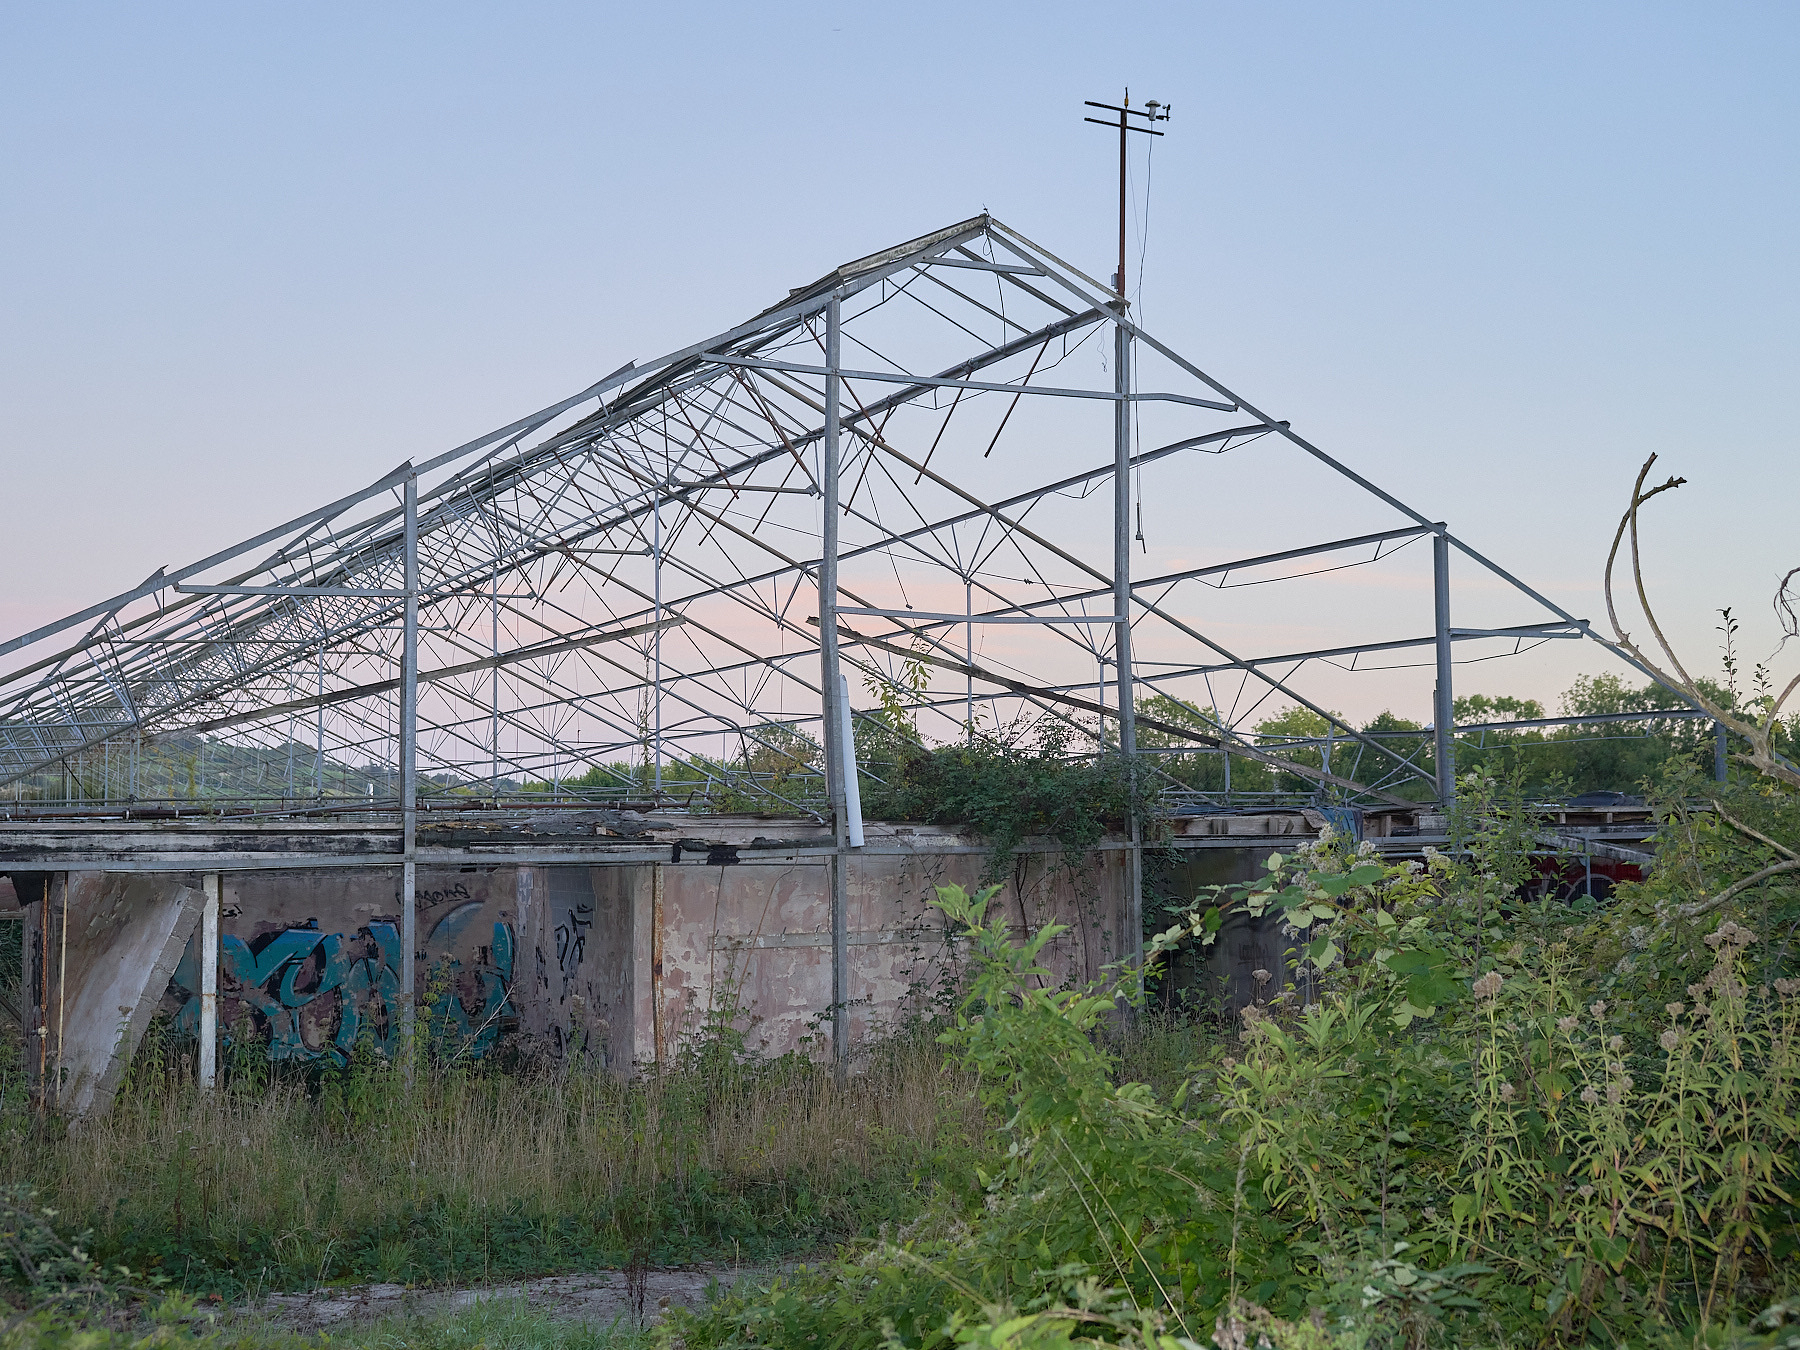
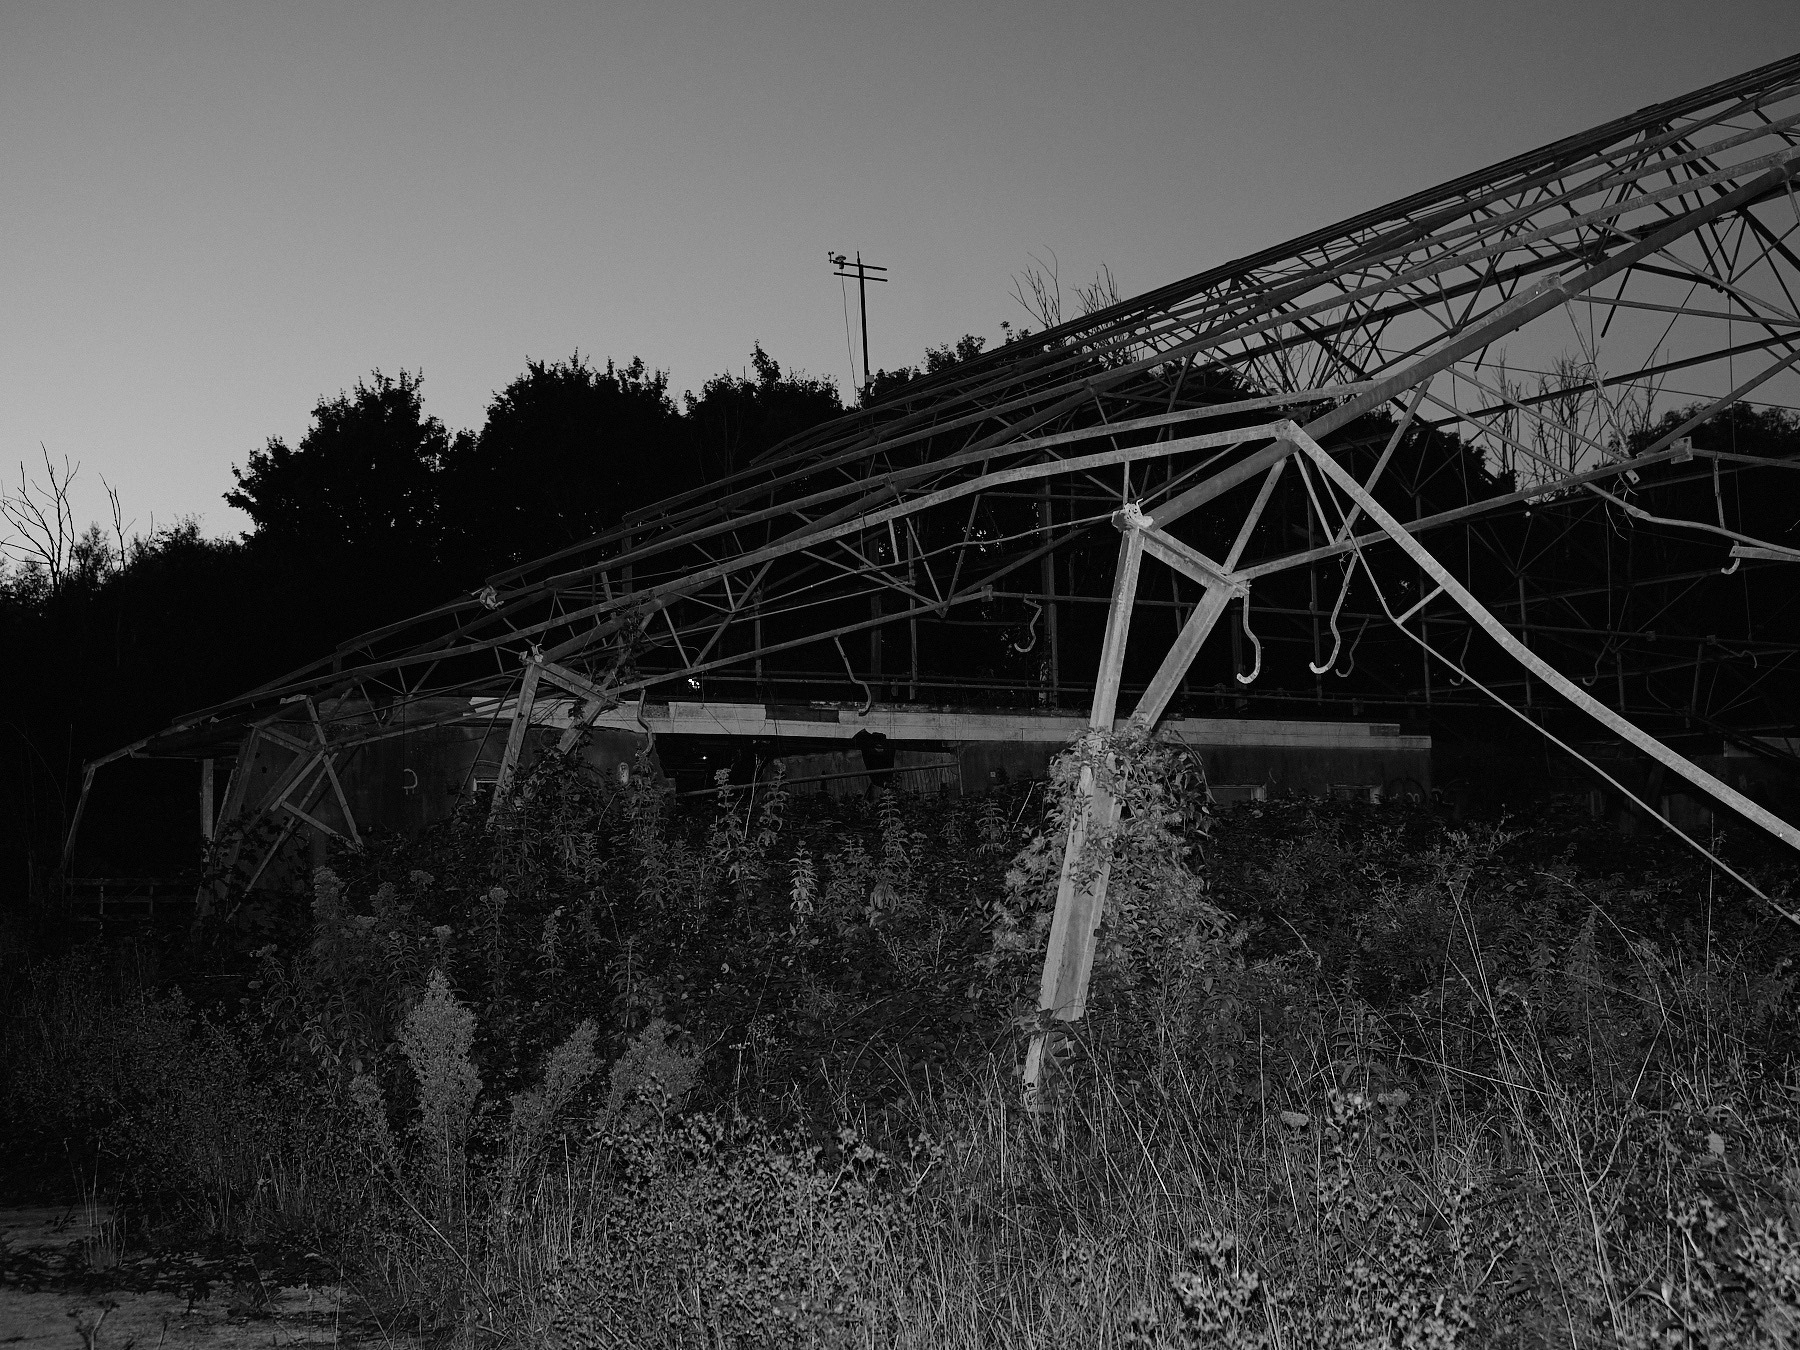
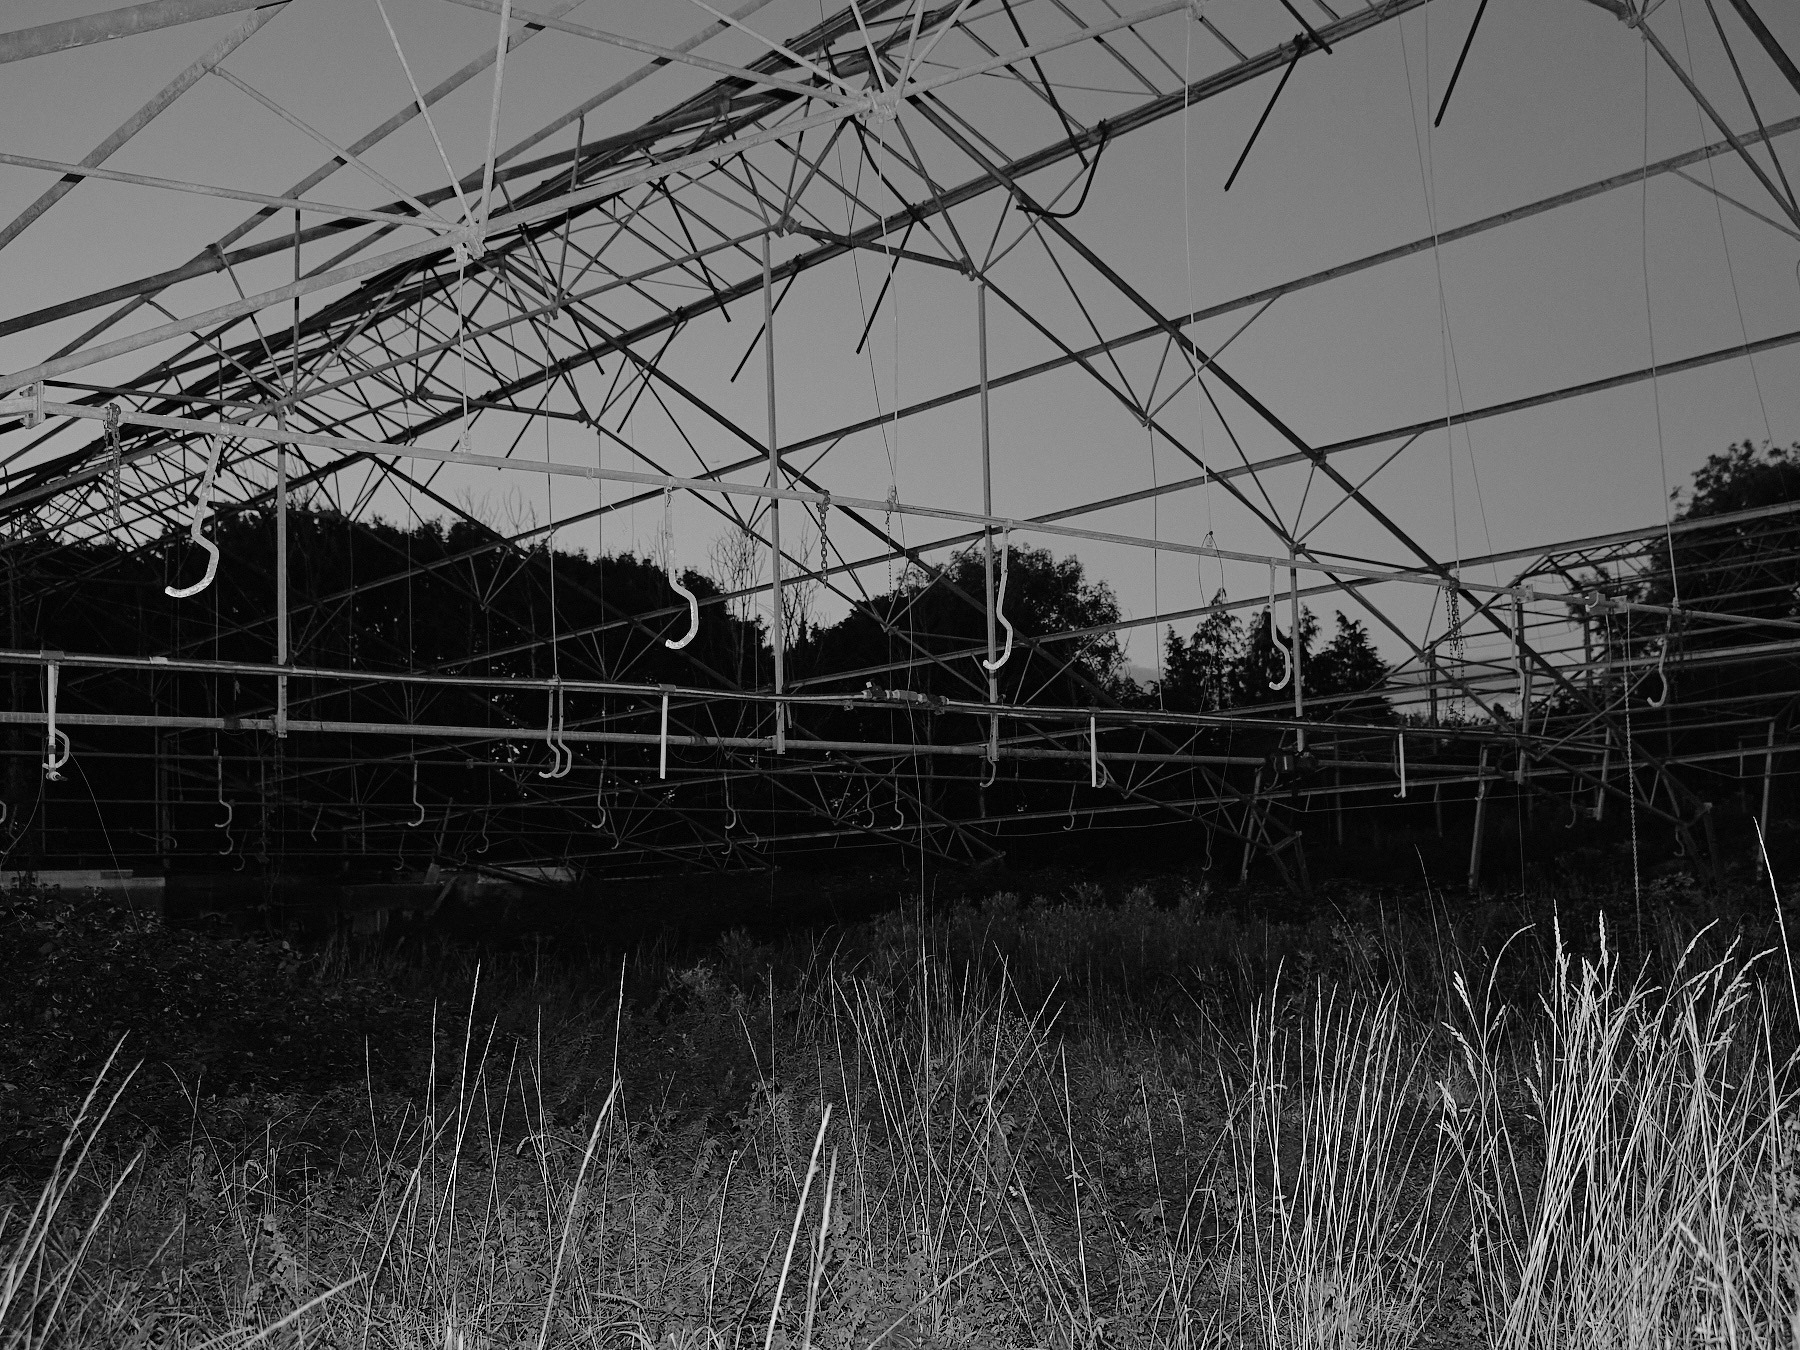
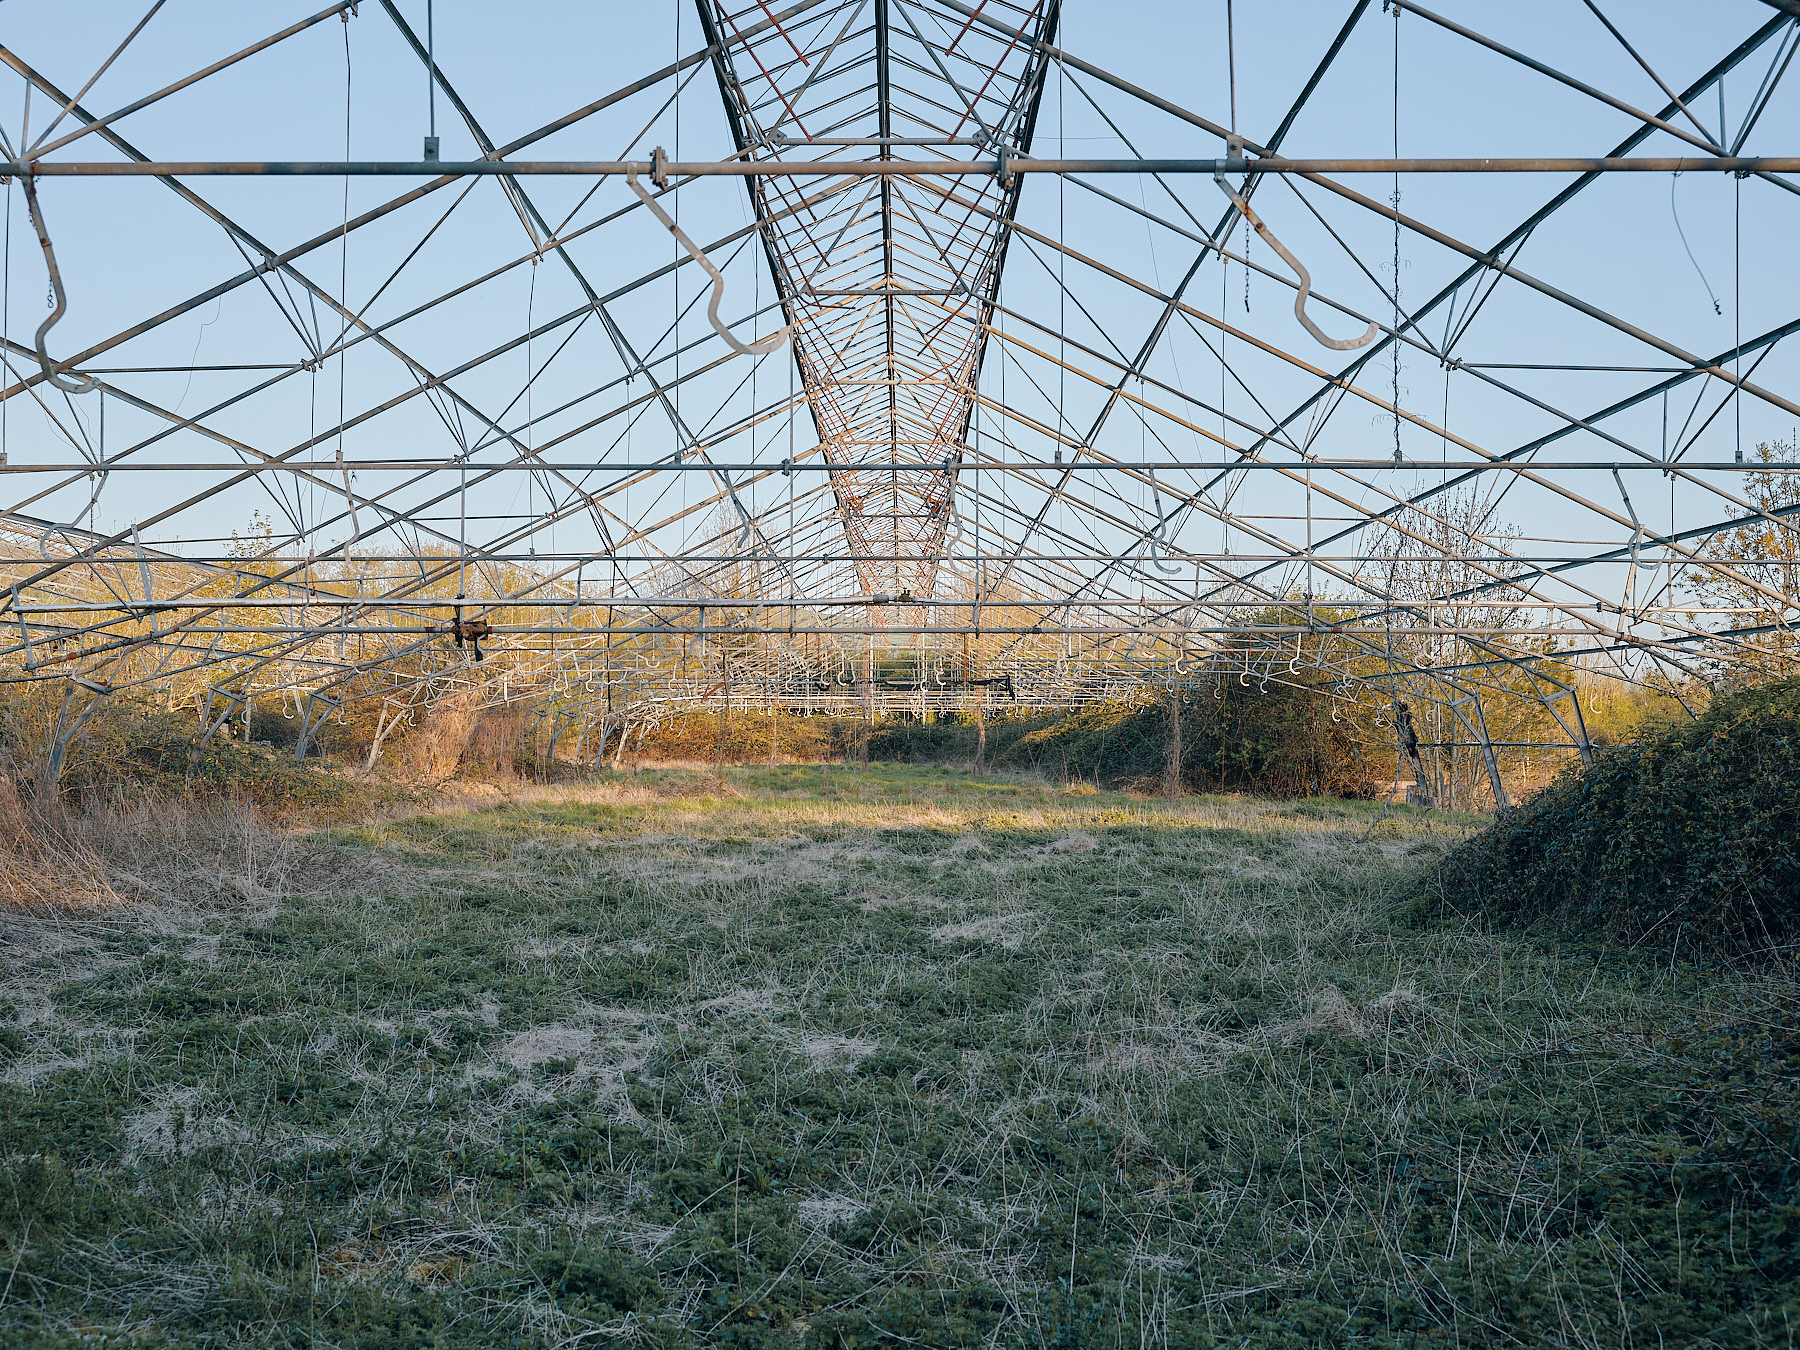
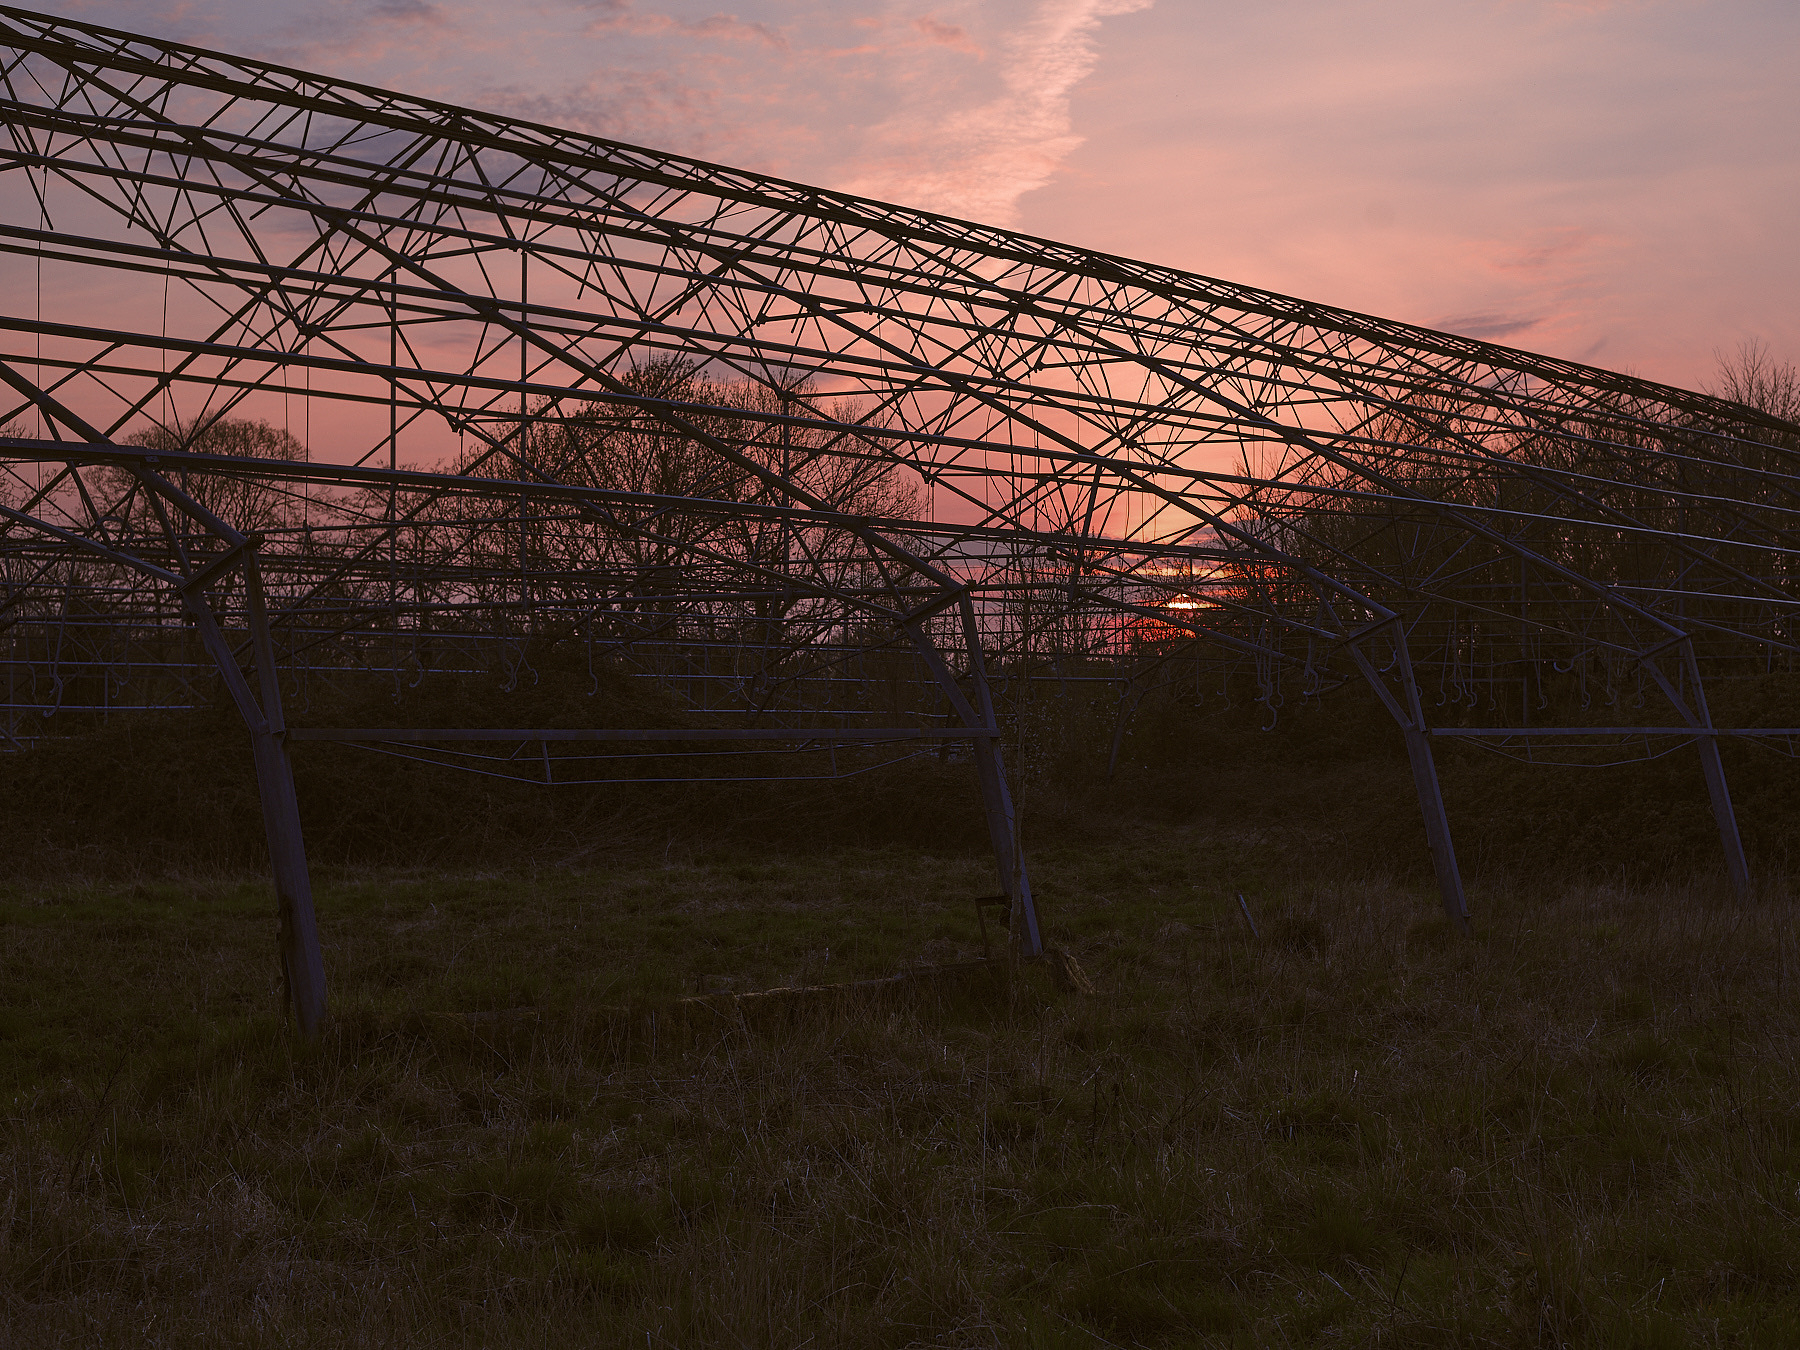
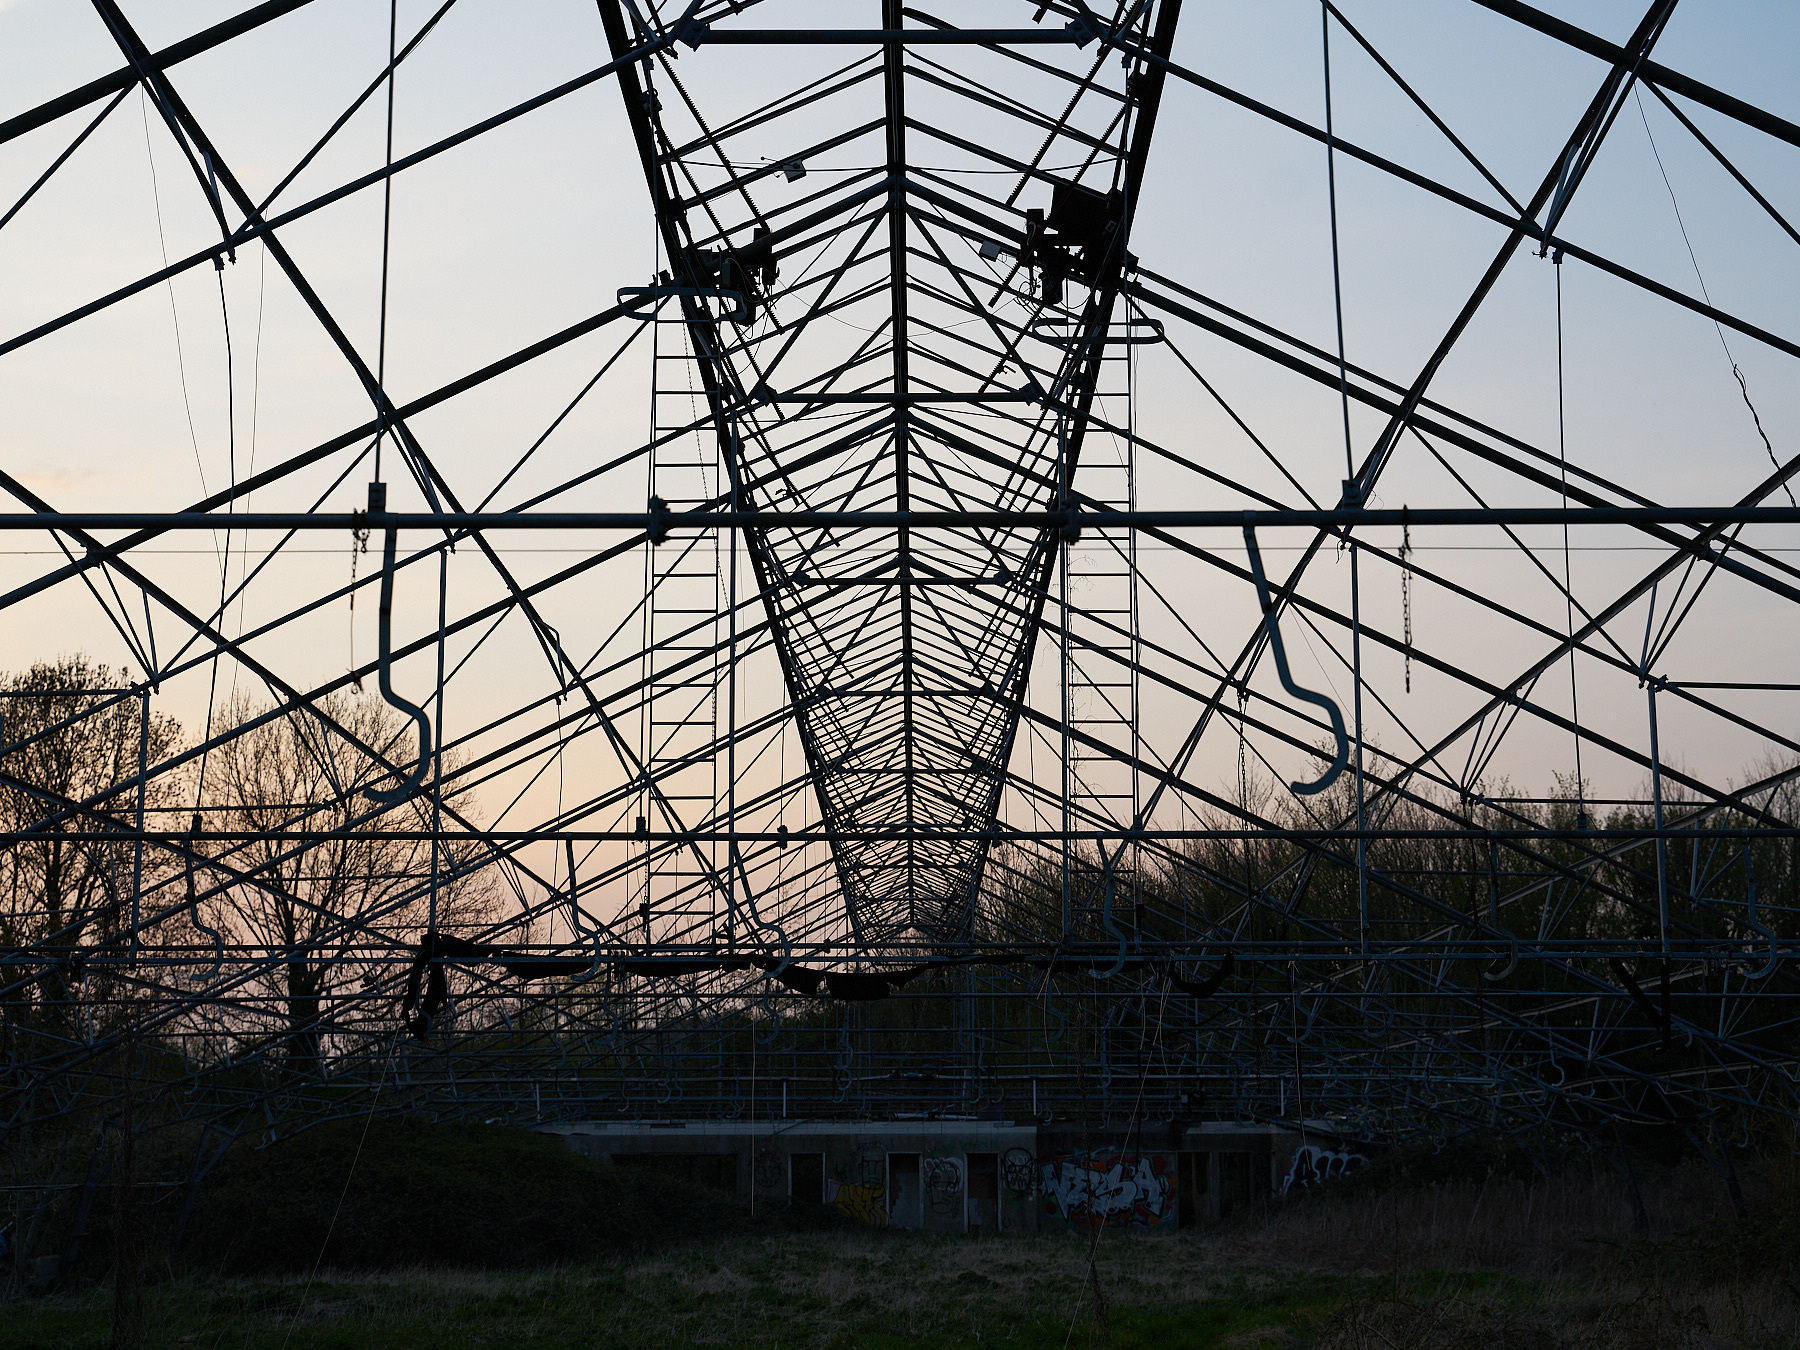
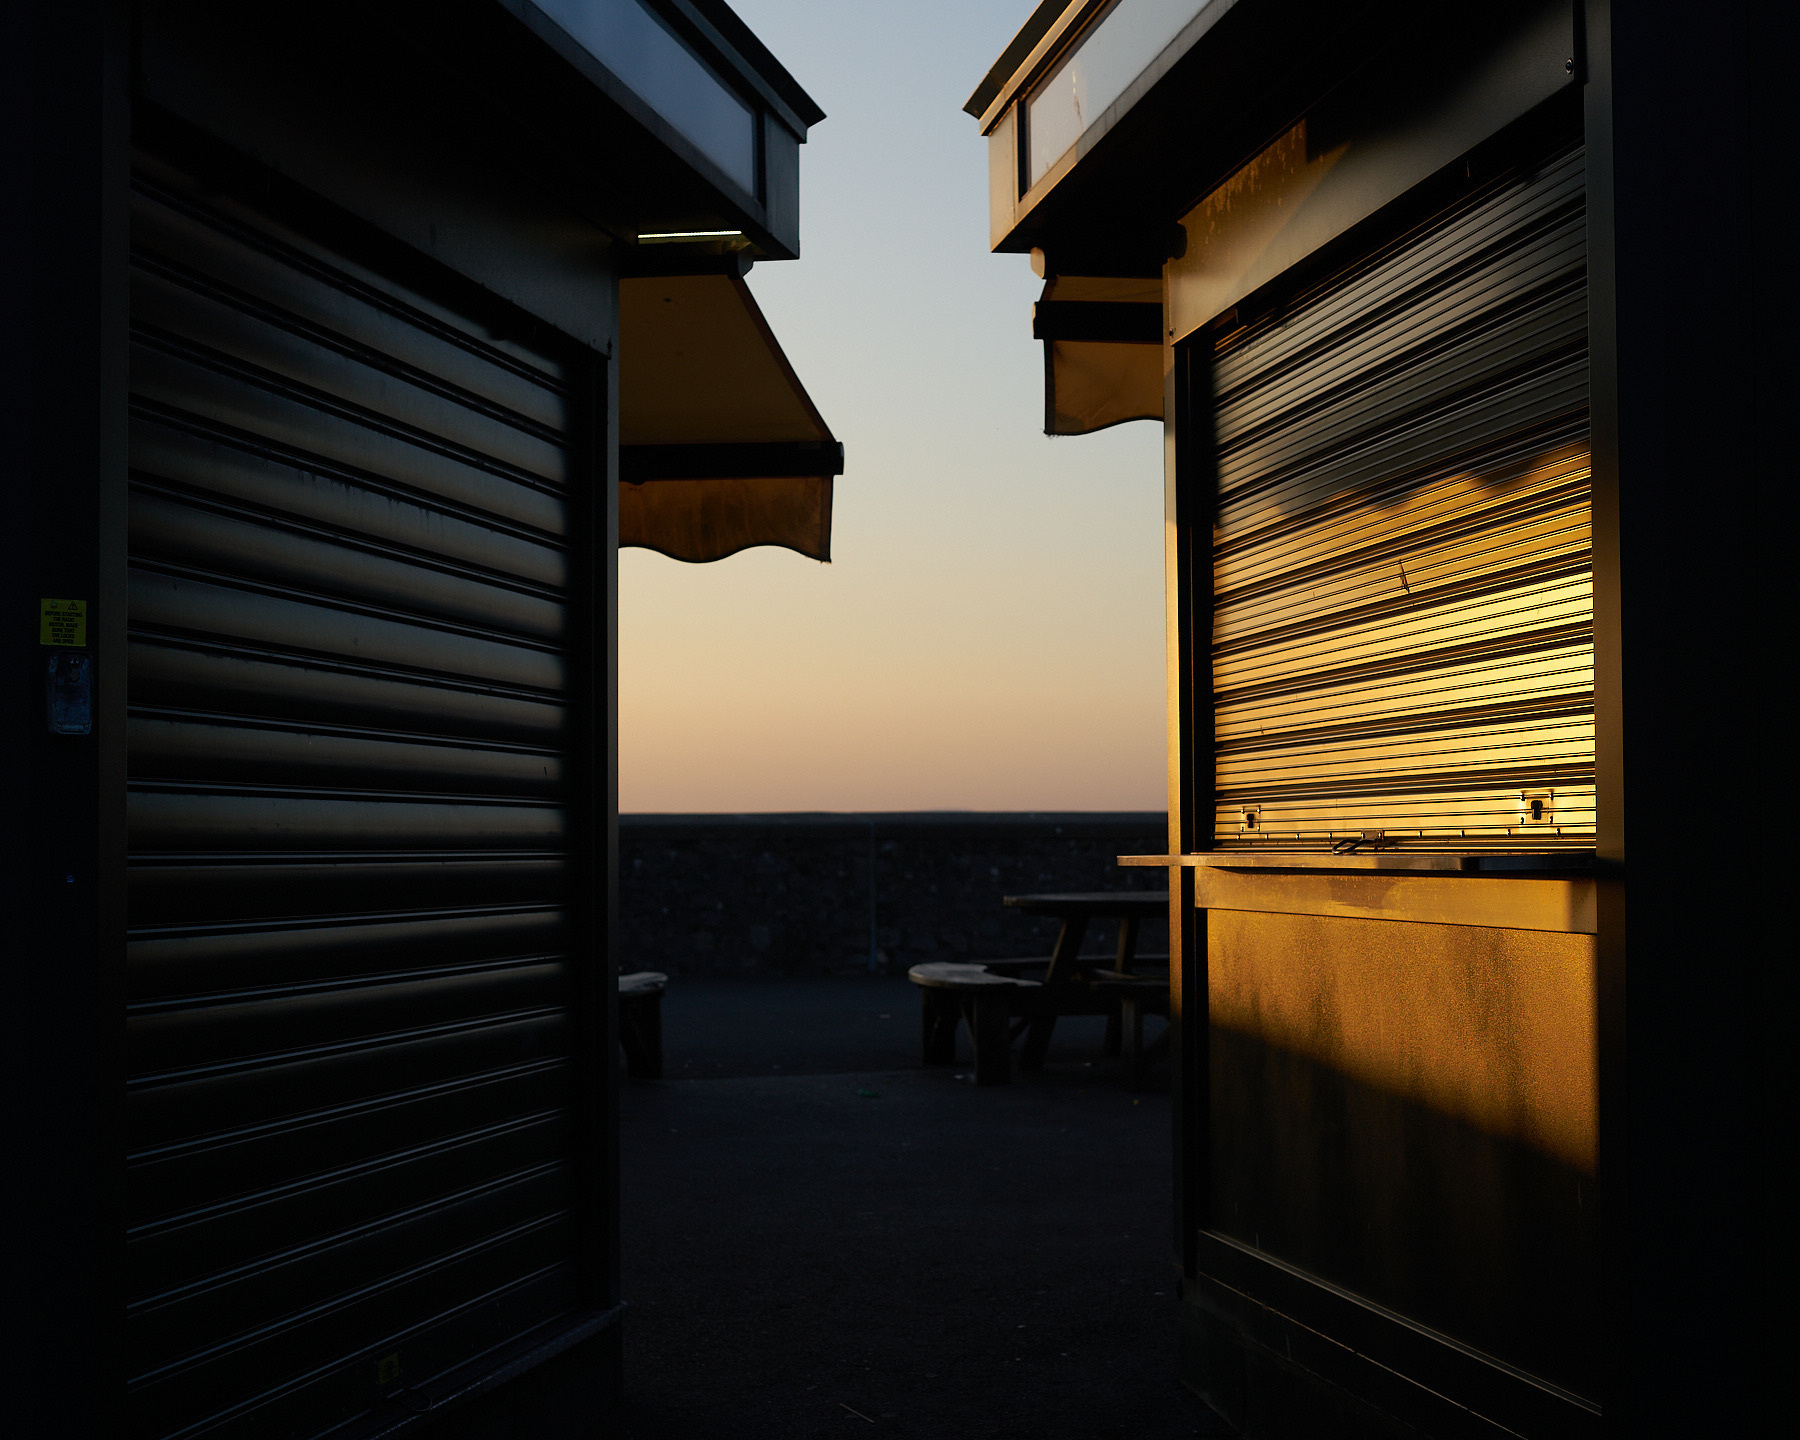
Then last year I finally made it back at dusk, had a good wander round inside, and managed to get the shots I had been thinking about for years. In case it all seemed to be going too smoothly, my flash stopped working when I arrived, and I glumly thought that maybe it’s just not meant to be. But I have a little back up flash, and that had more than enough power these blue hour shots, so it all turned ok.
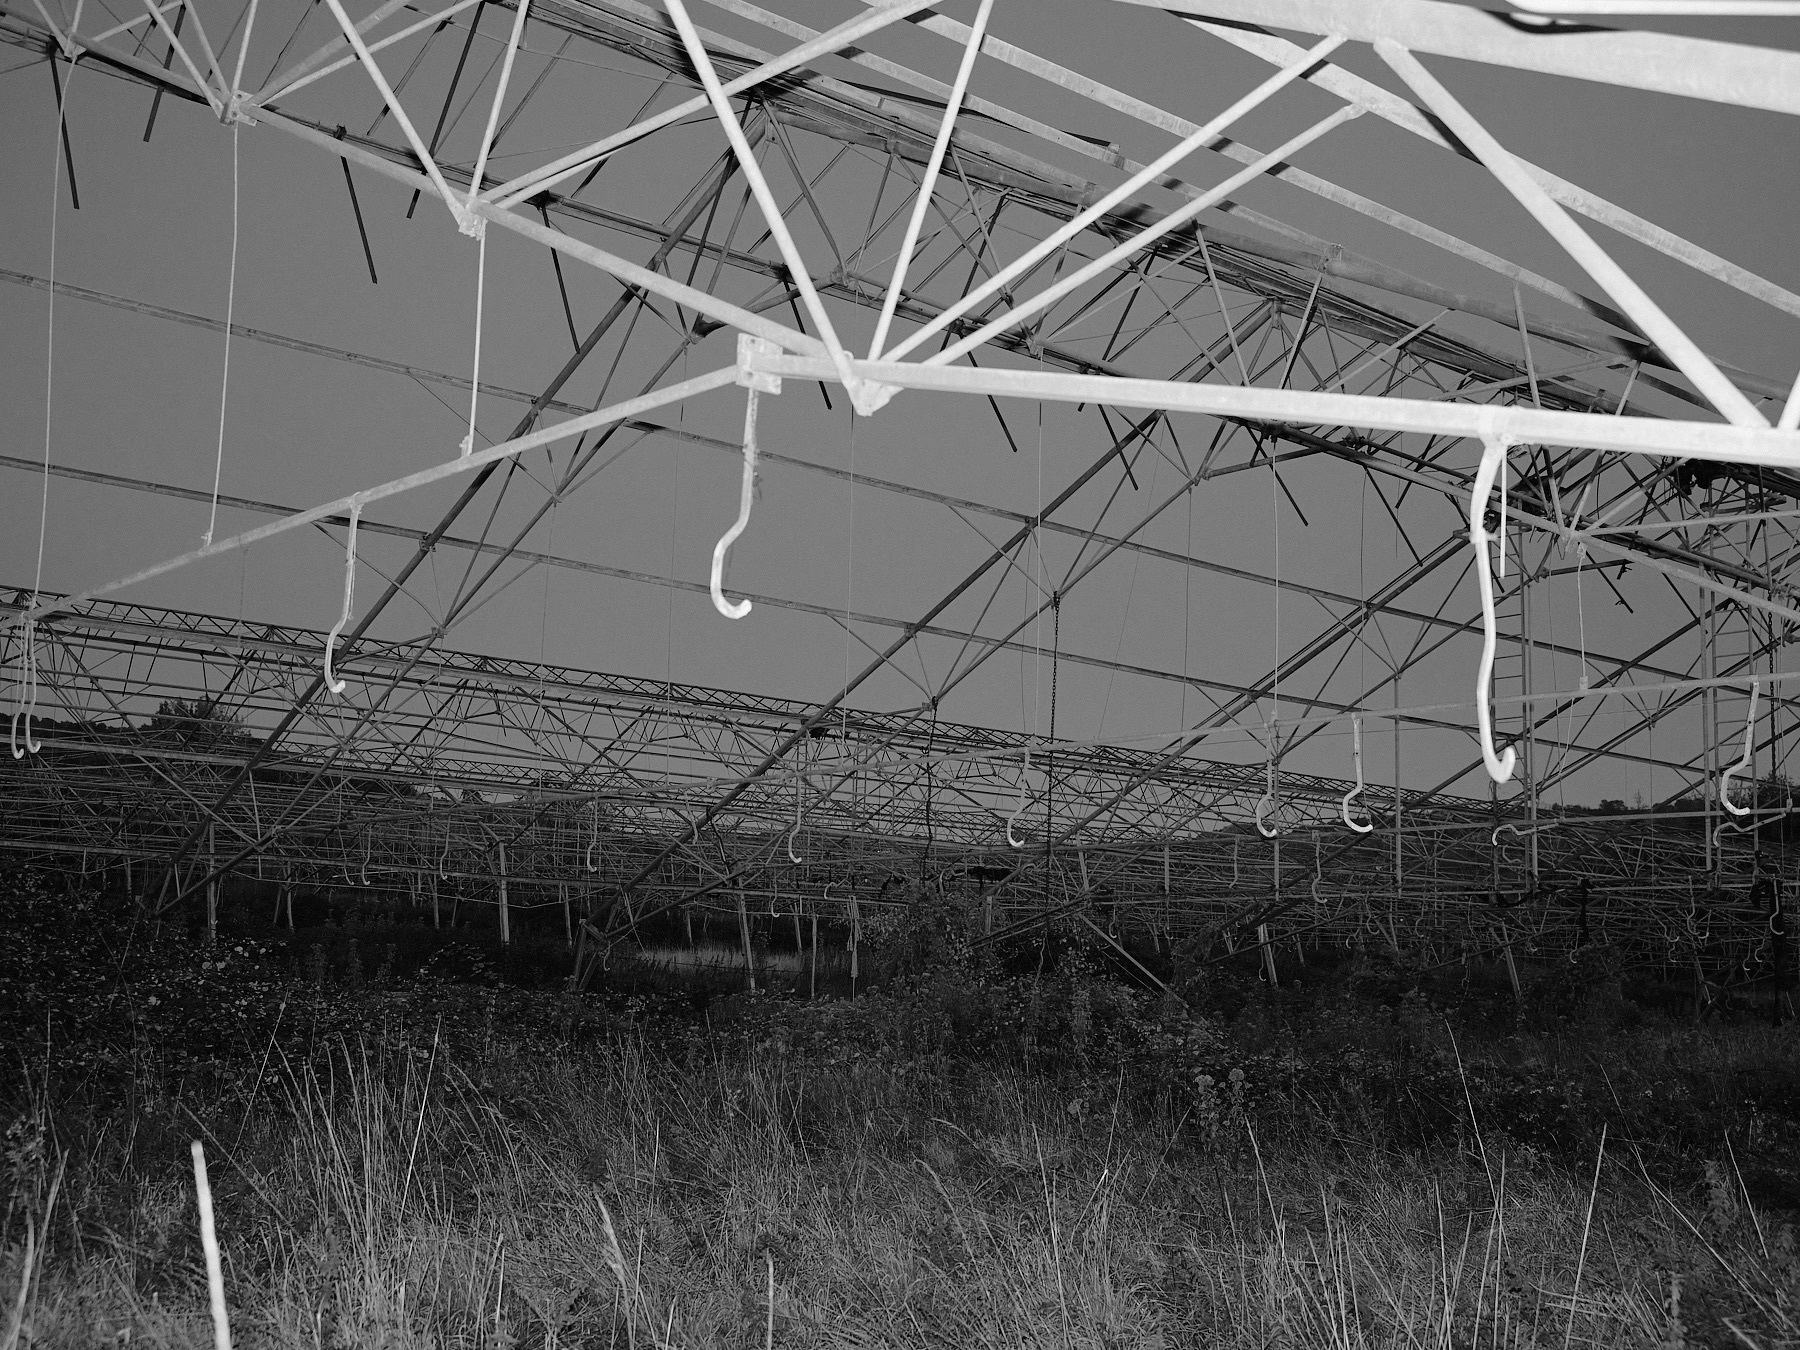
I thought about taking some longer exposures with the tripod - but apart from the fact I didn’t really want to hang there around longer than I needed to - there are no external light sources, so the photos would have just looked like daytime shots. I like how the flash gives that sharp contrast between the metal frames and the sky. I enjoy the freedom of shooting handheld, which was possible shooting wide open at f/2 and using ISO 1250-3200.
The main feeling when I was driving away was that of relief, I’d finally managed to get back, even if I never make it out again and they are bulldozed tomorrow, I know I won’t have that feeling of regret.
I’m sure like most people who take photos just for fun, as a hobby, quite often you have to be opportunistic and take chances when you can get them. Having a dog and an active toddler is a real blessing in this respect, as I find I’m often out and about, so just take the camera with me on the off chance there will be something.
This was one of those times, I wasn’t really expecting to find anything much, but came away with these three photos from an unplanned wander.
Flash gives a bit more leeway shooting handheld, but this one was right on the cusp just before needing a tripod.
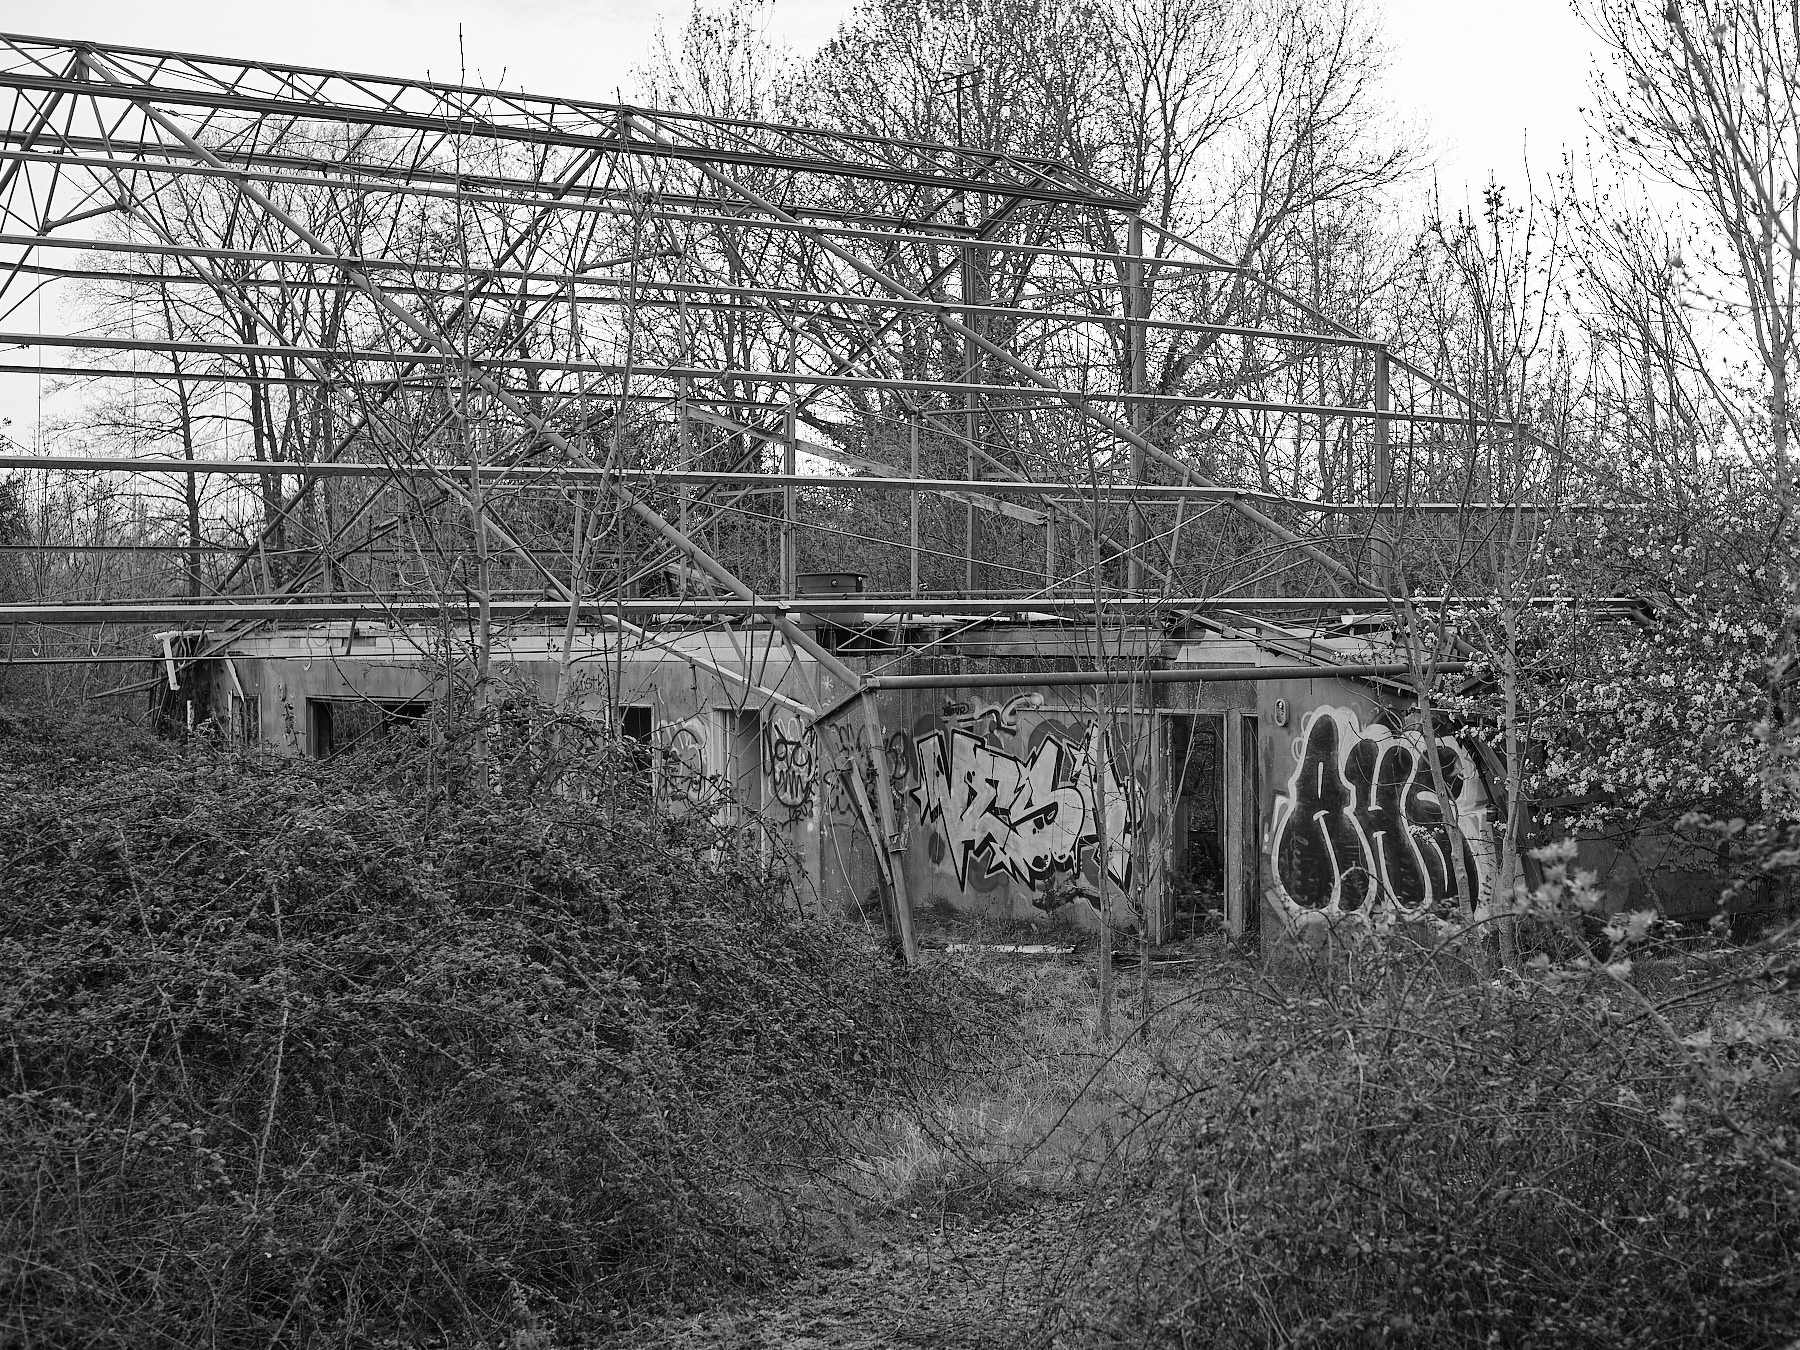
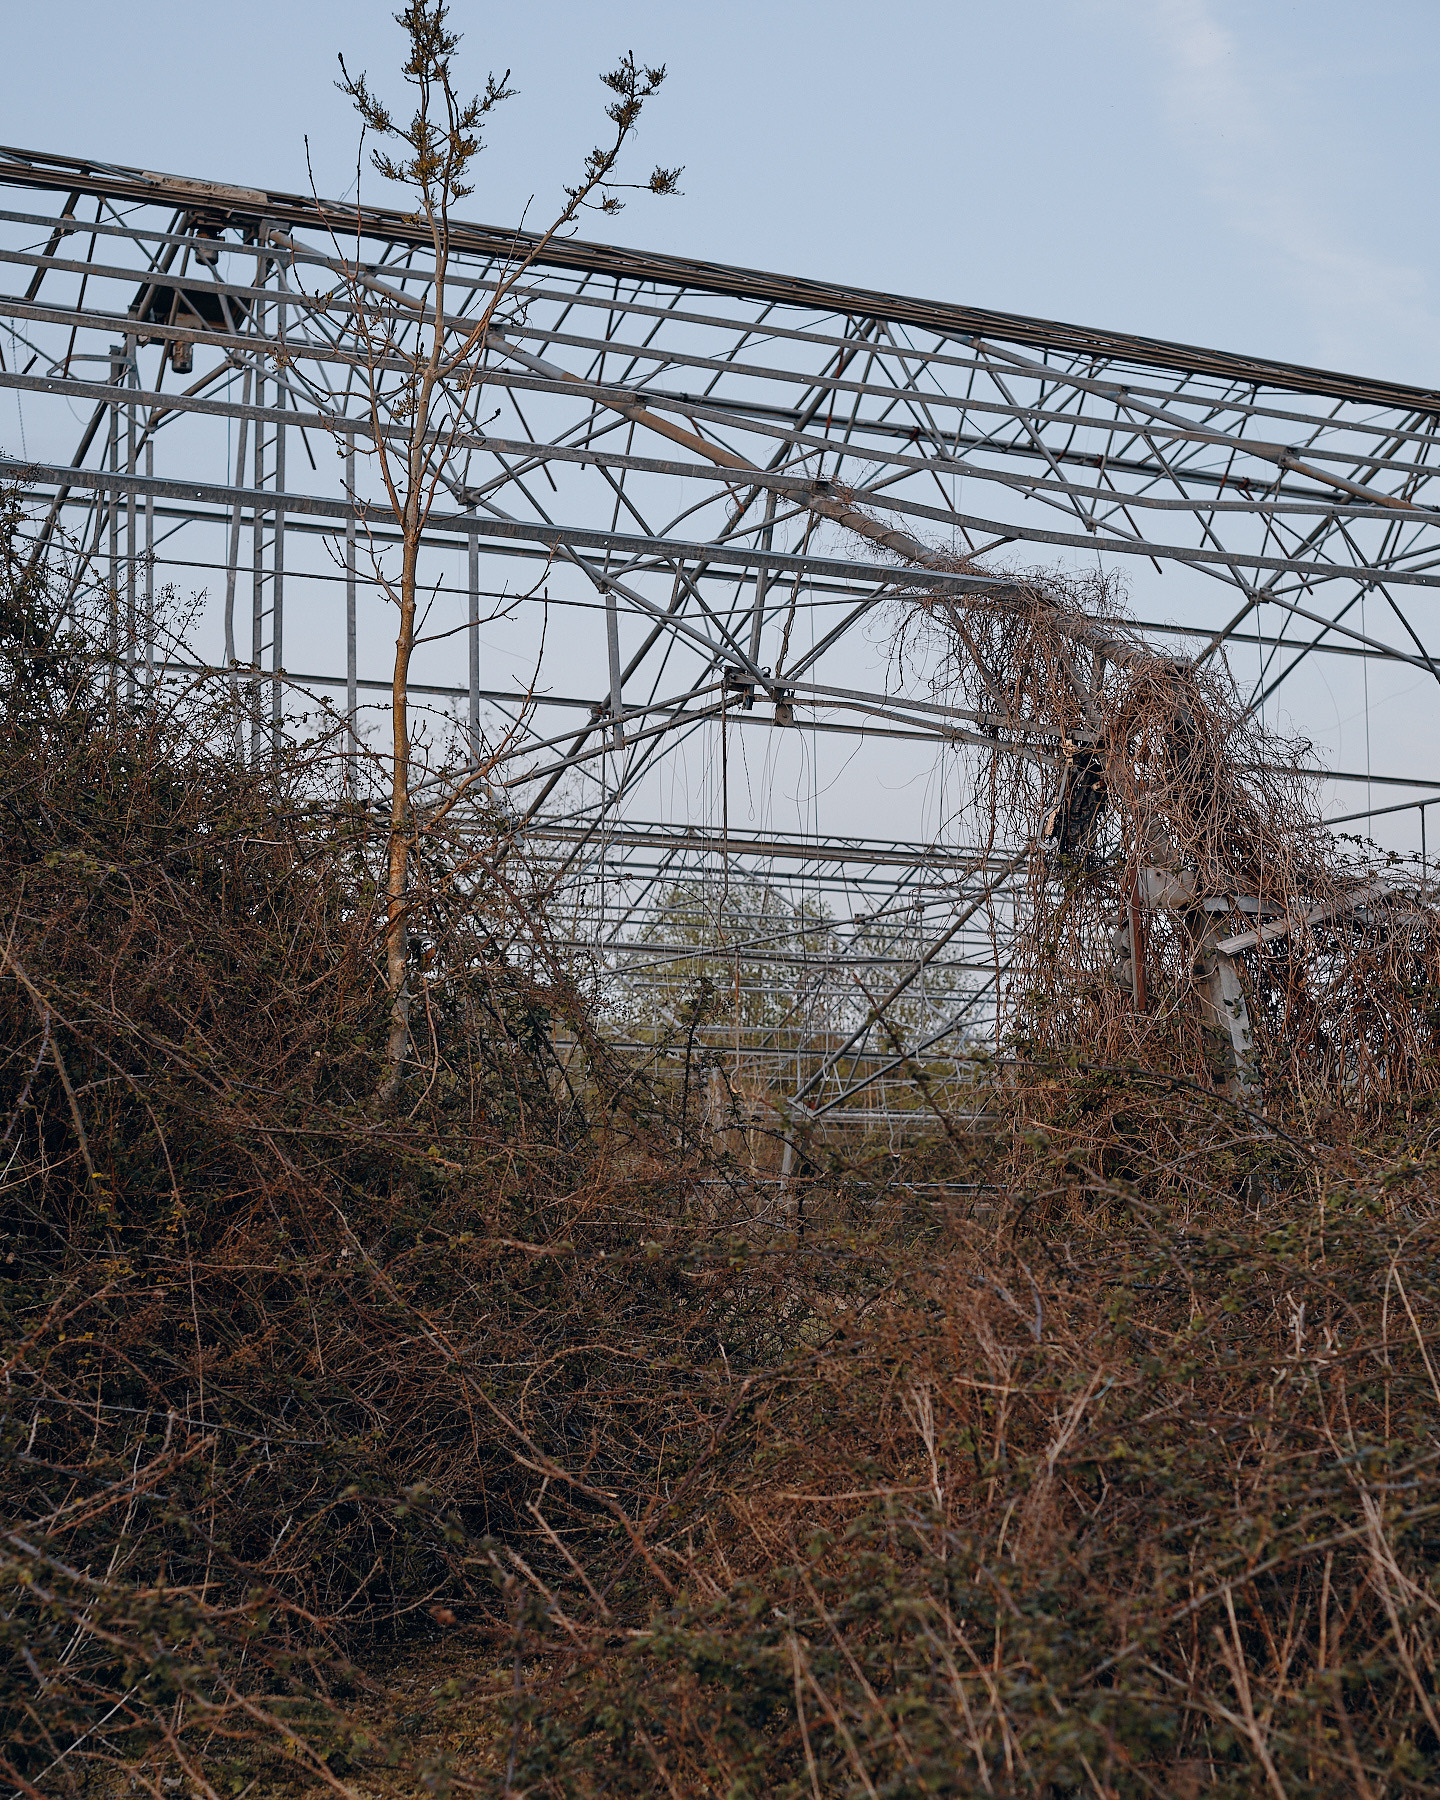
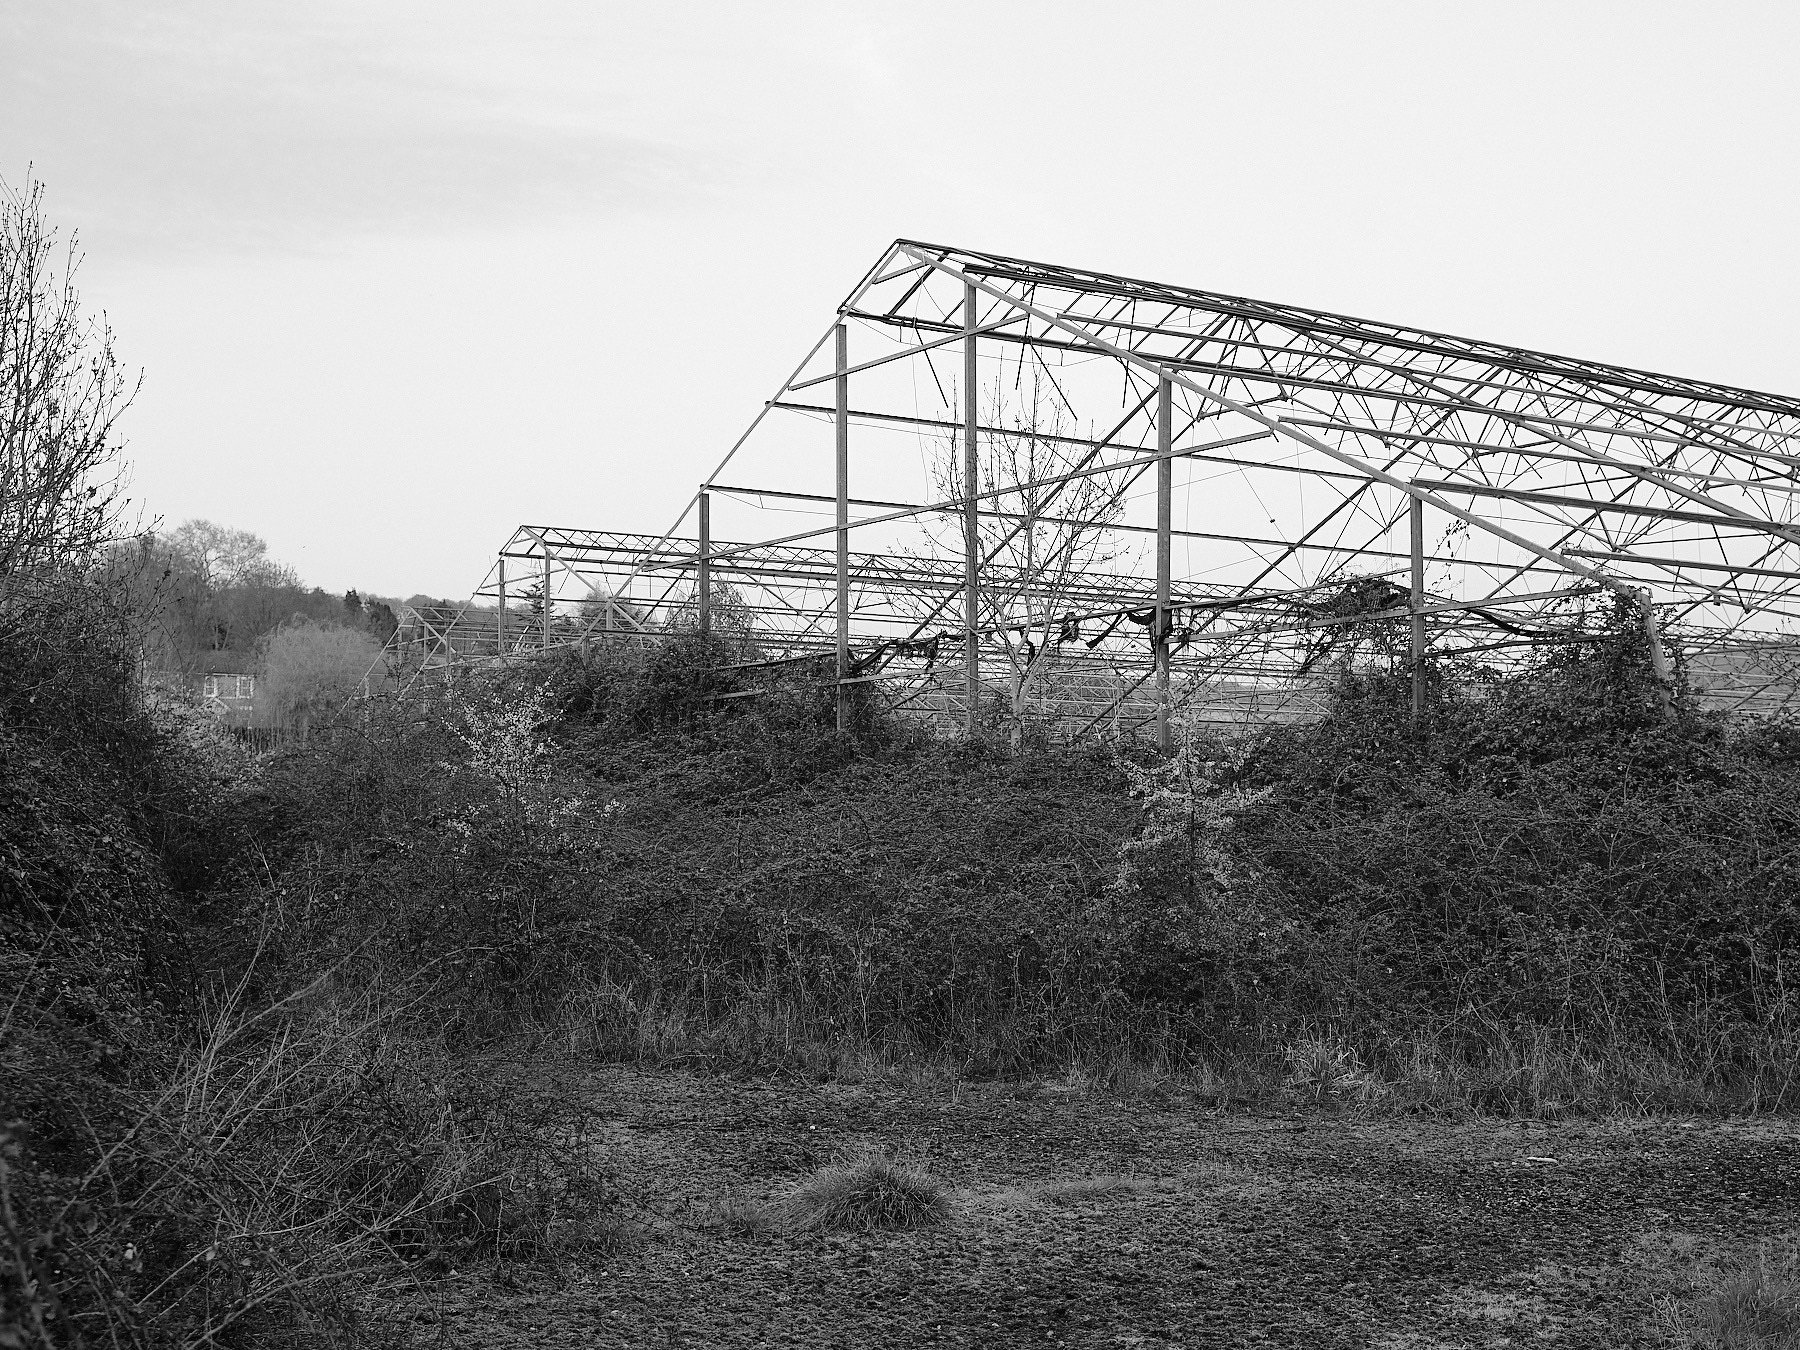
This old nursery looks like it has been abandoned for years, the walls have started to crumble, weeds have grown high, and the glass panes are long gone, leaving just the bare metal skeleton of the old greenhouses. They’re located in Bitton on the outskirts of Bristol, just visible from road in winter when the undergrowth has died down.
I’m drawn to these abandoned spaces, and knew I had to return to explore and take some photos. I’m also motivated by the fear that these spaces are never permanent, any day bulldozers could come in and flatten the whole site, I could wait too long to come back only to find a shiny new housing estate in it’s place.
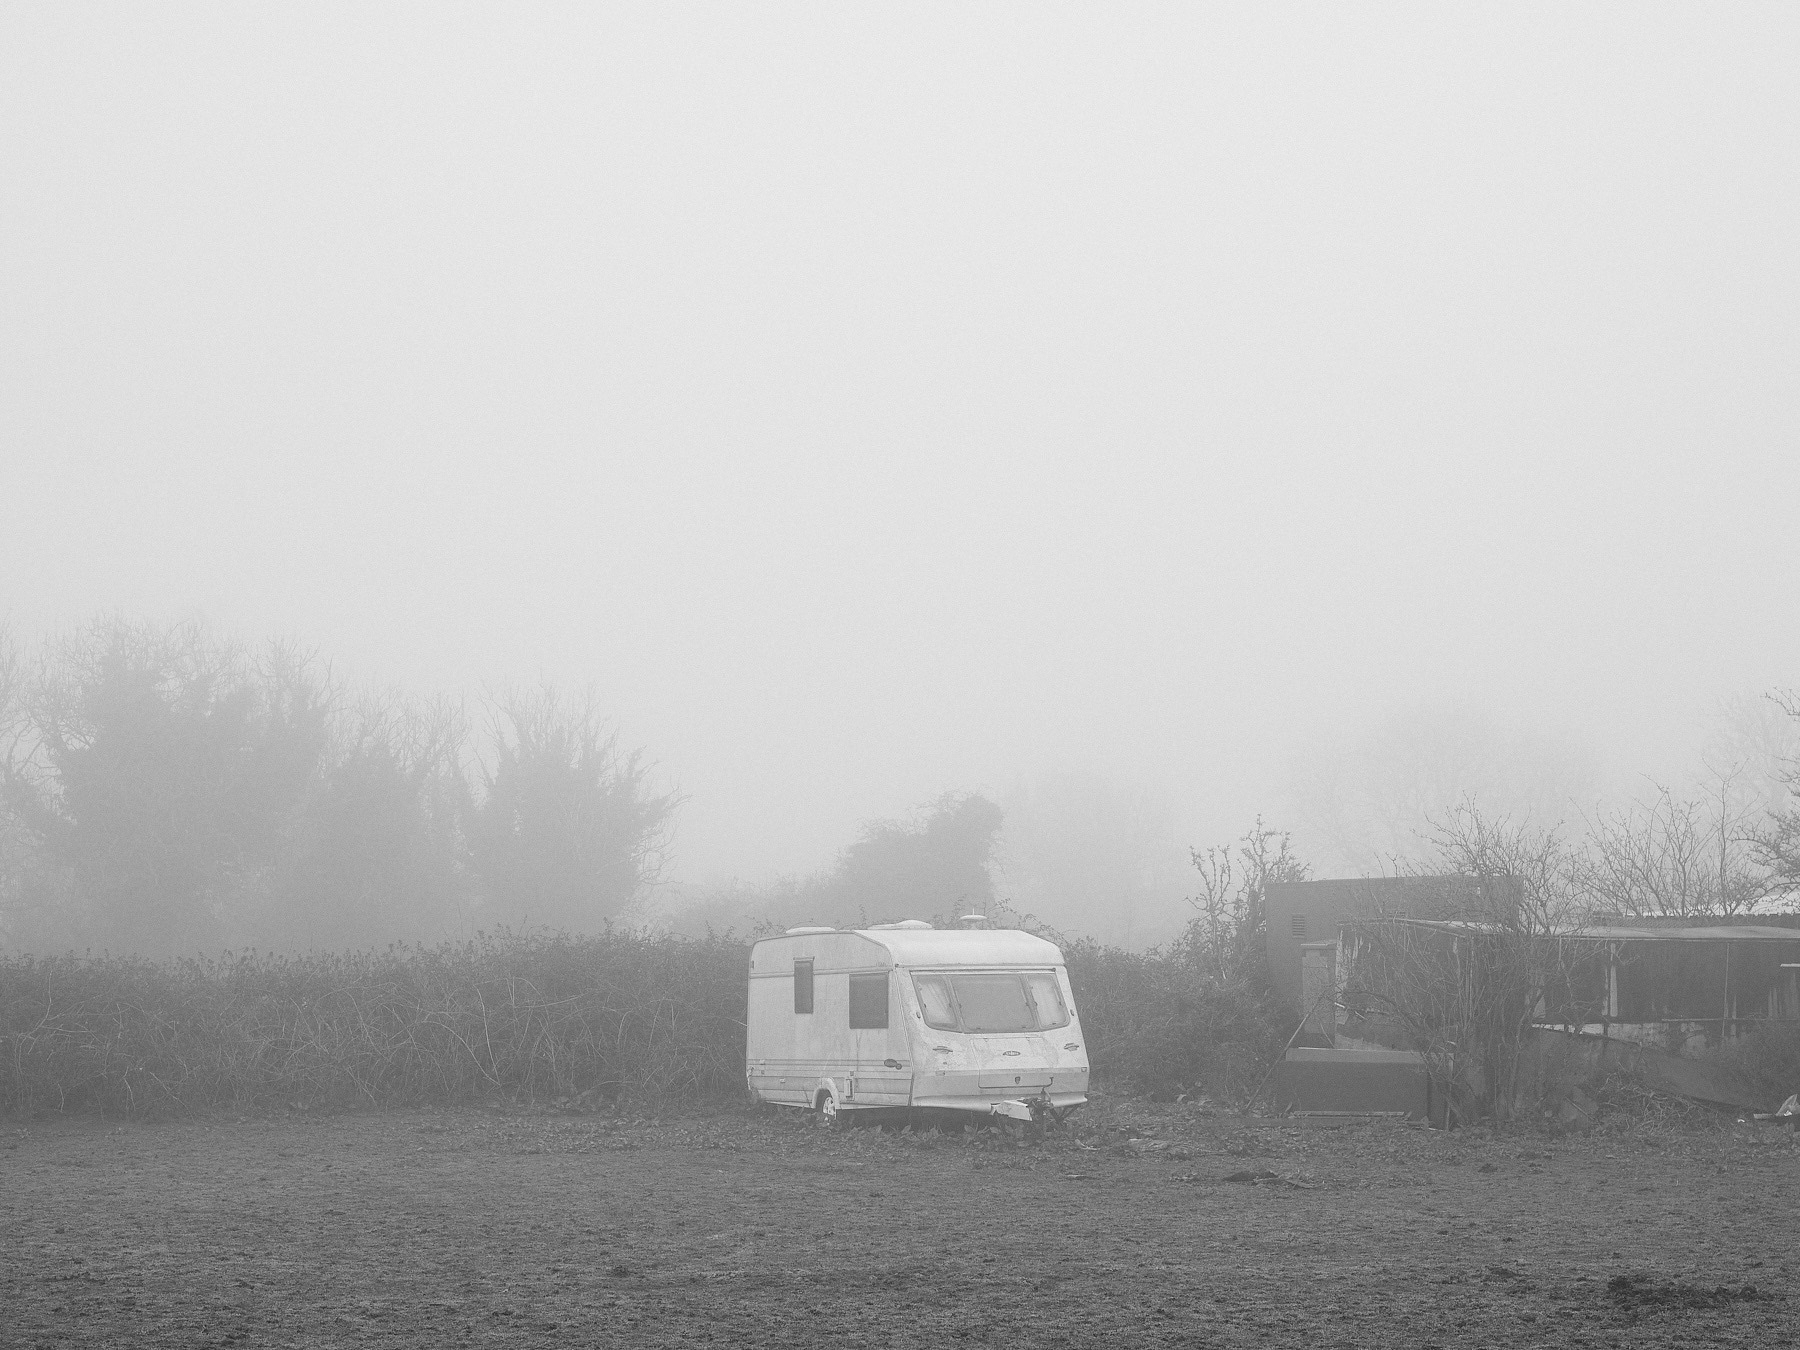
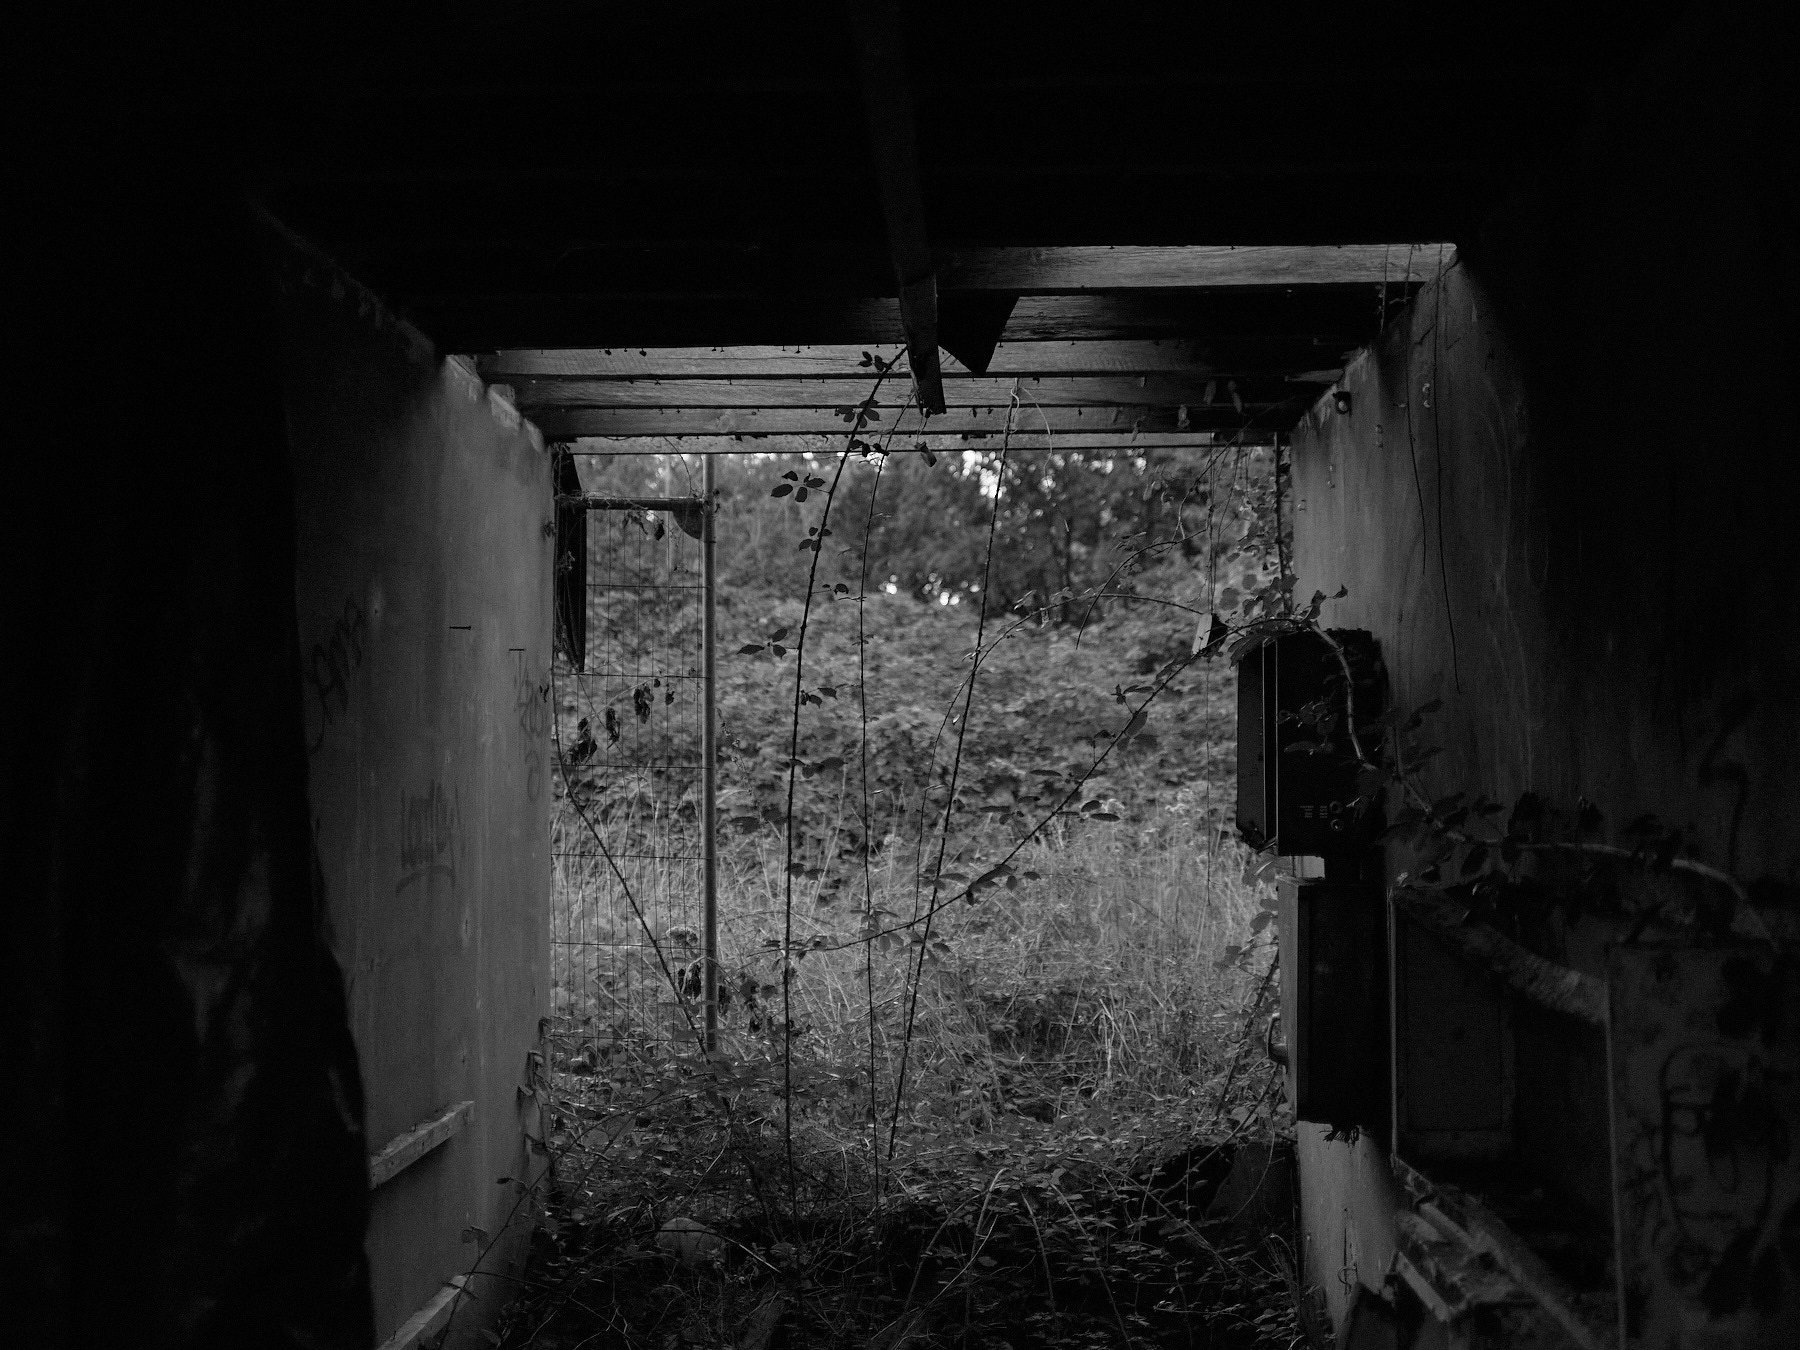
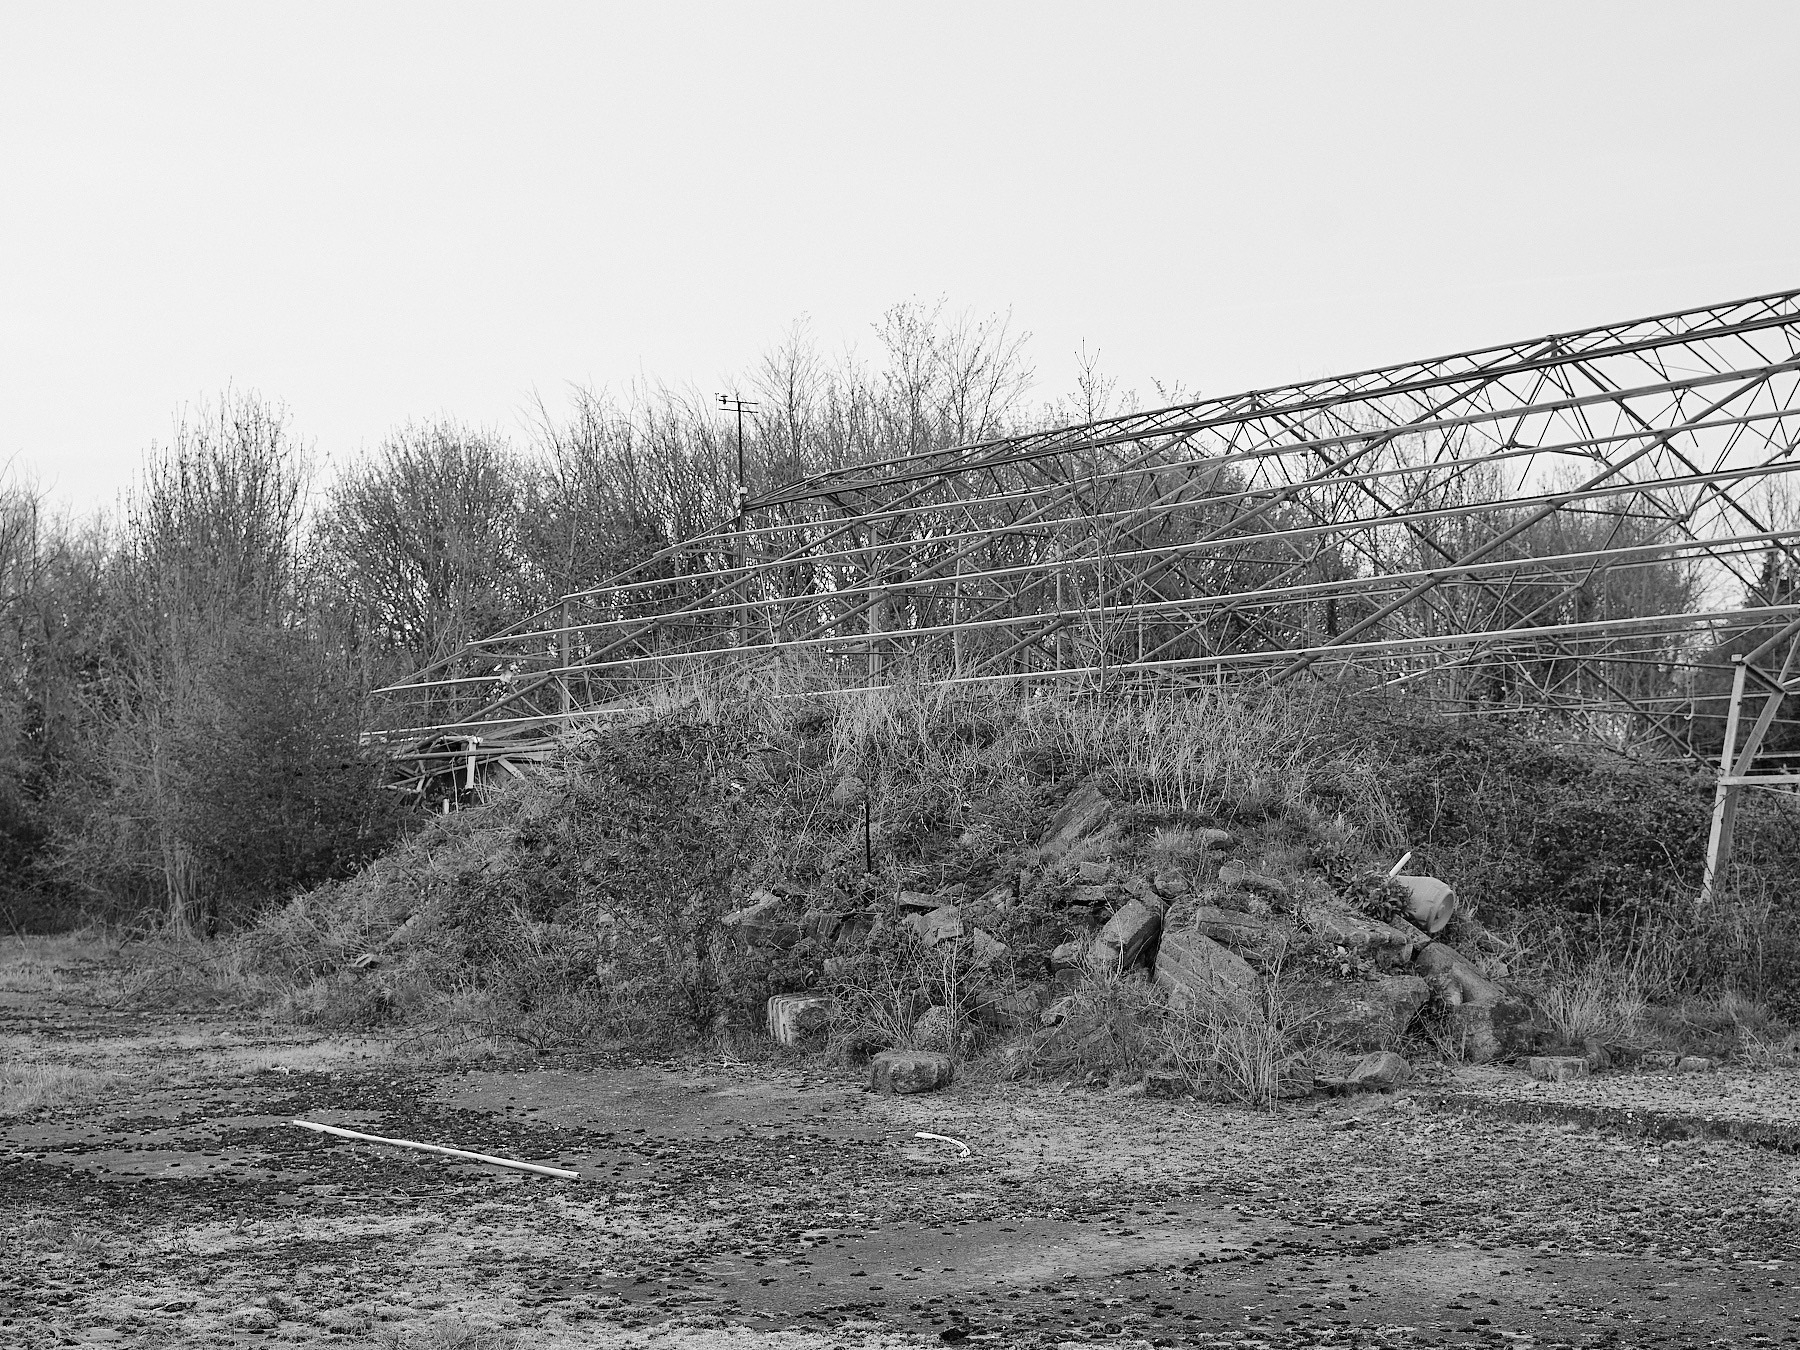
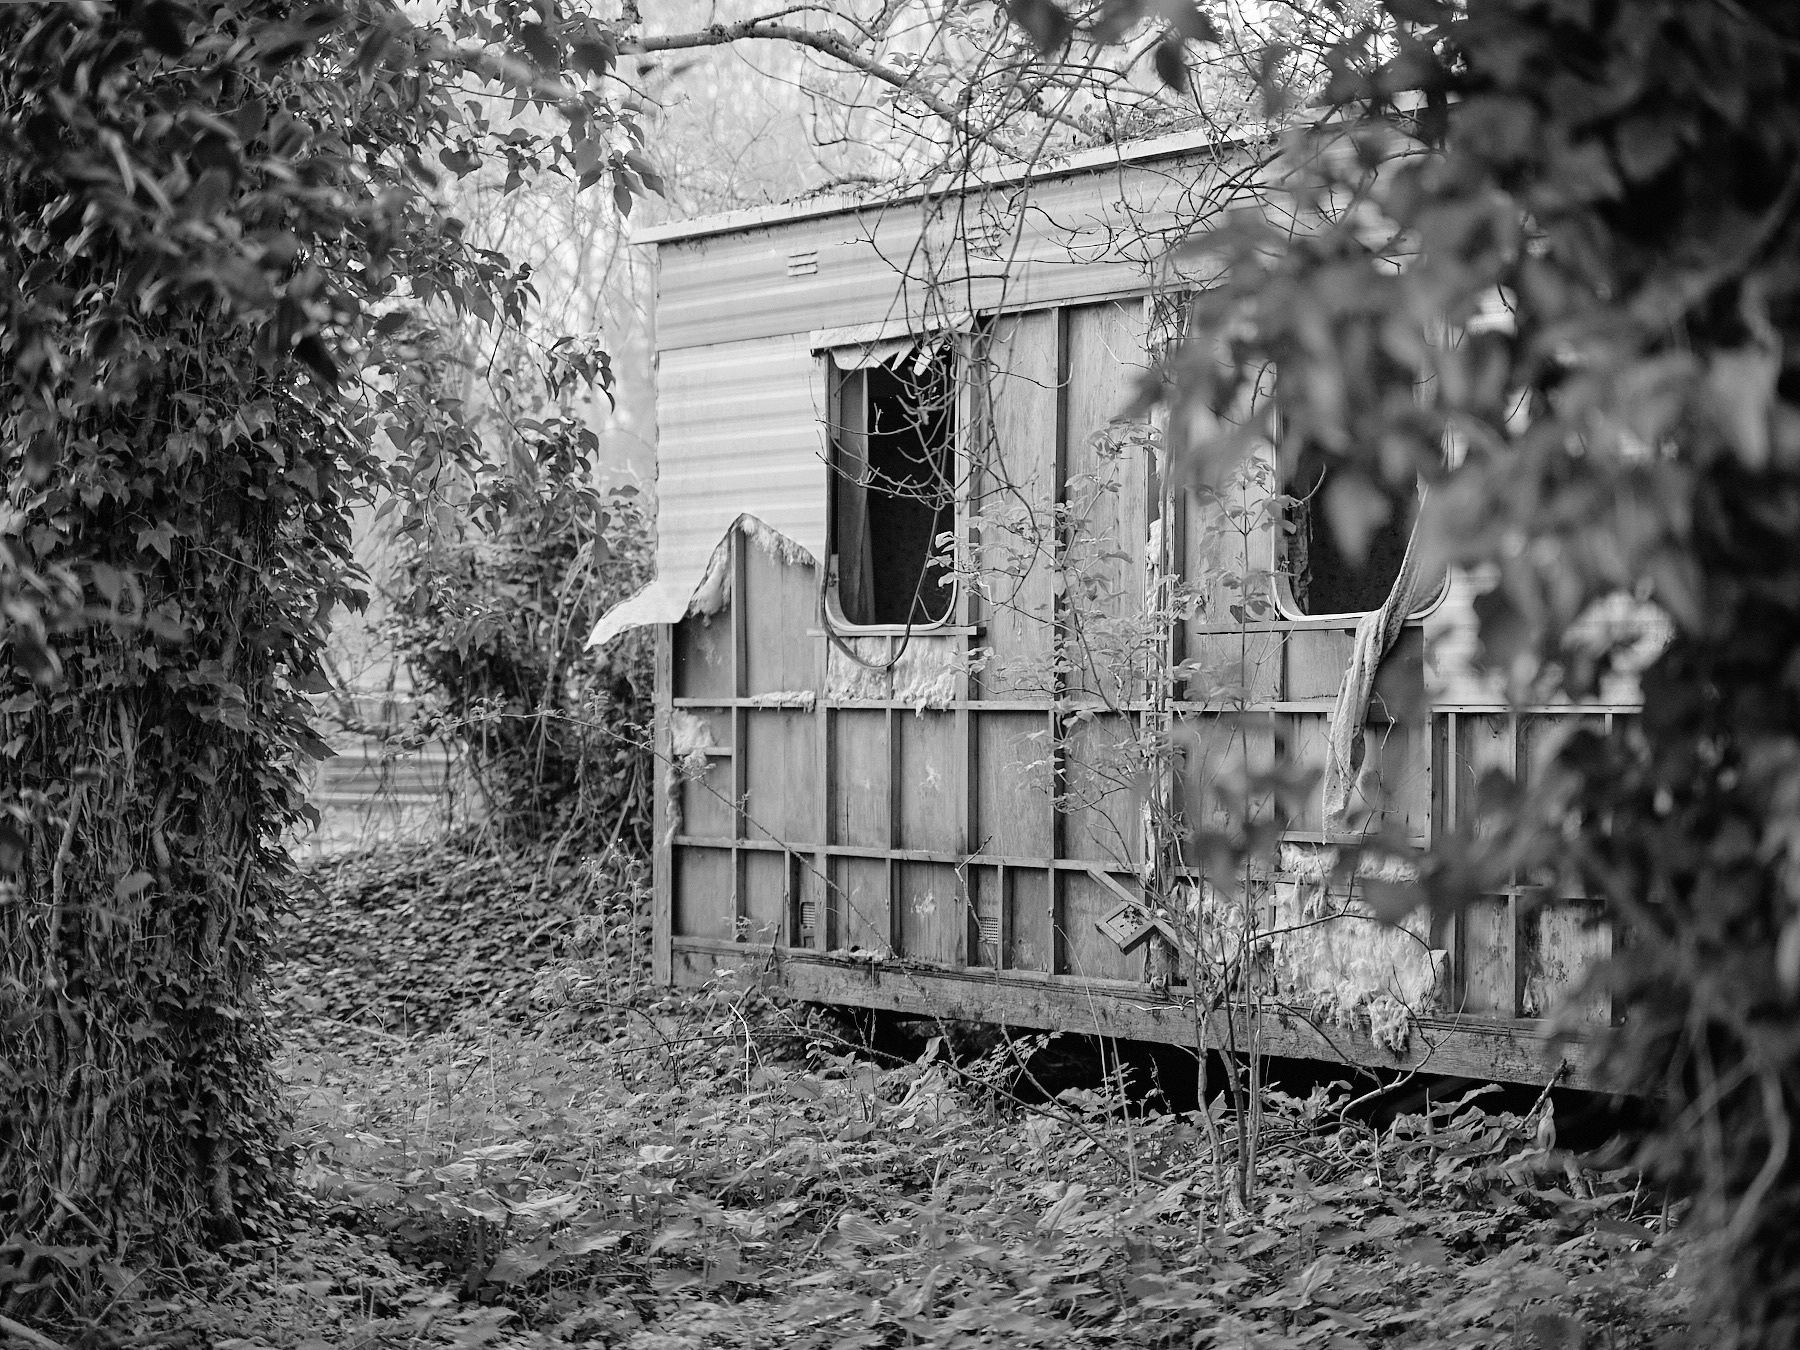
These photos are actually from back in 2020, as you probably remember it was a strange old time, but it a perfect opportunity to get on my bike and ride out to these greenhouses to investigate. I knew it was worth it, as soon as before I had even entered the main area I stumbled on this derelict static caravan, that looked like it hasn’t been occupied in a long old time.
Exploring the site was pretty easy, there is a main gate that’s locked, but you can just walk into the field from the road and head directly over. I always get a bit nervous exploring places like this, I have this feeling that any moment someone is going to tell me to clear off, so I’m always on edge. When I see the lengths that some urban explorers go to get into abandoned spaces, this is so tame in comparison, but I still get that feeling of apprehension.
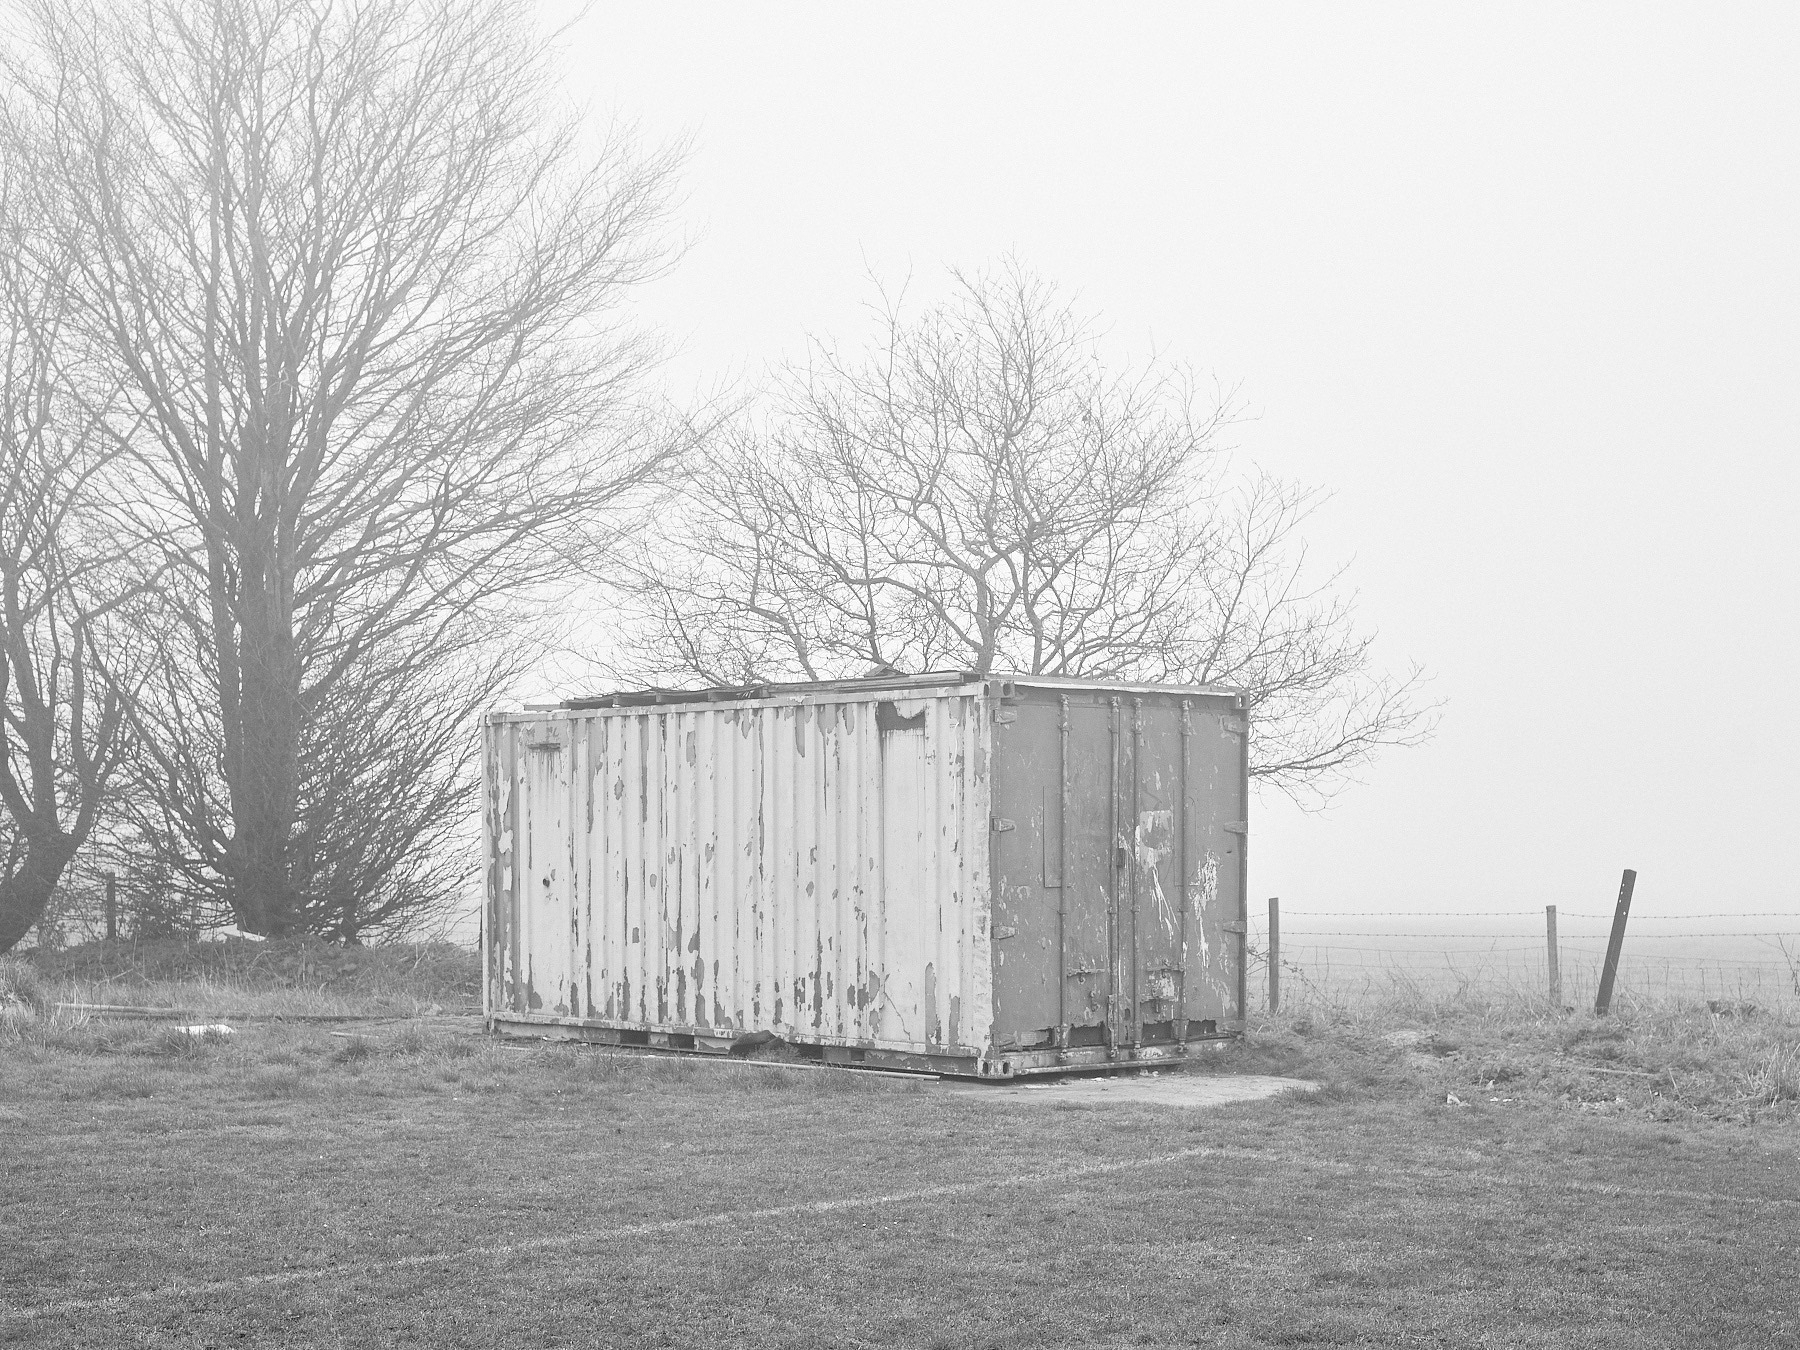
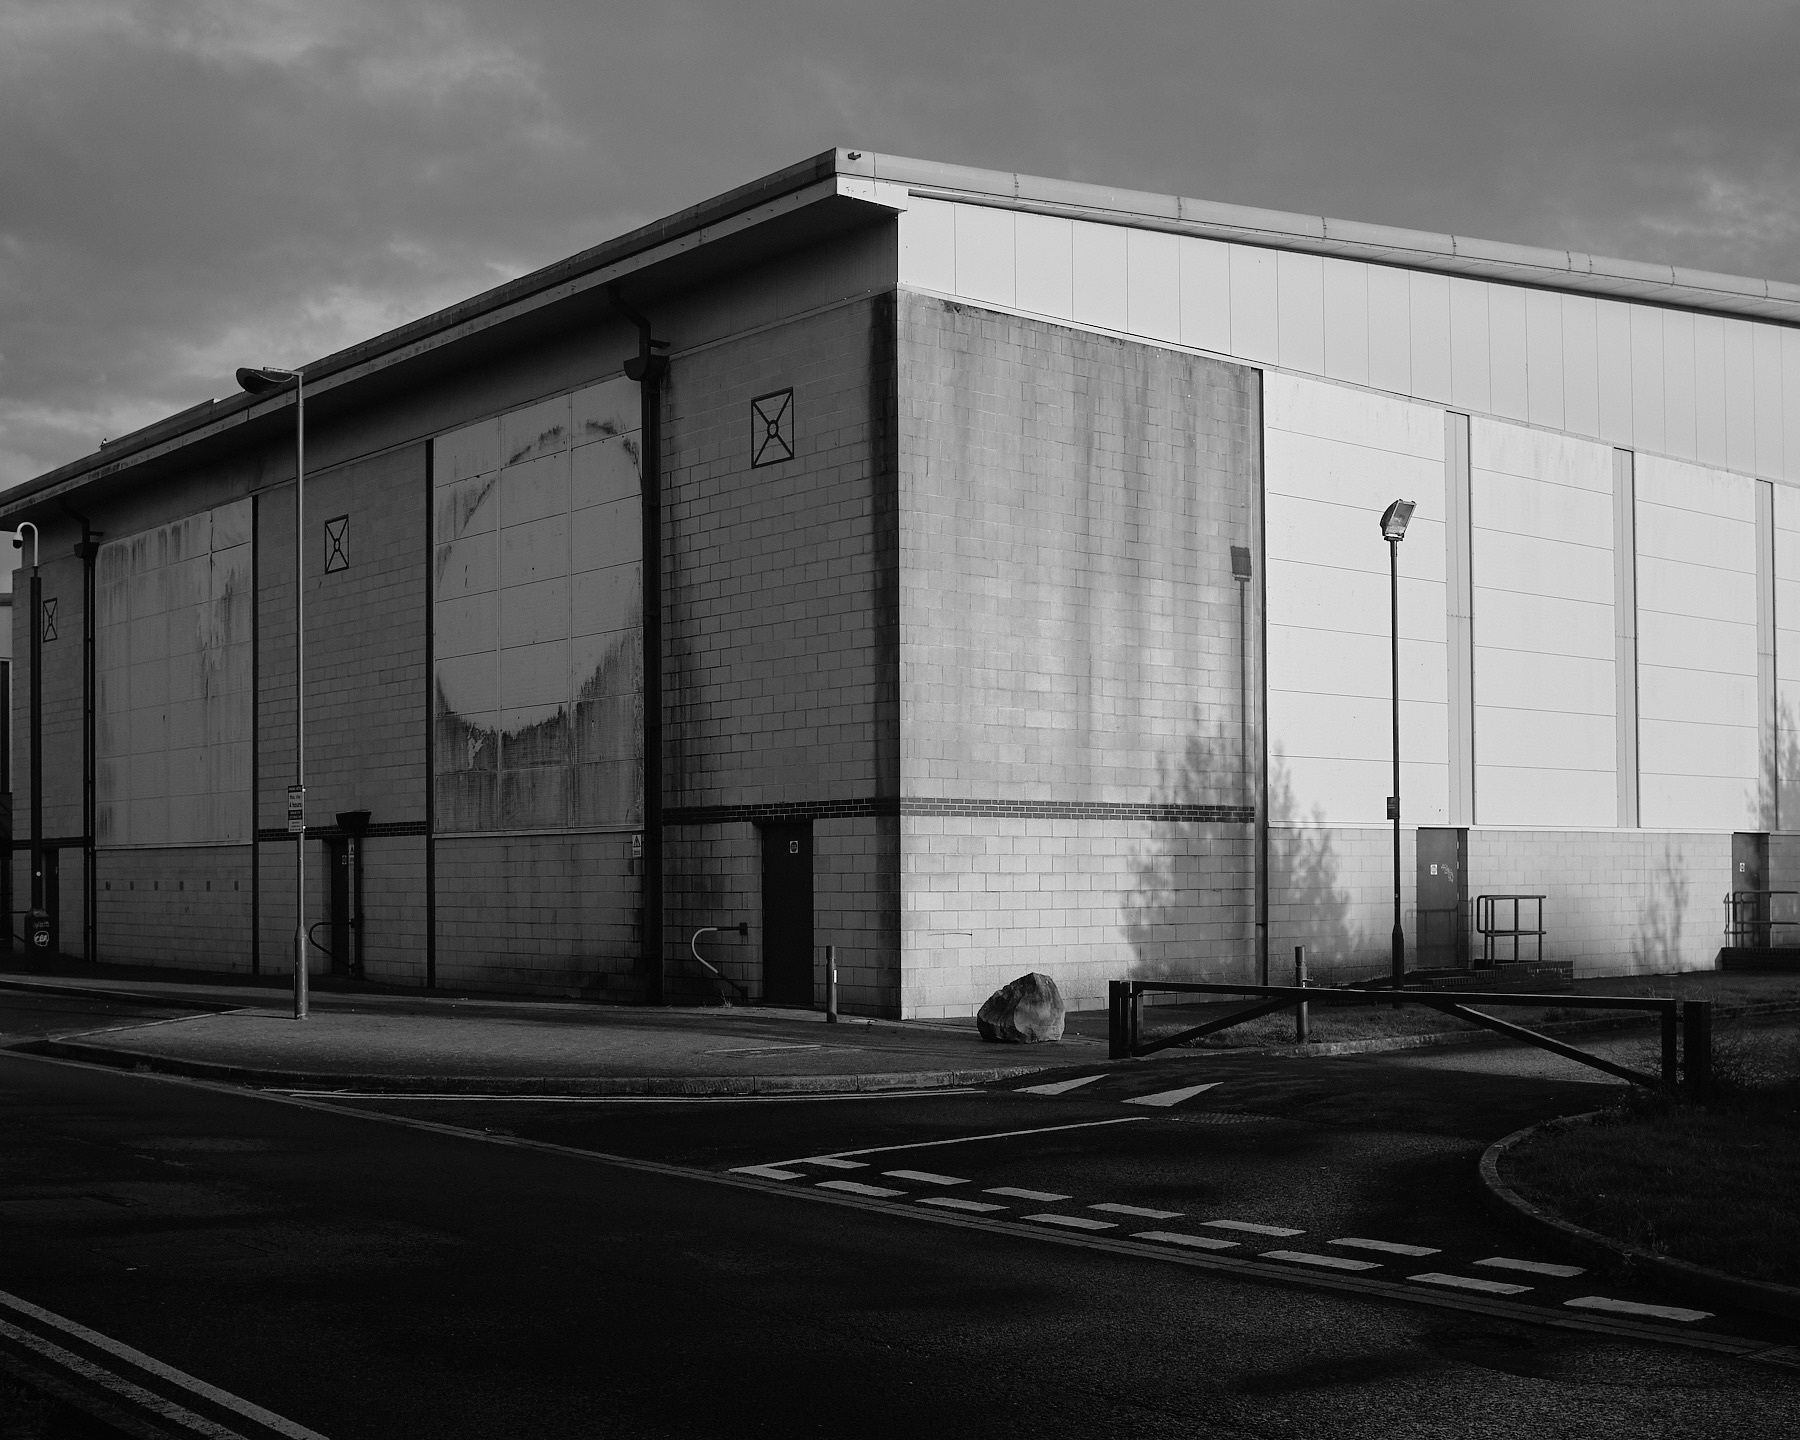
In my experience I’ve found that people do tend to get very suspicious when you are taking photos of things that aren’t obviously photogenic, and it can attract unwanted attention. Taking a photo of a sunset, fine. Taking a photo of a rusted out abandoned storage unit, instant suspicion. Another time I was taking a few photos of an abandoned old trading estate, , and this guy pulled over in his car and asked what I was up to, claiming he knew with the landlord. Which in turn made me suspicious, as I geniunely don’t understand why he would care, and then I thought, well what is this guy up to?
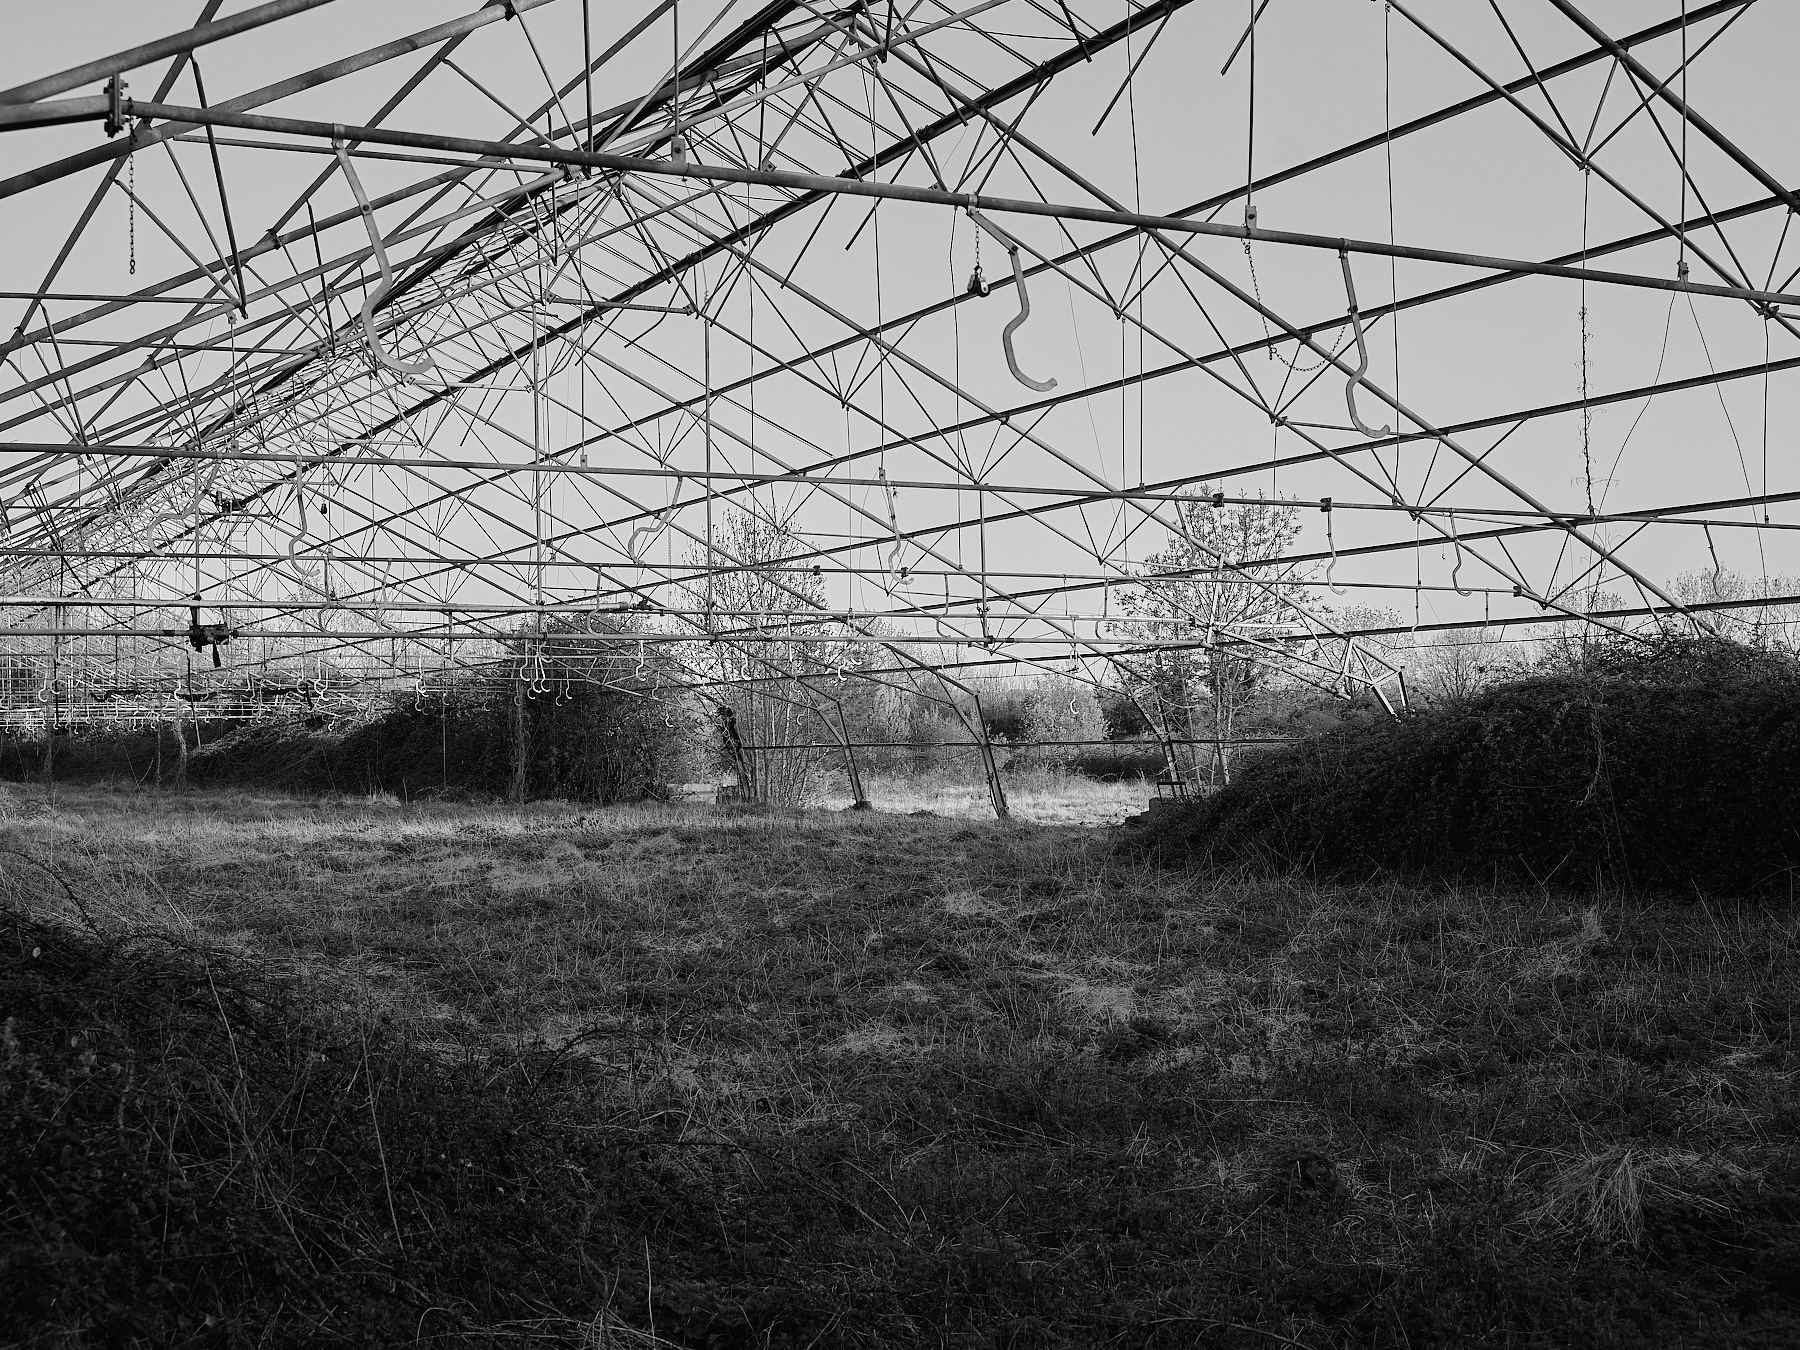
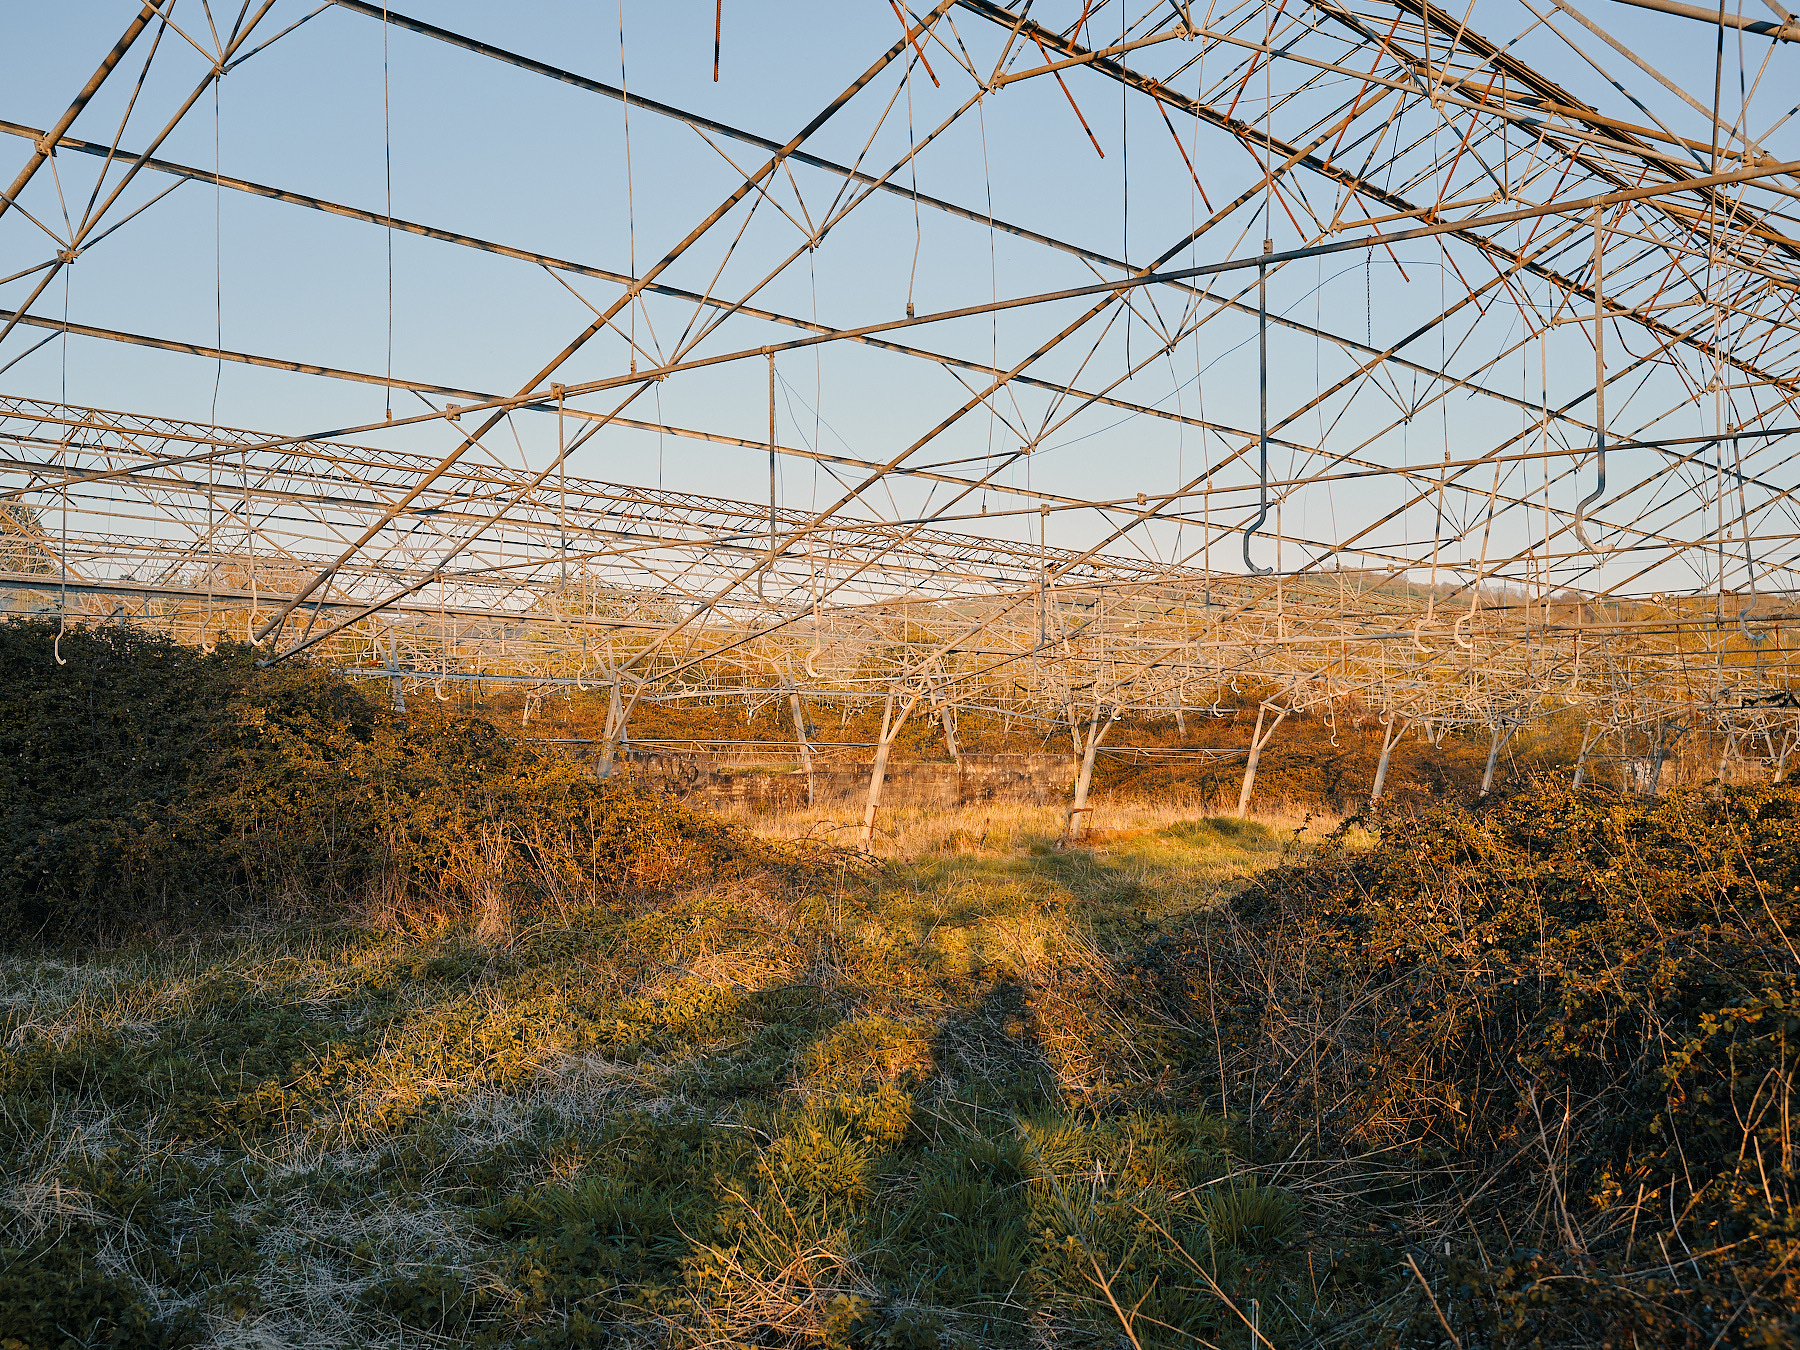
Anyway these greenhouses are in the middle of nowhere, and once you are in, no one would even know you are there unless you are up there climbing up on the roof.
I visited a couple of times, I made sure to head back during golden hour, as I knew that would look good (I think anything can look good shot at golden hour) and didn’t really think about it again for a couple years until I was looking back at some of the images taken around sunset. I’d started using more flash by then, and had an urge to return with the flash, and see what kind of results I can get. So please come back for part two, if that sounds interesting.
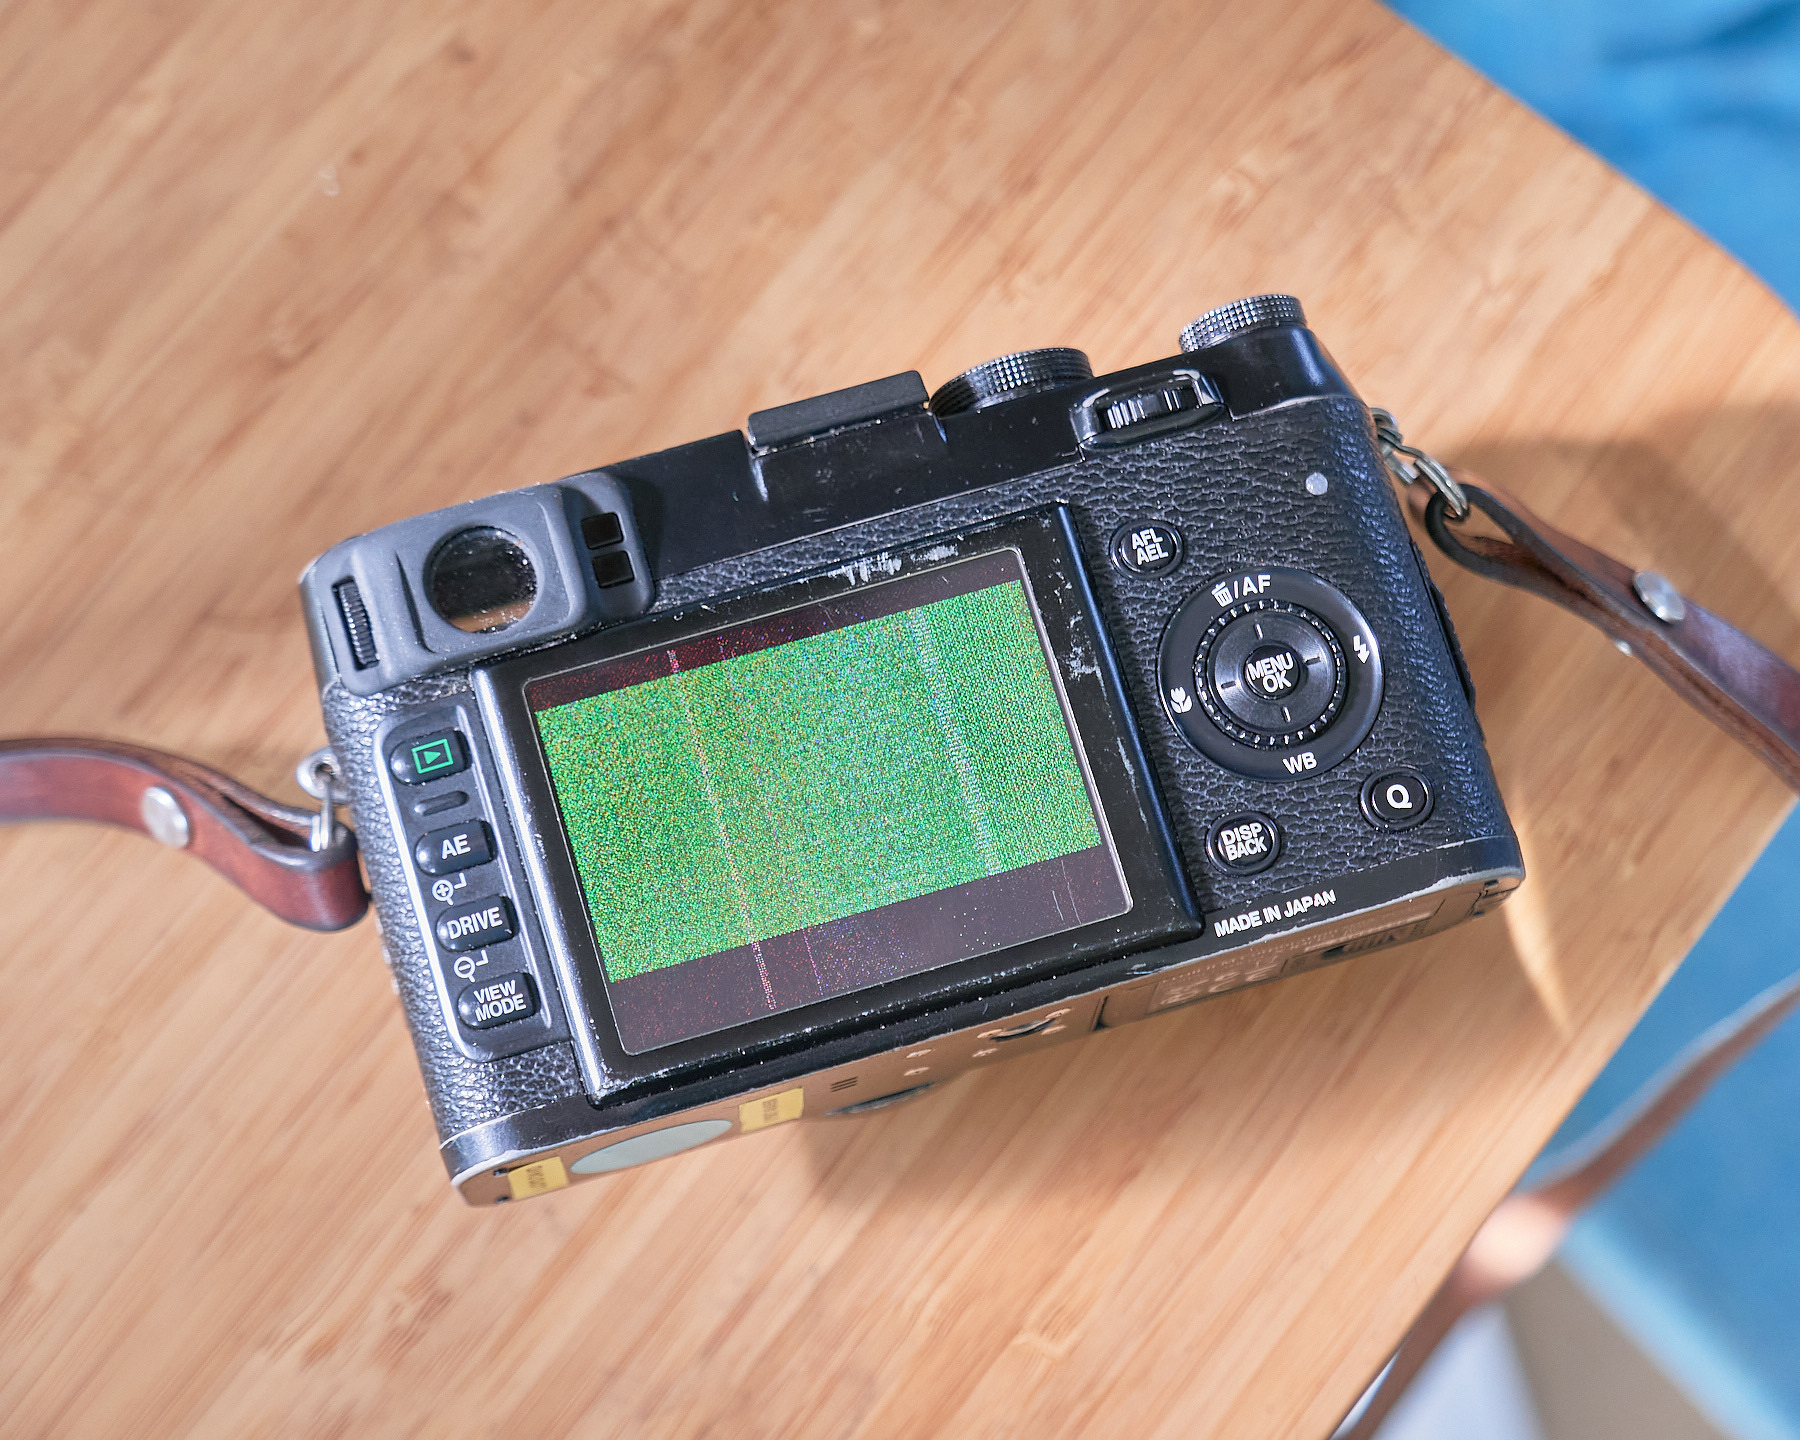
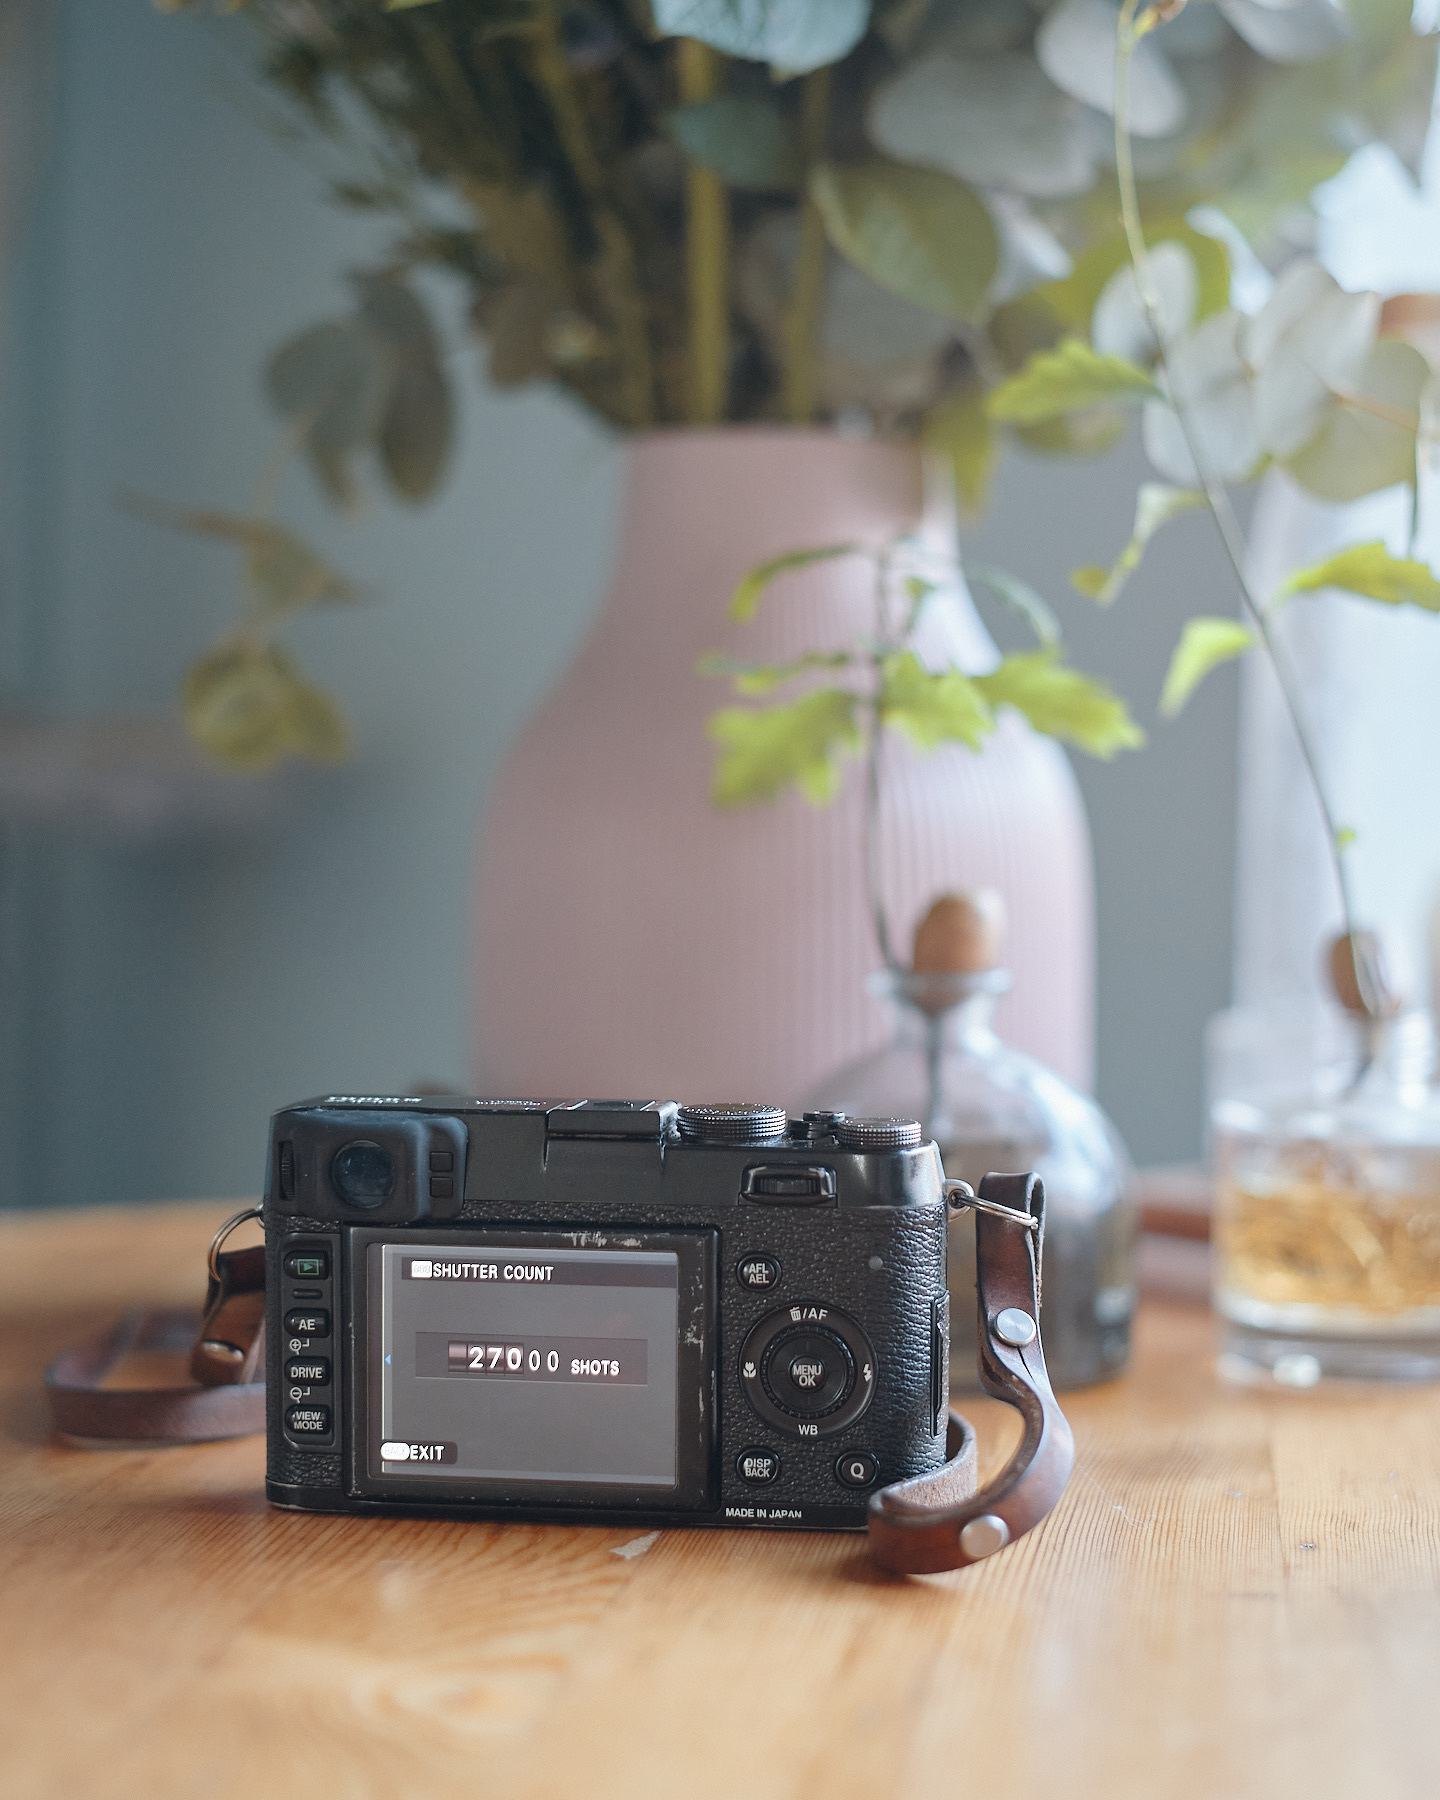
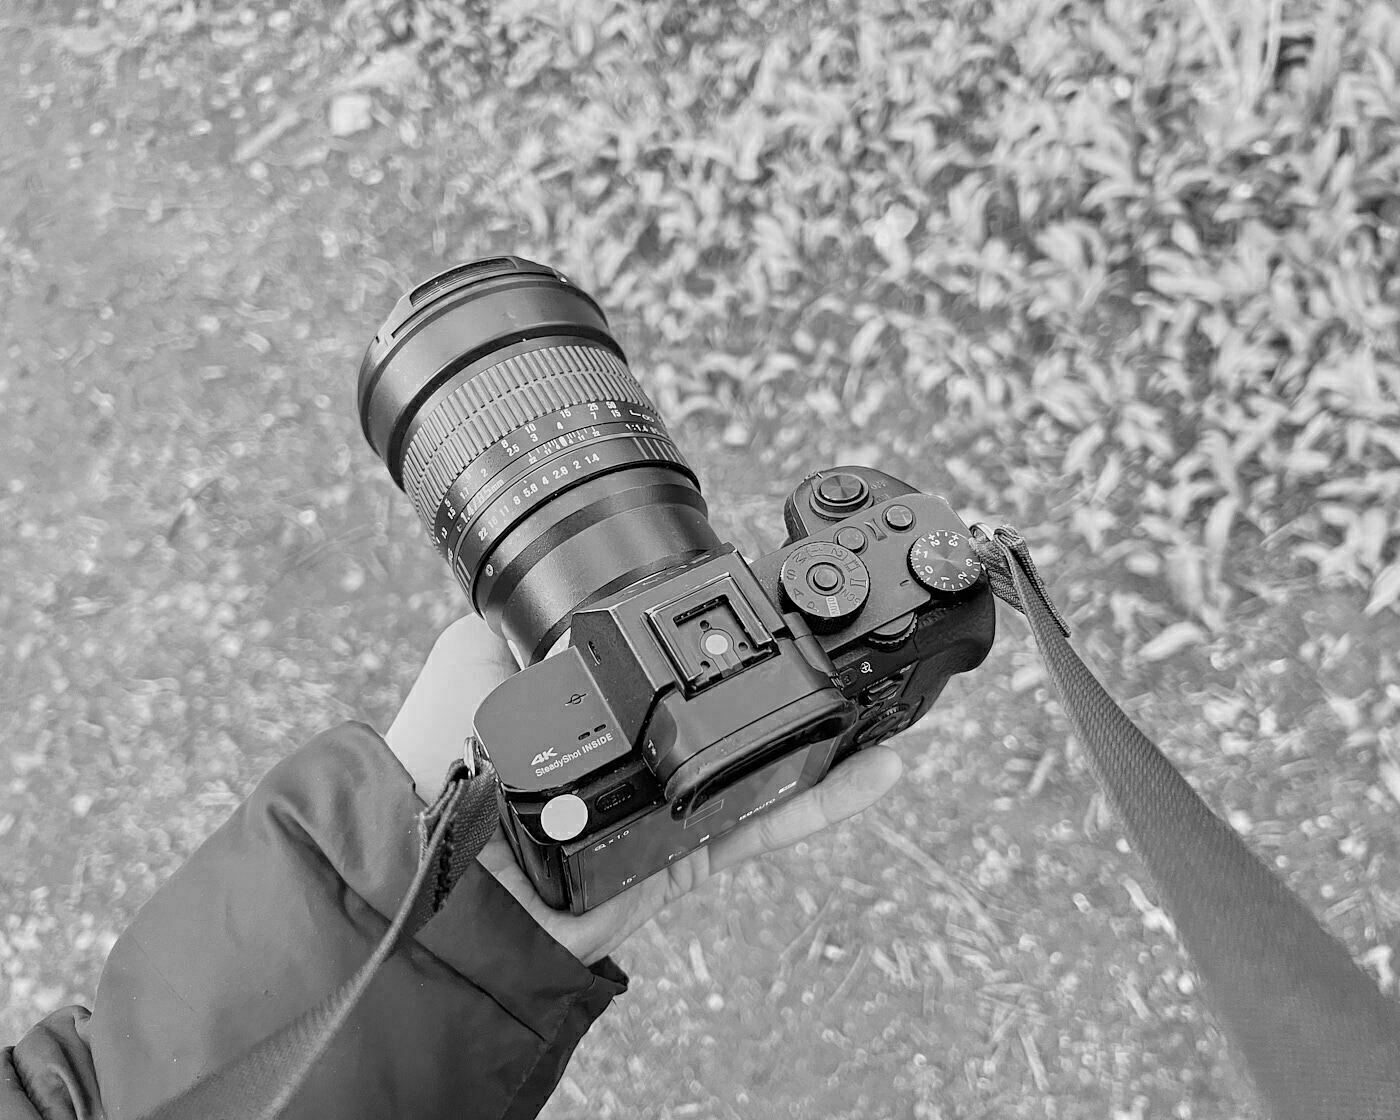
I’ve had this camera for nearly 10 years now, in that time it’s been repaired twice, and unfortunately it’s now broken again. I’m struggling to justify sending it off to be repaired another time. There is a view that cameras are tools, there to do a job, and then be replaced and upgraded as necessary, but not for me. I always get ridiculously attached to my cameras, I’ve only ever sold two cameras, and I regret them both. As you can probably already tell, I hold a real sentimental attachment to this camera. Especially as this is the camera I bought when I started getting really immersed in photography.
It was shortly after I moved to Bristol, which was an exciting time. I was in a new city, and just having fun going out and exploring and shooting loads of photos. Learning through trial and error, making mistakes, and shooting loads of photos with this camera.
I also took the first photo that I was really proud of with this camera. By then I had started to develop a little more knowledge and an idea of what I wanted from the finished photo. I had started using a tripod, and was slowing down and being a little bit more deliberate with my process.
It’s very old (for a digital camera) and it’s pretty delicate (as you can tell from the amount of previous repairs). I was rushing, dropped my bag on the floor heard a clunk, and I immediately knew what had happened. I had that sinking feeling in my stomach as I took it out to test it, and as soon as it powered up (a good sign) the screen was weird and glitchy, none of the buttons work, and I had to remove the battery completely to turn it off. The fact it still turns on means it’s not dead dead, but it’s certainly not looking good.
For now it’s safely tucked away, I’m a hoarder so there is no way I’ll ever throw it out, even if it is definitely broken. I have this optimistic conviction that if I leave it long enough, one day I’ll put in a fresh battery and it will start working again. It sounds far fetched, but something similar has happened before.
I was really hoping to get the shutter count higher than this one day, but inevitably something else broke first.
This is very similar to a blog post I have already done, but it’s a good excuse to share some of favourite photos taken with this camera. It’s very on brand that one of the last photos I ever took with the camera was with a burnt out motorbike, which feels very appropriate, incidentally the last photo I ever took with it was of a goat, but they can’t all be bangers.
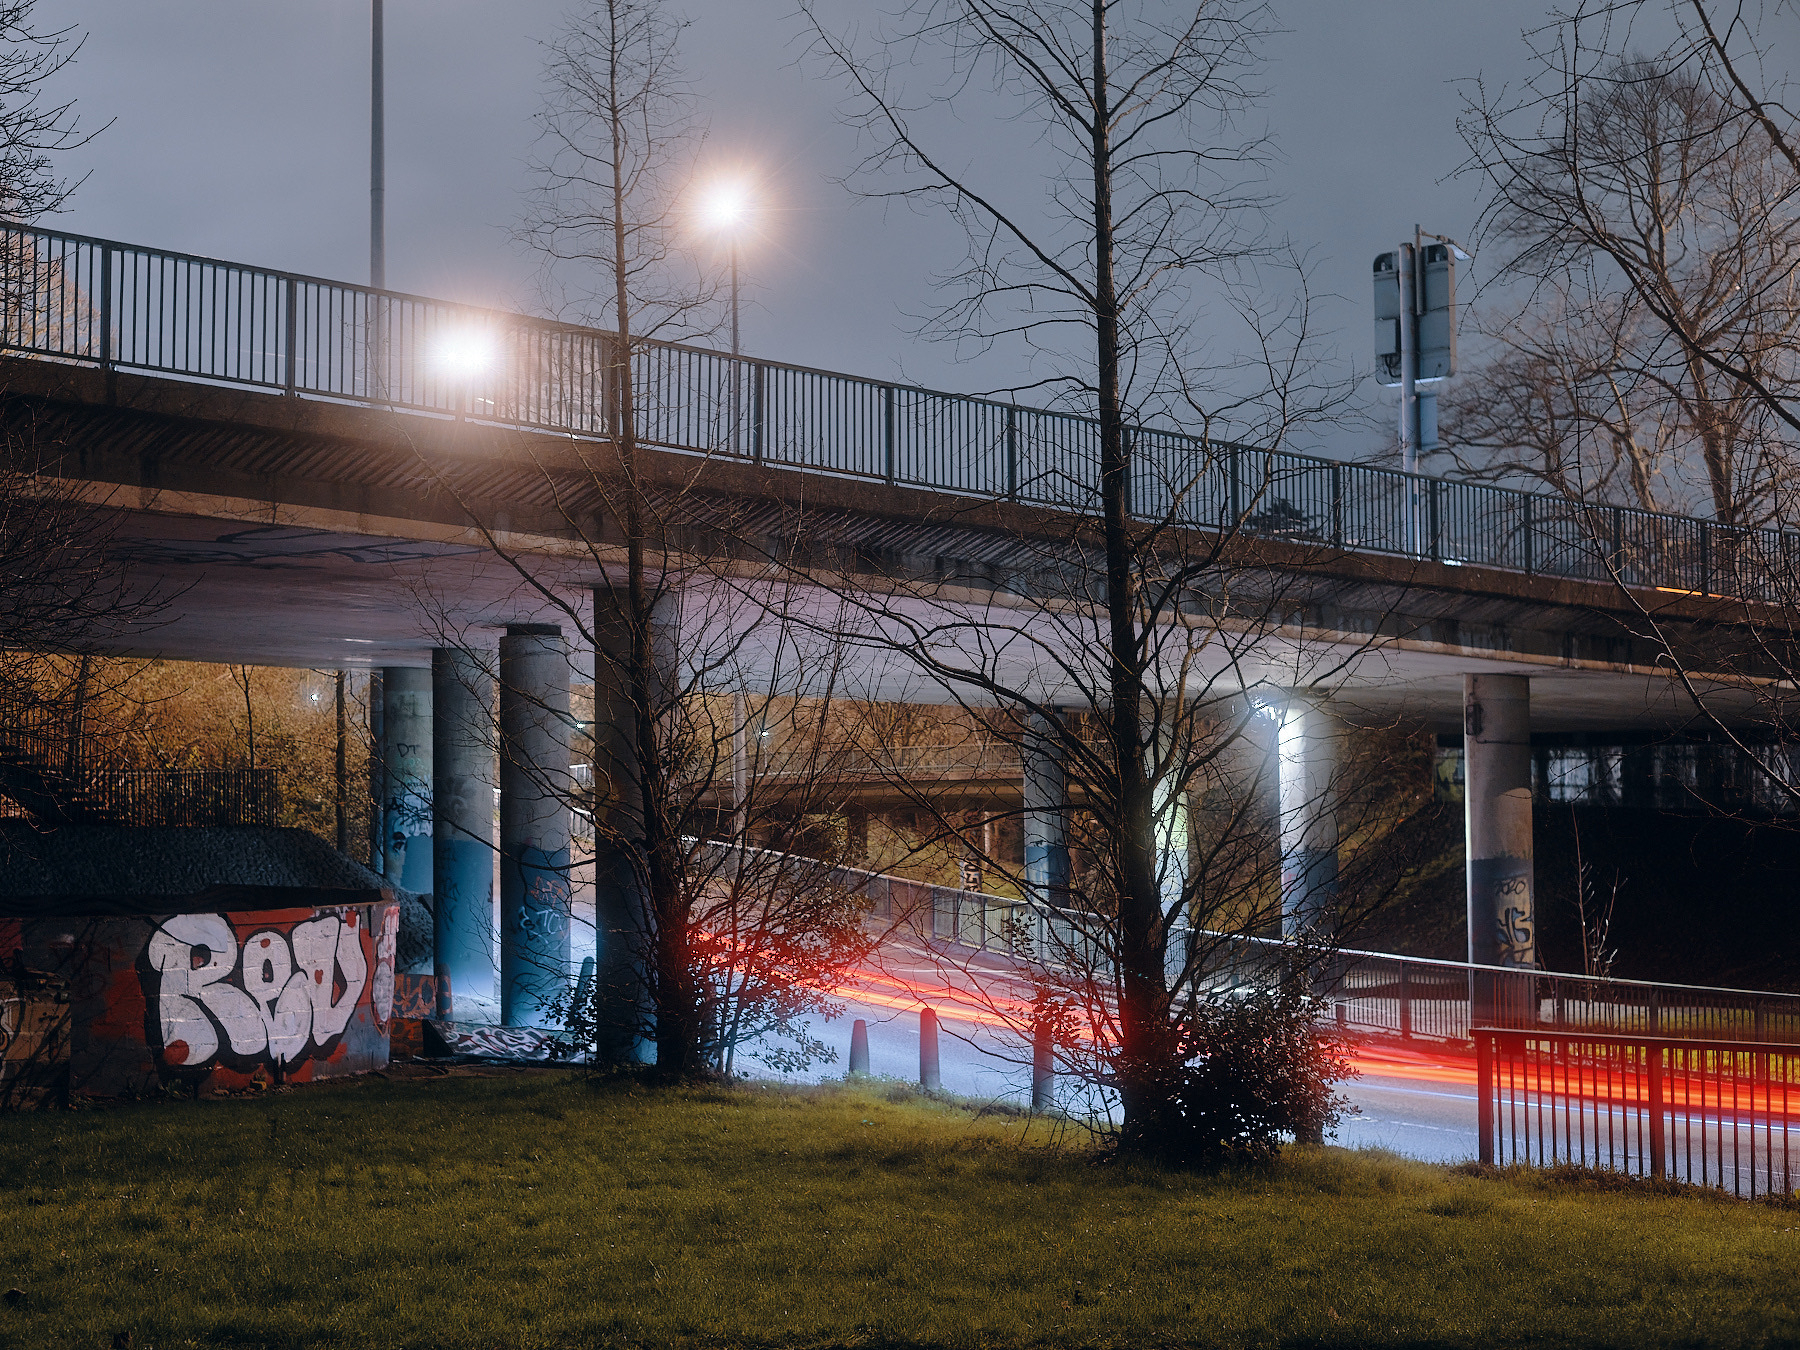
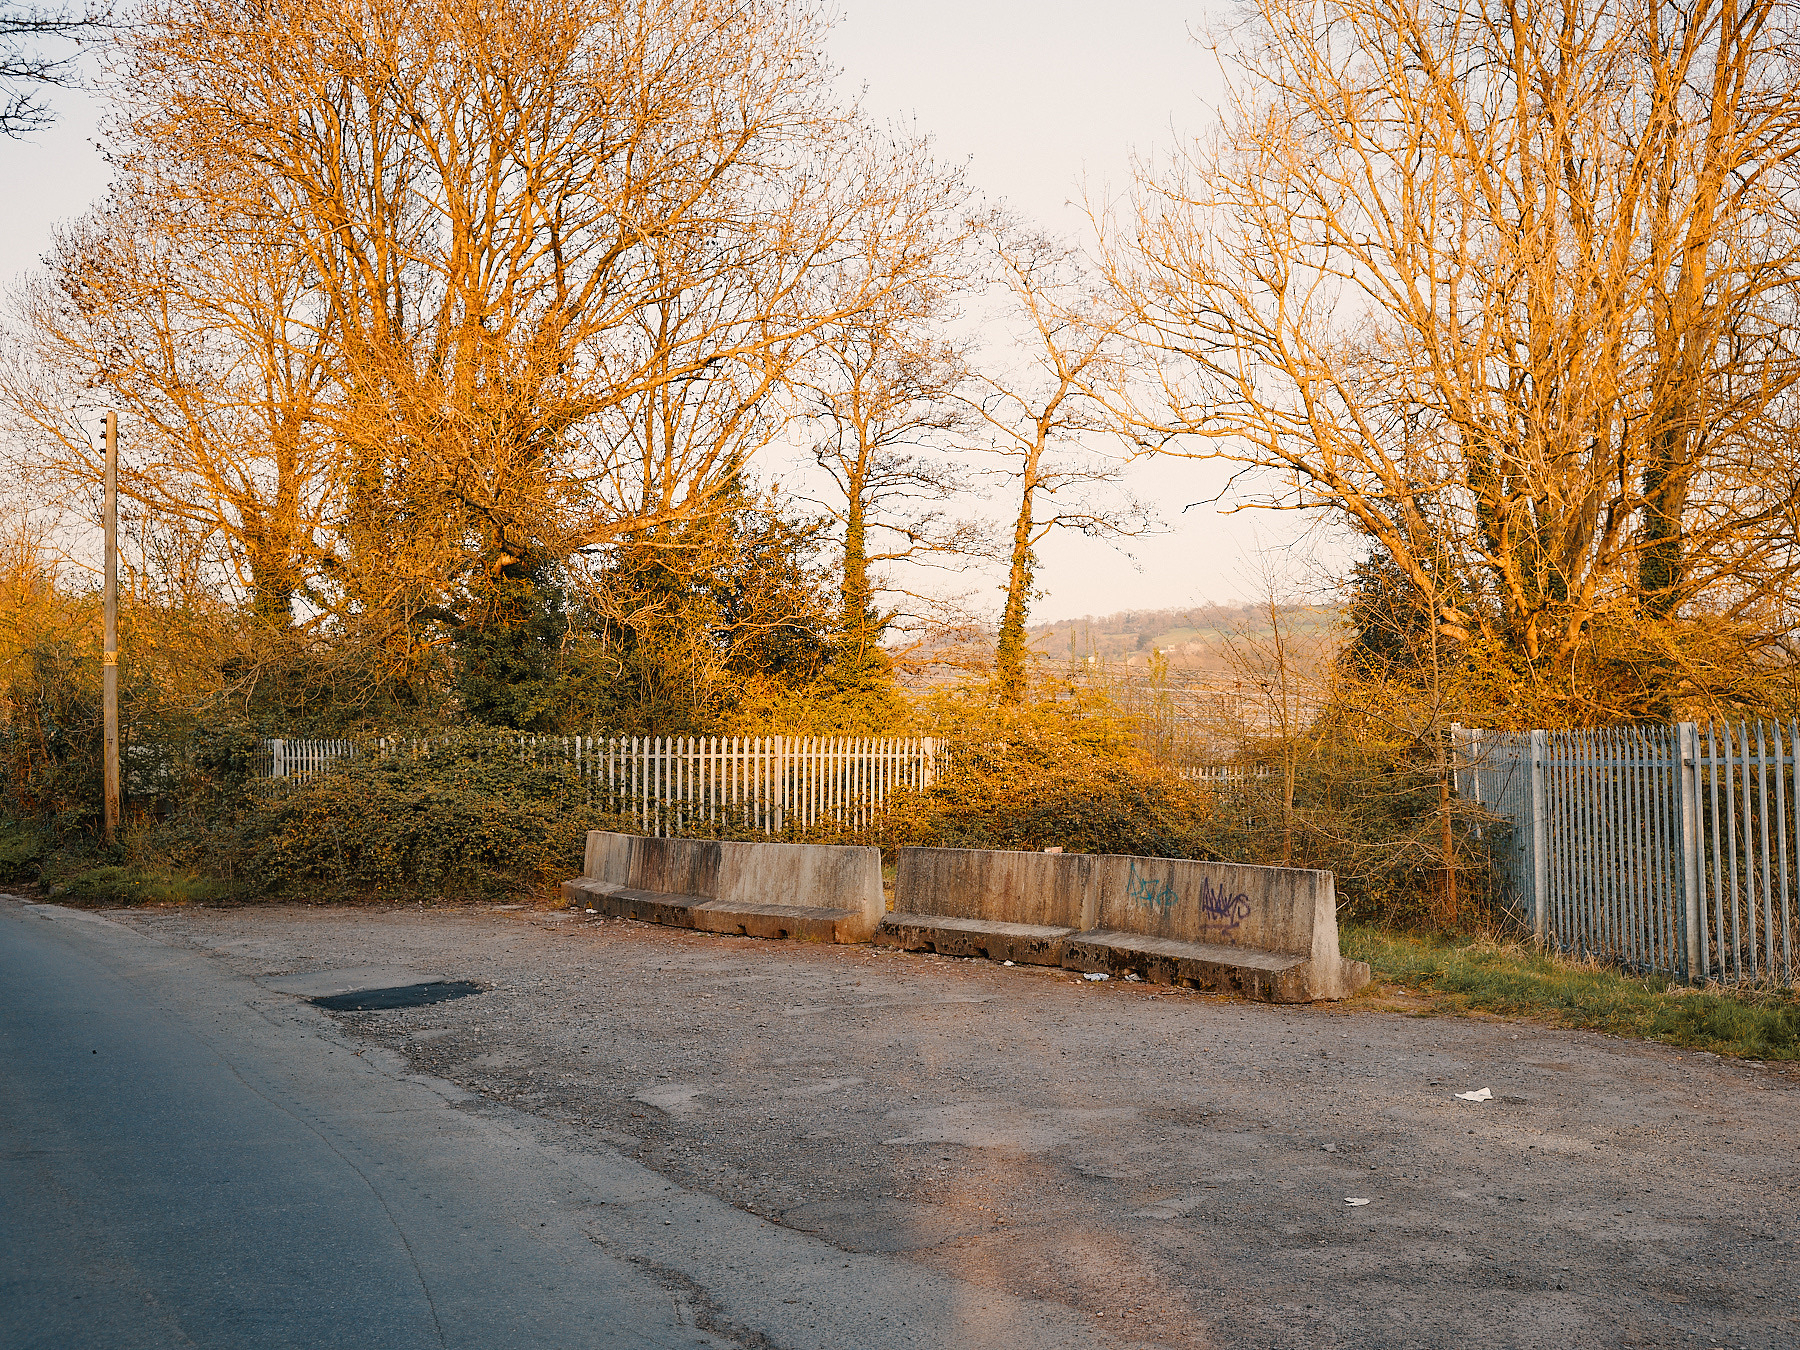
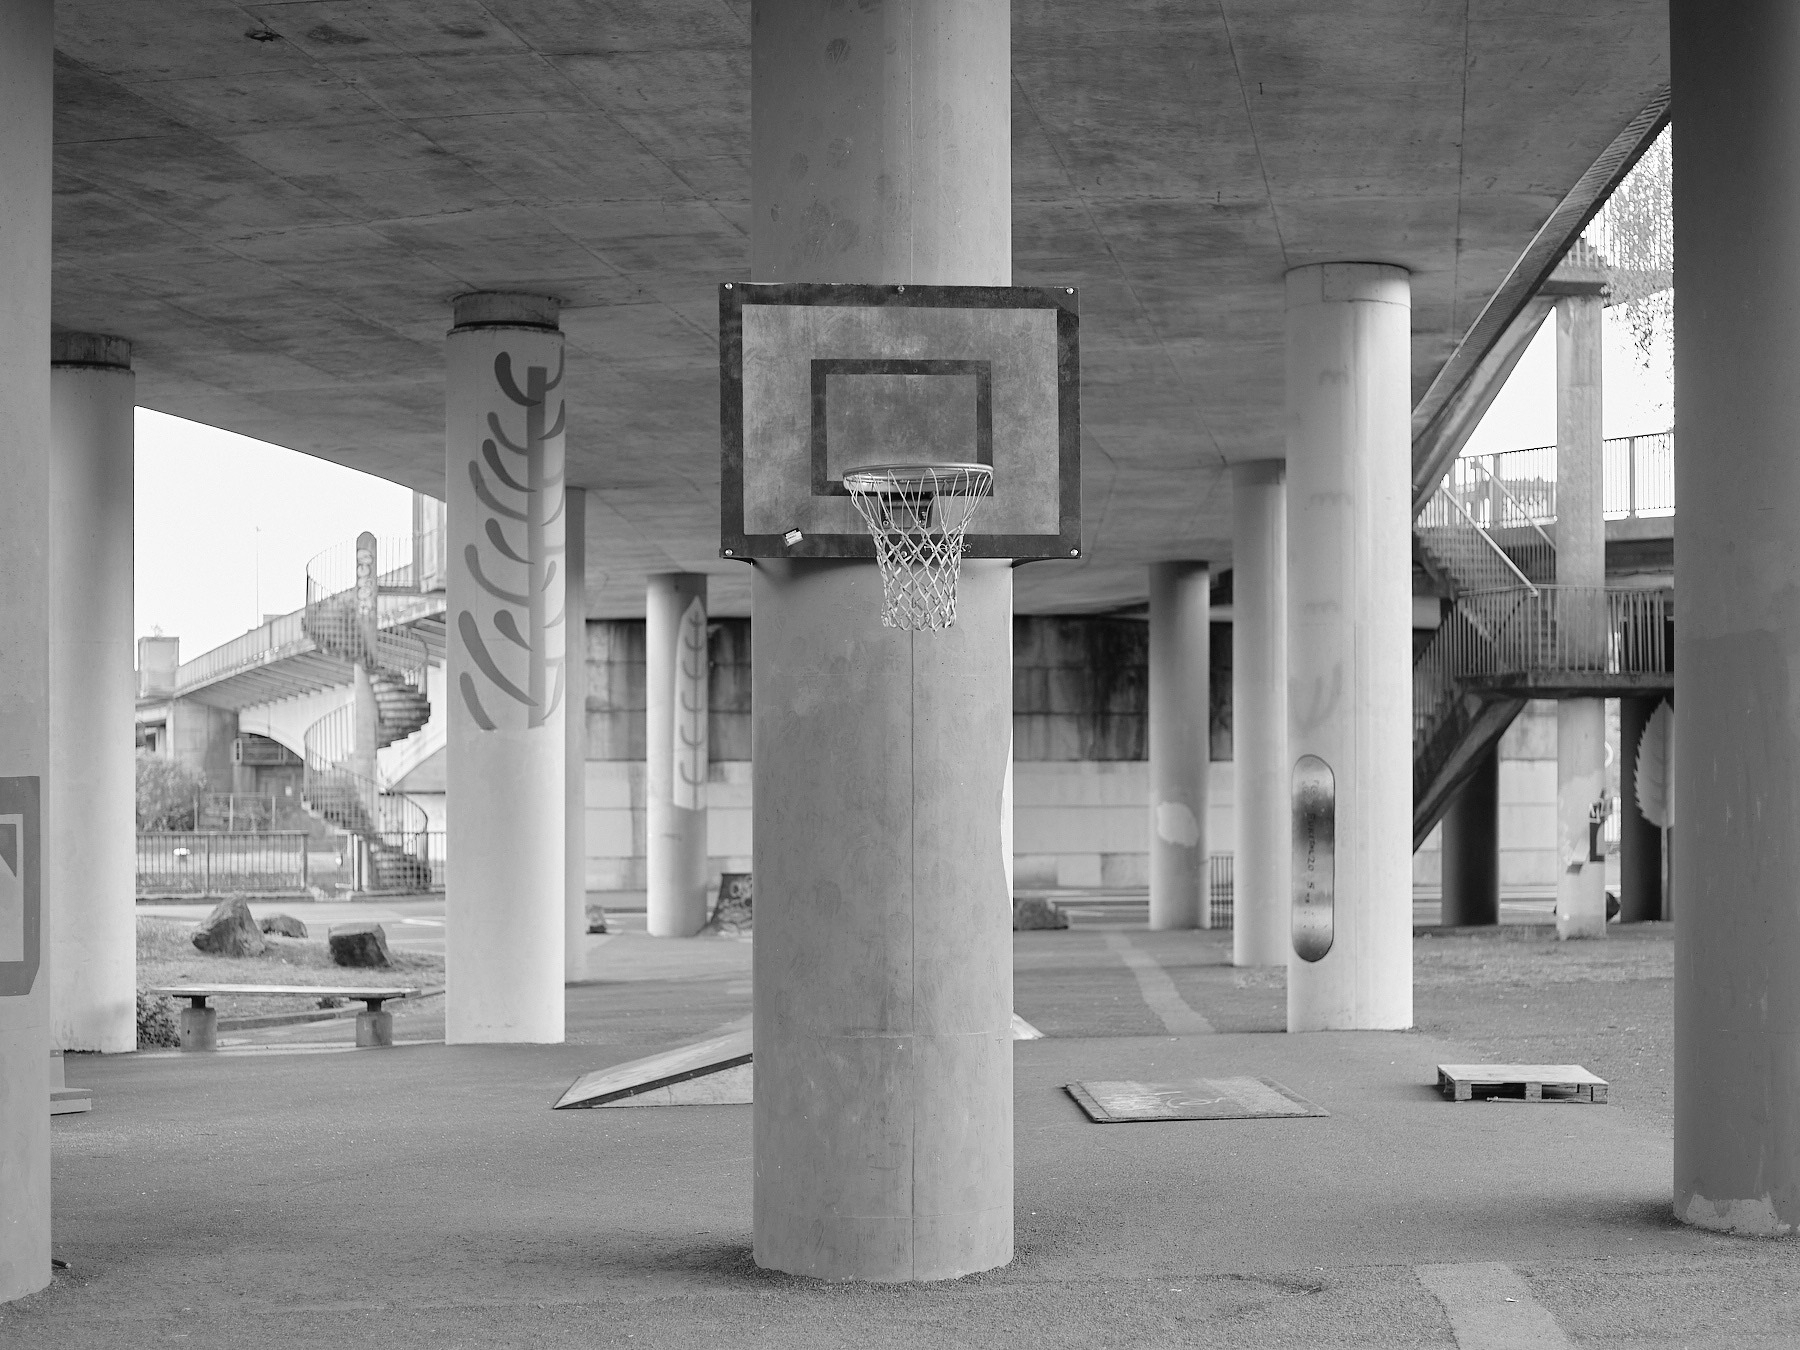
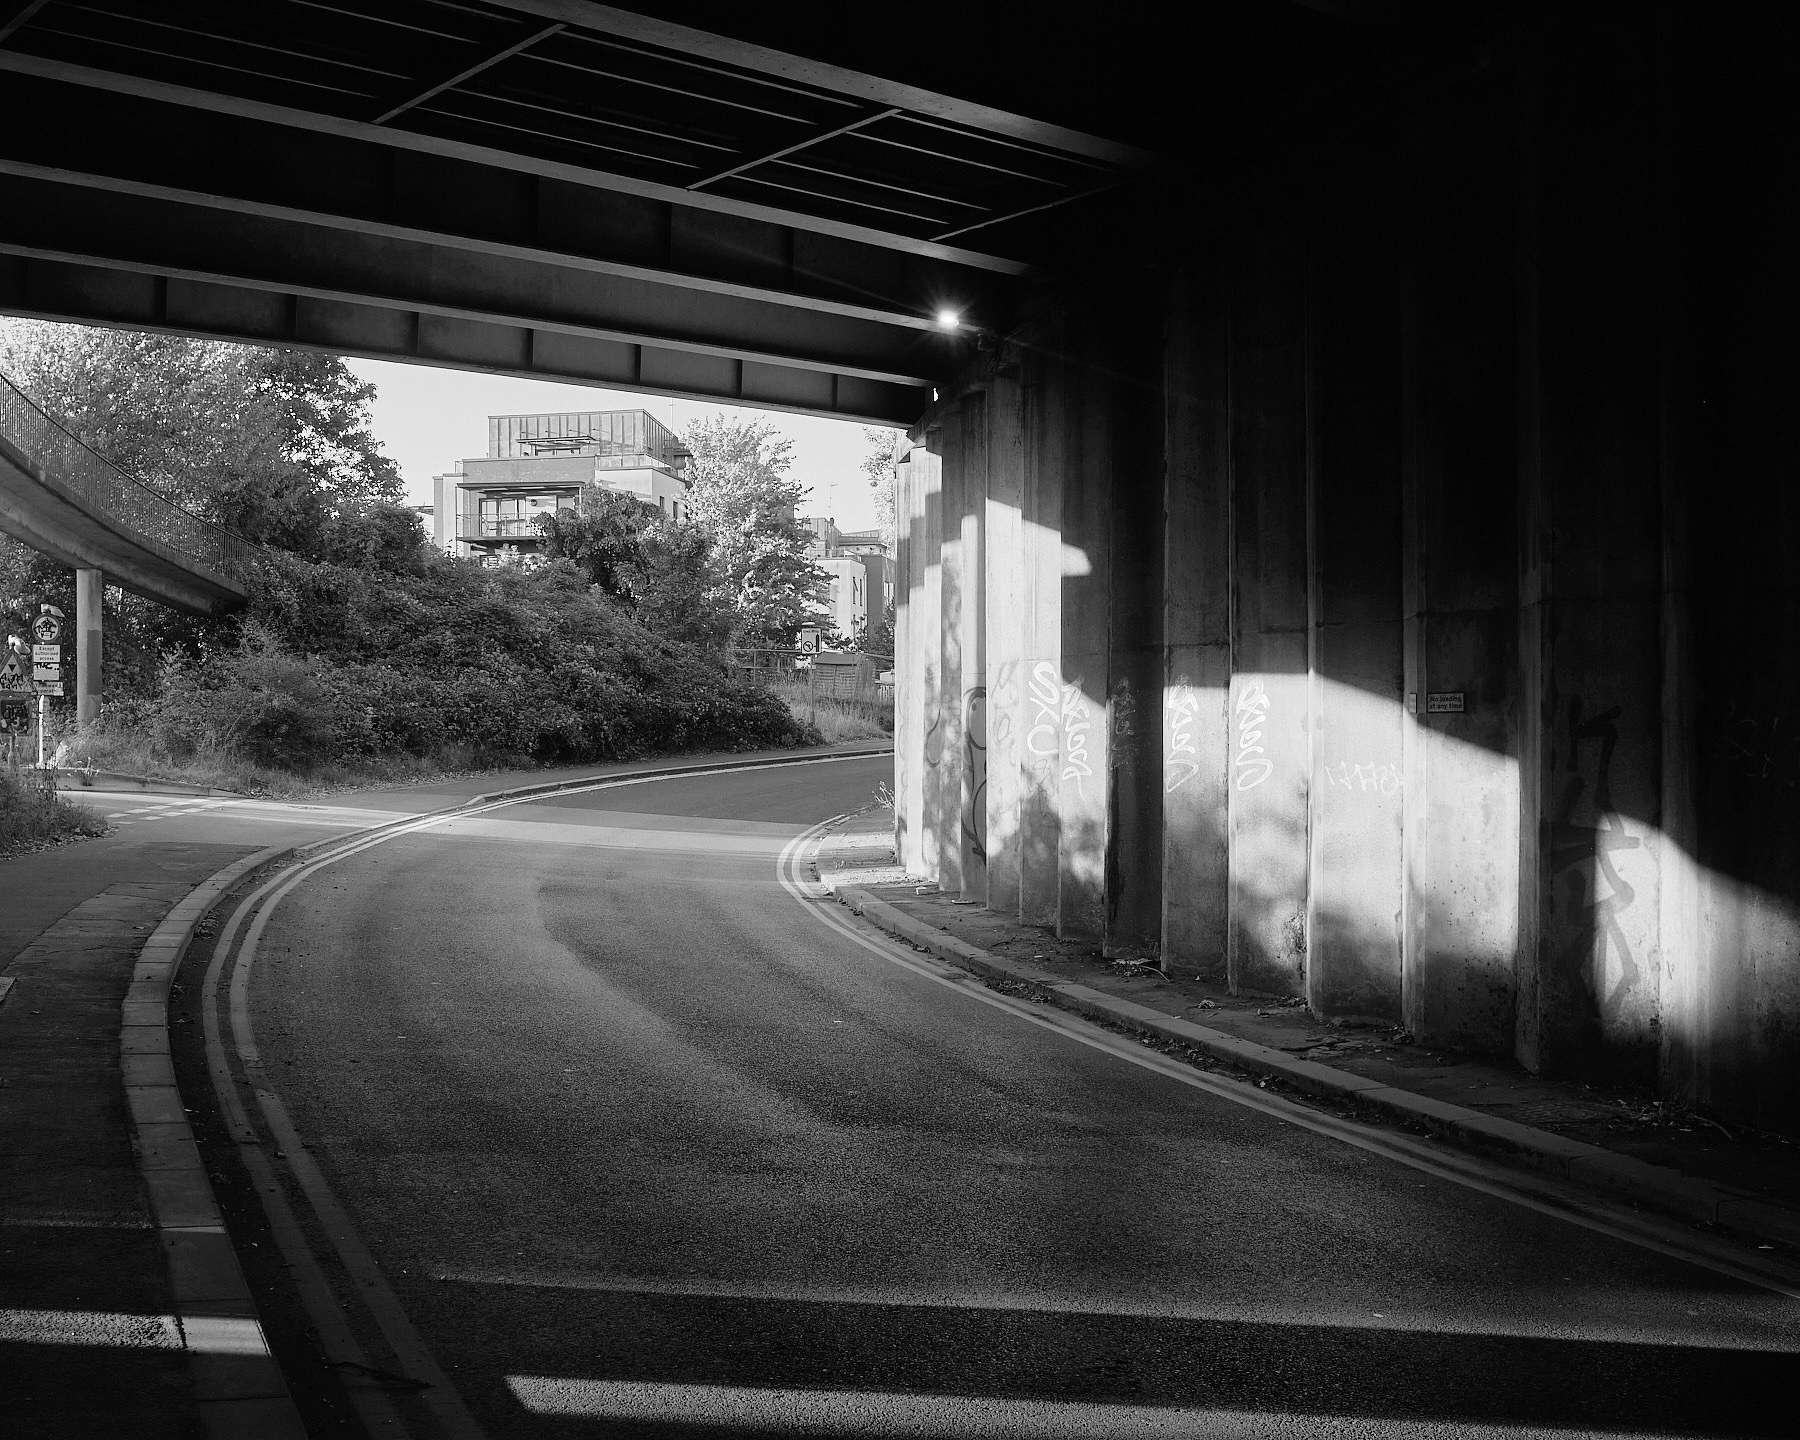
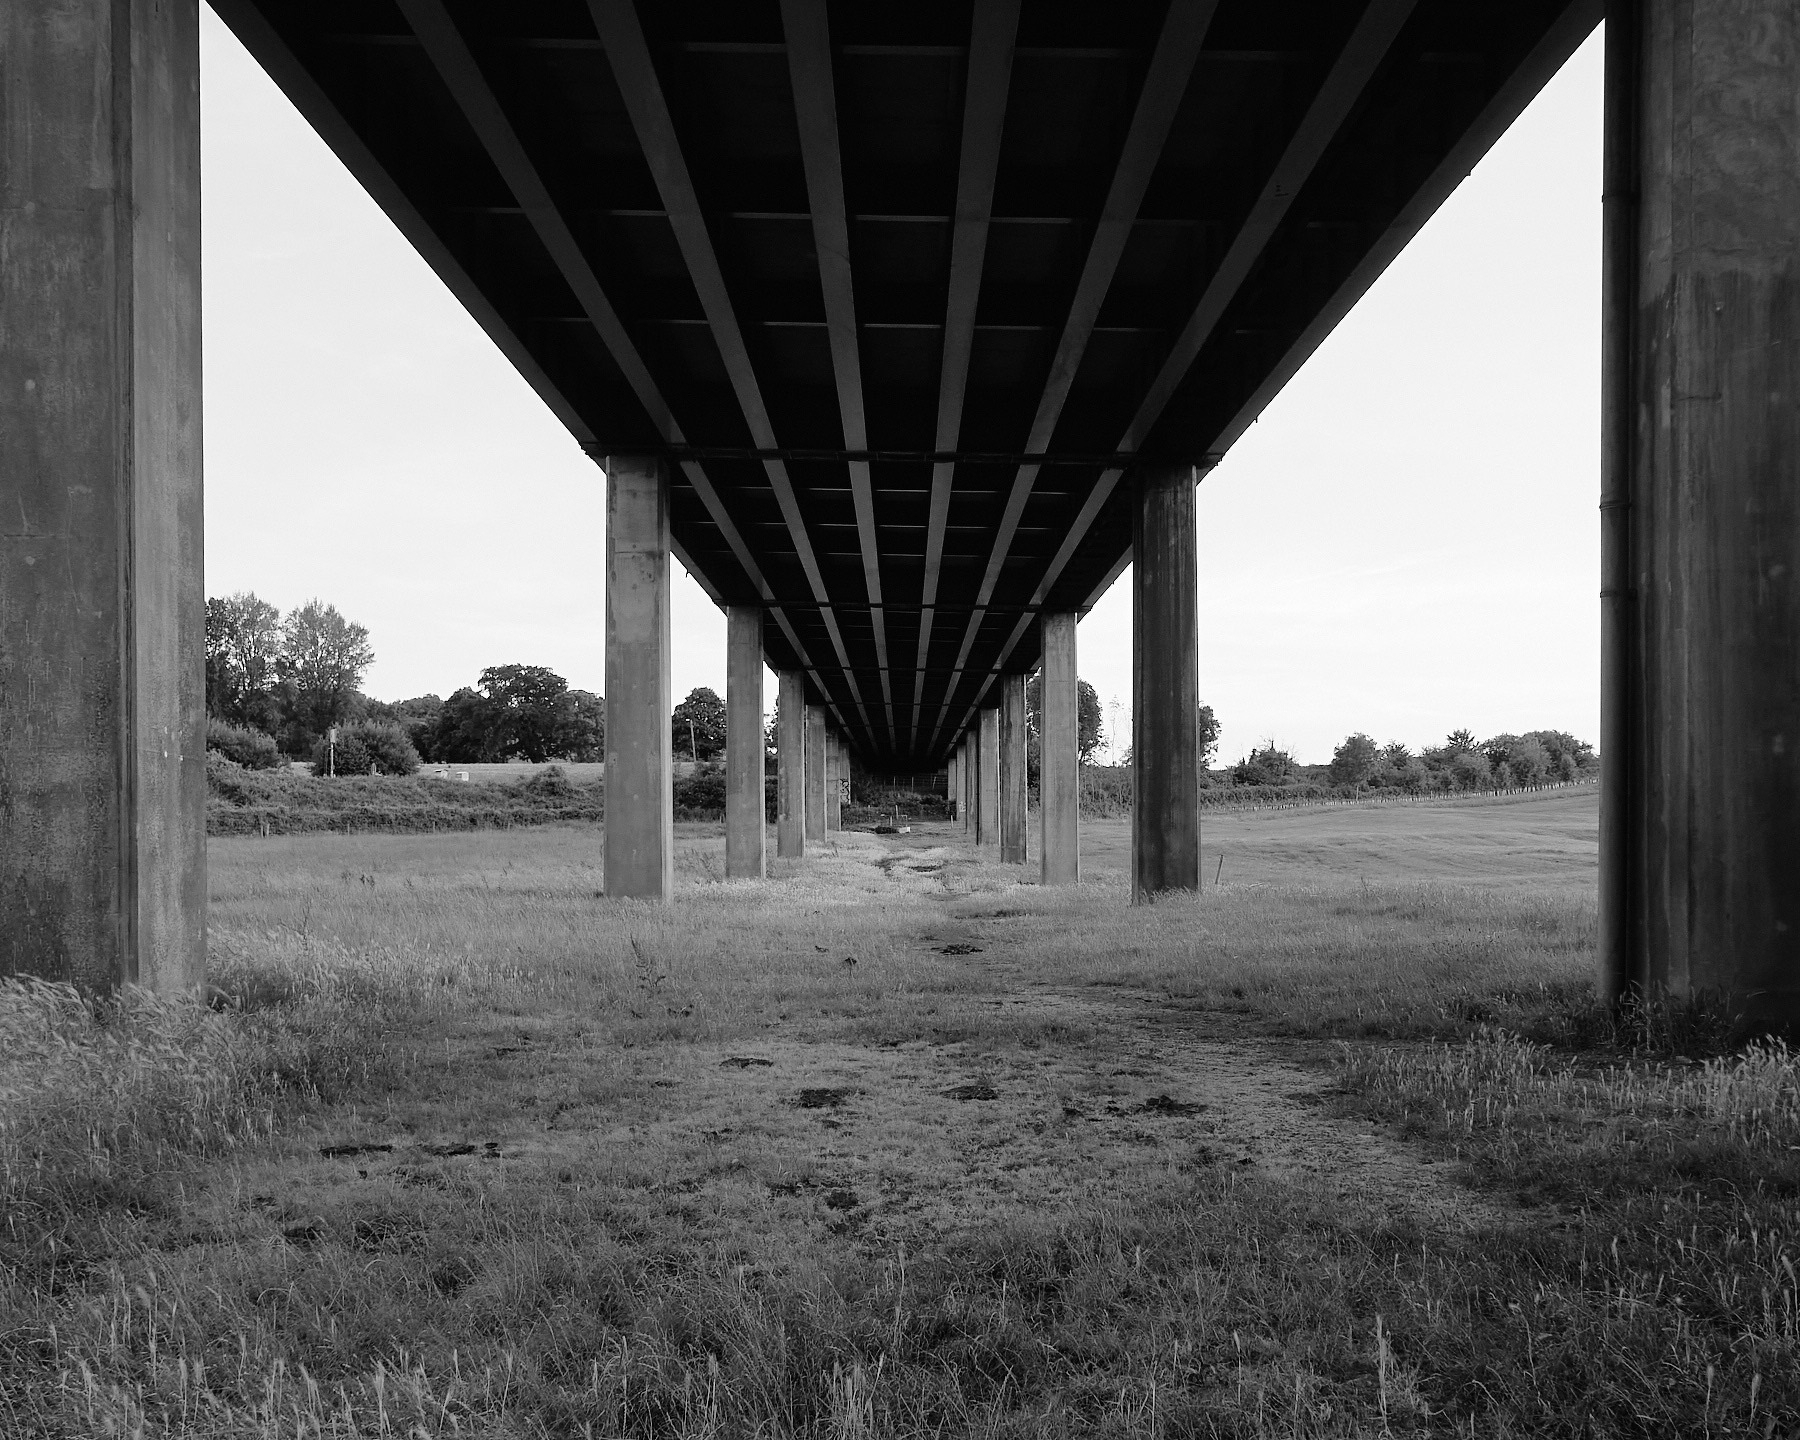
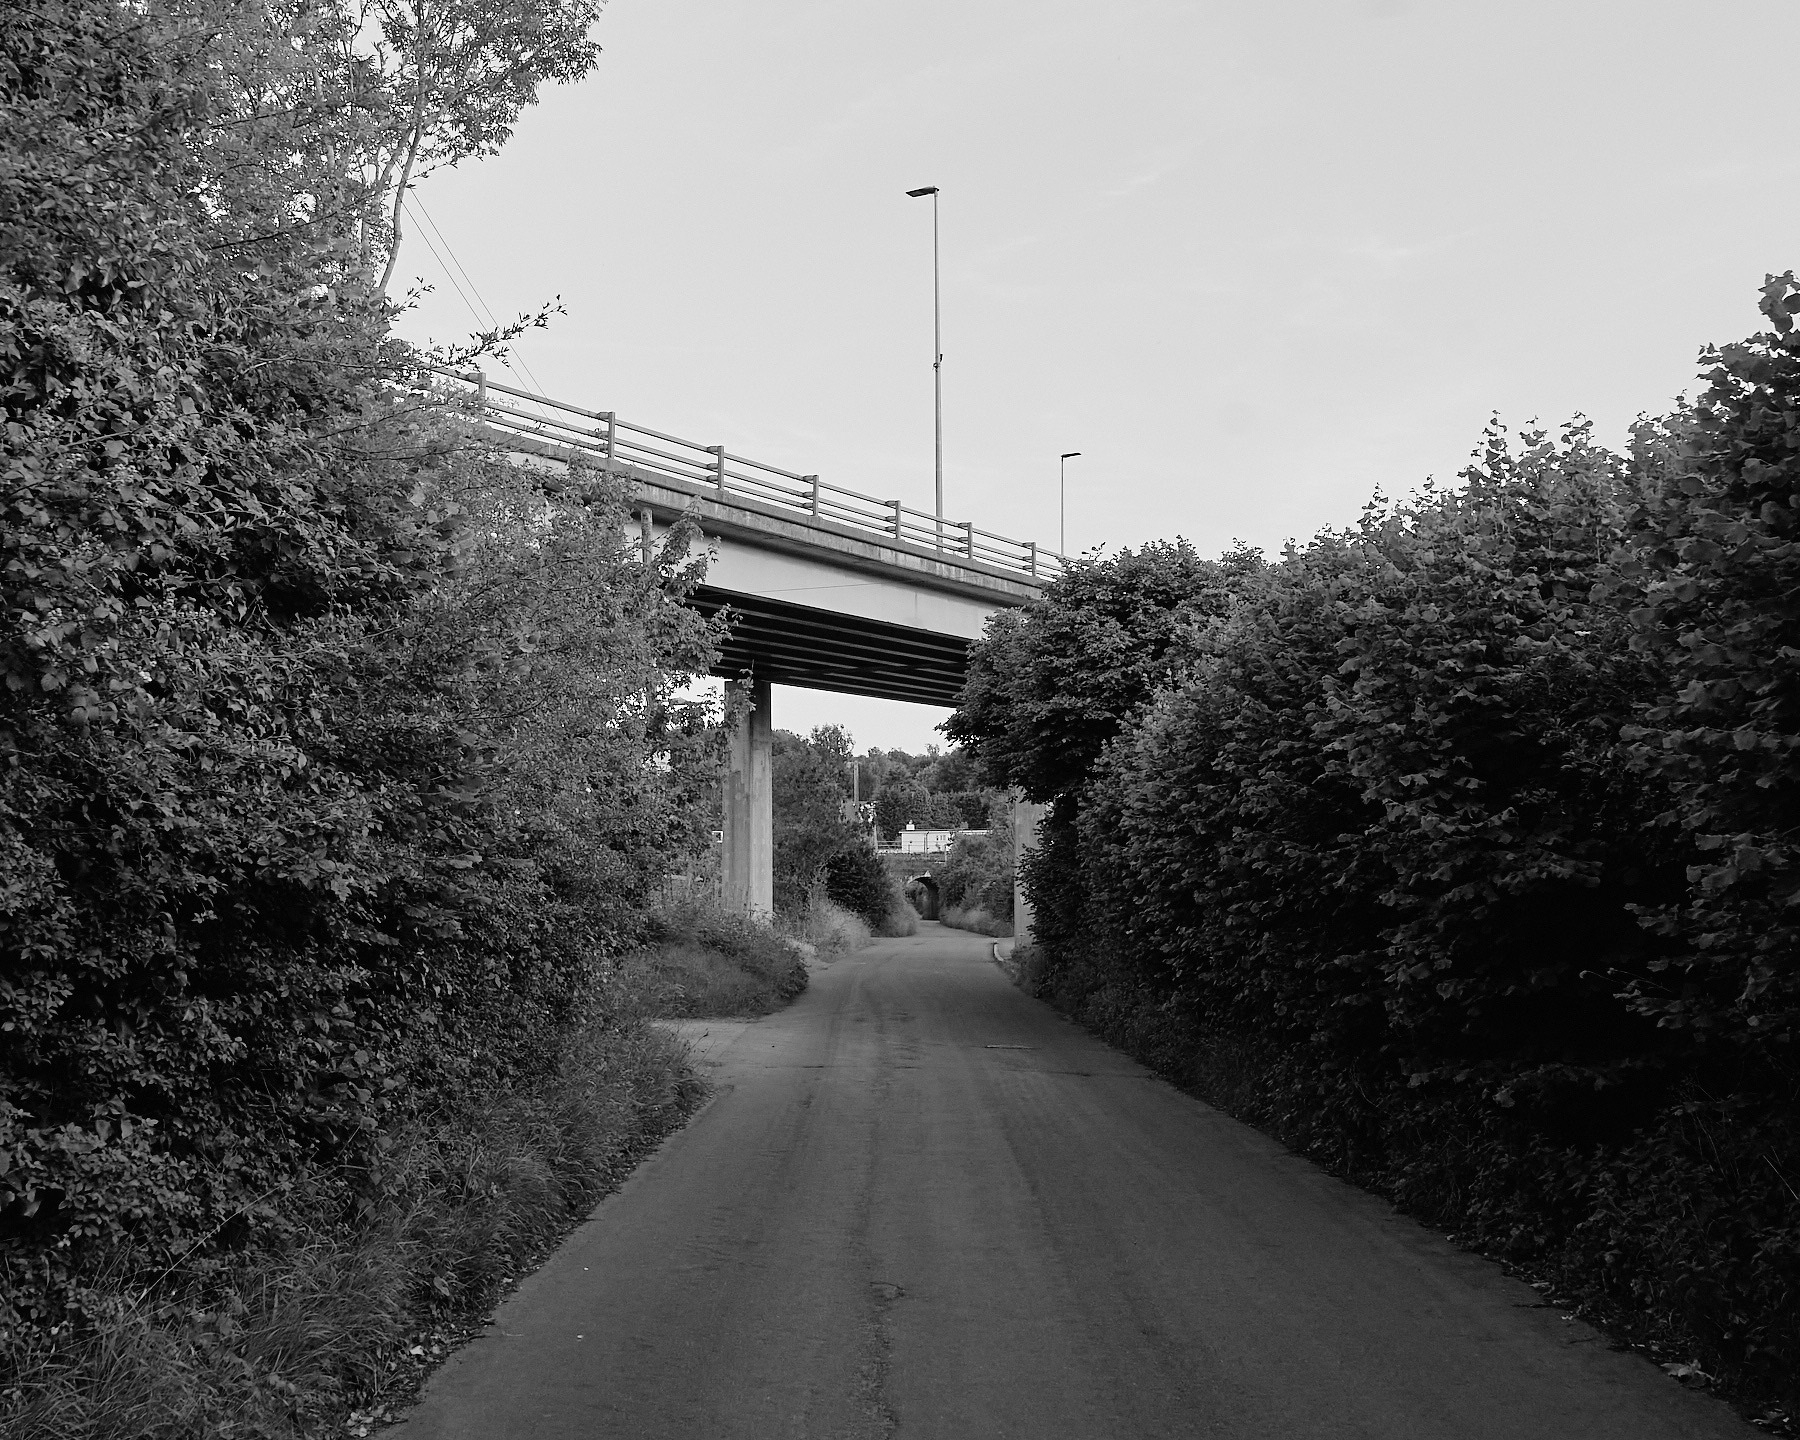
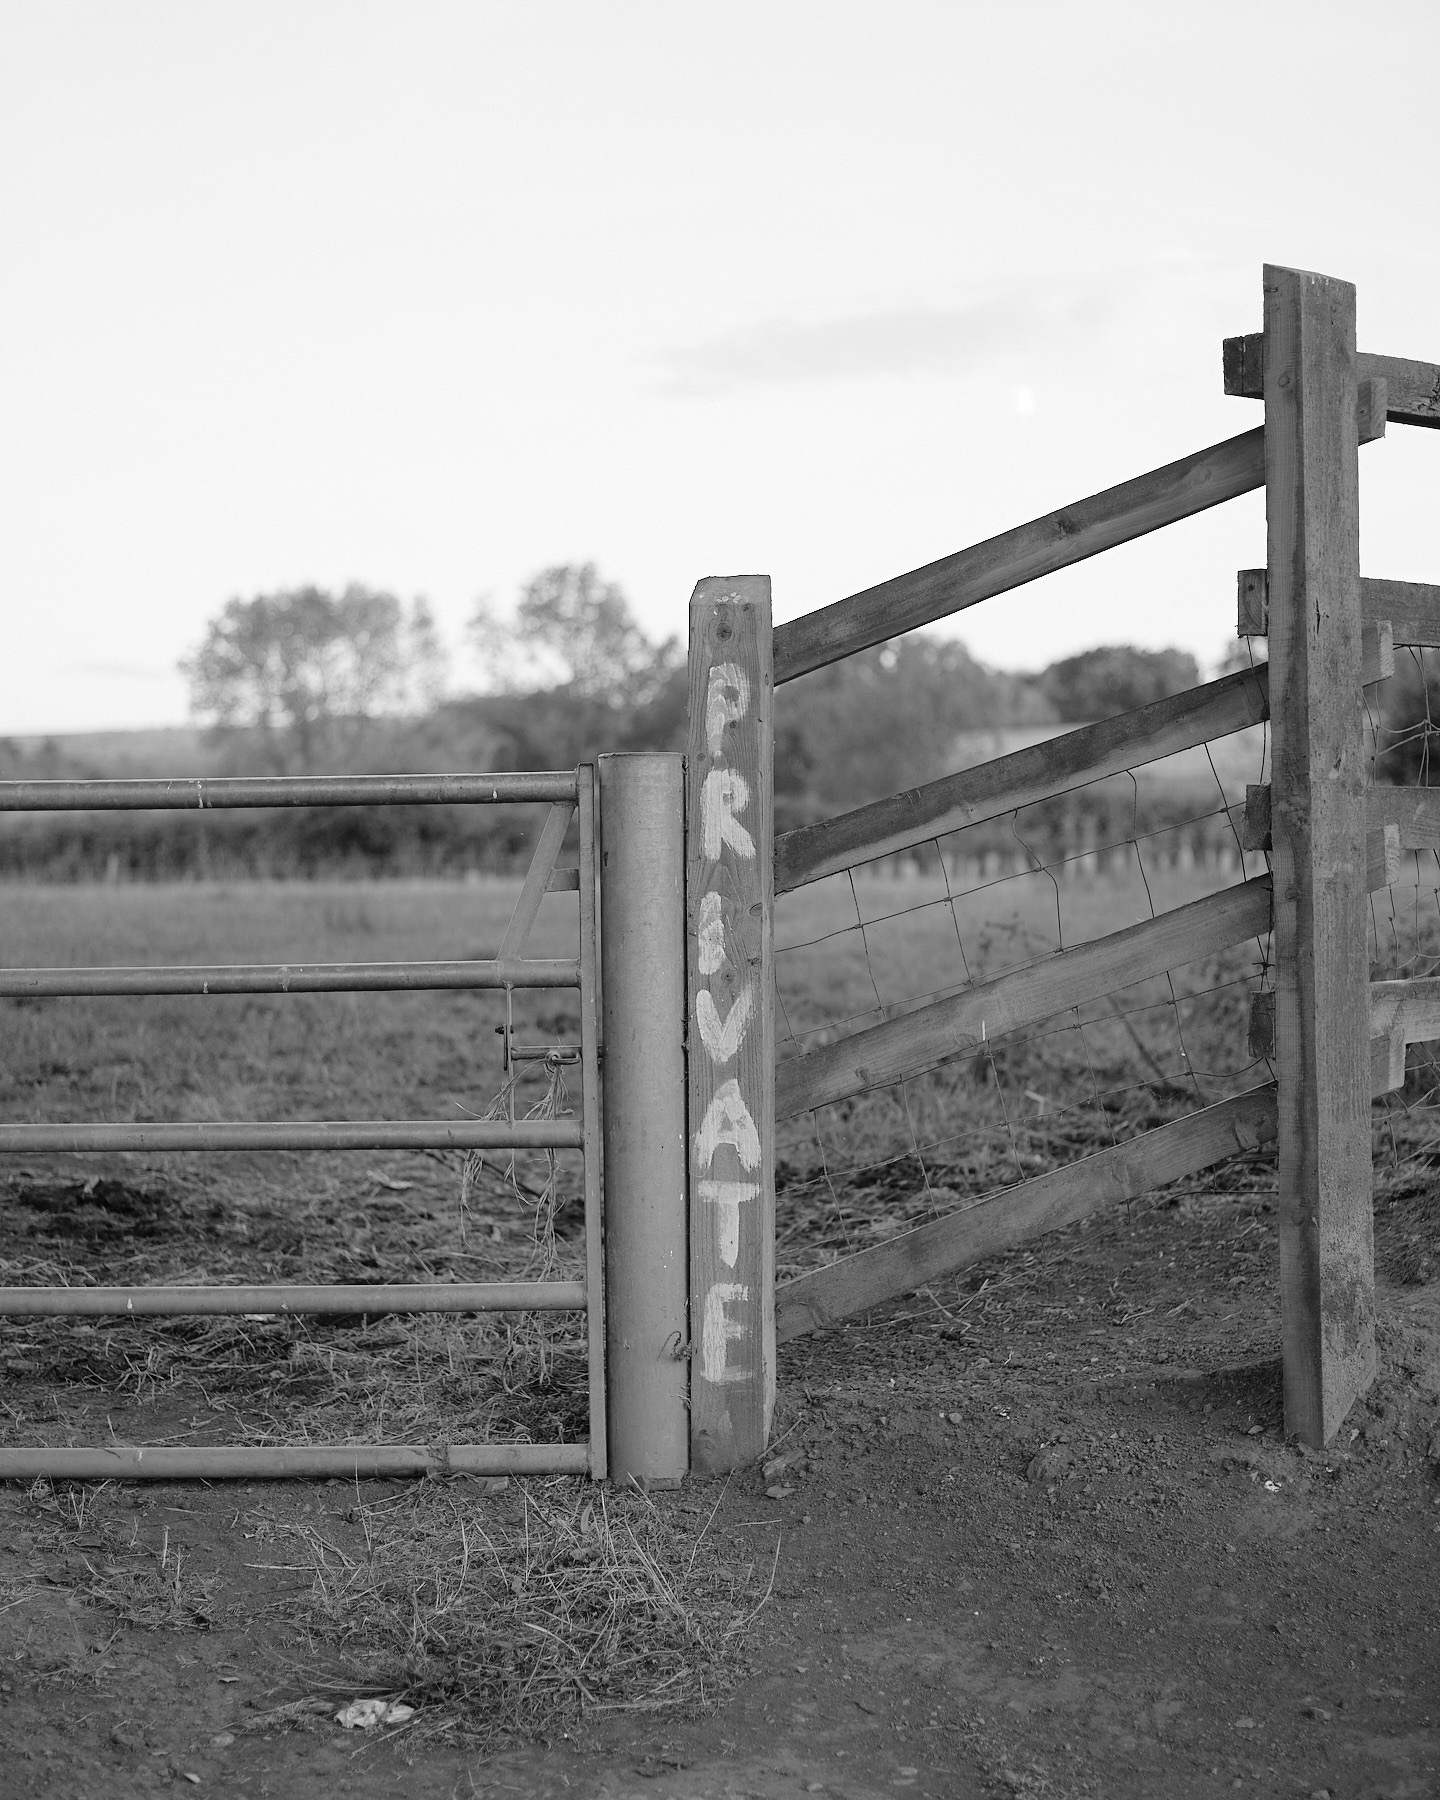
I found this location by chance, stuck on a diverted route, with traffic at a standstill, I took a quick phone photo of this bridge as a reminder to come back some time and take some proper photos.
This road is on the bike path between Bristol and Nailsea, you actually have to cross this road as part of the path, which I’ve ridden before, but I’ve never thought to venture off and explore around this section. It just shows there is good stuff everywhere, you just have to look for it. It reminds me of the Bristol to Bath cycle path, when I first moved to Bristol I didn’t drive, so I used to spend hours and hours riding this path with my camera, and I feel like I must have explored every single little section, and followed every fork and offshoot to see where it leads, and what was hidden there.
Bikes are perfect for these little missions, as I can just head out with a location in mind, and there is nothing to prevent me stopping and exploring if I see something that catches my eye. I feel so much more nimble and reactive compared to driving, where it’s a bit dangerous to just slam on the brakes and stop if I see something that catches my eye.
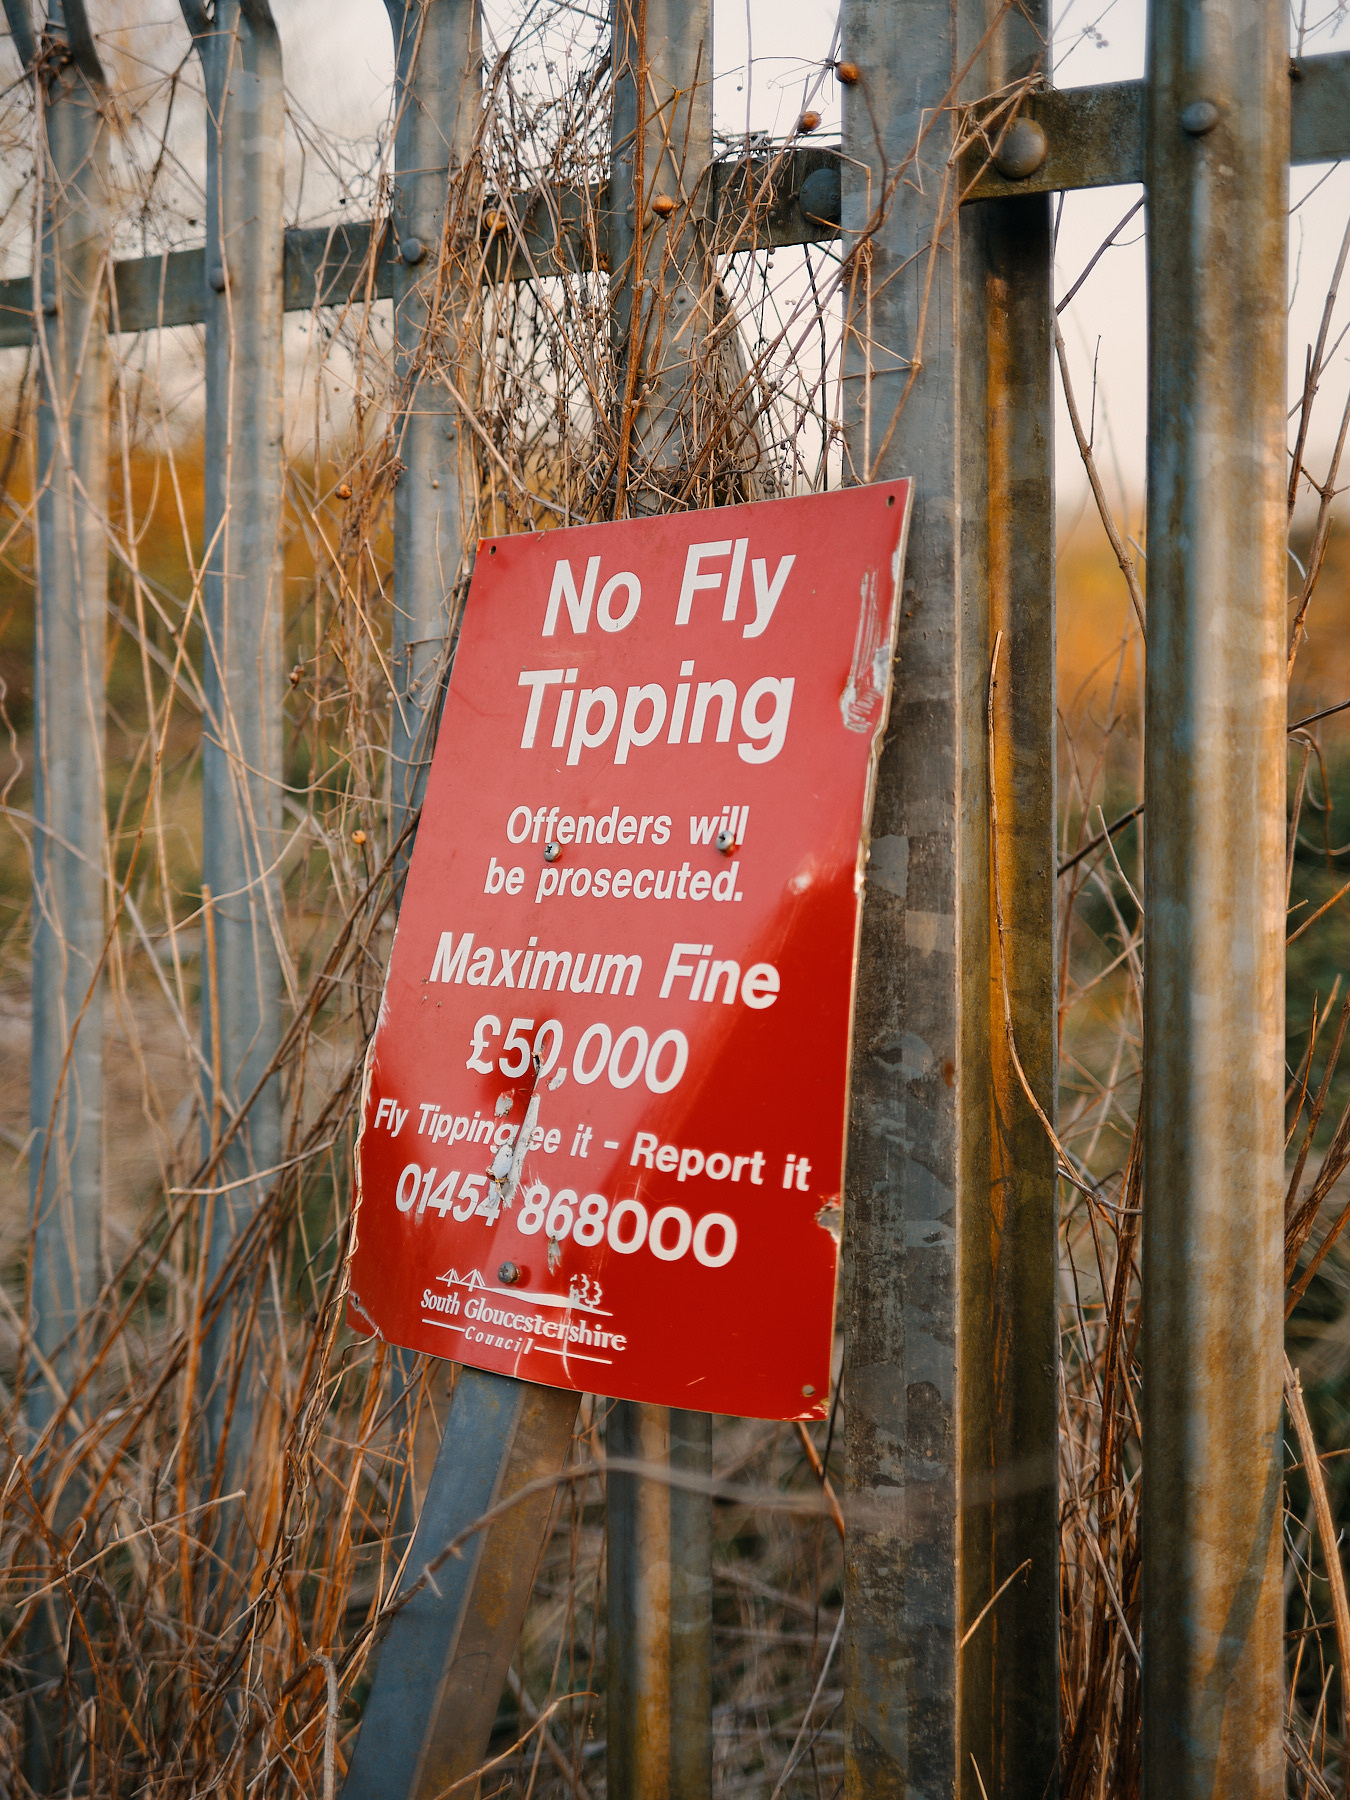
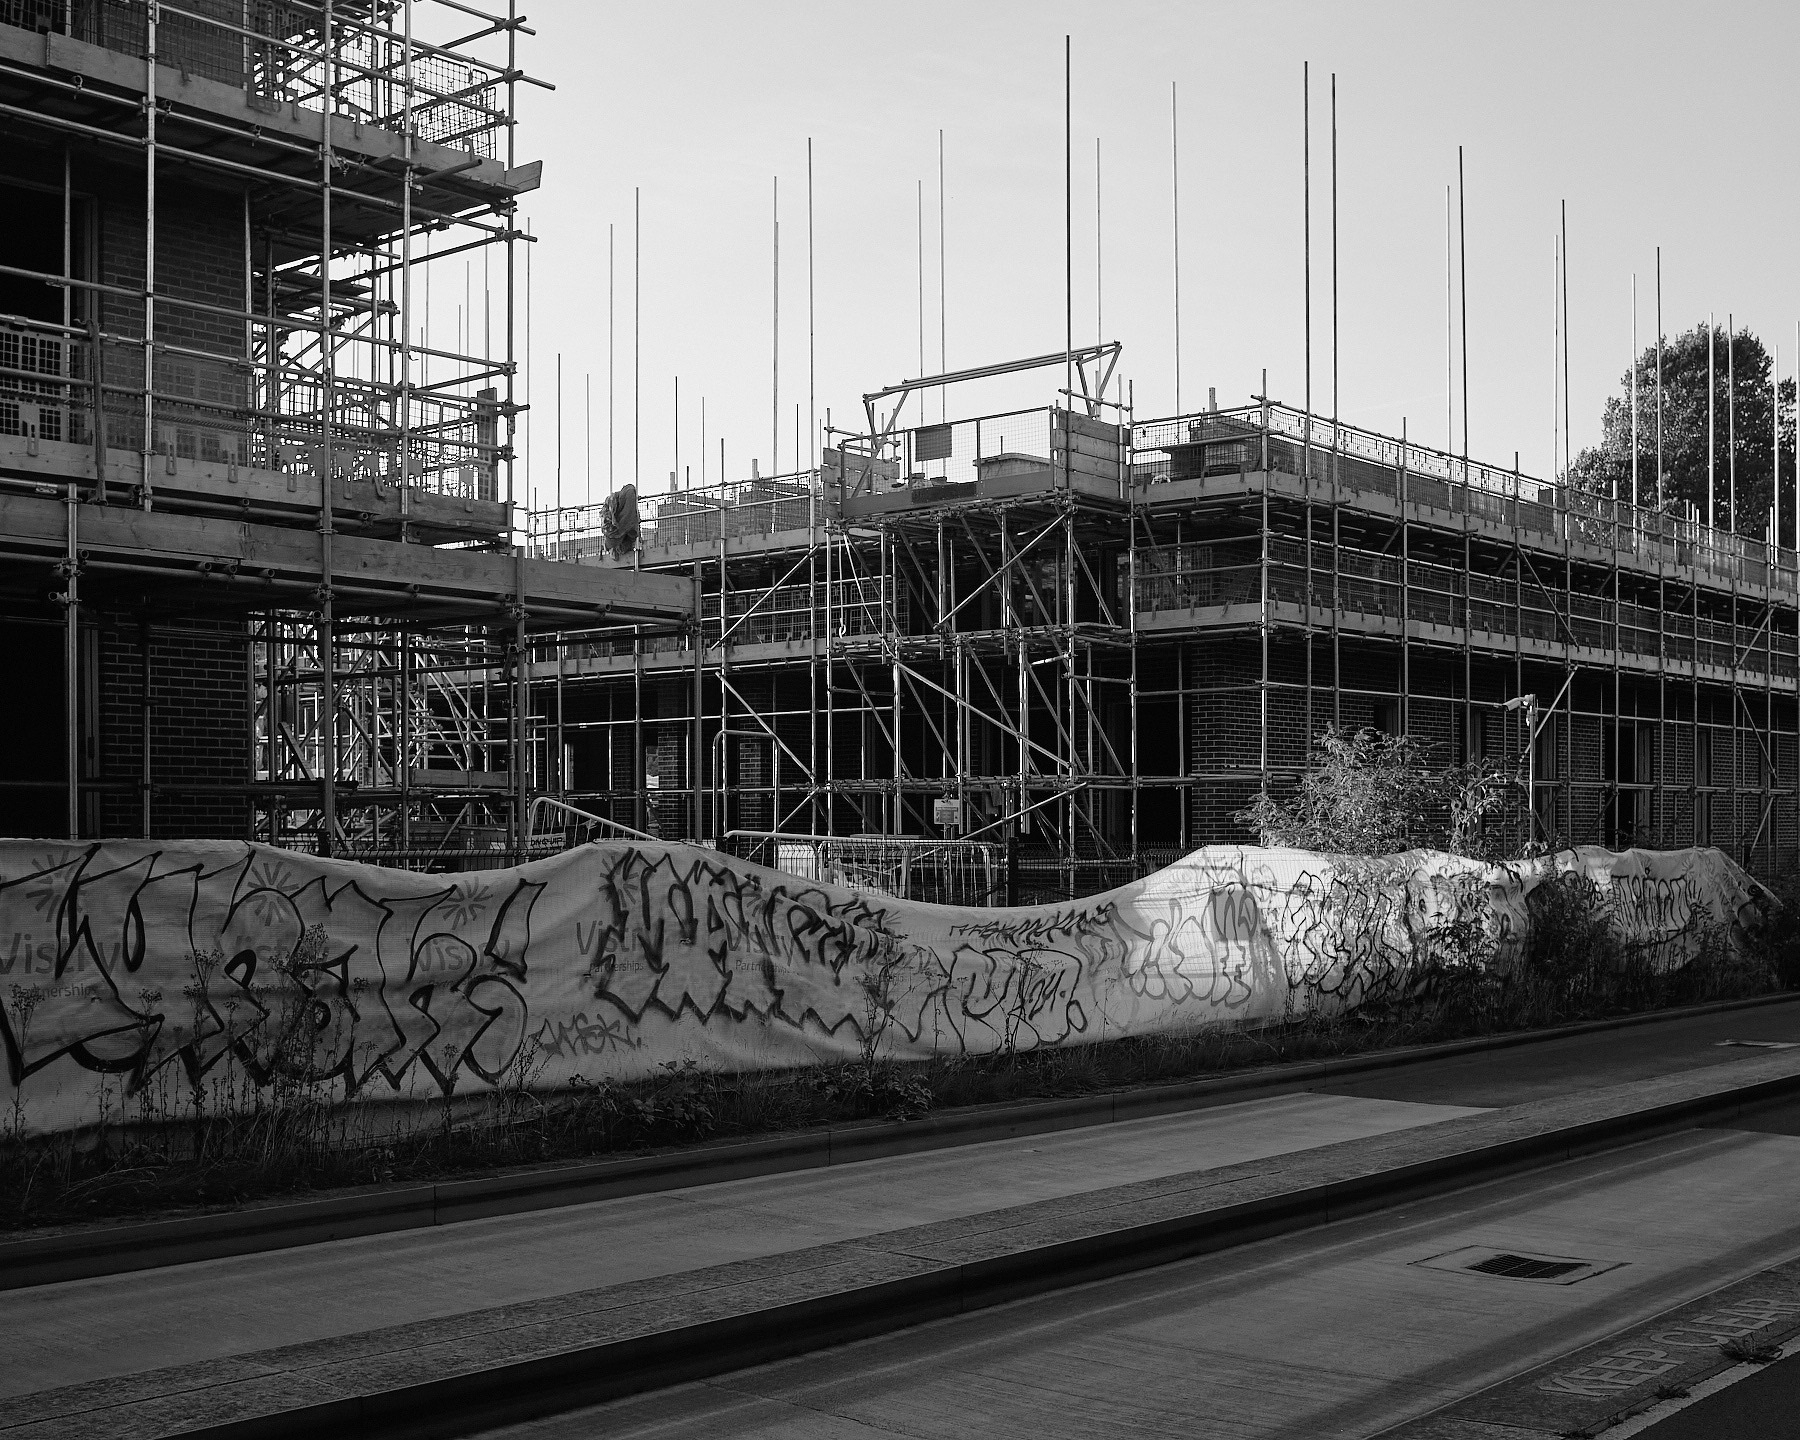
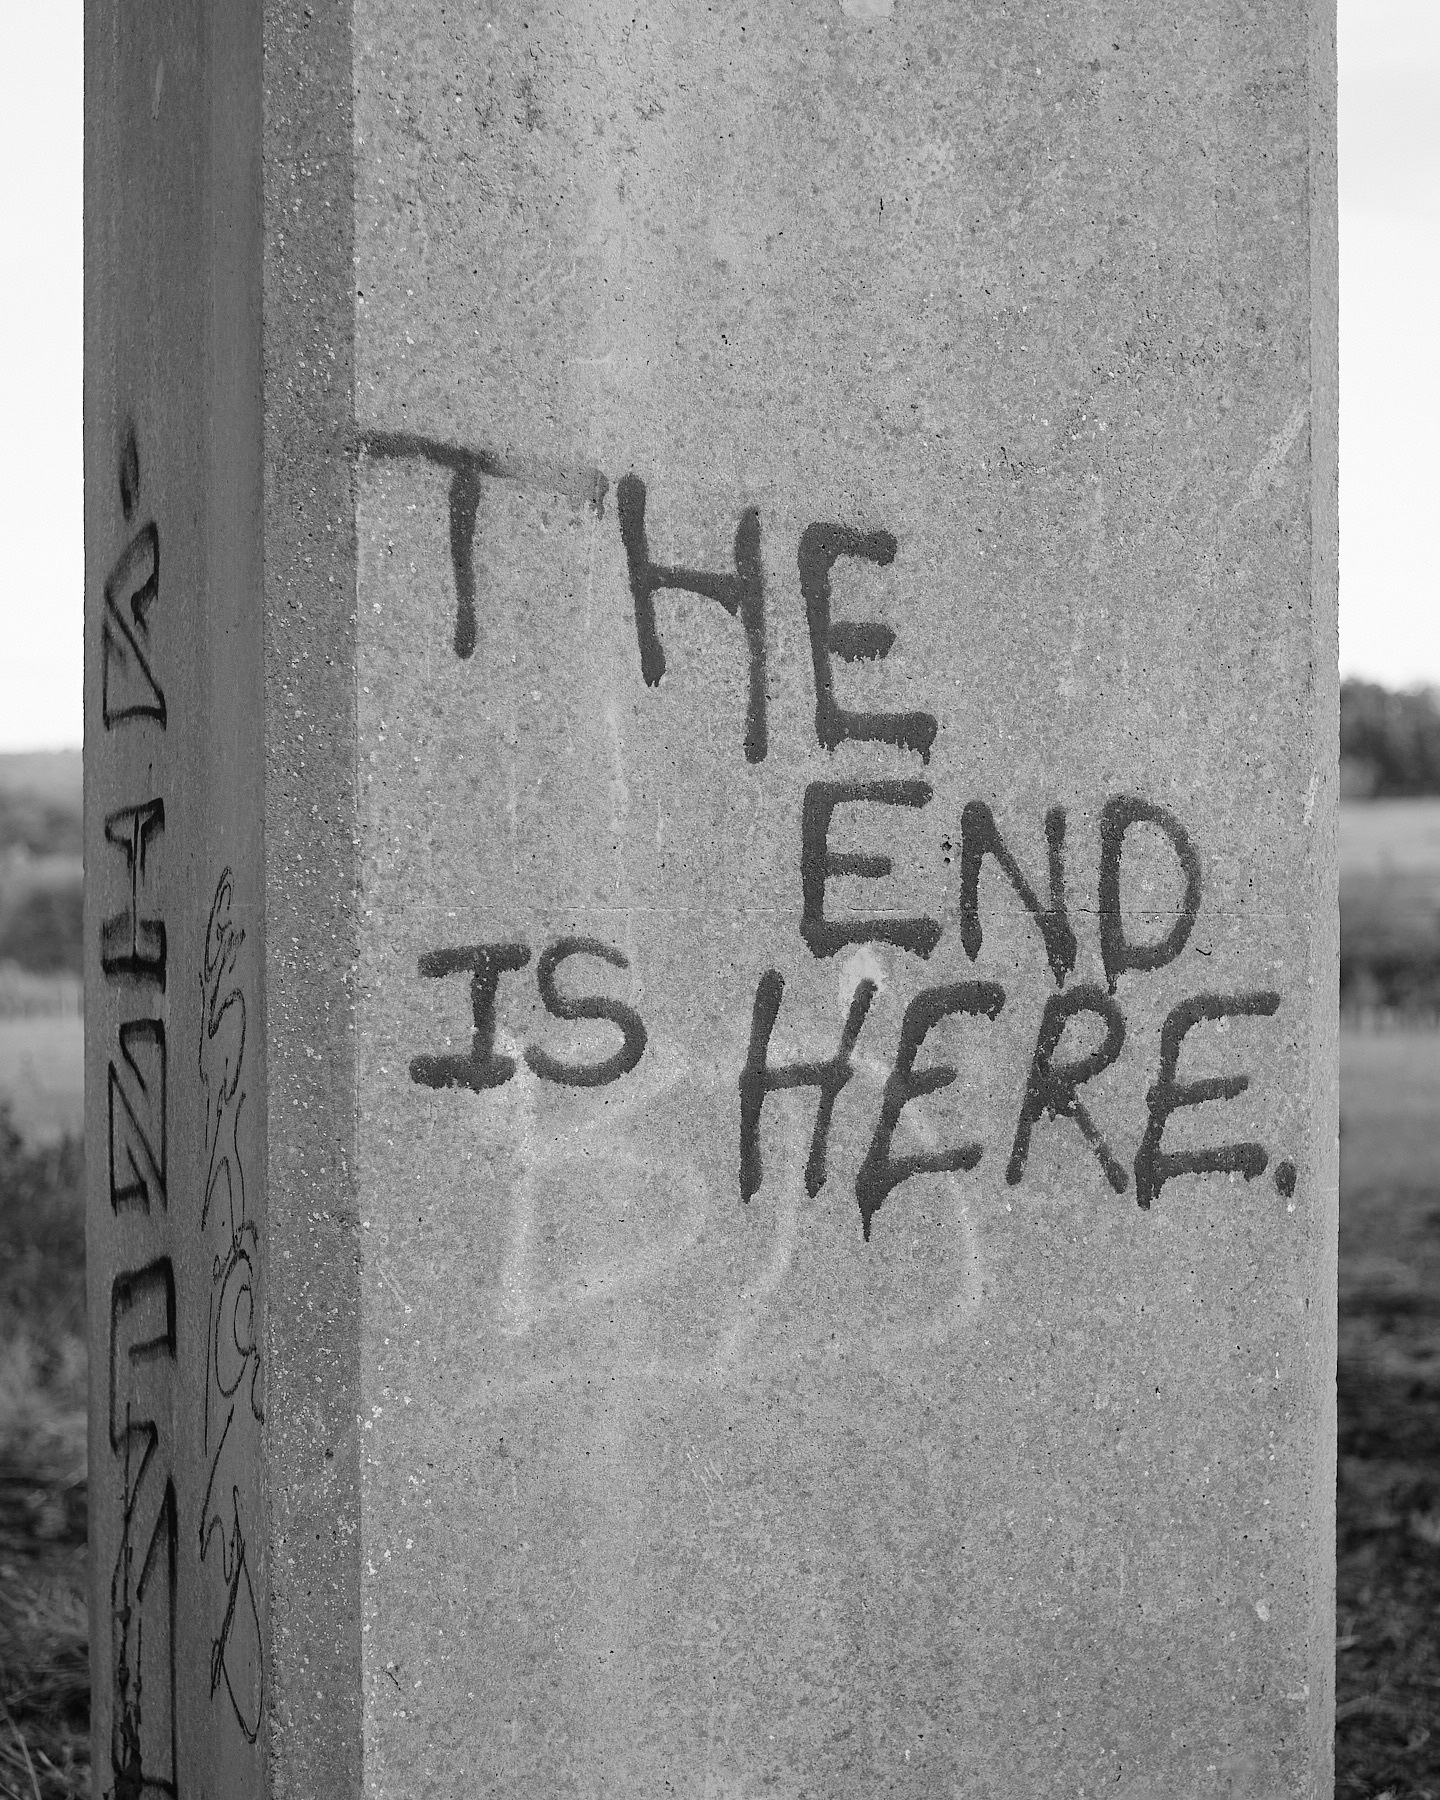
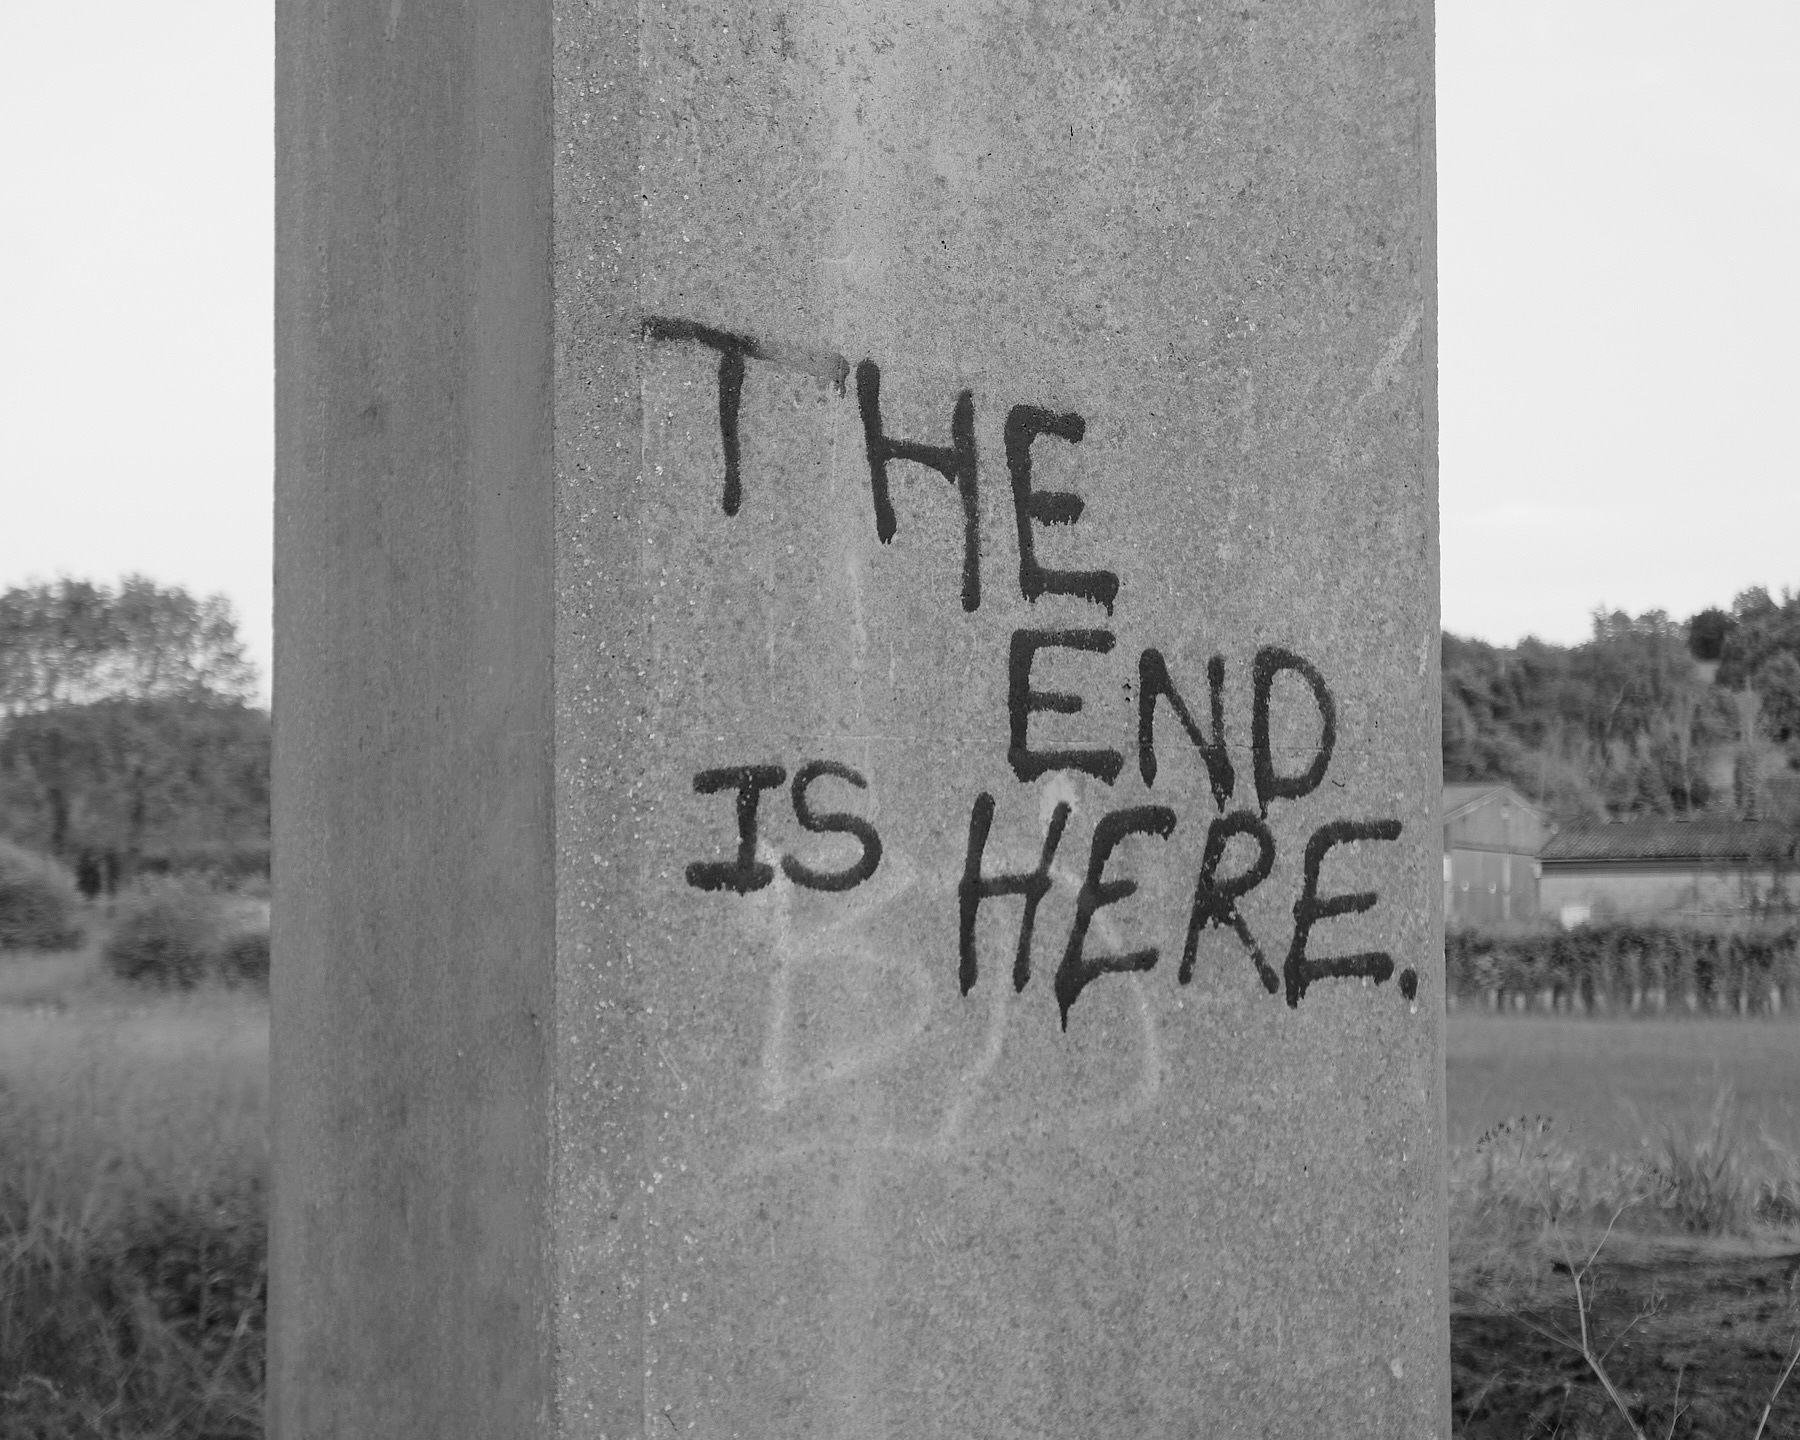
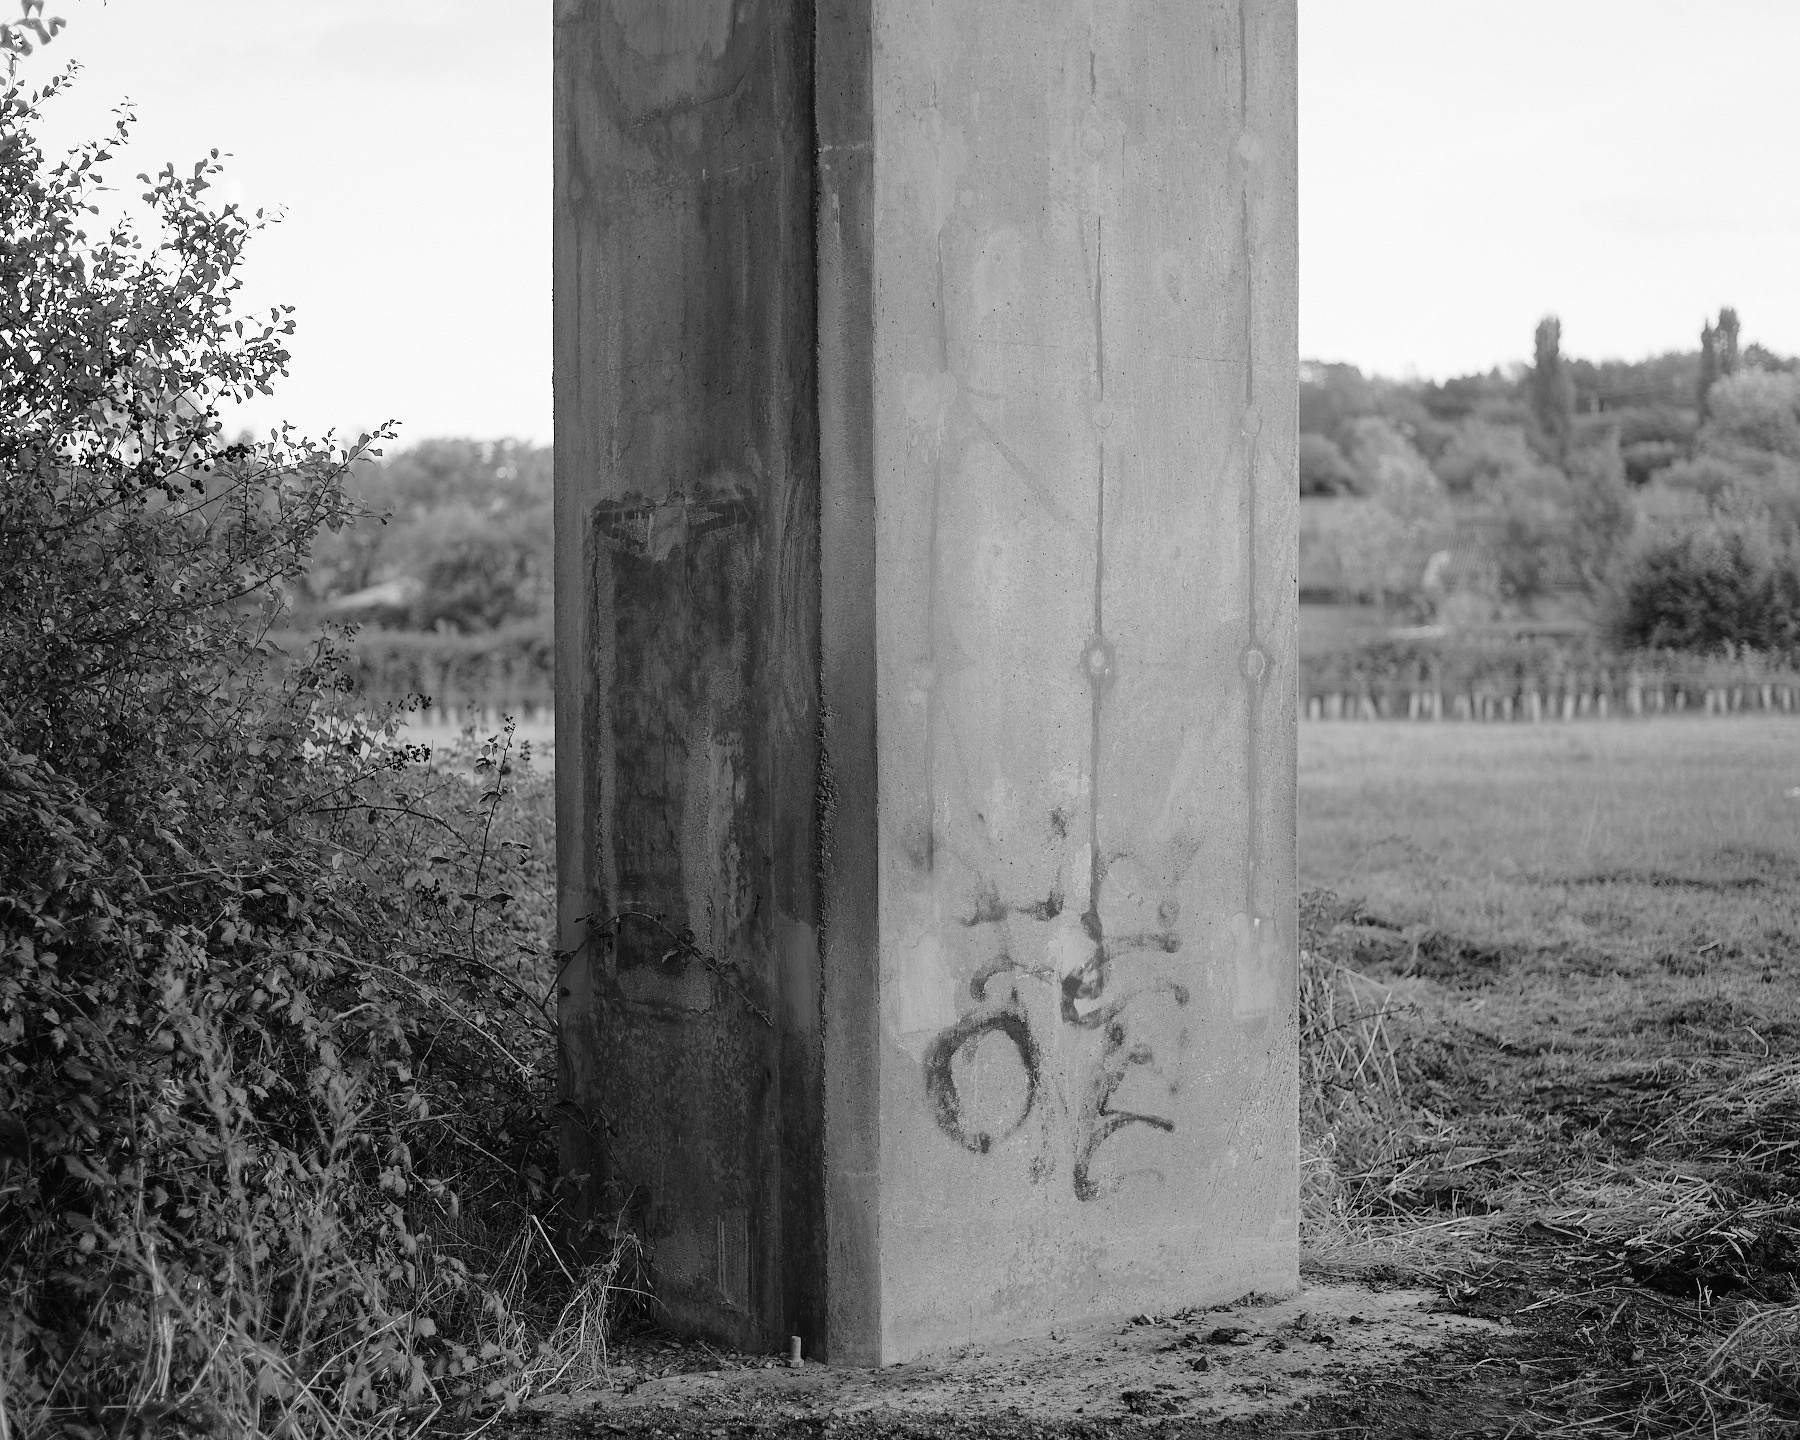
I wanted to get a photo of this graffiti, I’m always fascinated by this specific kind of graffiti. It has a very serious apocalyptic tone, which is at odds with remote location, it reminded me of the rapture that wasn’t from earlier this year.
Plus it’s been done by someone with a spray can who felt that they had to go out and write this, which I find fascinating. There is no specific style, this hasn’t been done by someone in the graffiti scene, it’s just in someones block capital handwriting, which just makes me question their motivation. It’s so dramatic, why did they feel that they had to spray this on the bridge support?
I made a version with the graffiti on the side edited out, as it looks shit, and it disrupts the photo. But the editing doesn’t look great, and I’m not really comfortable with removing whole elements from a photo like this, so I won’t use this version. I’ll go back and shoot it again from the other side instead. I just have to hope the original graffiti hasn’t been removed by then, but I find anything in remote spots like this, basically never gets removed.
I’m going to head back at night one time, as I think it would look great illuminated from above by the road lights, even at dusk or blue hour, when the contrast would be a little more subtle. I think a late sunday summer evening would be best, as I’ll have the least chance of getting run over with my tripod set up in the middle of the road.
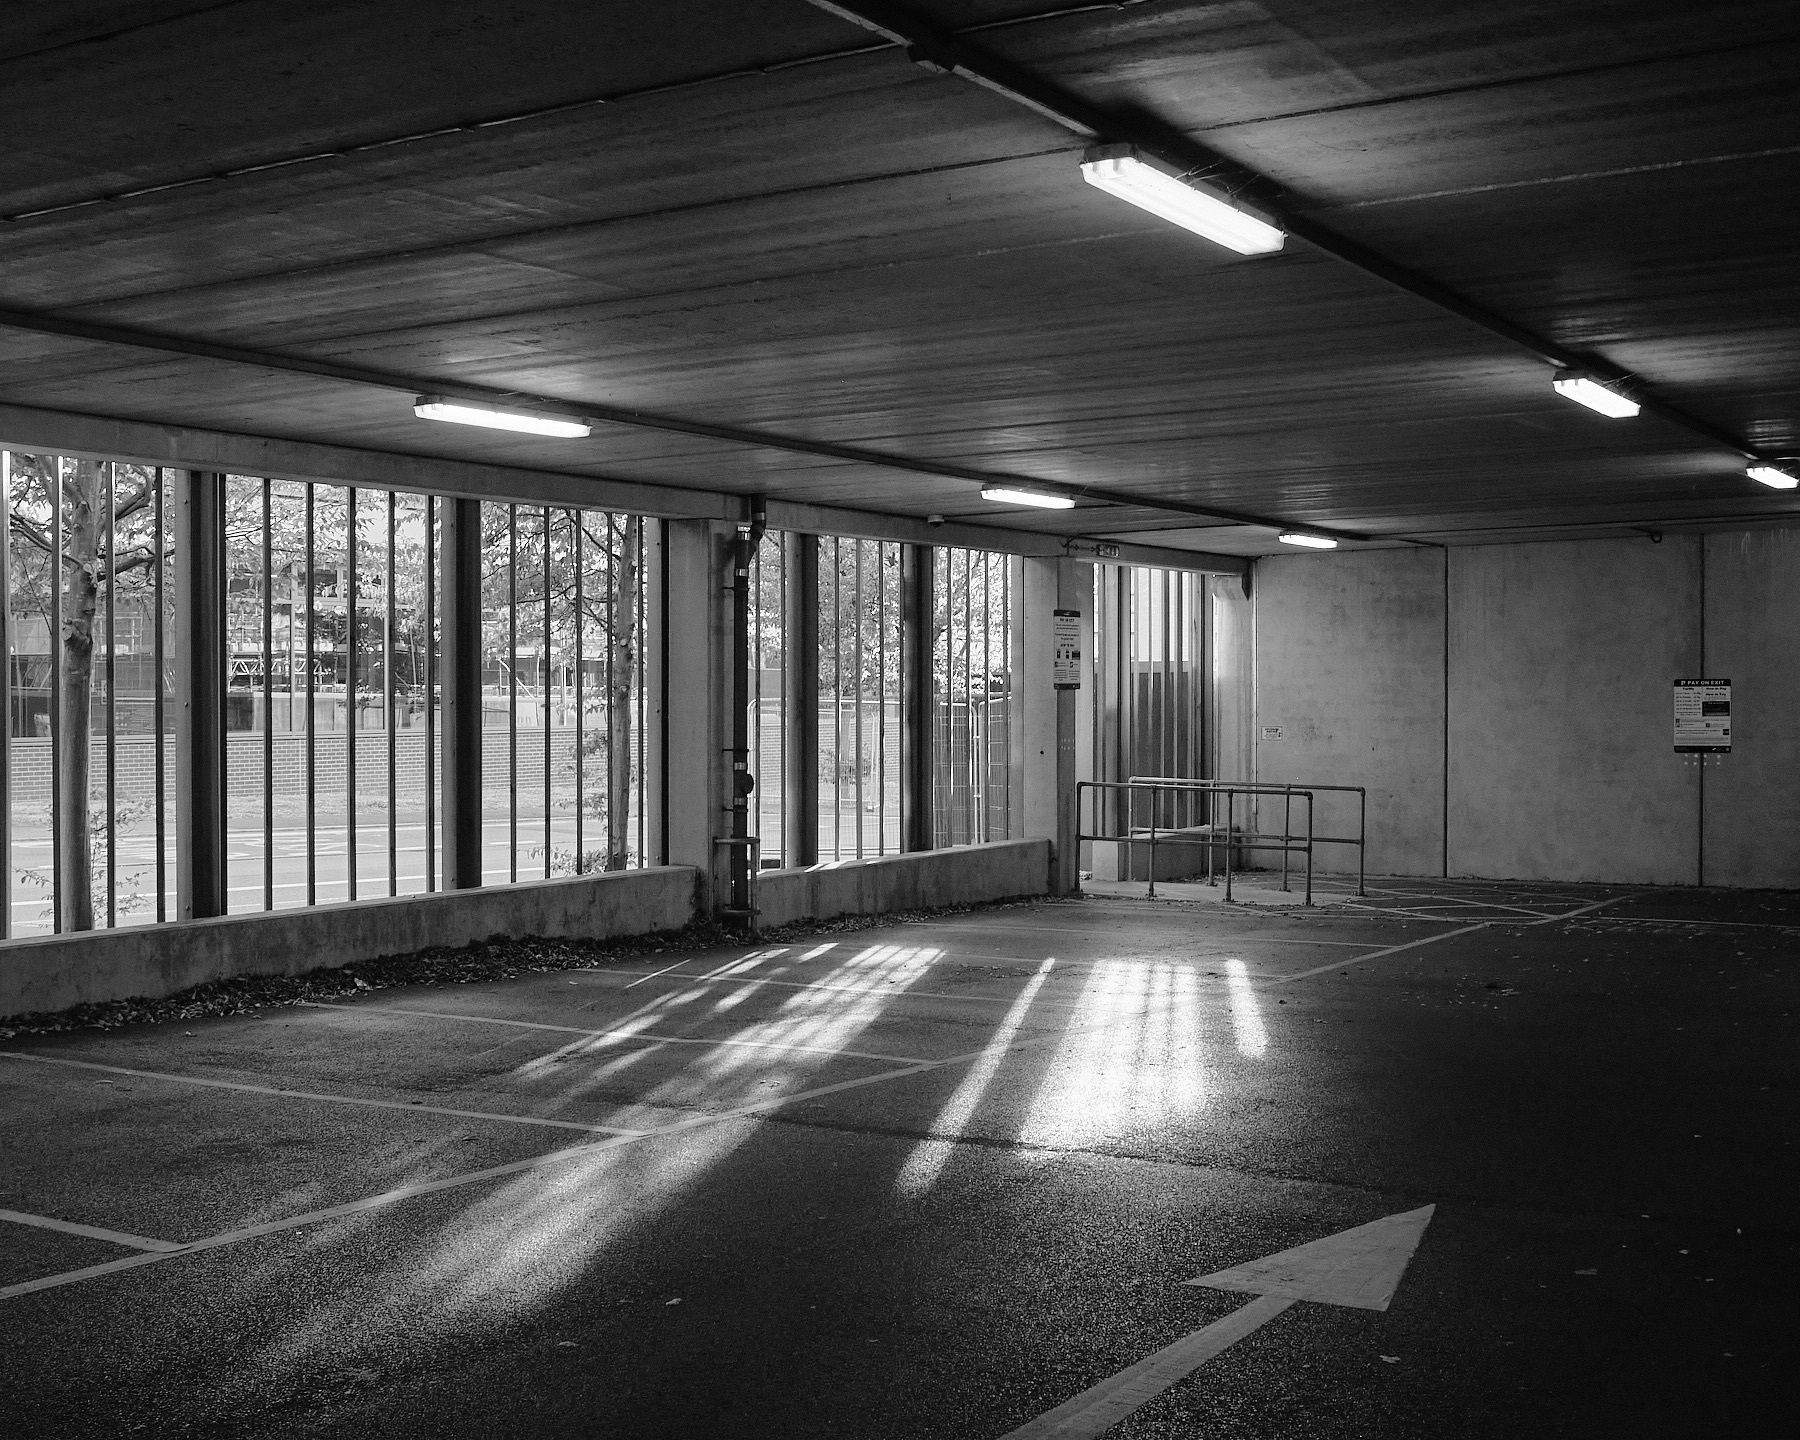
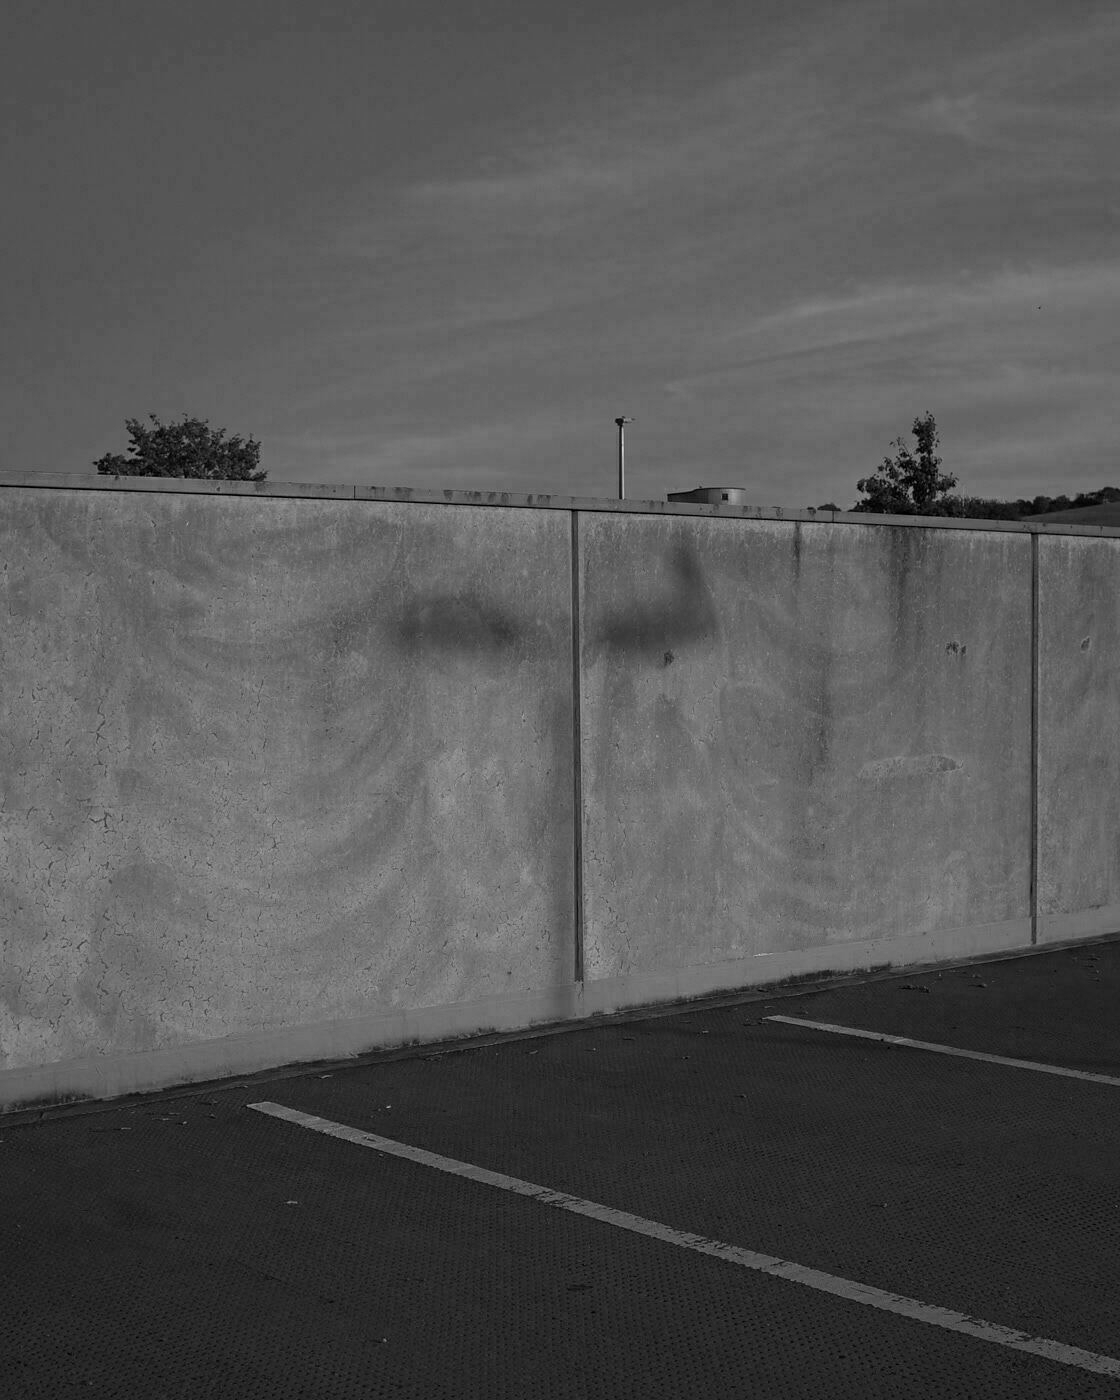
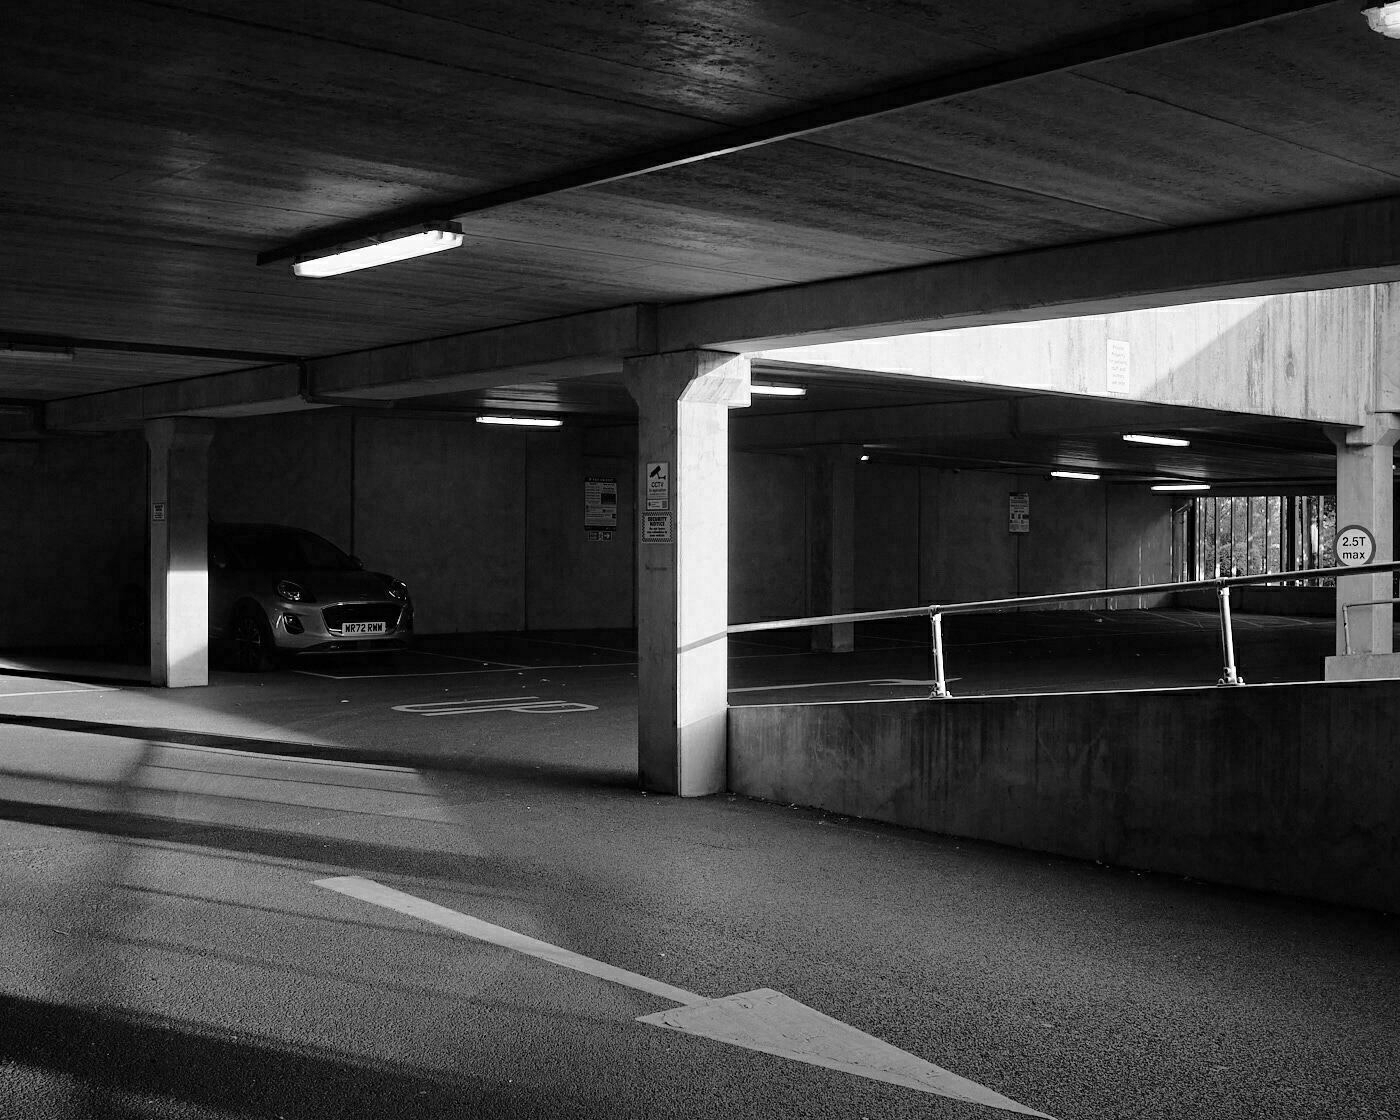
I love a good multistory car park, especially when they are quiet and the light is right. These were some opportunistic shots taken on a family bike ride, as I knew my son would enjoy going down the ramps in his trailer while the car park was mostly deserted on a quiet sunday evening.
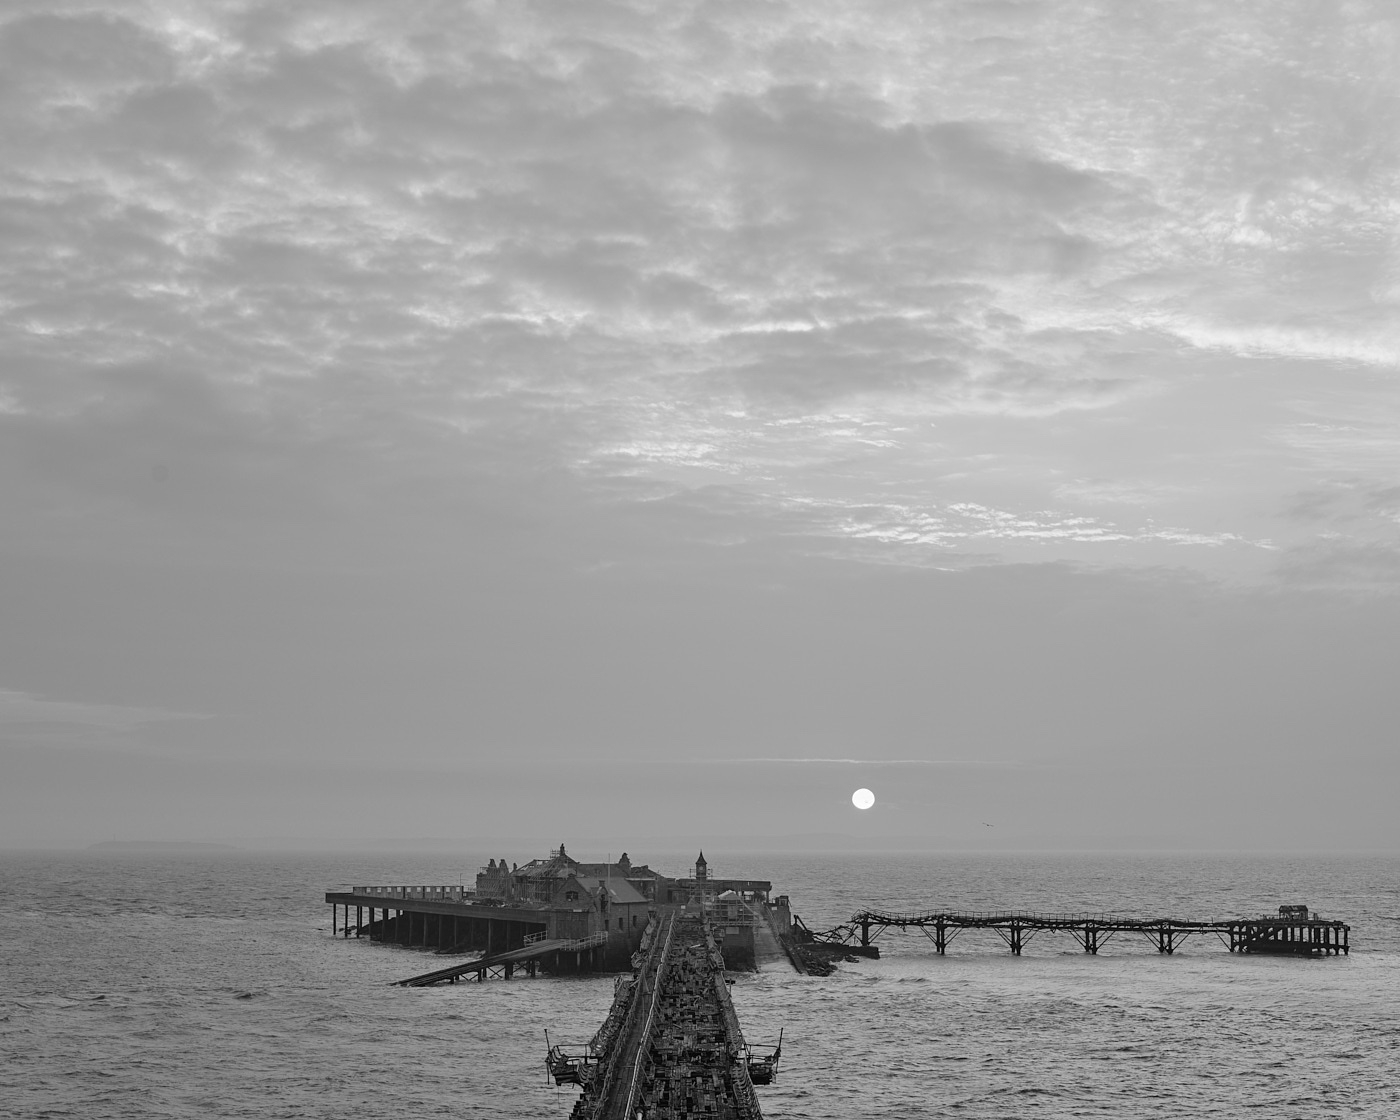
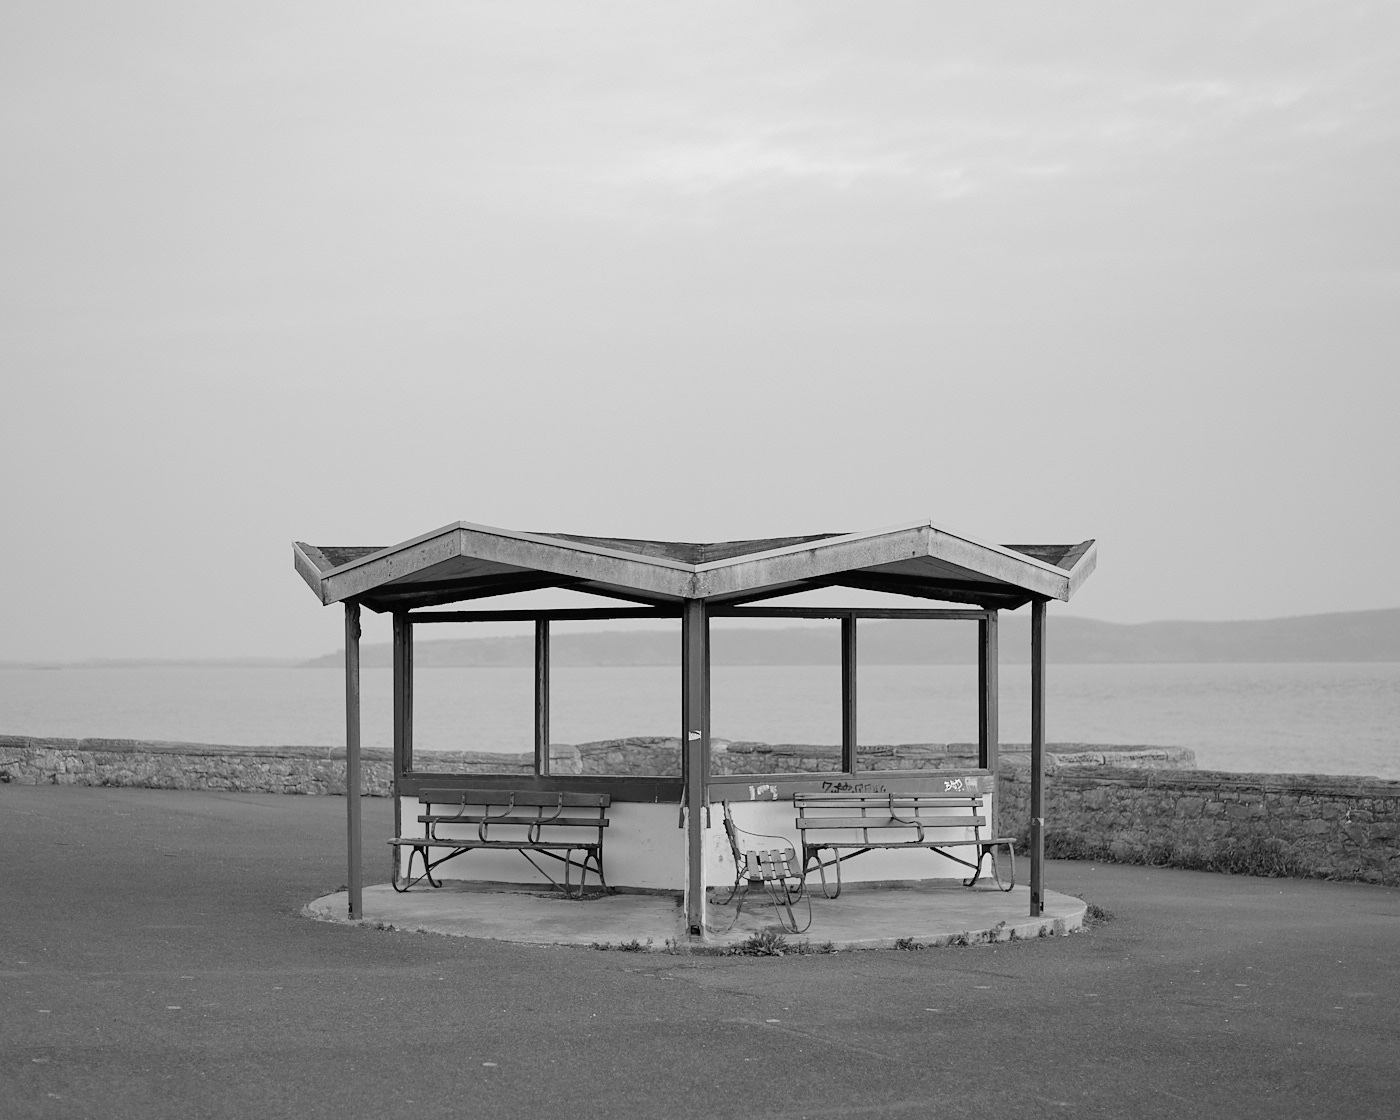
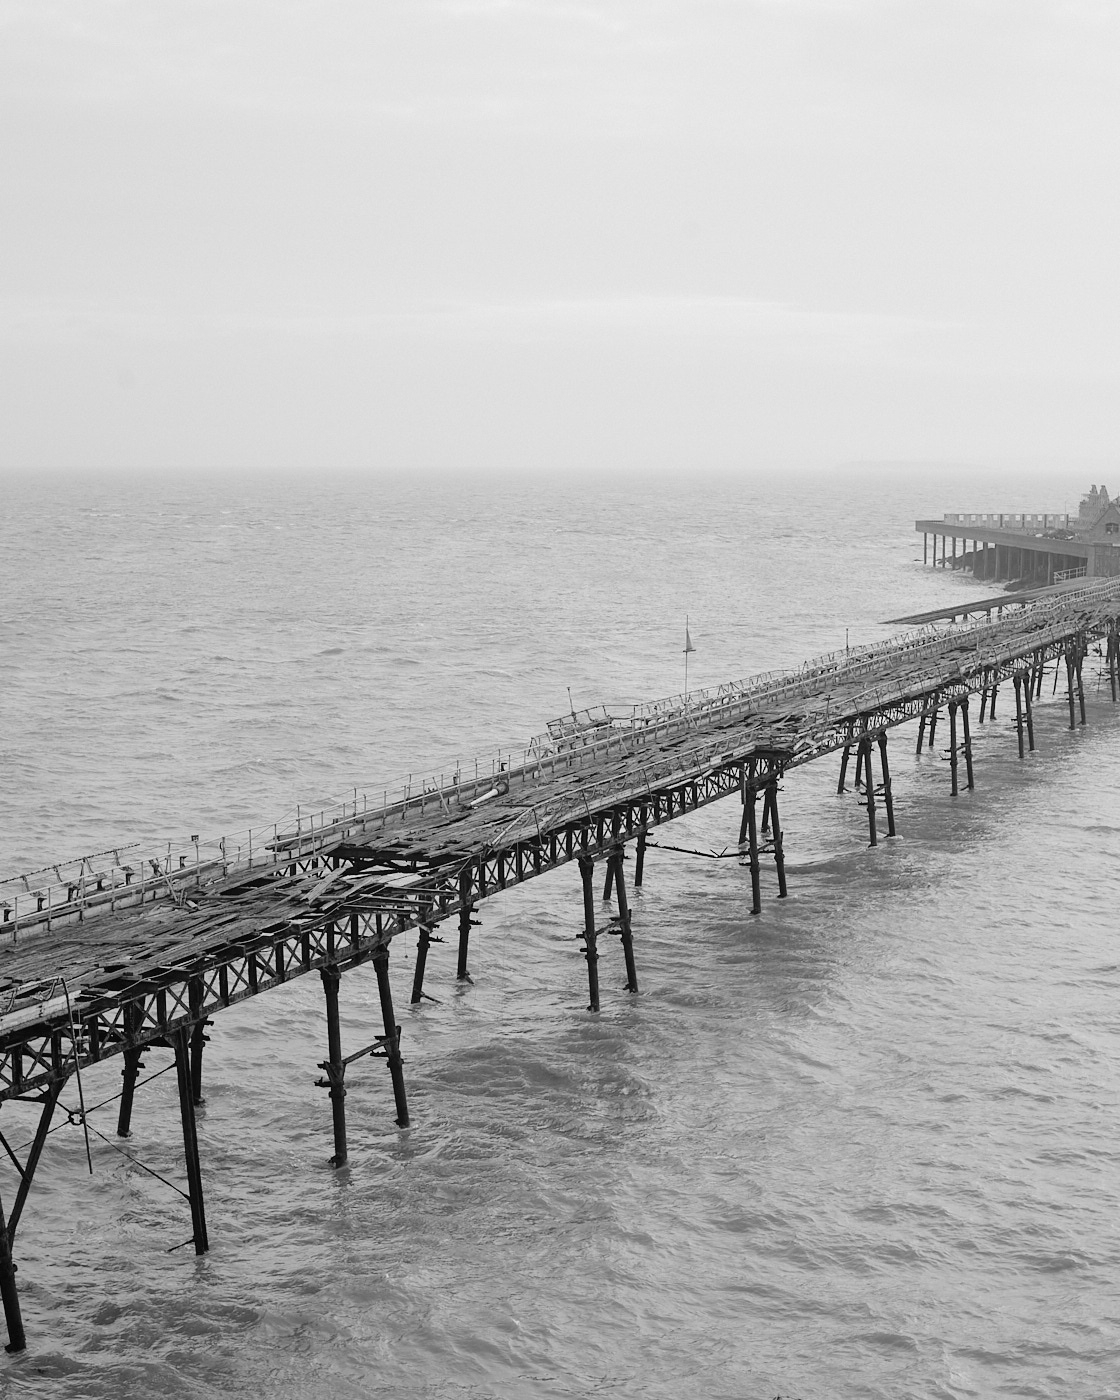
This is the old pier in Weston Super Mare, which has been closed since the 90s, it’s away from the main sea front, where it’s just been left to crumble into disrepair.
I posted some of these photos on instagram and Mr Baloo summed it up perfectly “Lovely Lovely Birnbeck Pier & it’s surroundings- where Every day is like Sunday…"
Binkbeck is definitely the the part of Weston that seems most forgotten, I go to Weston a lot, and this is the first time I’ve ever gone over to this side and taken a look at the pier, and I don’t really know too much about it. There is no point me just regurgitating the wikipedia page, but having a quick search it looks like it might be finally restored after years and years of false starts.
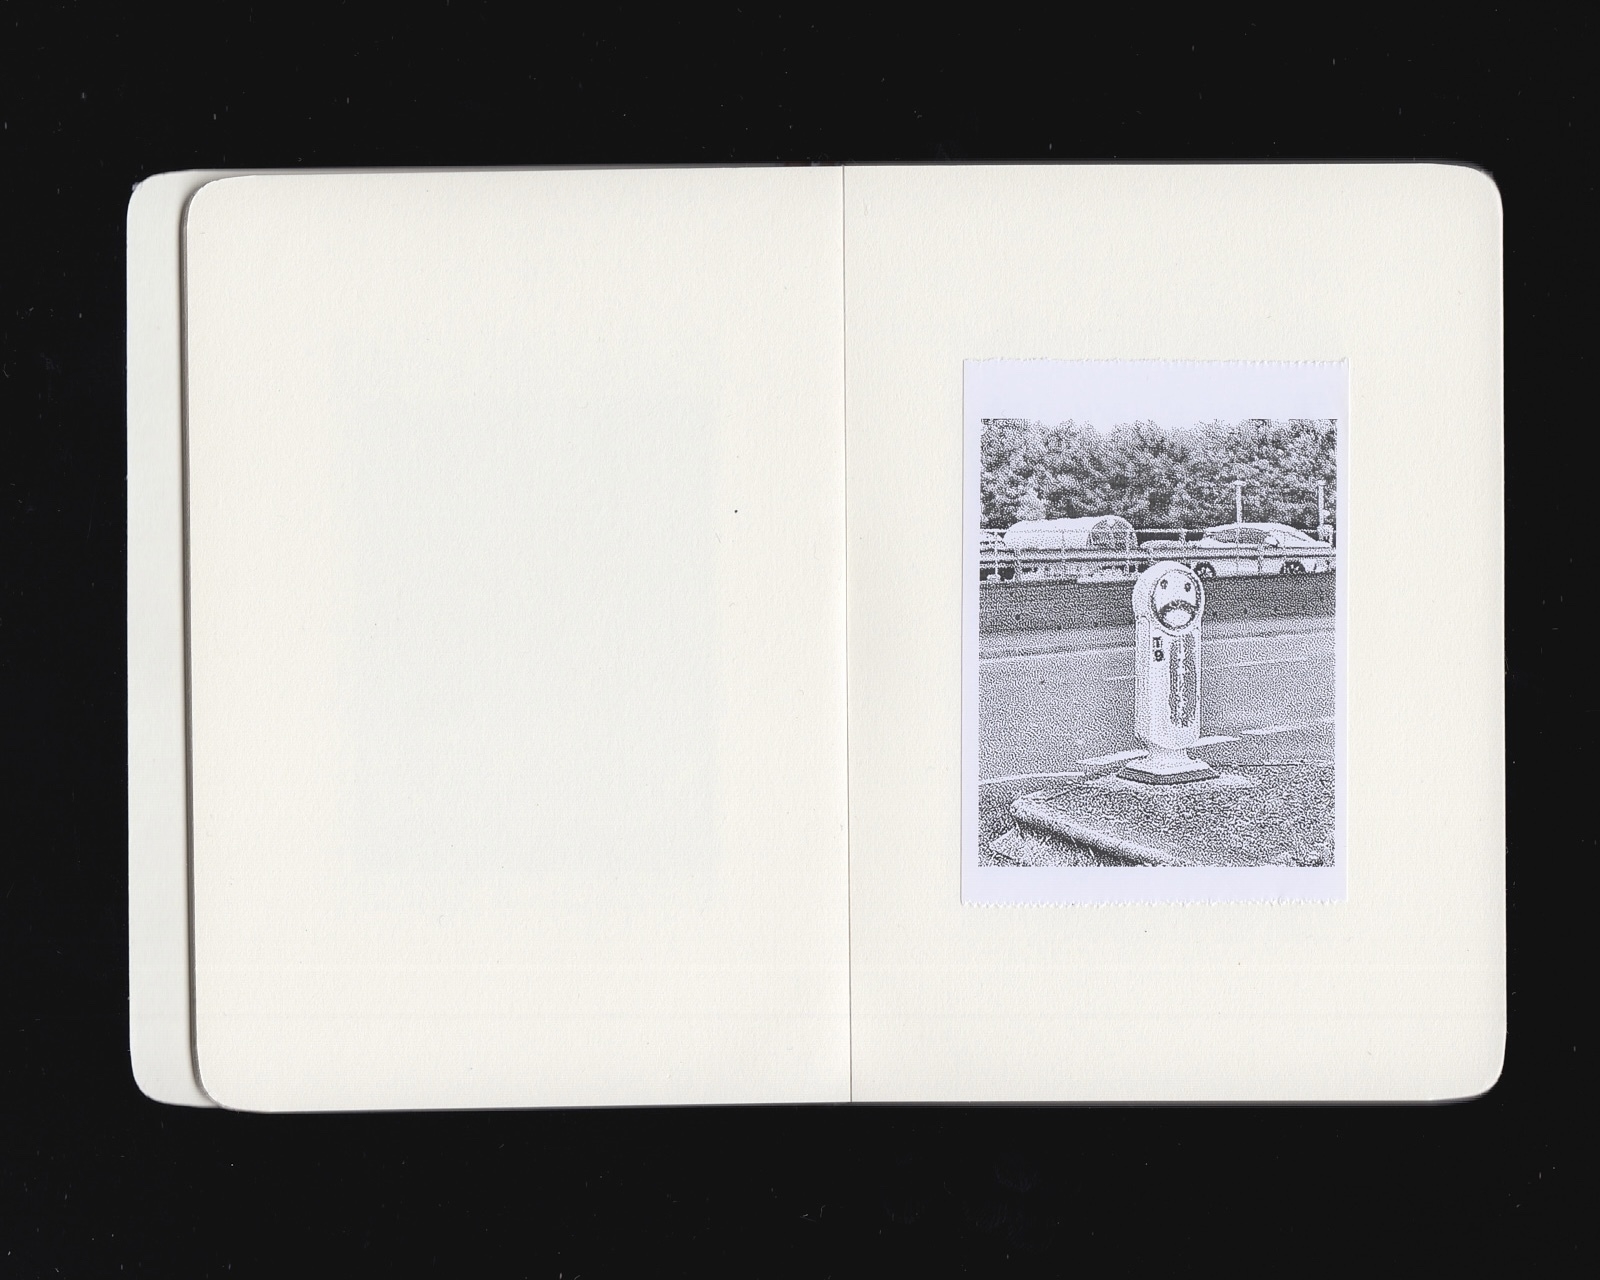
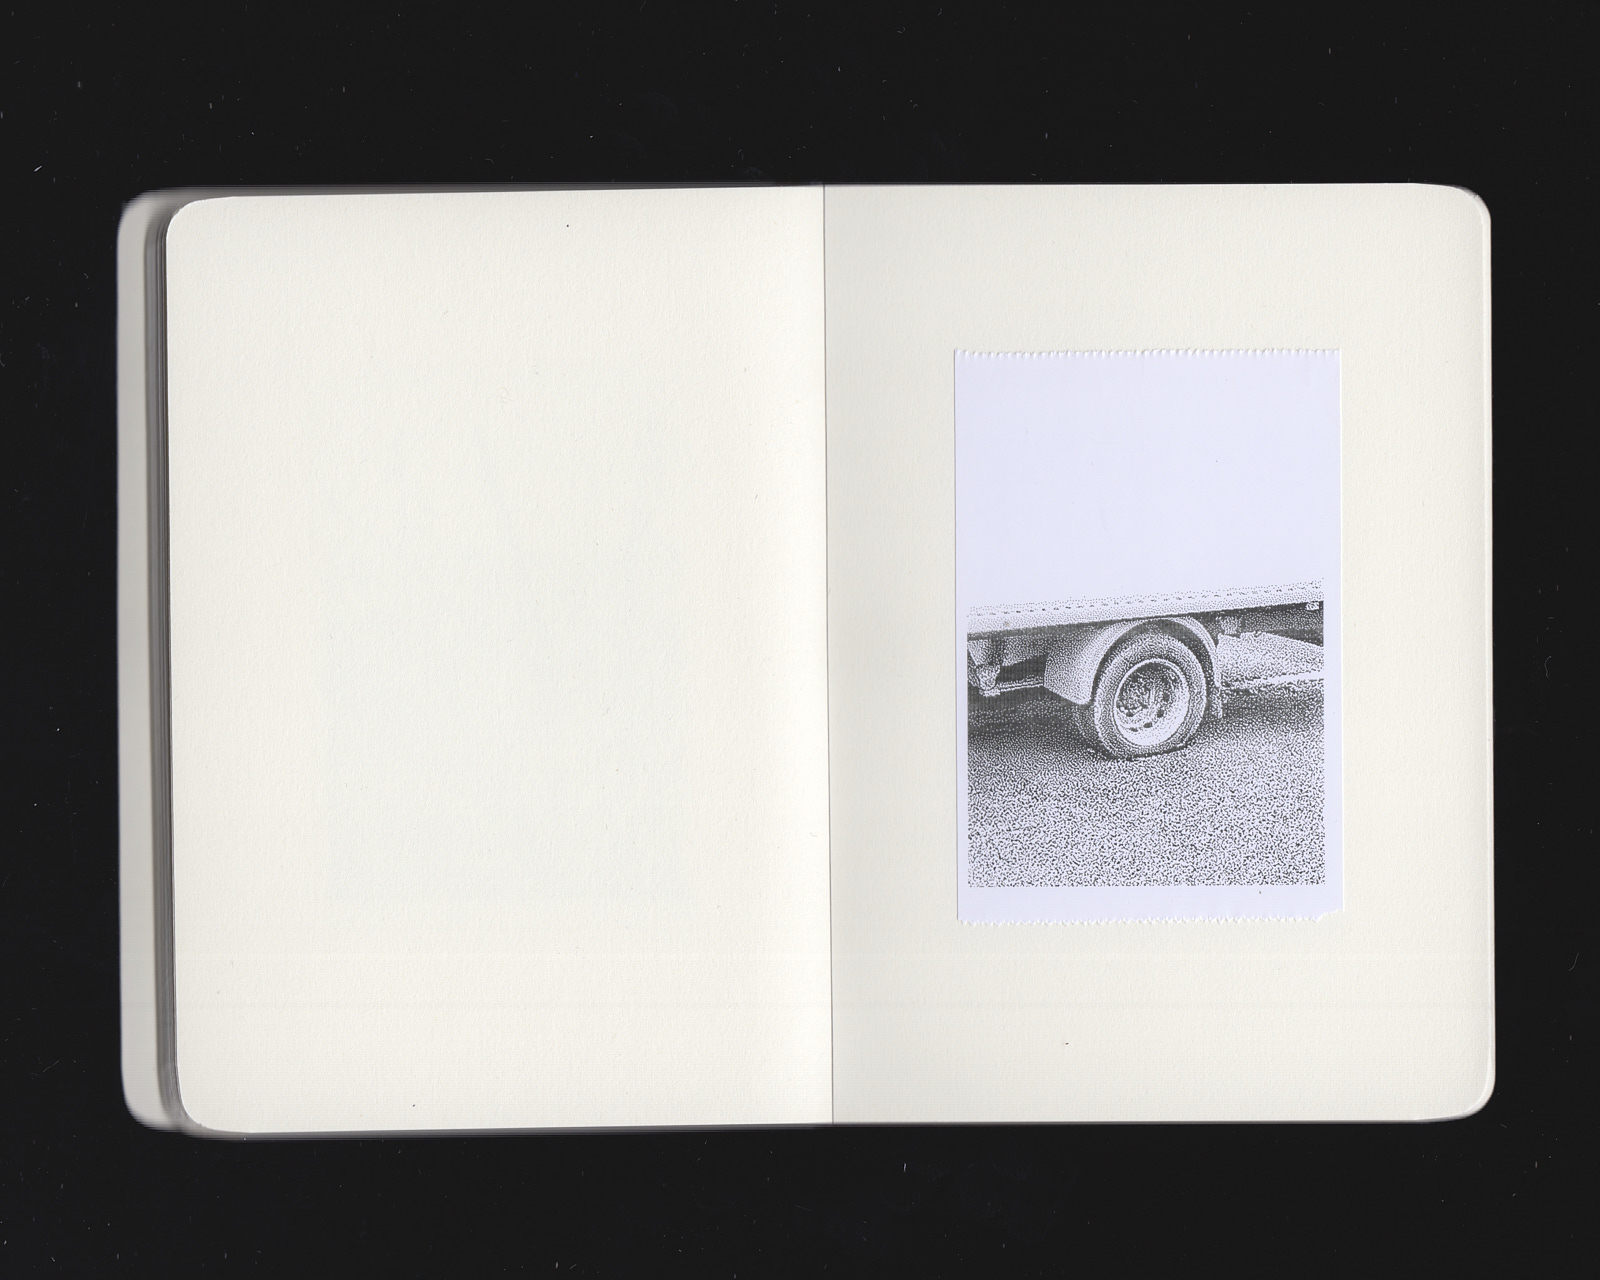
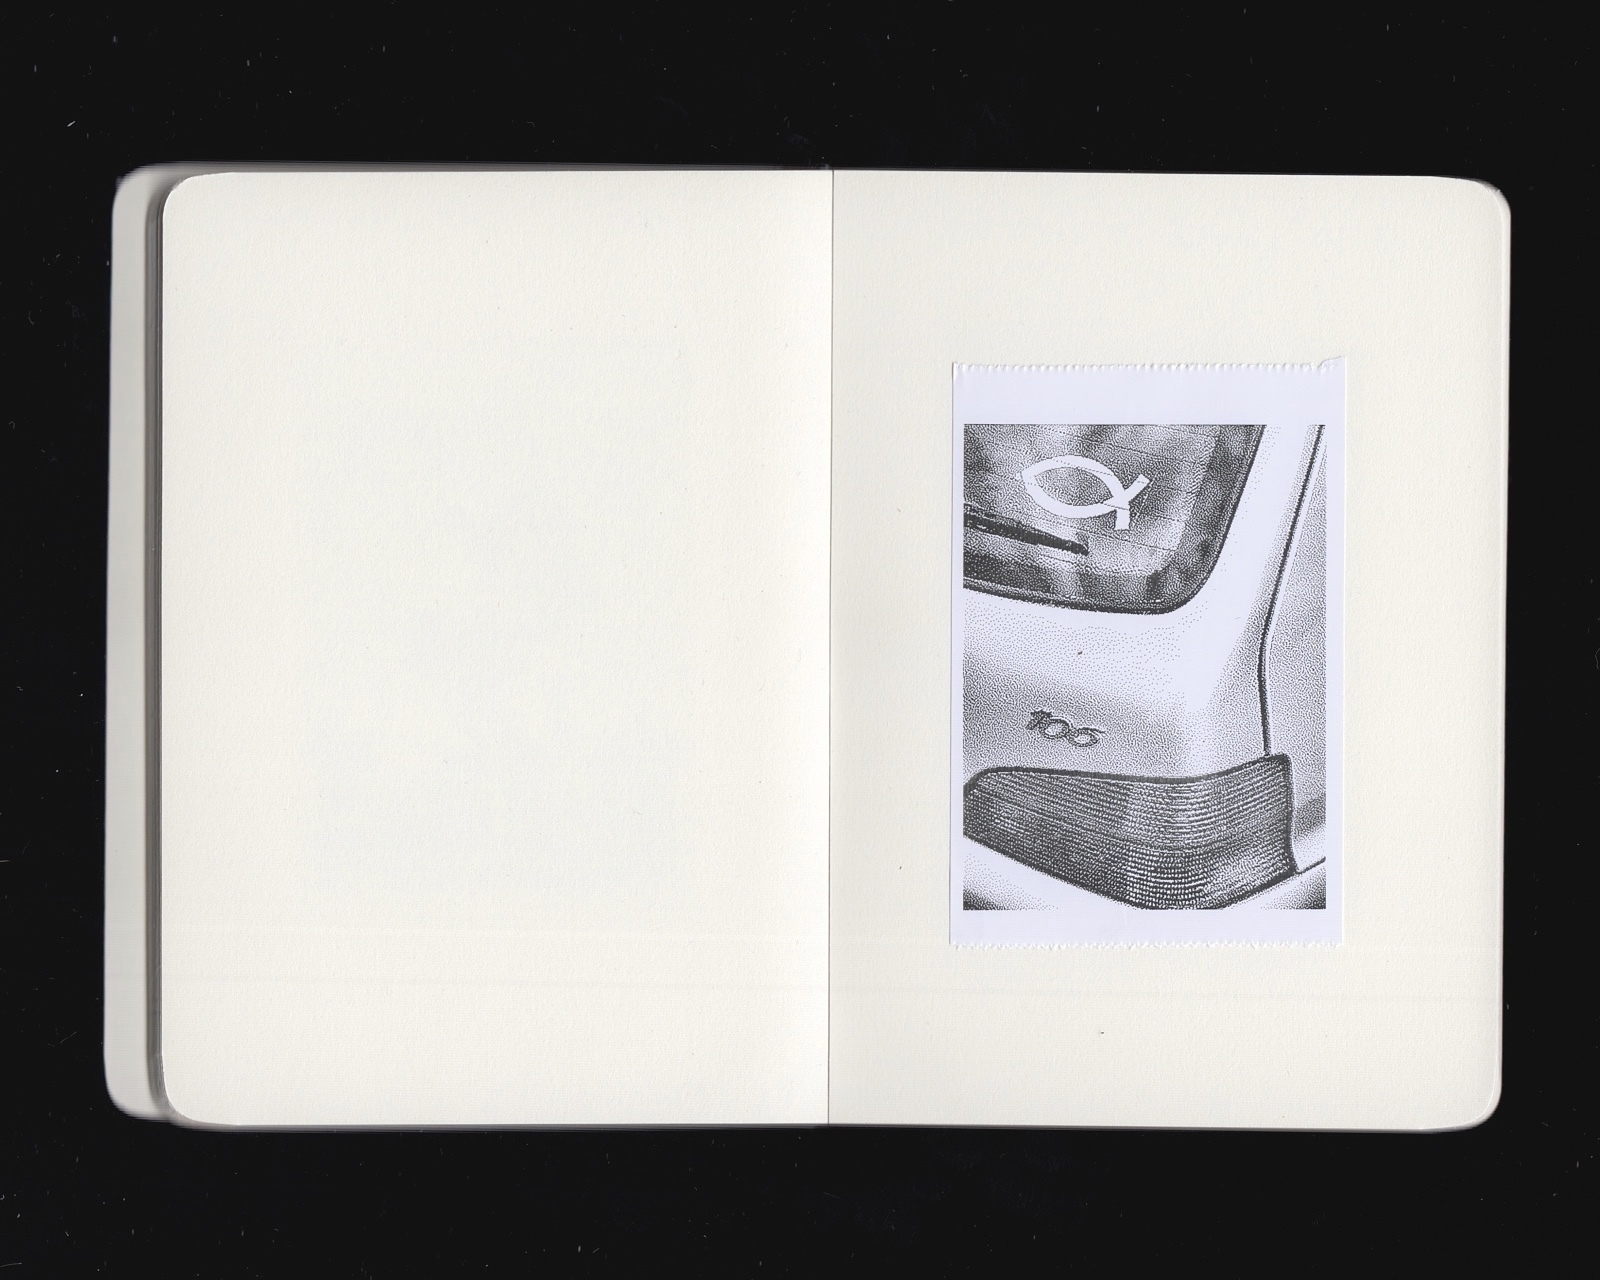
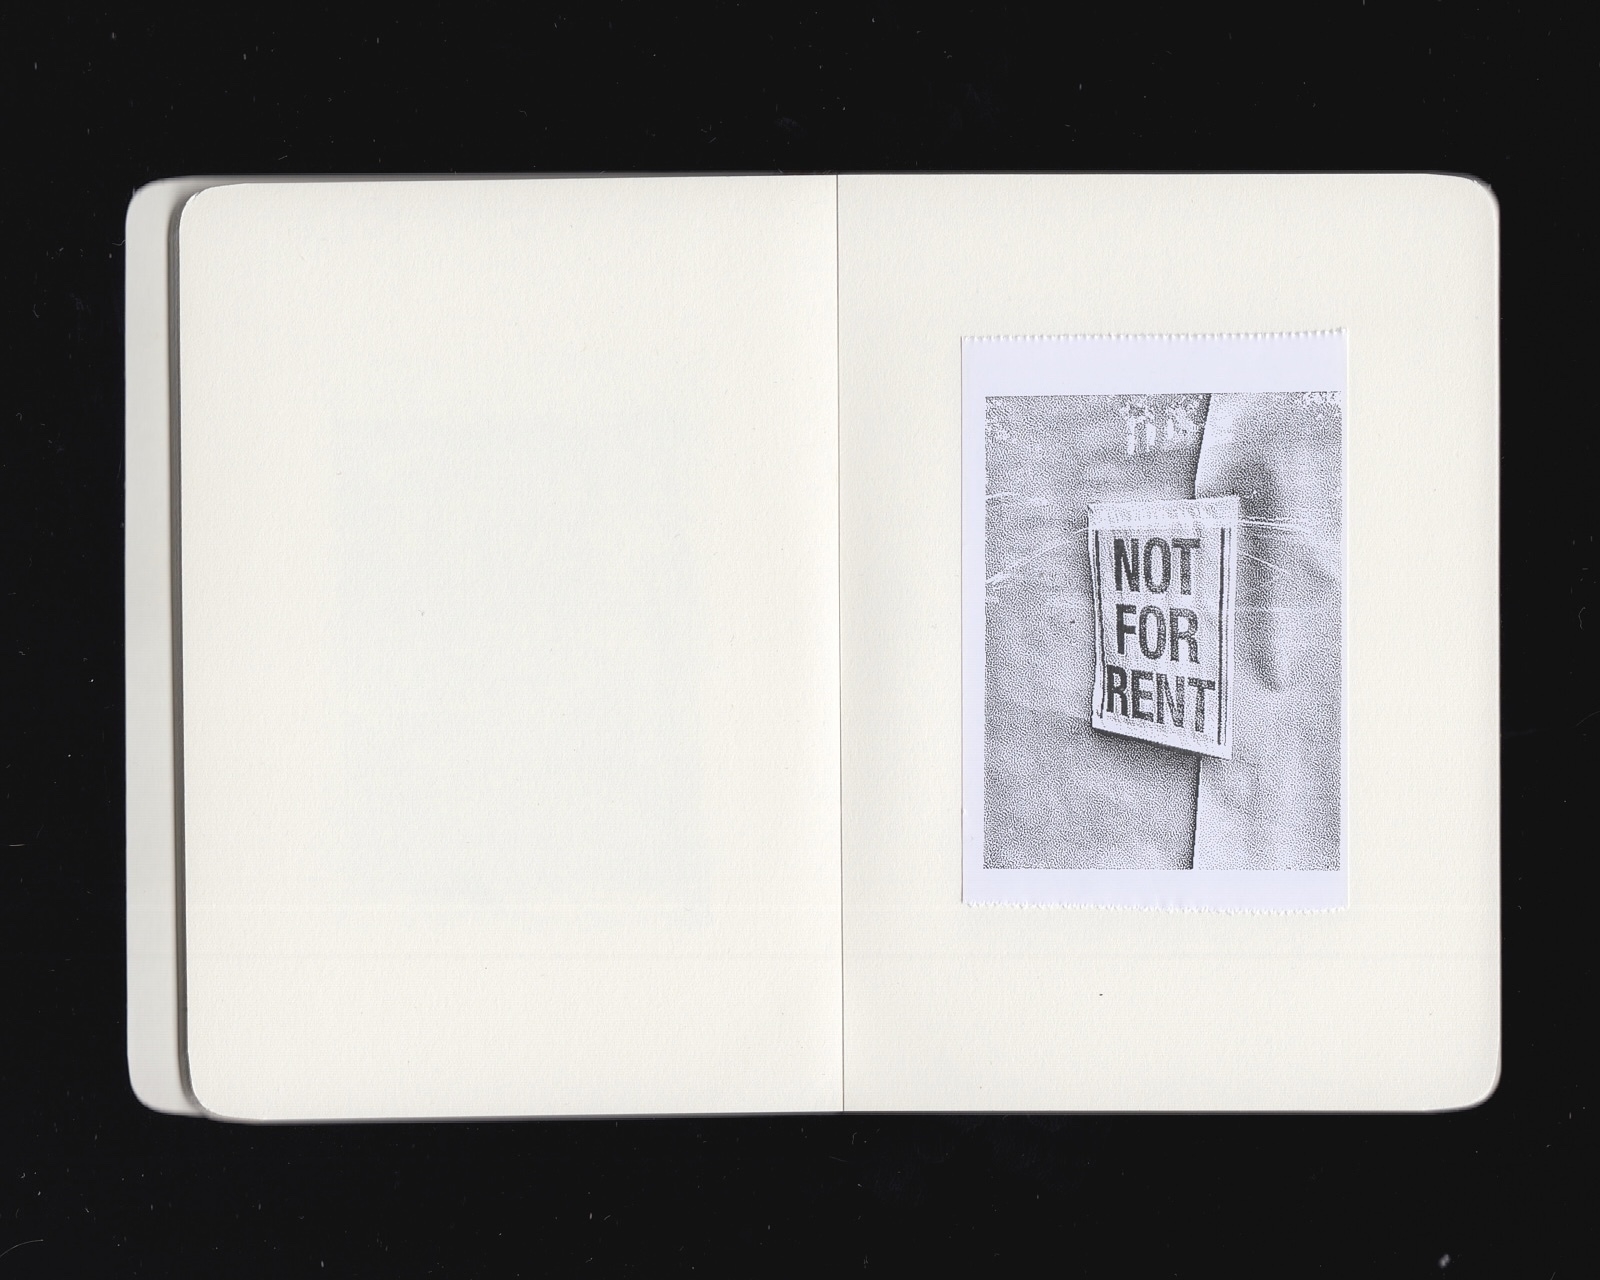
I bought this little thermal printer on a whim from aliexpress, because they look great fun to play around, they are super cheap, the printer and 5 rolls of paper cost less than £10. Plus get a little hit of nostalgia, as it reminds me of the gameboy camera and printer I had as a kid - it’s got that same lofi appeal, but without being limited to 128 x 112 pixels
Obviously quality on these still isn’t great, but that’s part of the charm, digital photos are so crisp and sharp now, it can be fund to have a process like this that is a little rougher around the edges. Being able to print as many photos without worrying about cost is freeing, and makes the whole process really fun. It’s also great with kids, I have a toddler and he loves being able to choose an image and have it printed almost instantly, before he then proceeds to scribble all over it.
Anything that encourages me to actually print out images is great, it’s nice to have them off a screen in a physical book I can pick up off a shelf and have a flick through. The size of them is perfect for little A6 notebooks, which I can never resist picking up from Tiger or Muji, and again they are cheap, so there is no pressure, and I don’t end up overthinking the process, unlike a moleskin, where it’s constantly at the back of my mind that it cost the best part of £20.
Anything too detailed gets lost when using the thermal printer, I’ve found that simple scenes with lots of contrast work well, so these are all just simple scenes, usually close up little signs, cars, no big detailed lanscapes, as they just get lost in the lack of detail.
so these are mainly just phone shots of little everyday situations I’ve noticed, something that’s caught my eye, you know the kind of thing I see and post to instagram stories.
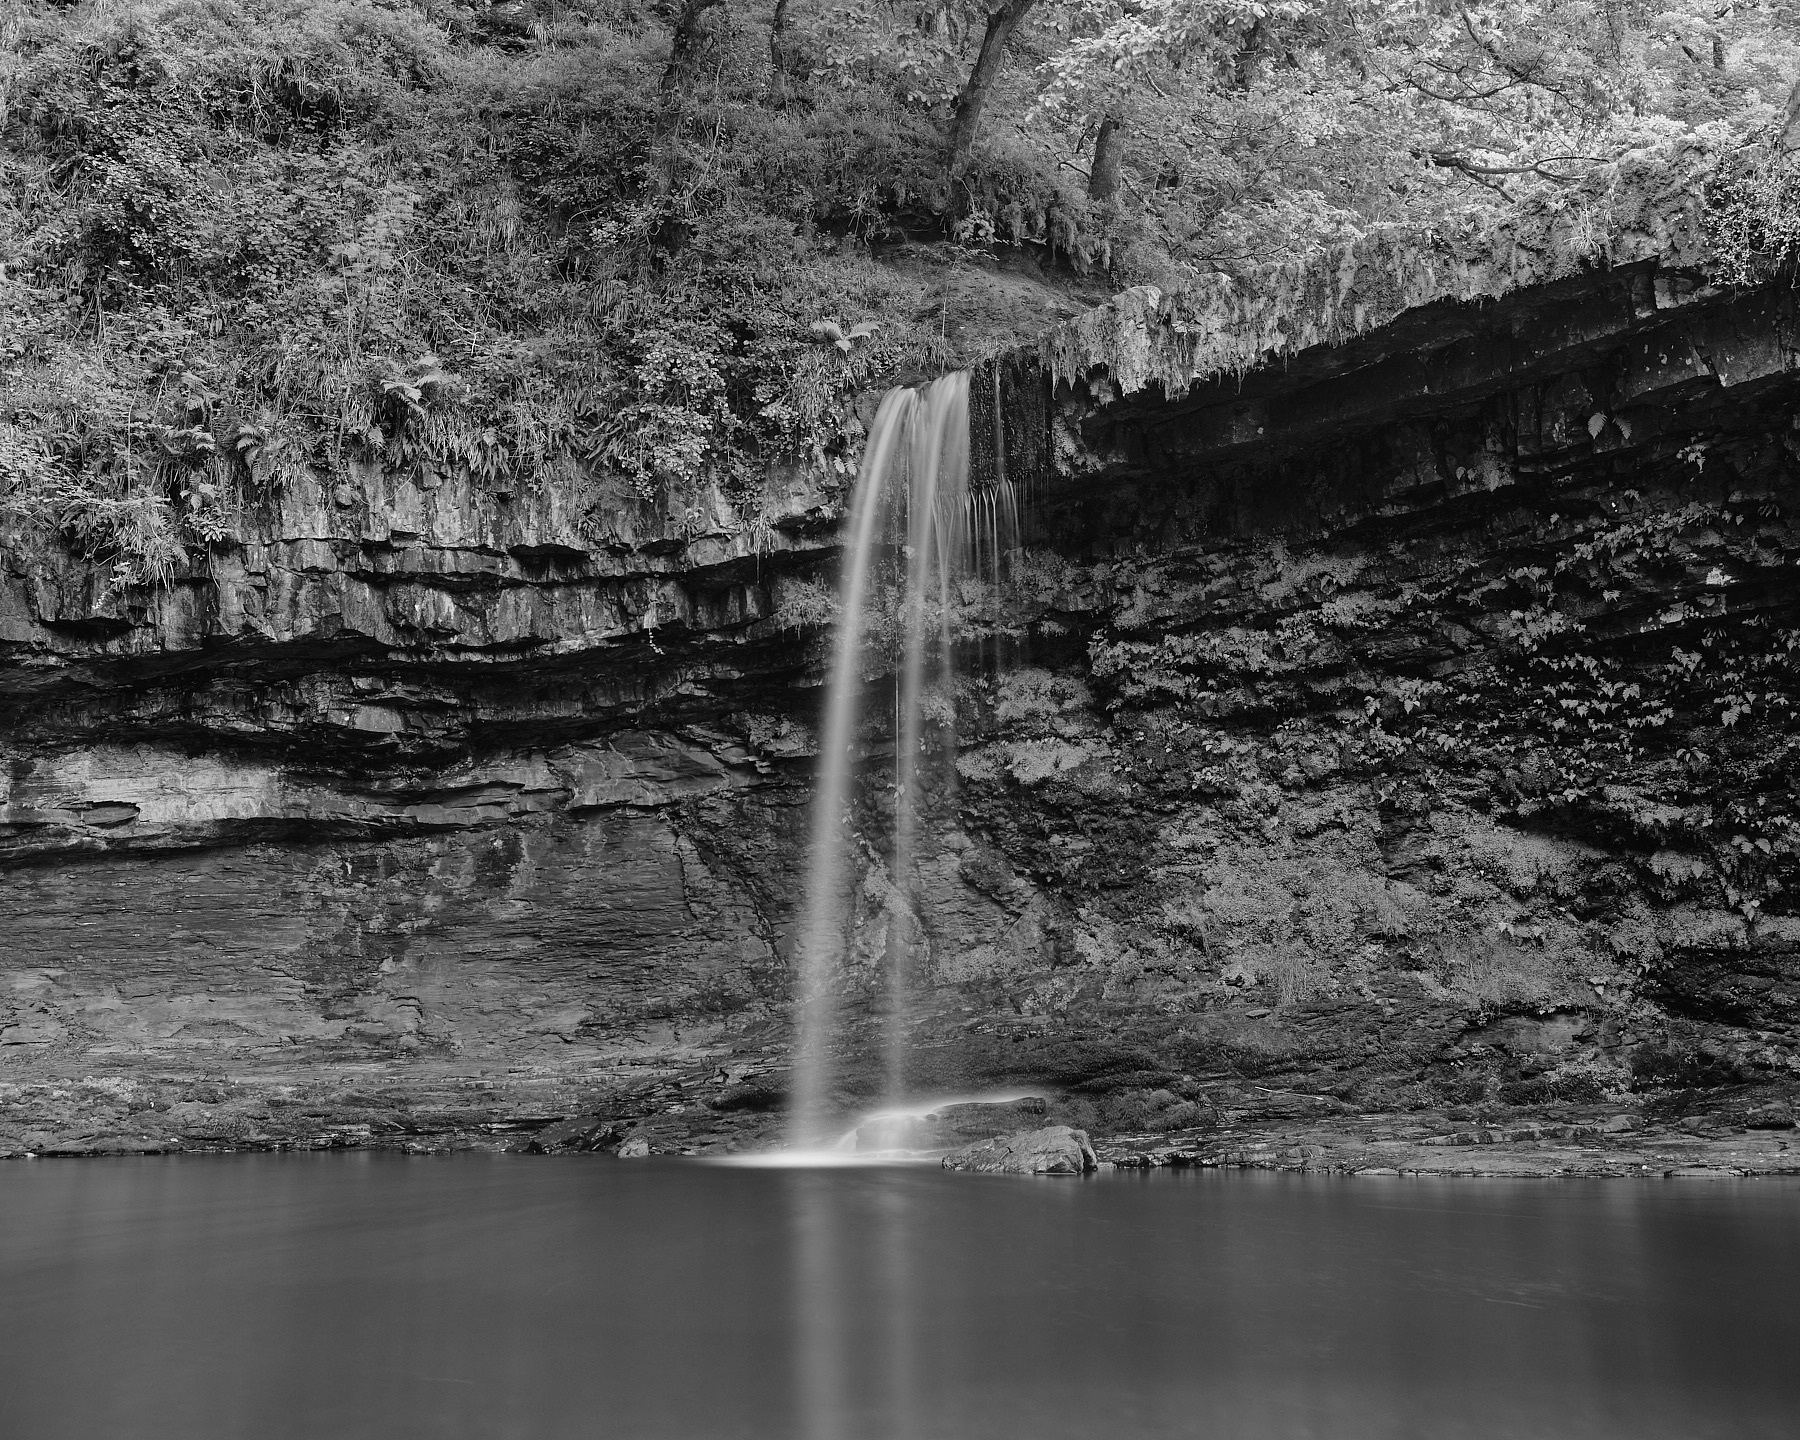
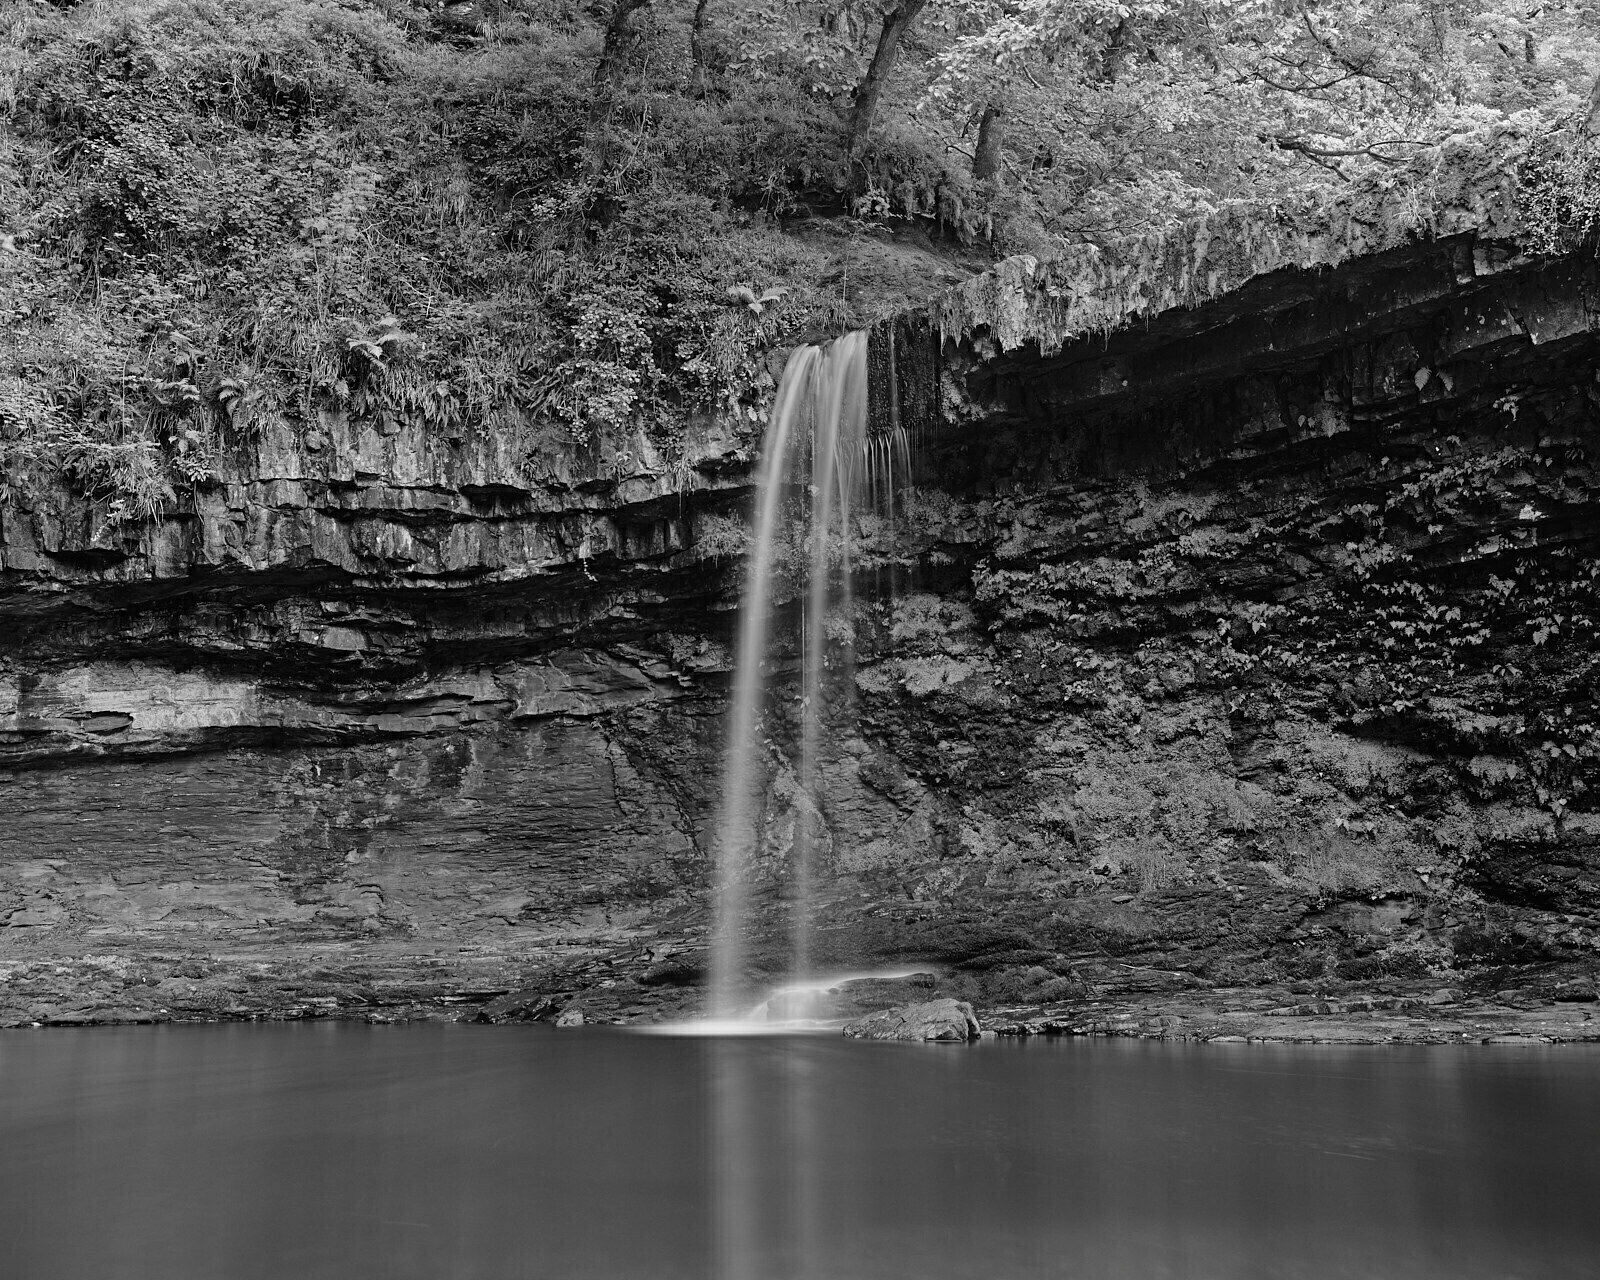
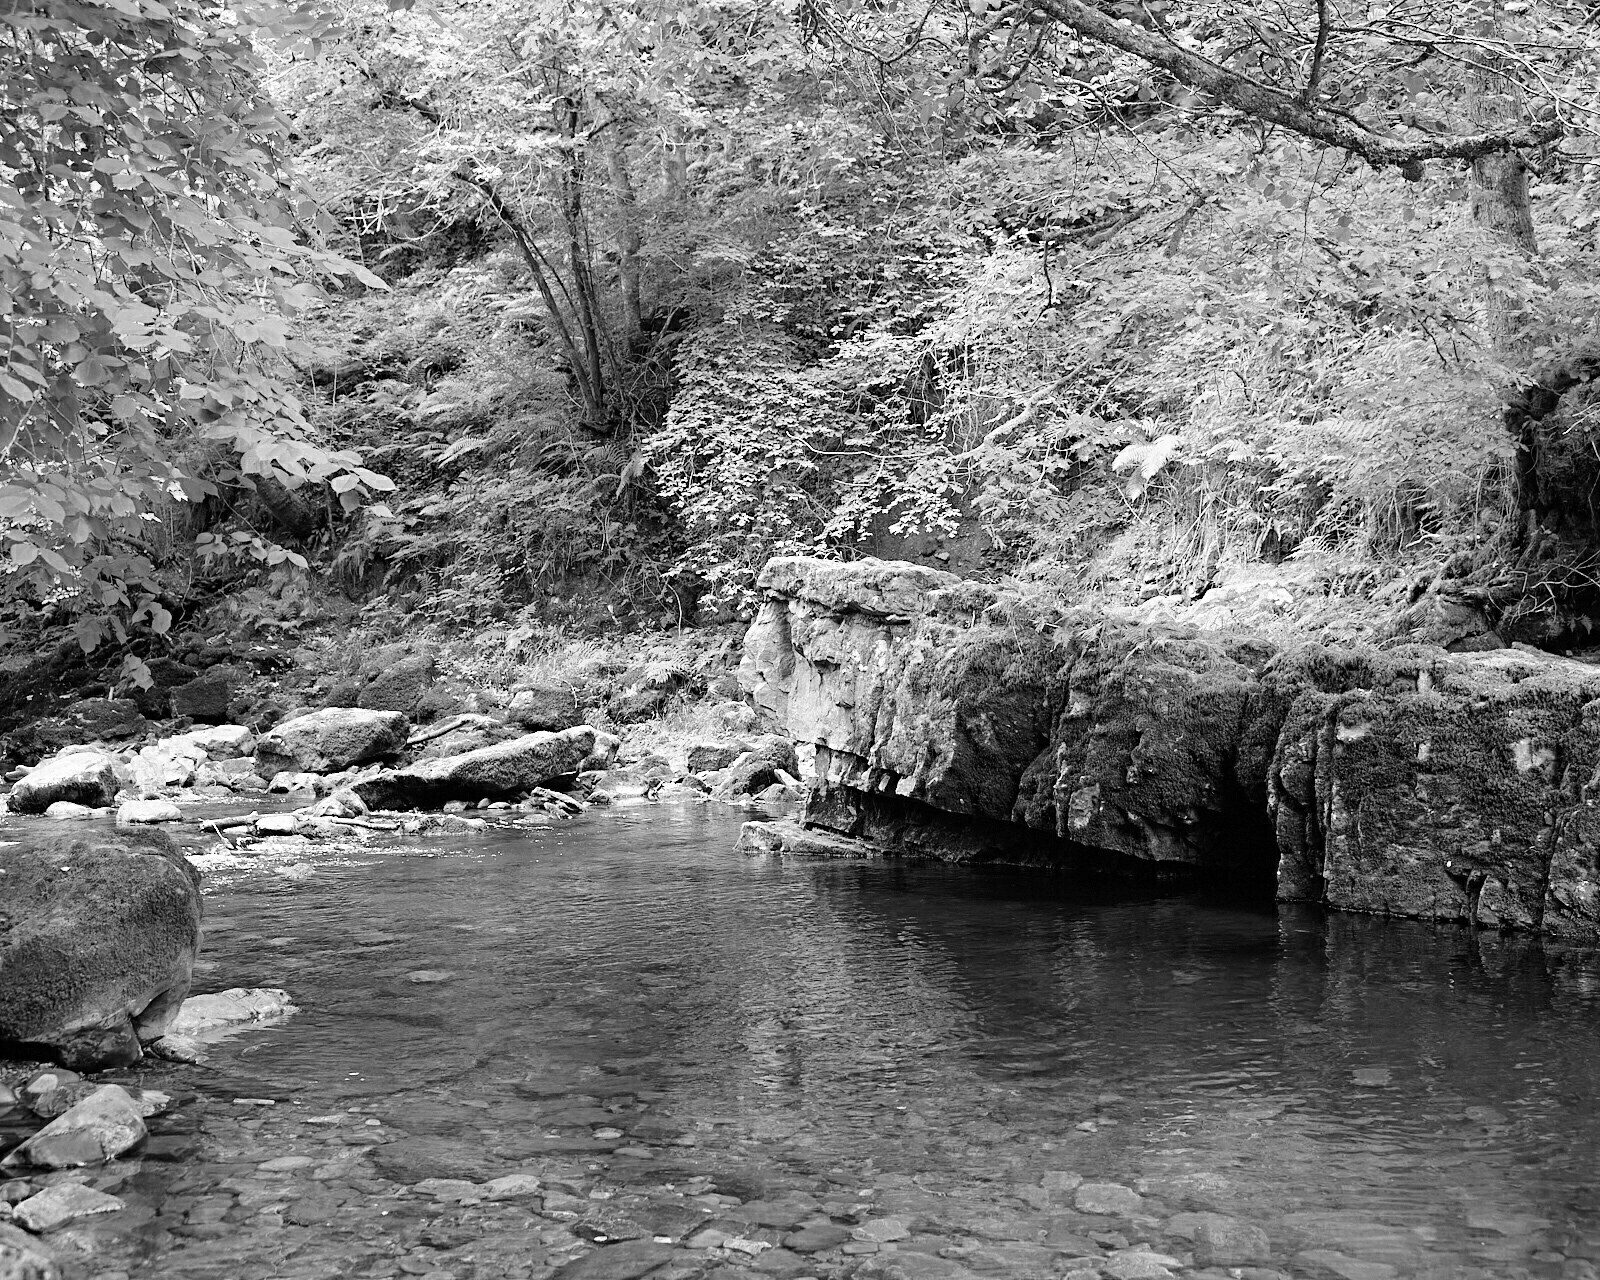
I’ve been keen to get back to Wales to explore some waterfalls since a trip last year, this time the destination was the Sgwd Gwladus waterfall on the Elidir trail, as it looks absolutely perfect.
Now I know there are already thousands of photos of this waterfall, and my plan to take a long exposure photo isn’t exactly ground breaking in its originality. But I don’t care. Even if it looks identical to every other photo, it will be my photo. Sometimes you have to just embrace the obvious, otherwise there would be no point in doing anything, as almost everything has already been done.
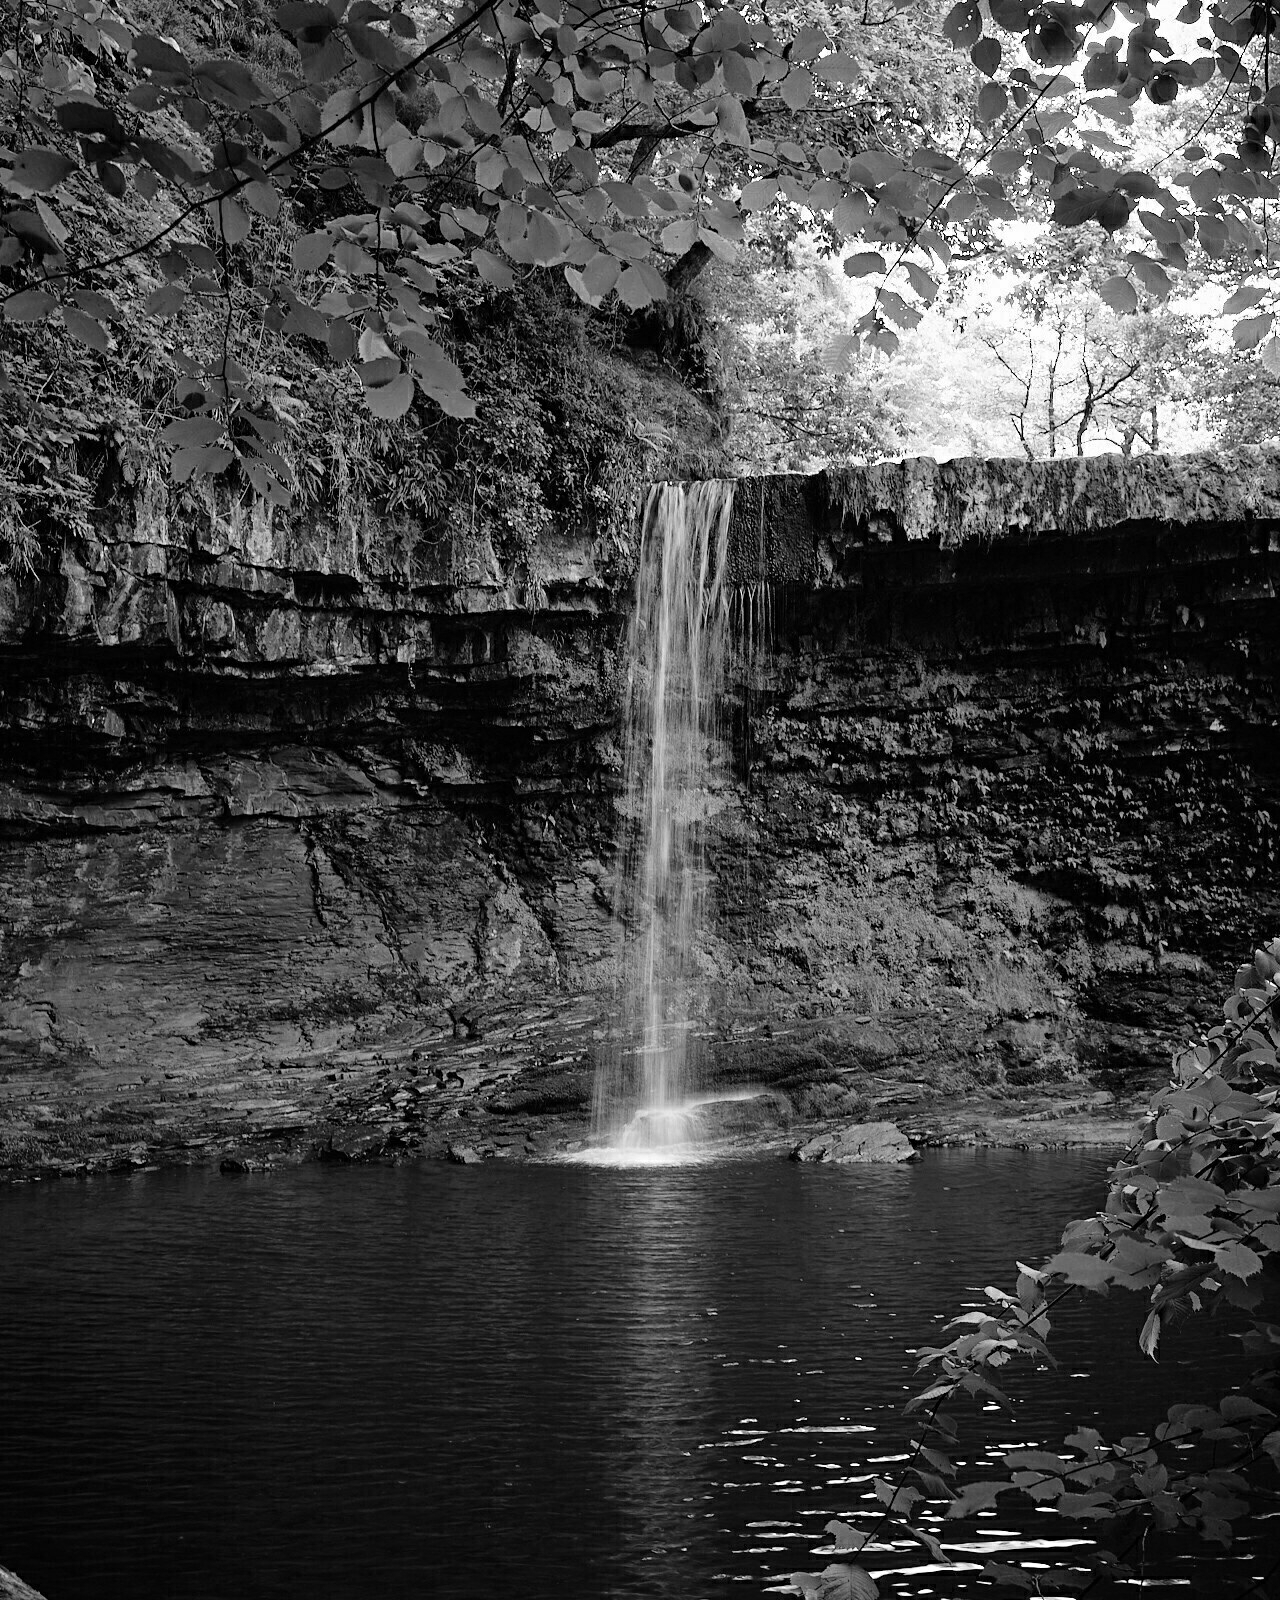
It’s a perfect daytrip spot, as you can park in the village, I feel like such a dad saying this, but there is plenty of parking, even on a sunny busy day, we found a spot no problem. Once you’re on the trail it’s a 40-50 mins straight path to the waterfall, though with a toddler and a dog it took at least double that time, but it’s nice weather, there’s no rush.
We lost count of the amount of people that overtook us on the way there, and then passed us again, this time heading the back the other way before we had even reached the waterfall. Though I think some people must have got to the waterfall, stopped for 30 seconds so they can say they’ve seen it, and then head straight back.
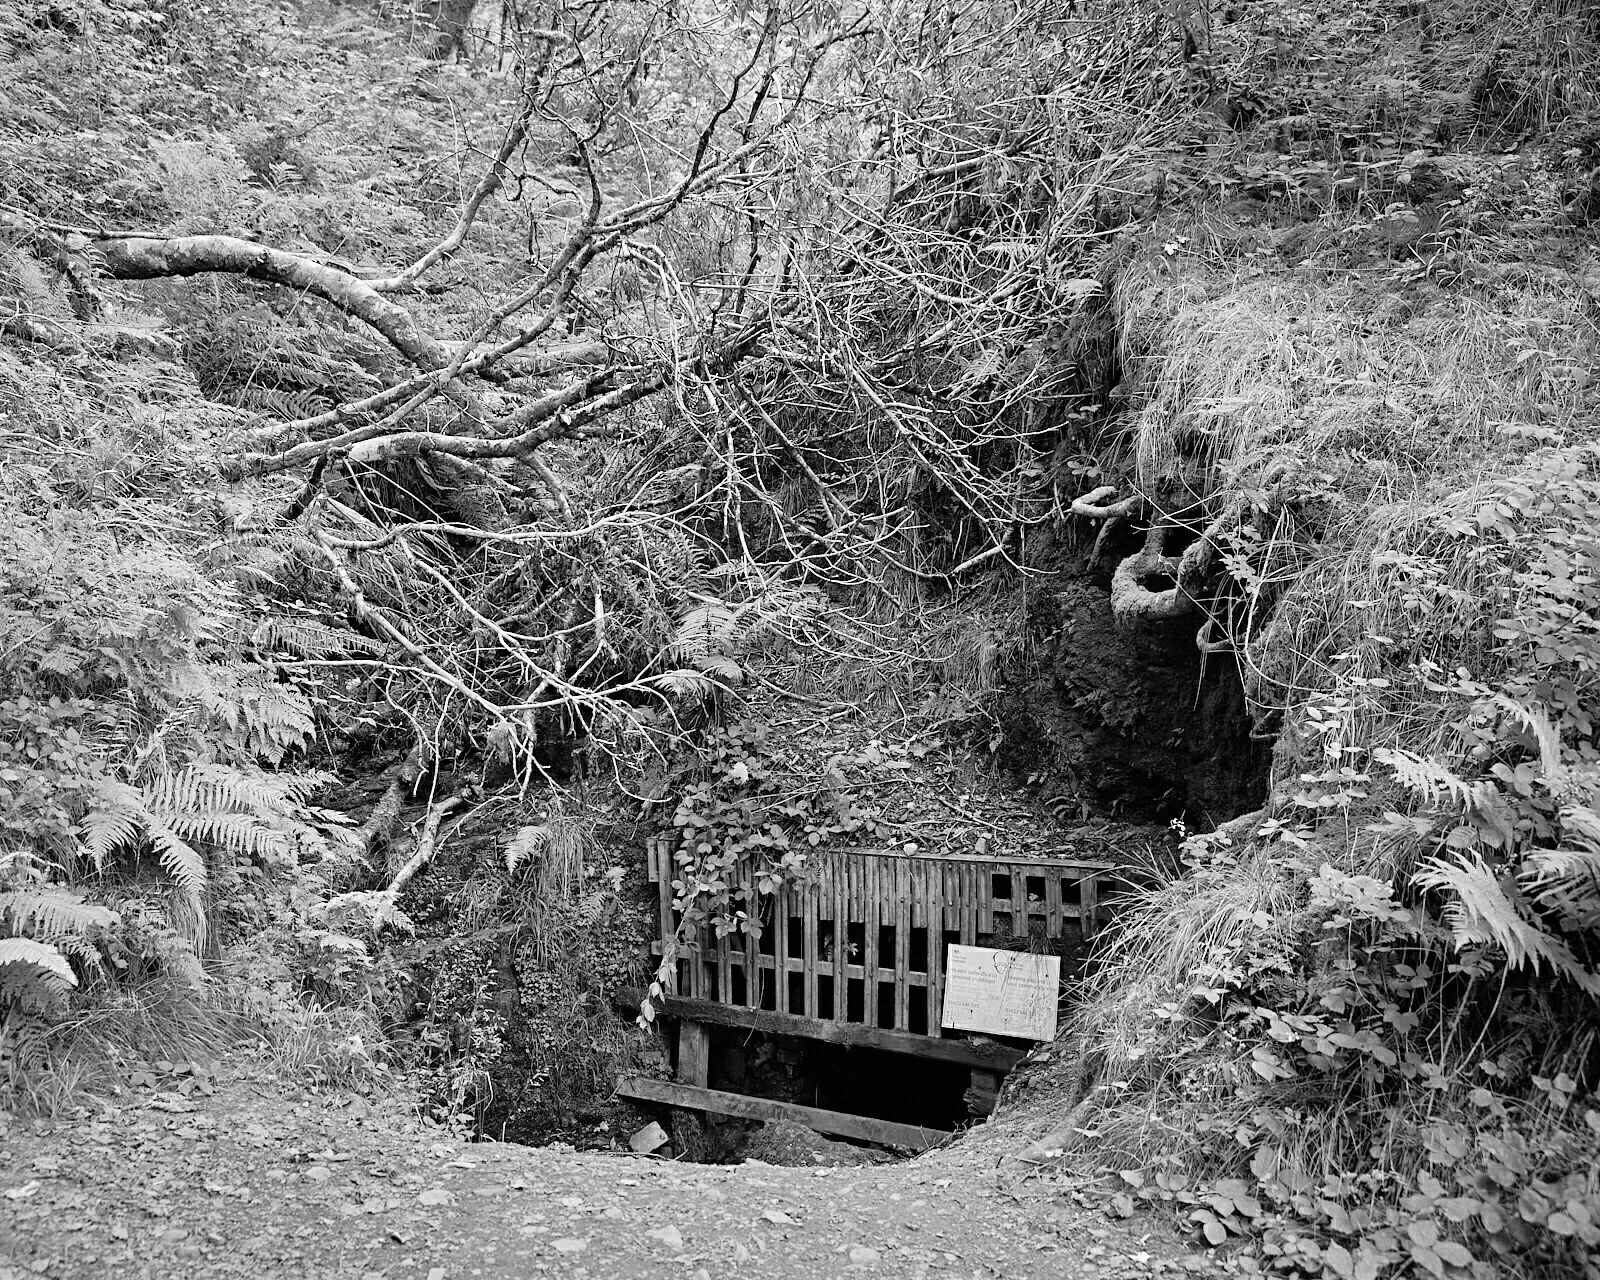
On the trail I spotted a few of these entrances that have been completely sealed, must be to stop people exploring them, and getting themselves into trouble.
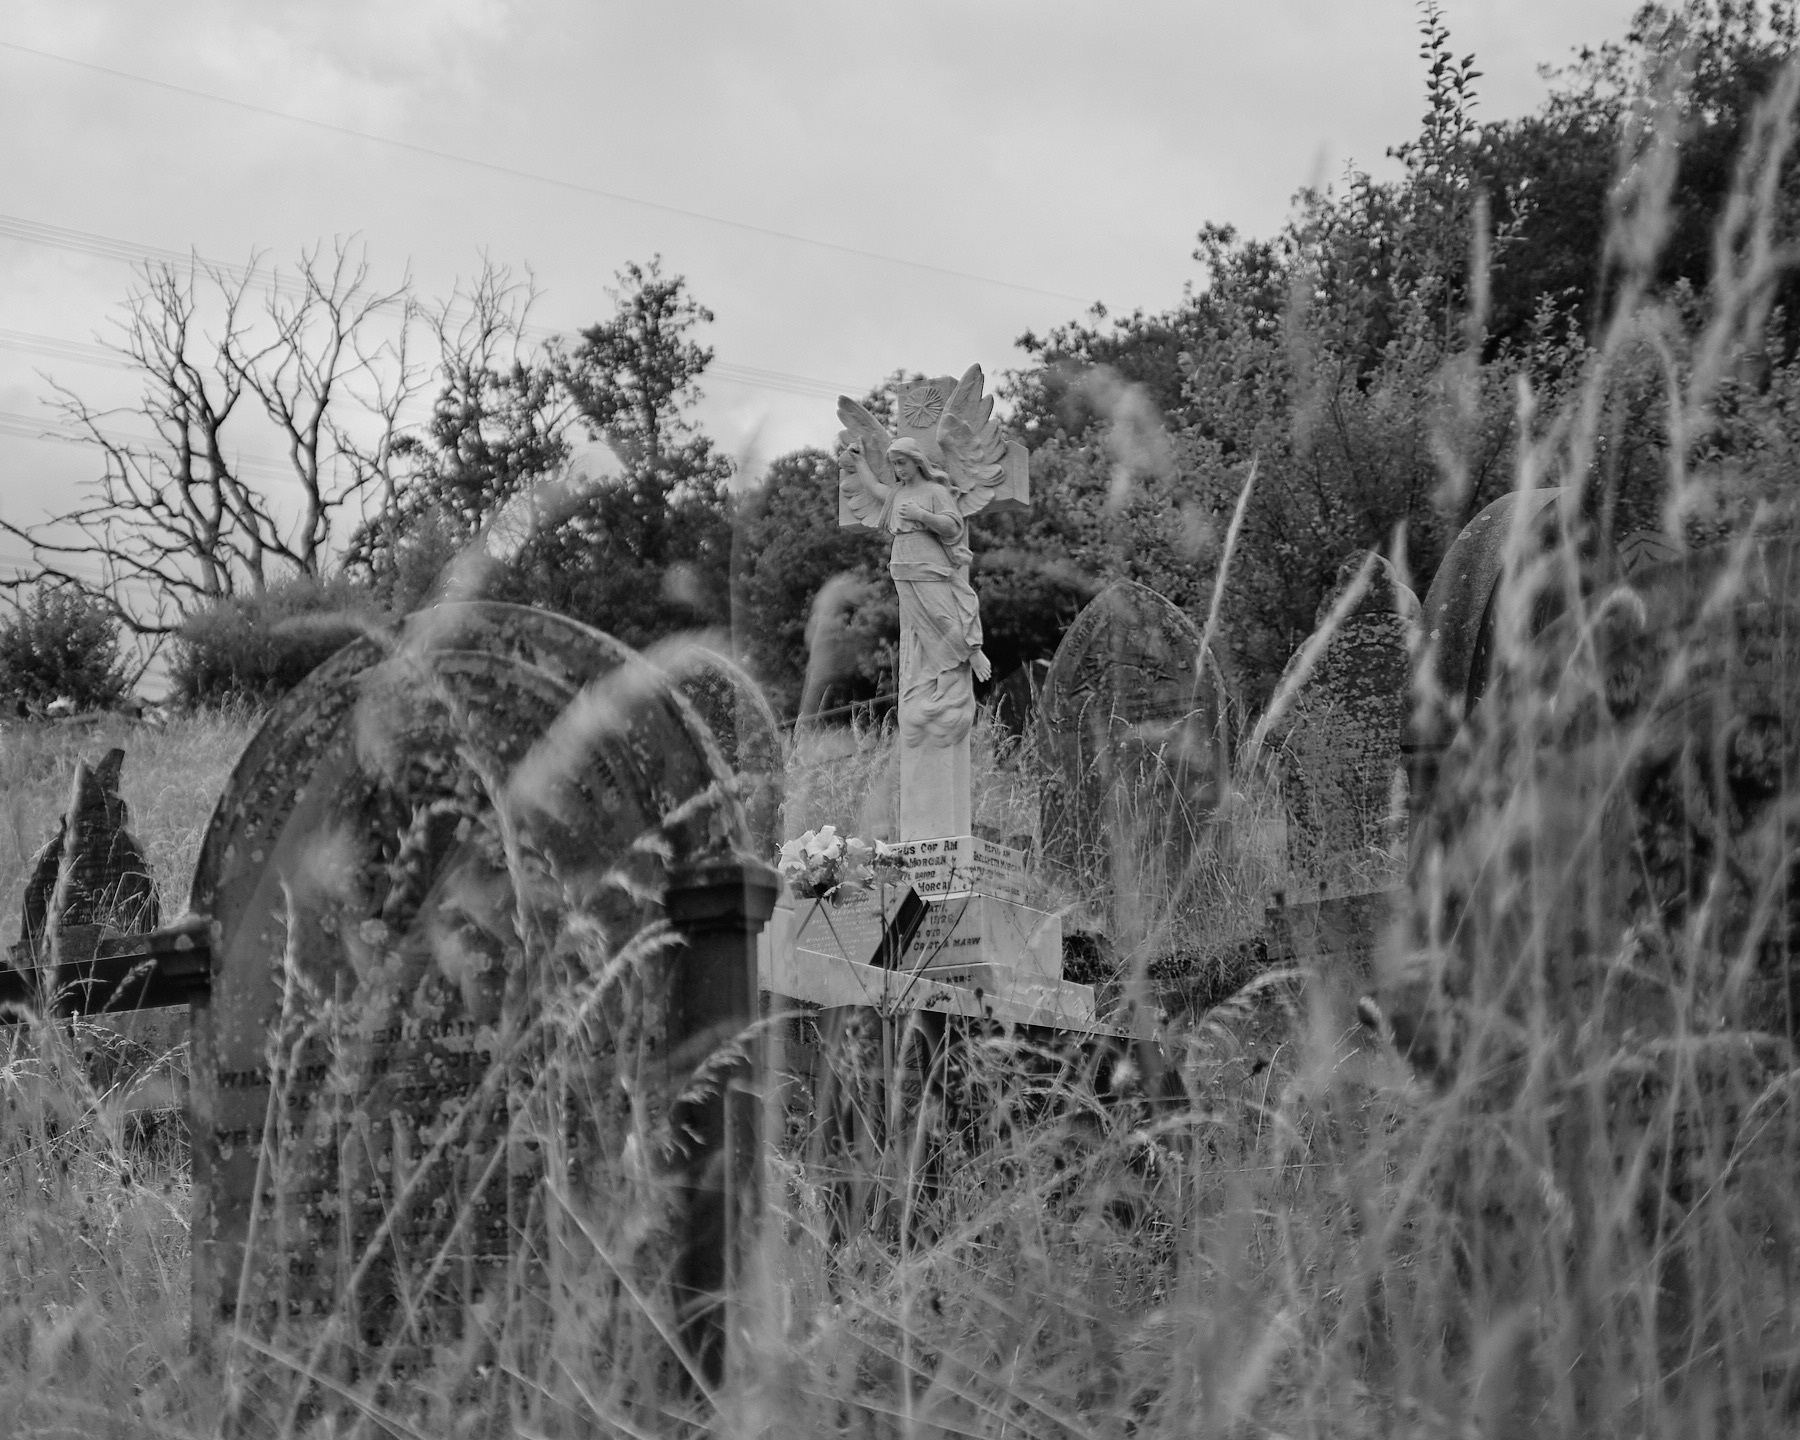
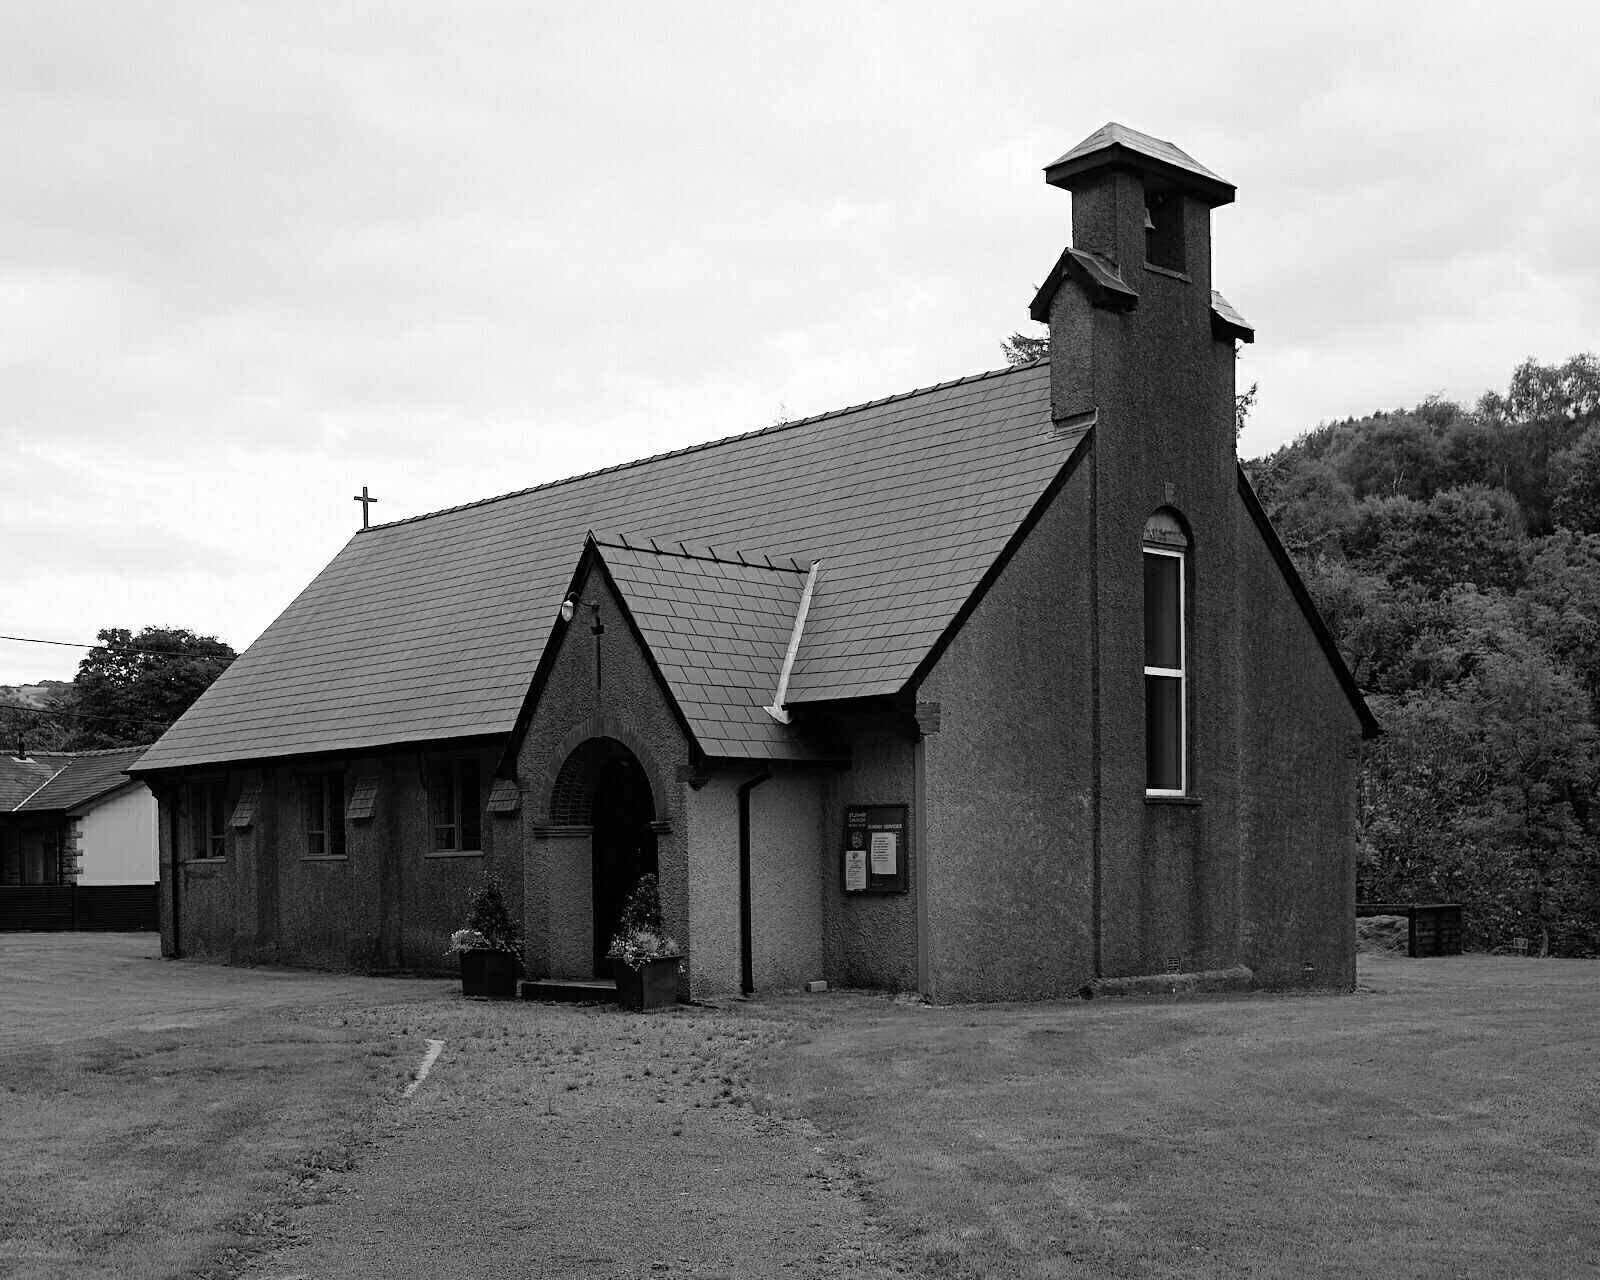
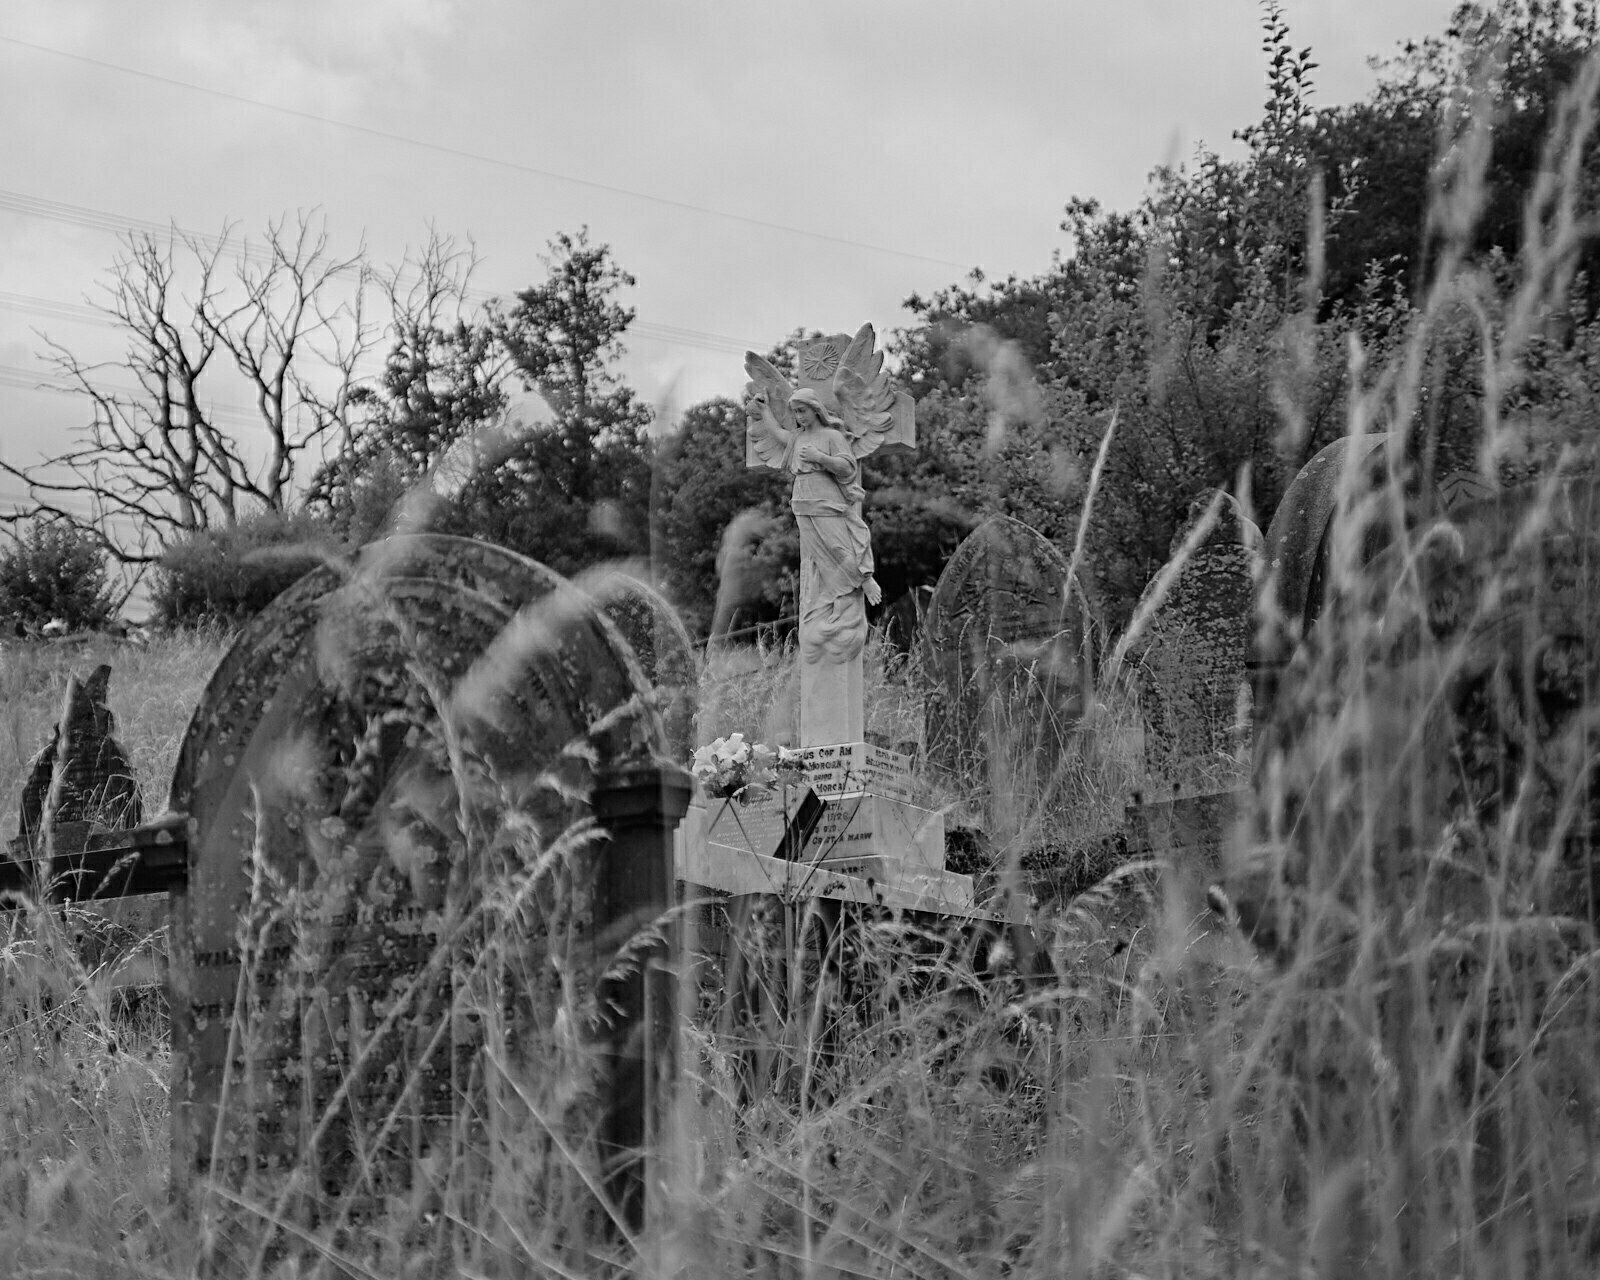
There were a couple of nearby churches that looked photogenic, and were worth stopping at, I would have loved to explore a little more, but a tired hungry toddler meant I had other priorities.
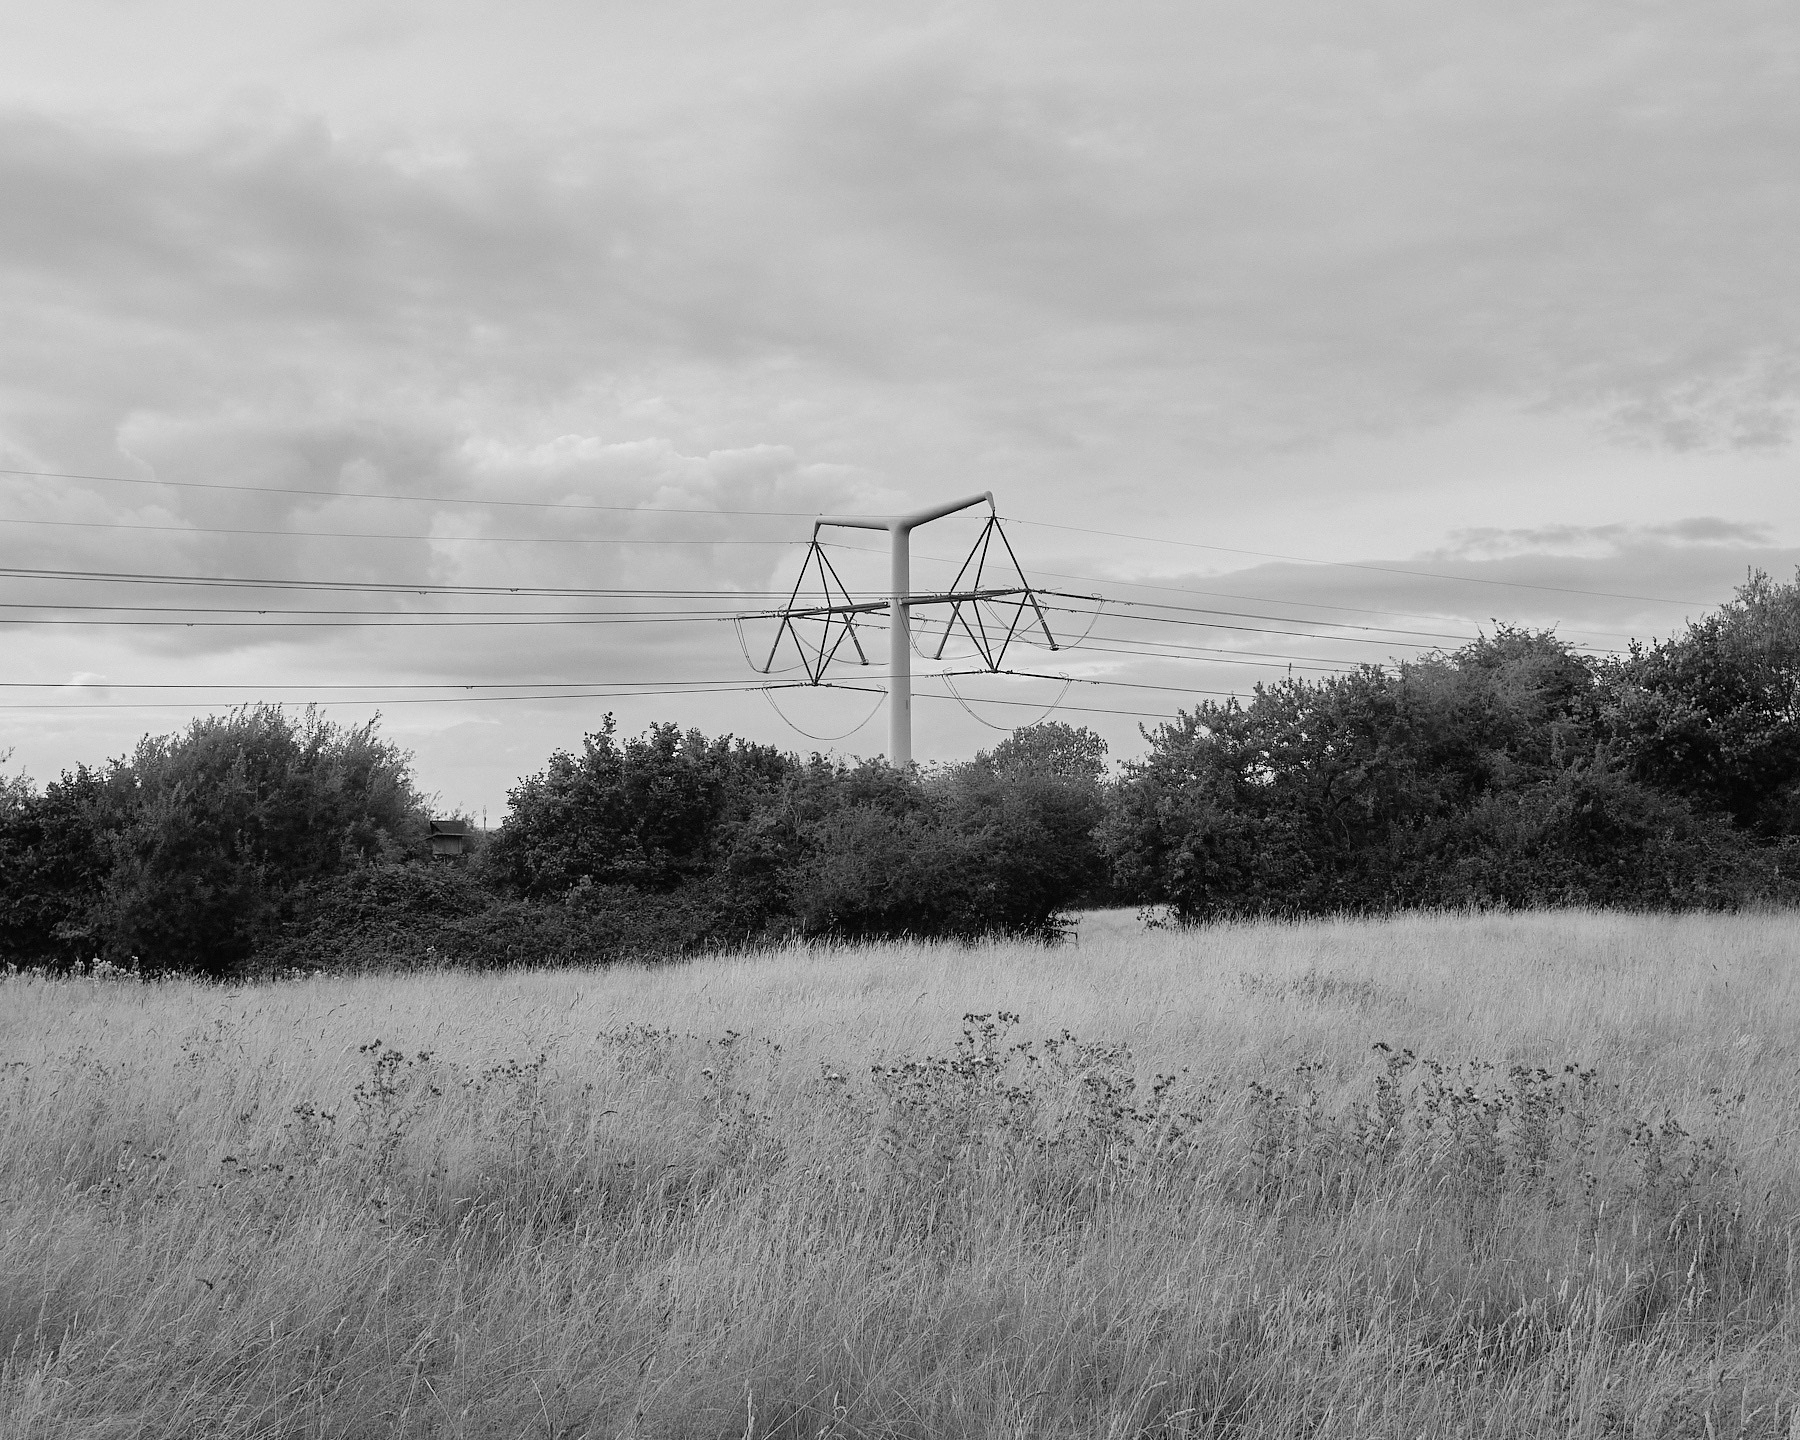
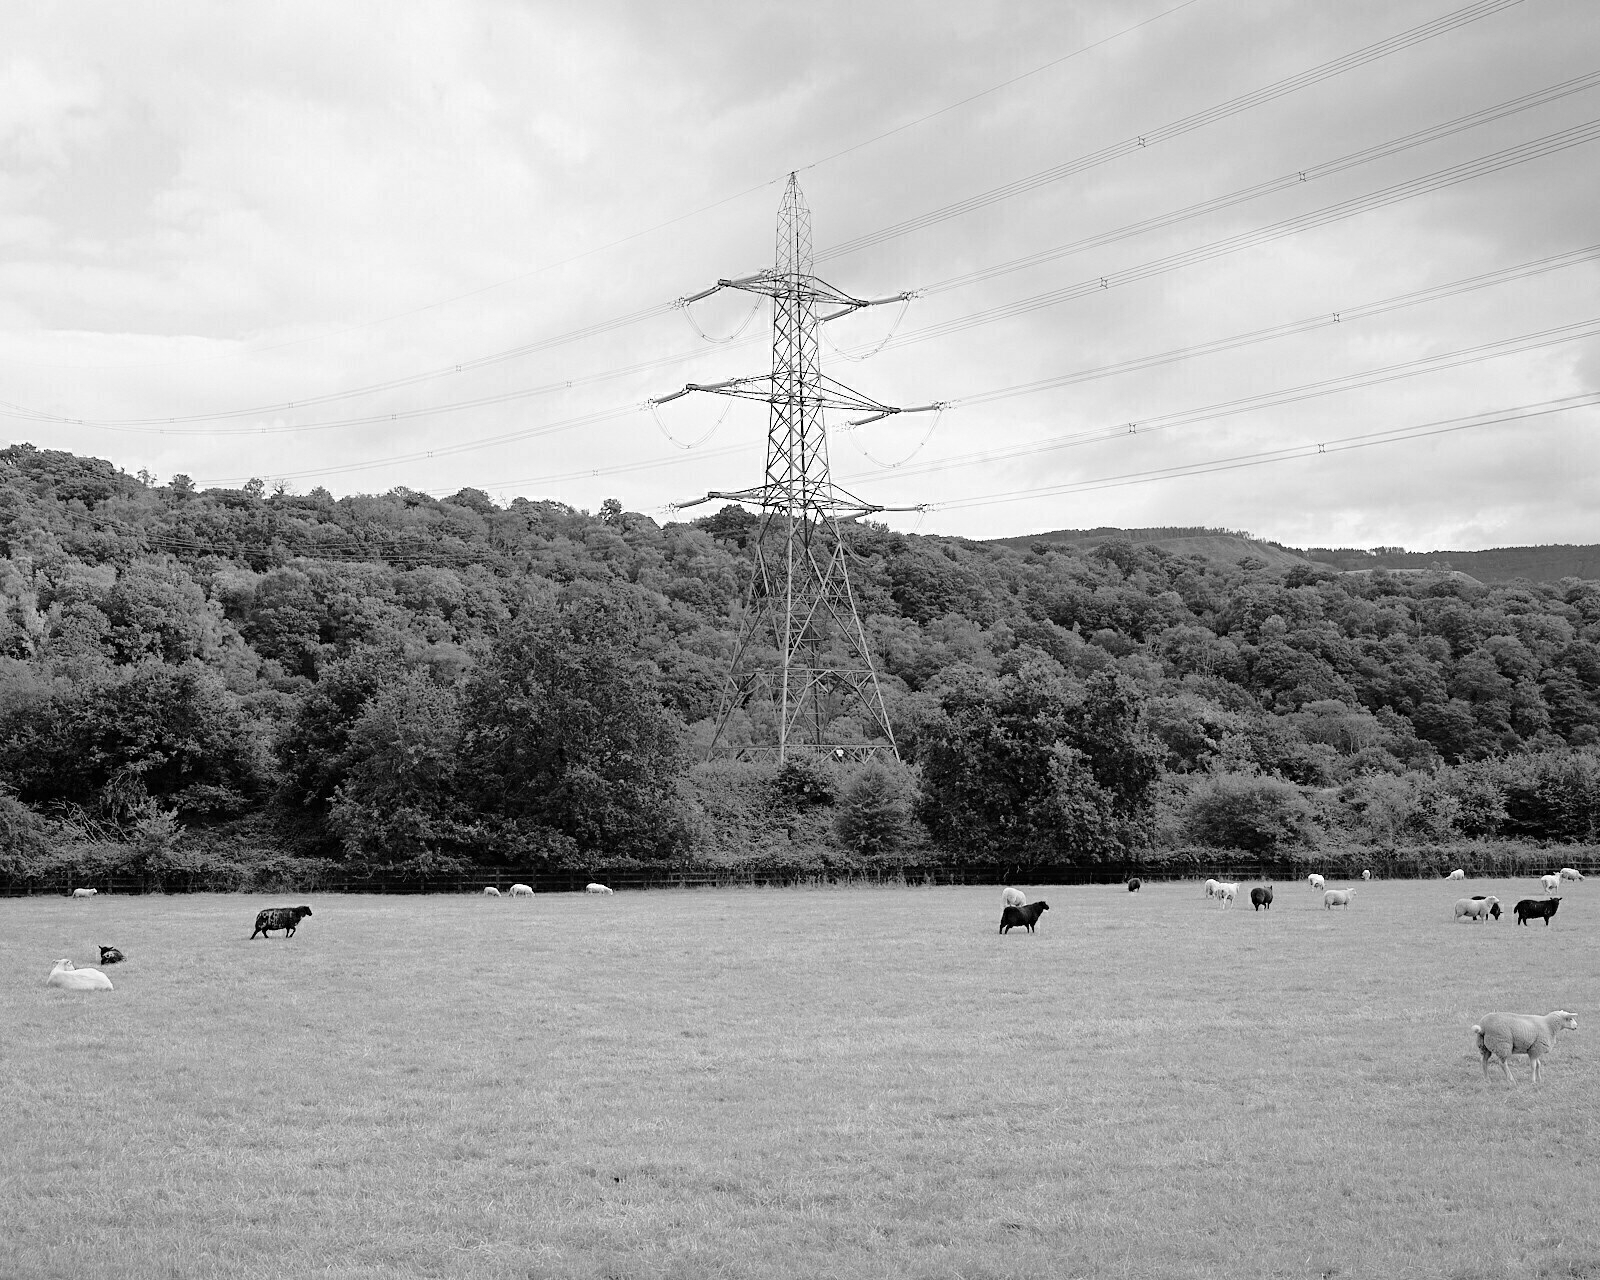
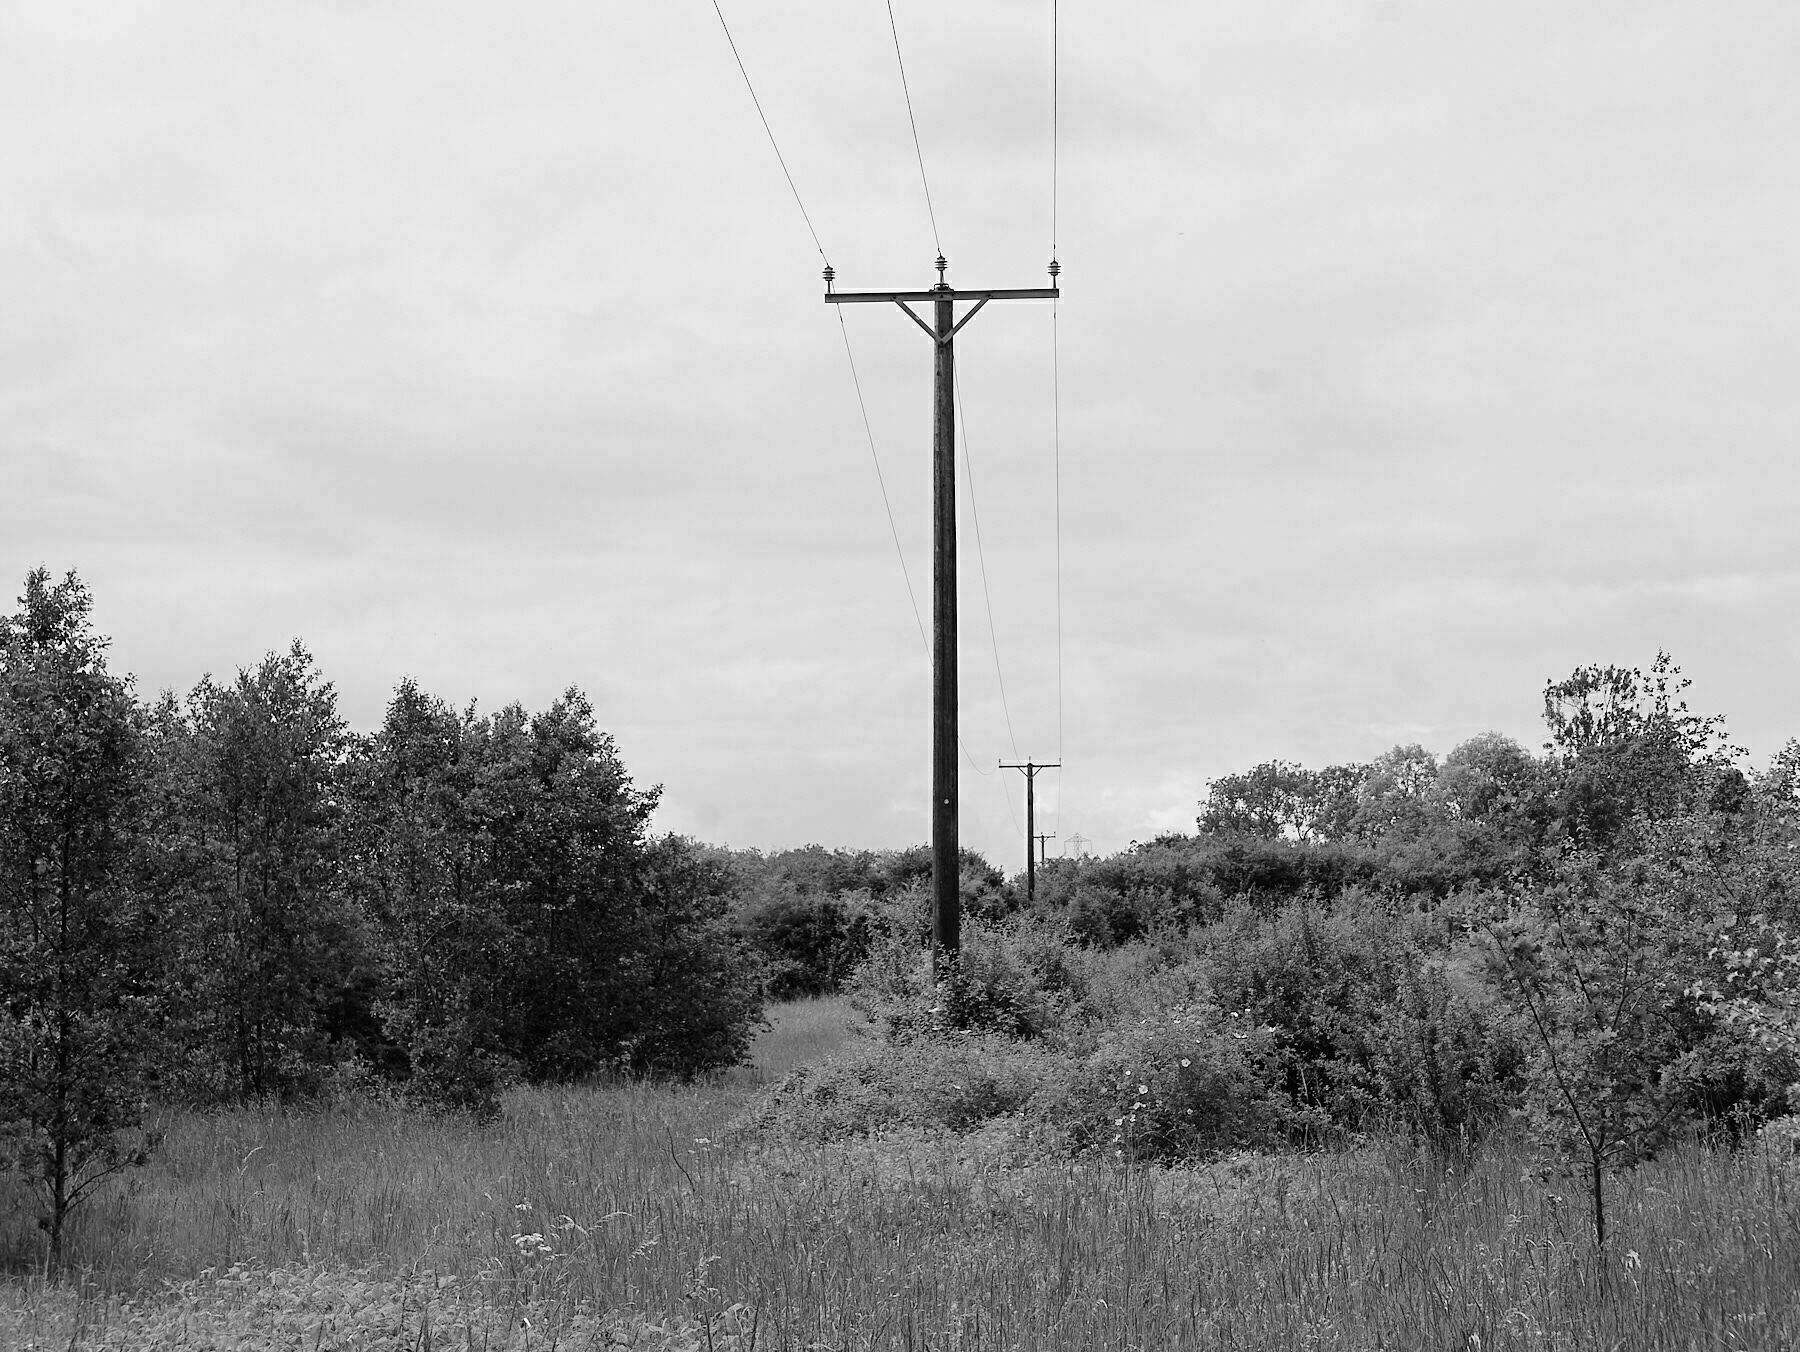
Plus a pylon shot, as big ugly structures are like catnip to me, I can’t resist.
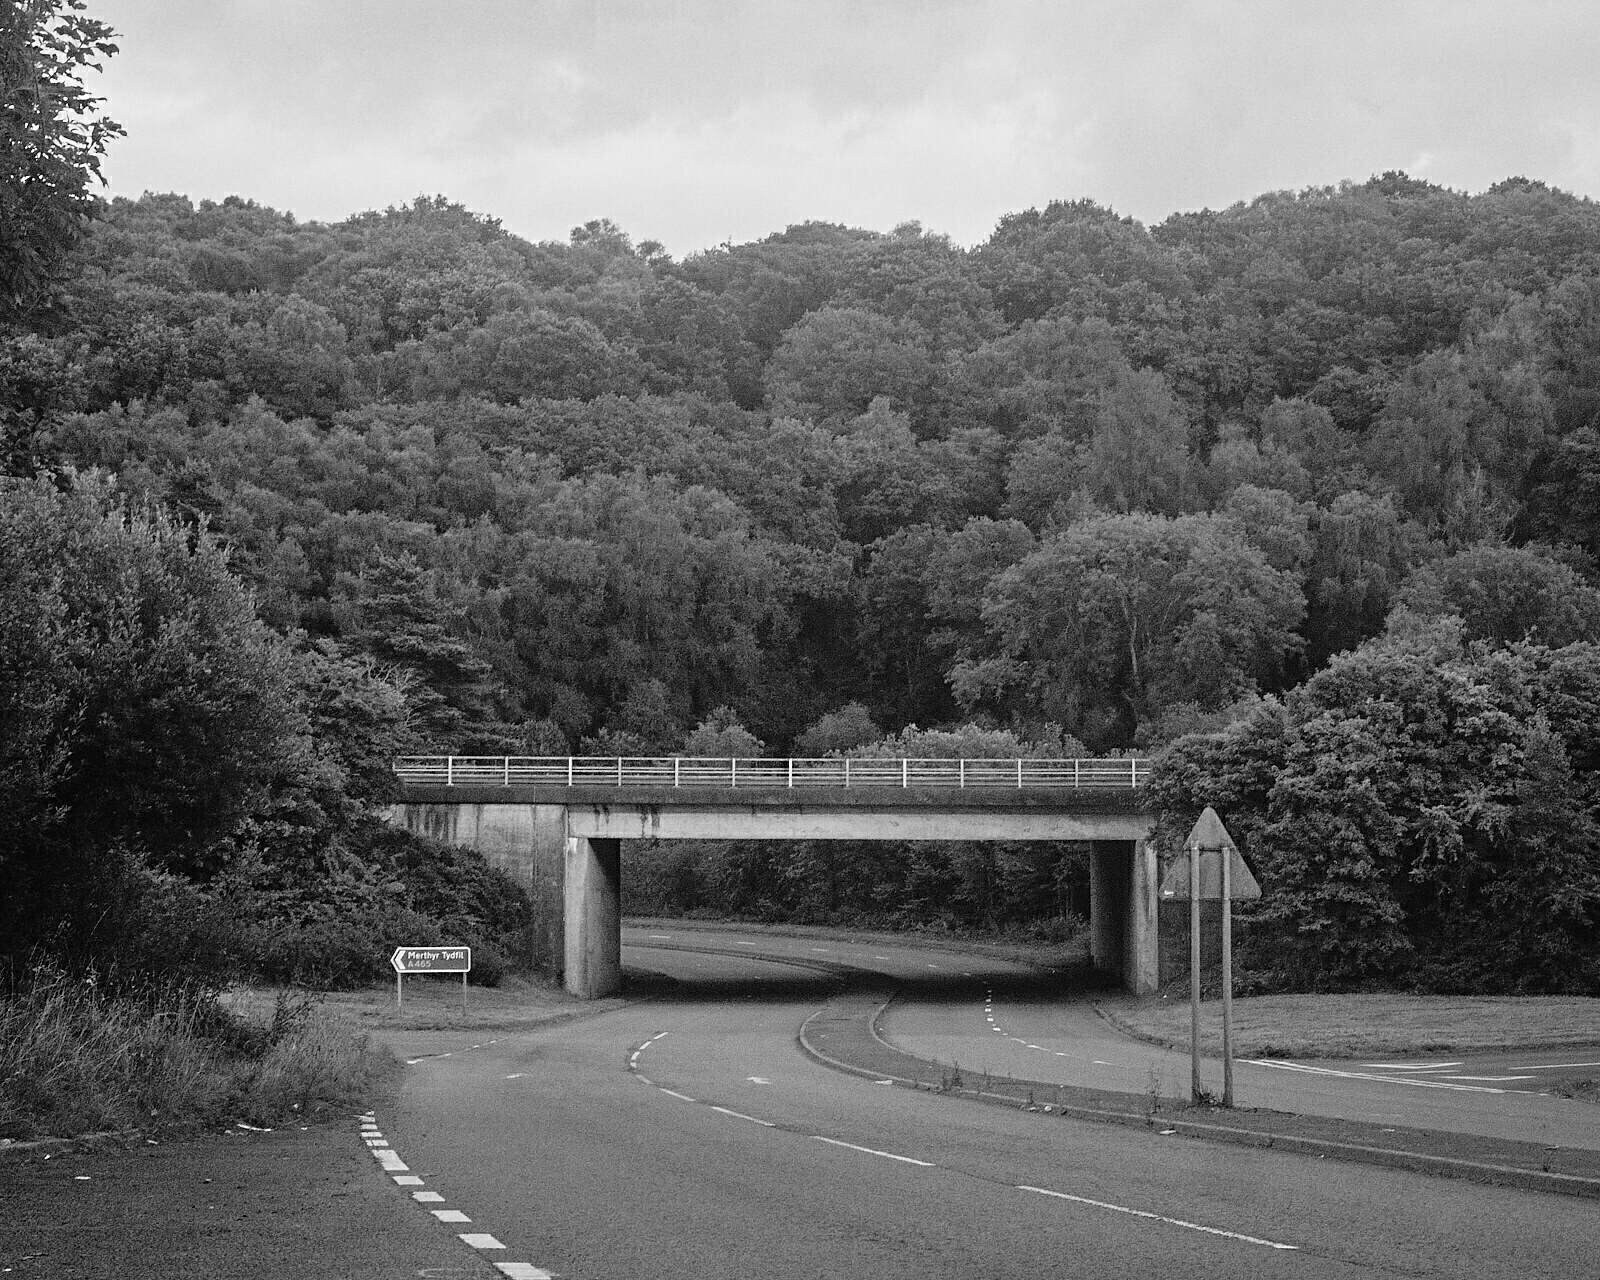
Last little shot was an opportunistic one through the windshield when we had to pull over just before taking the big road out. I’m never quite happy with iphone shots, but I took this with bayercam and it turned out ok.
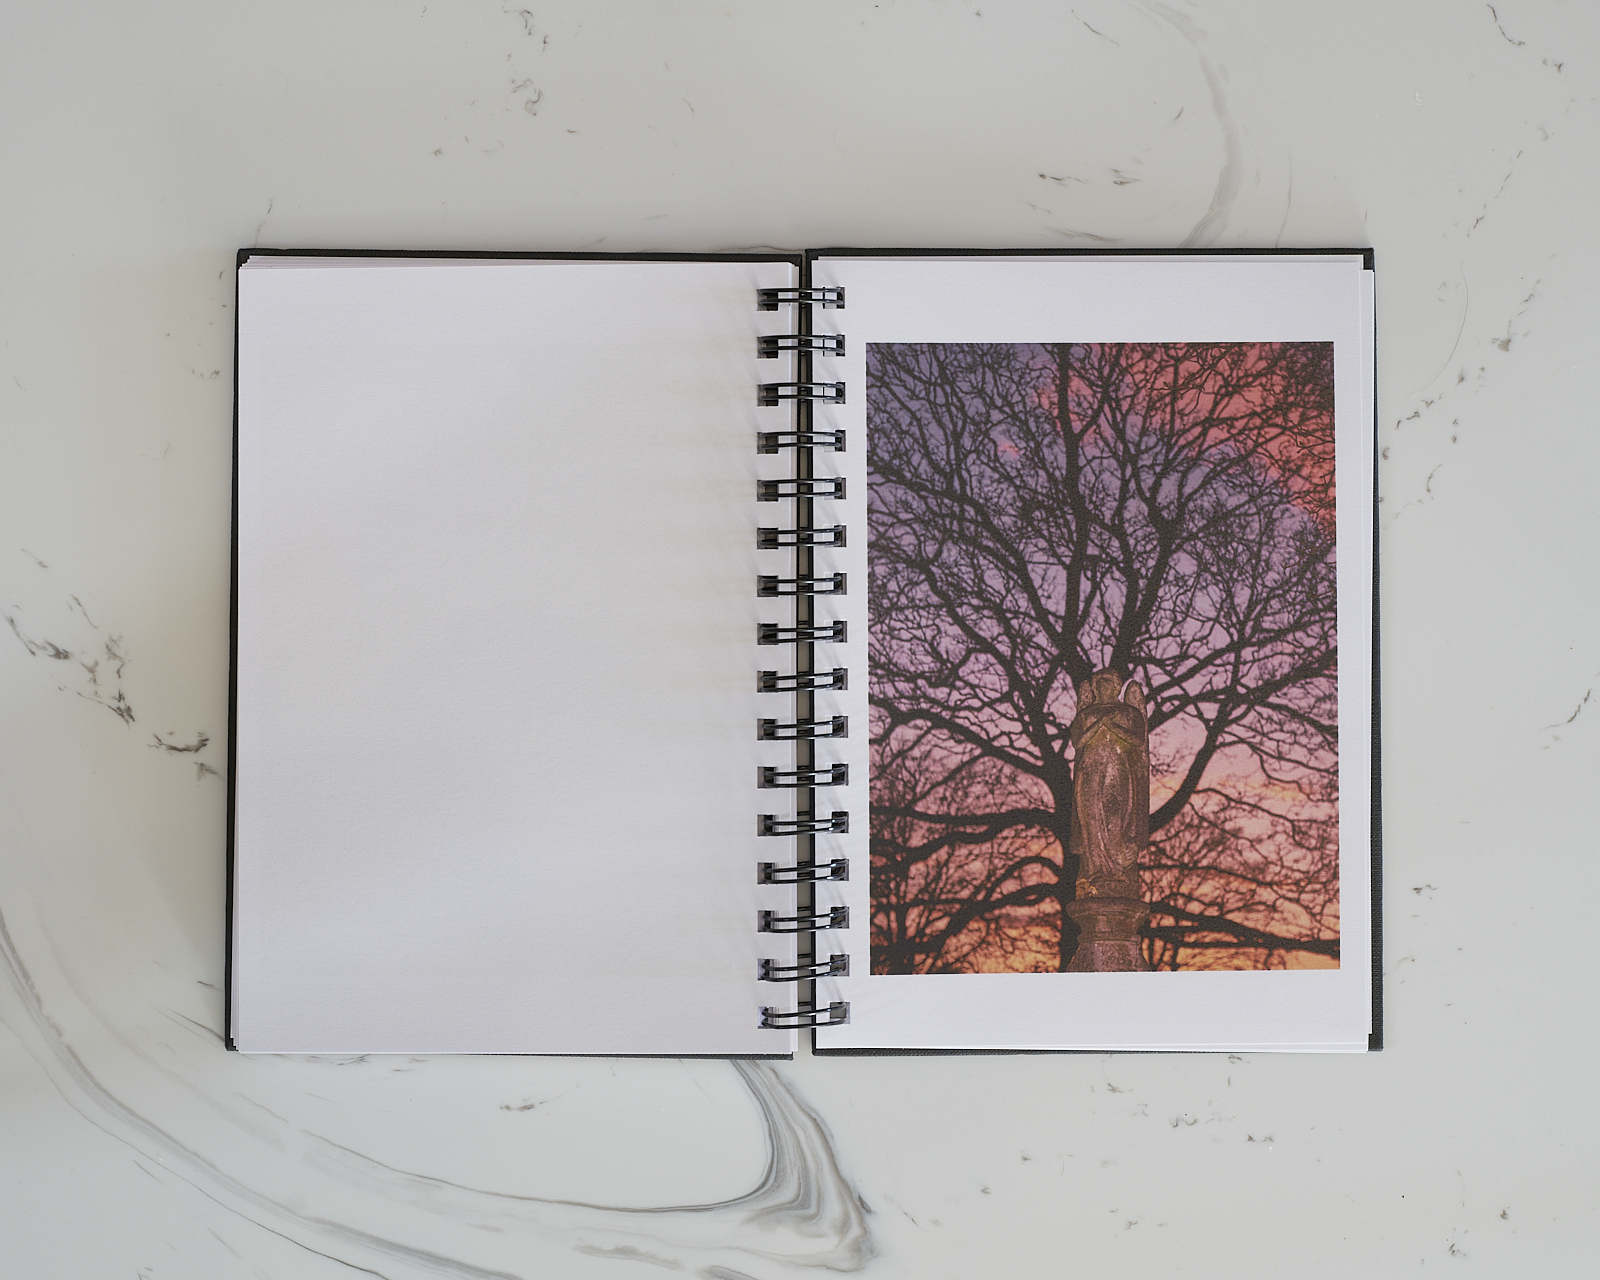
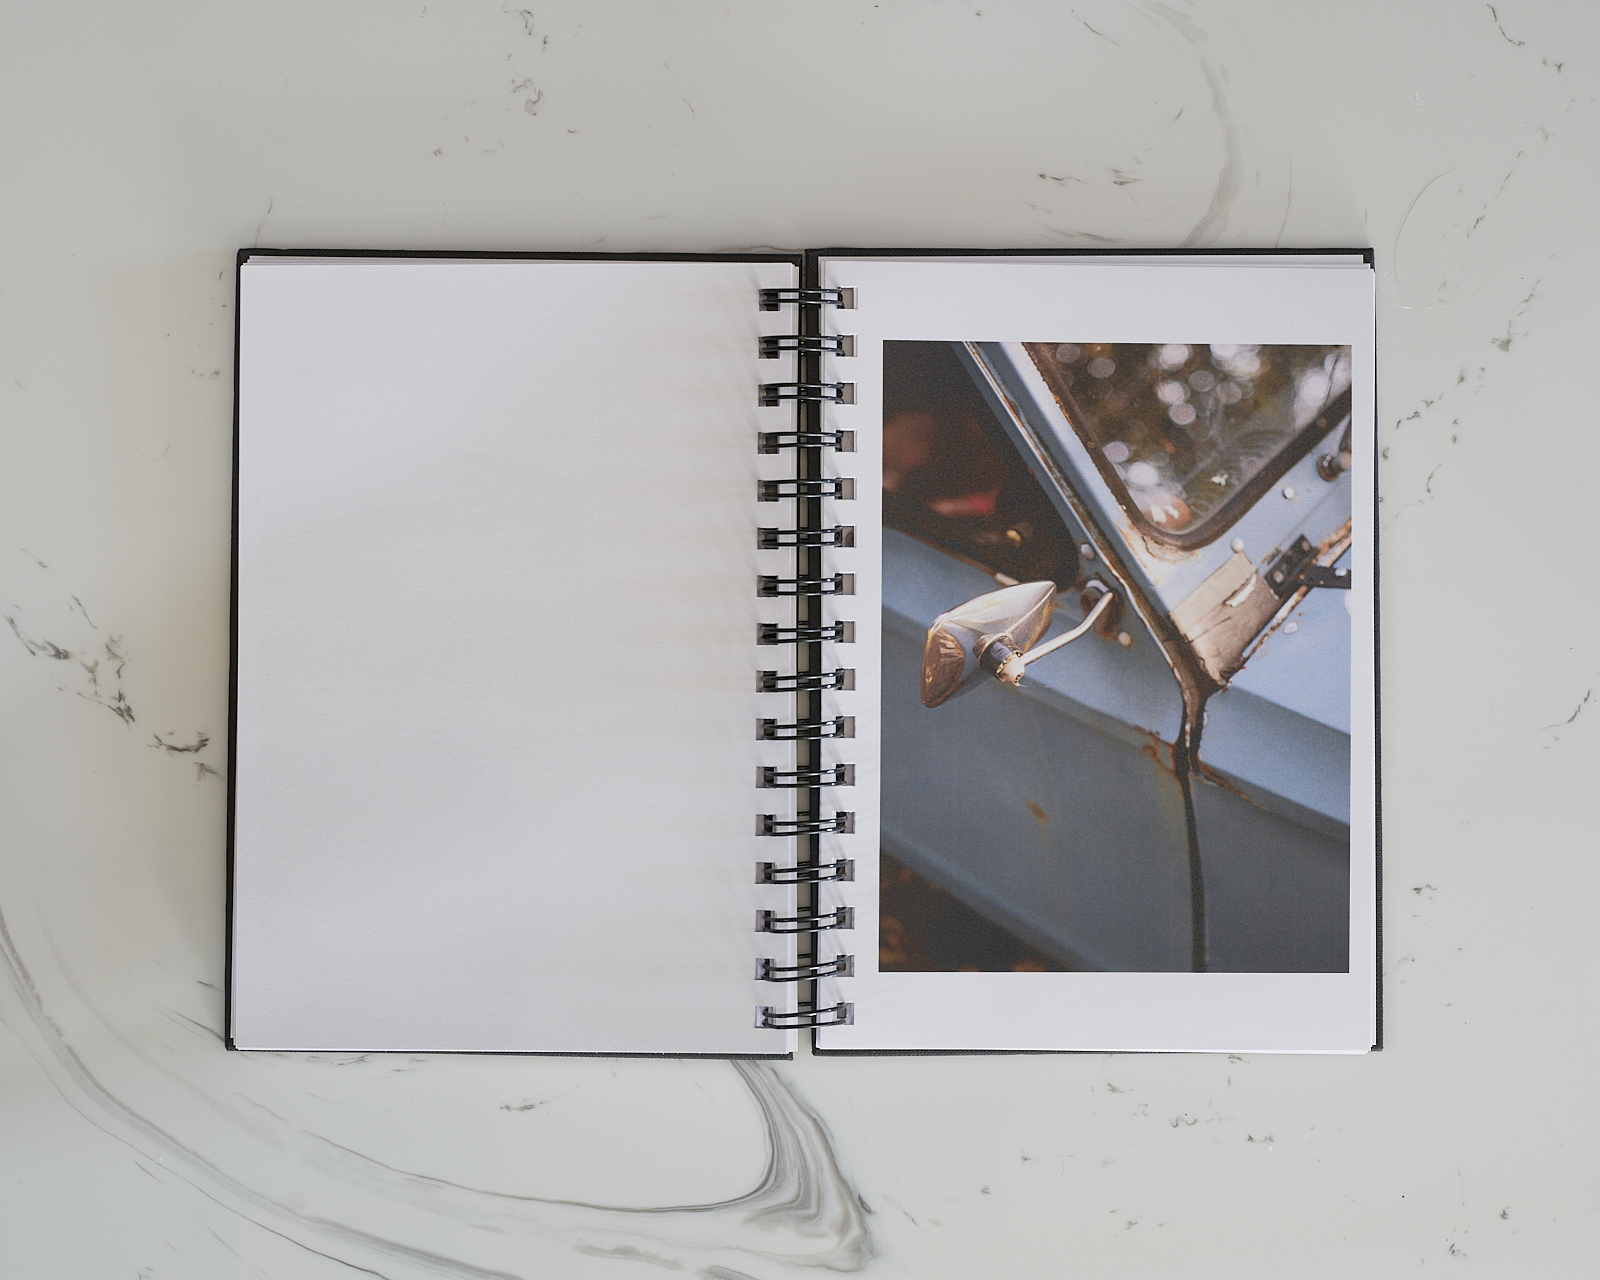
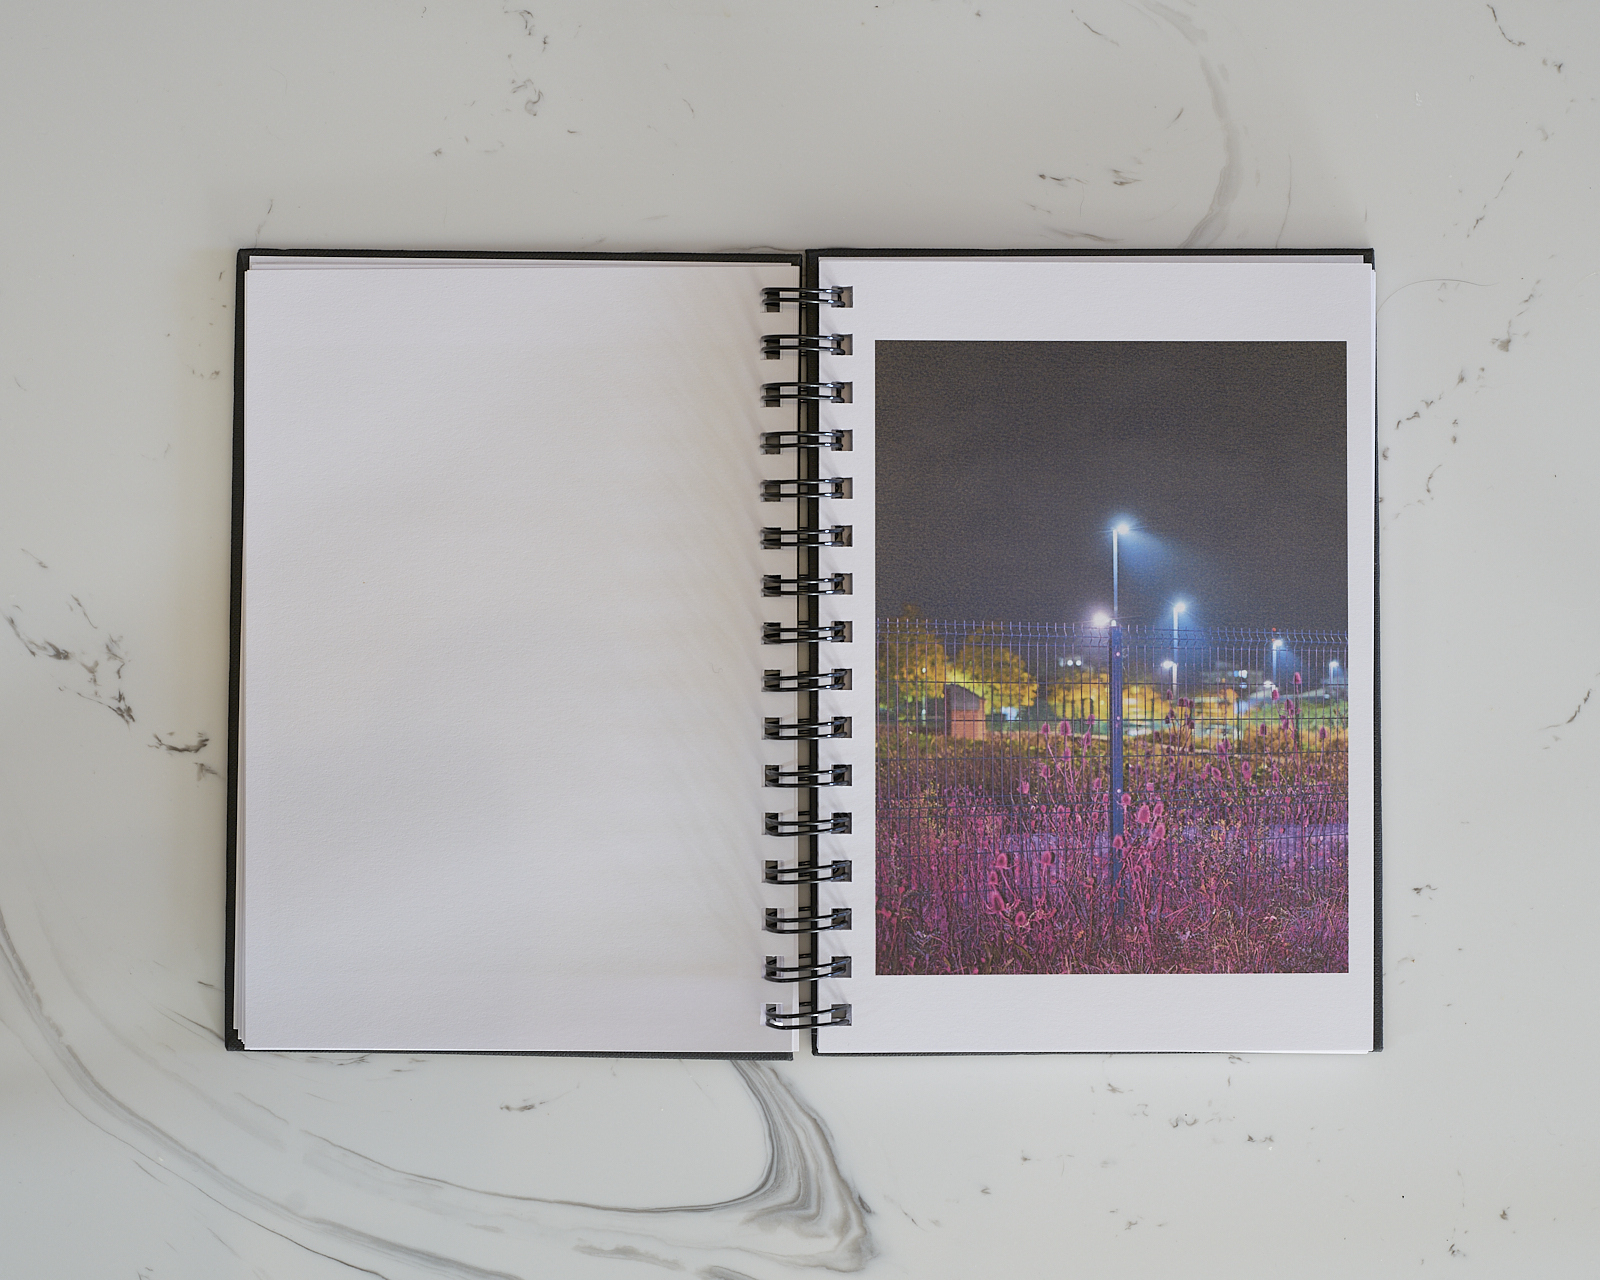
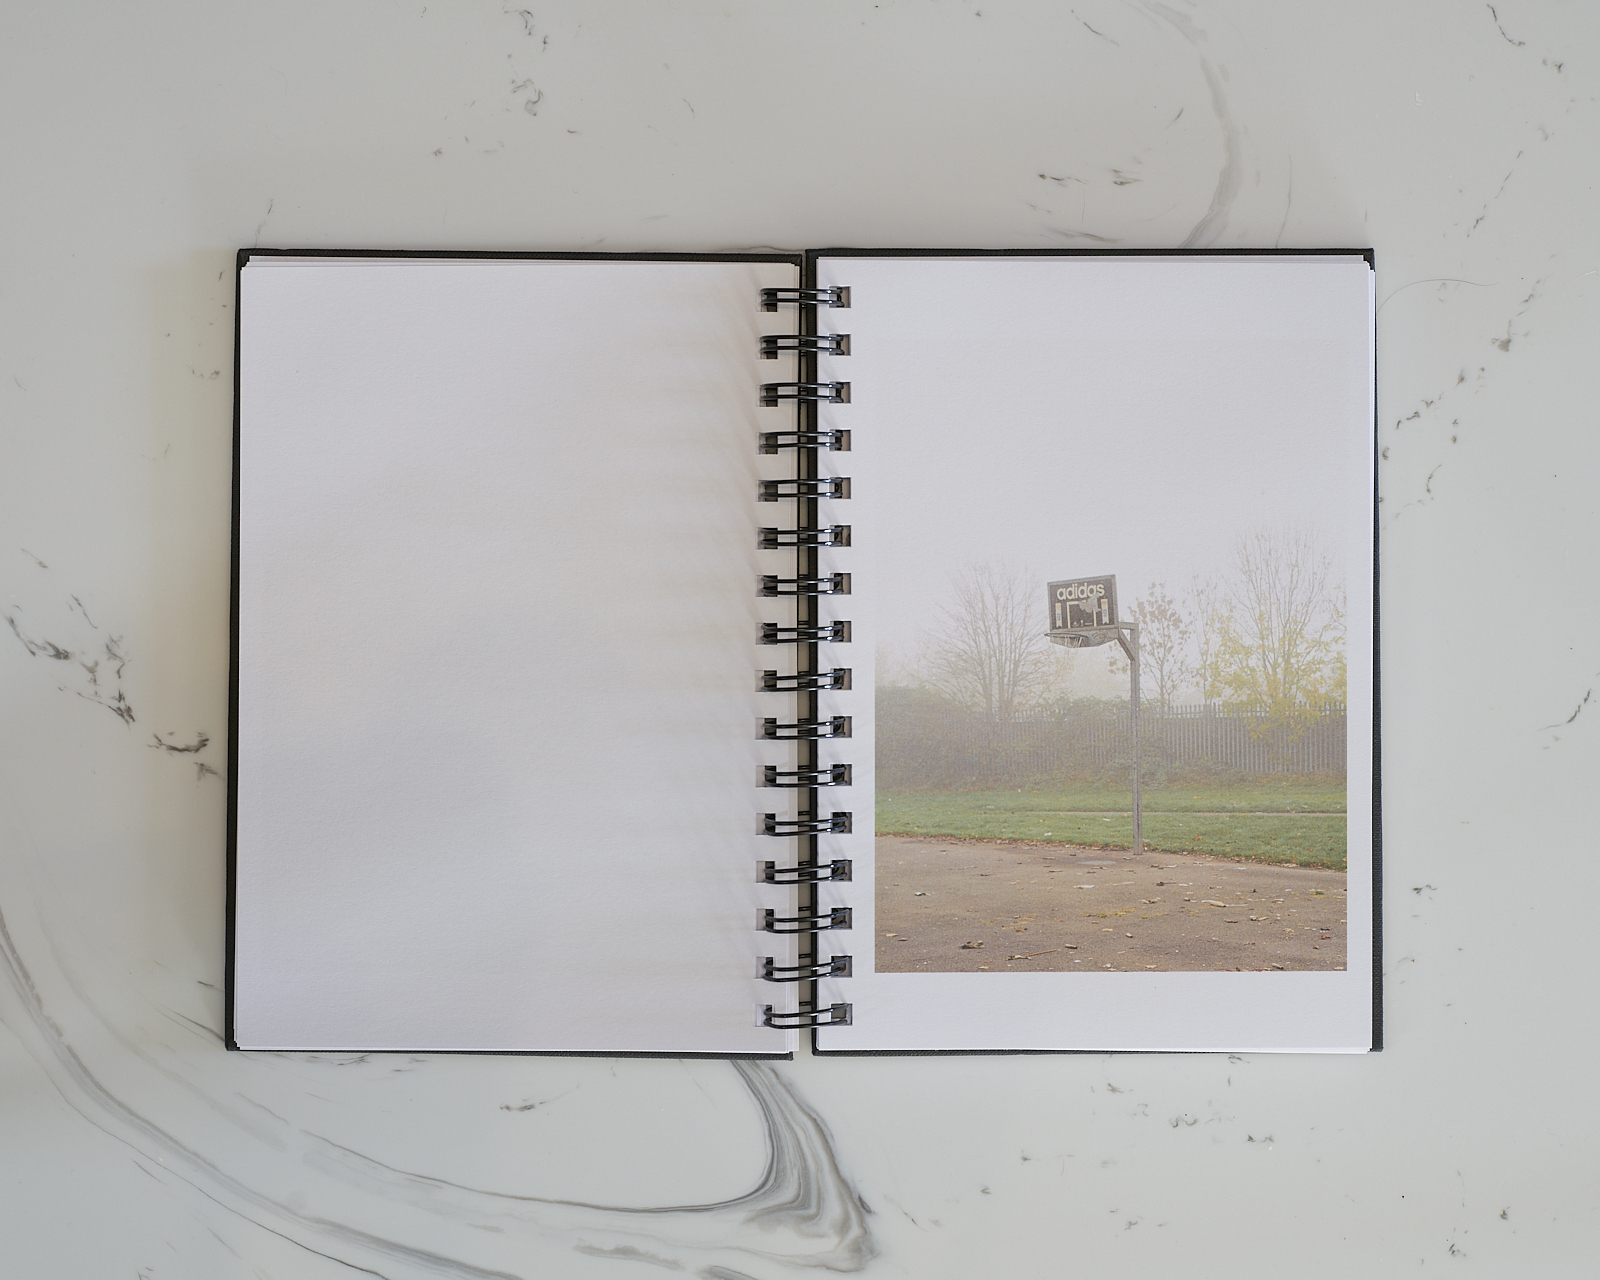
I really enjoy home printing images, it’s quick, cheap and easy. It’s great having physical copies of images, they don’t have to be professionally printed.
I’ve made DIY zines before with sketchbooks, which is good fun. But I’ve found it’s really hard stapling them back together, and getting everything perfectly aligned, even with one of those staplers with comically long arms.
I thought, why not try with a spiralbound sketchbook, as that can be taken apart and put together by hand, without any fiddly stapling. `To be honest it’s still a fiddly process, and I managed to get myself really confused at one point figuring out the exact order that each page and both covers have to be threaded back in.
I’m pleased with the end result, it’s feels good to have a physical record of the photos I’ve taken in the past couple of years, as I take them, view them on a screen, post them online (which more and more feels like I’m just throwing them into the bottomless pit of content) and then they get forgotten about.
Despite it being impractical and cumbersome , there is just something special about the way the 85mm renders photographs. As I’ve written about before, as an all purpose walk around lens it is no good, but when I want super shallow depth of field, that just melts the background away into gentle blurriness, then this lens is the one.
Manor woods is a location I visit a lot, usually a couple times a week with the dog, to the point of being over familiar, I don’t even usually take my ‘proper’ camera, so taking the 85mm lens felt like a good way to see it in a new light.
One of the great things about having a dog, as they force you to get outside at least once a day. I know dog walkers who enjoy going to the same spot every day, but I find that so boring, and I’m always on the lookout for new locations, and found this on the always great bristol barkers website
I also have another motive for new locations, taking photos. It’s not always with an active toddler to find time specifically to go and take photos, so I have to make the most of any opportunity to explore somewhere new.
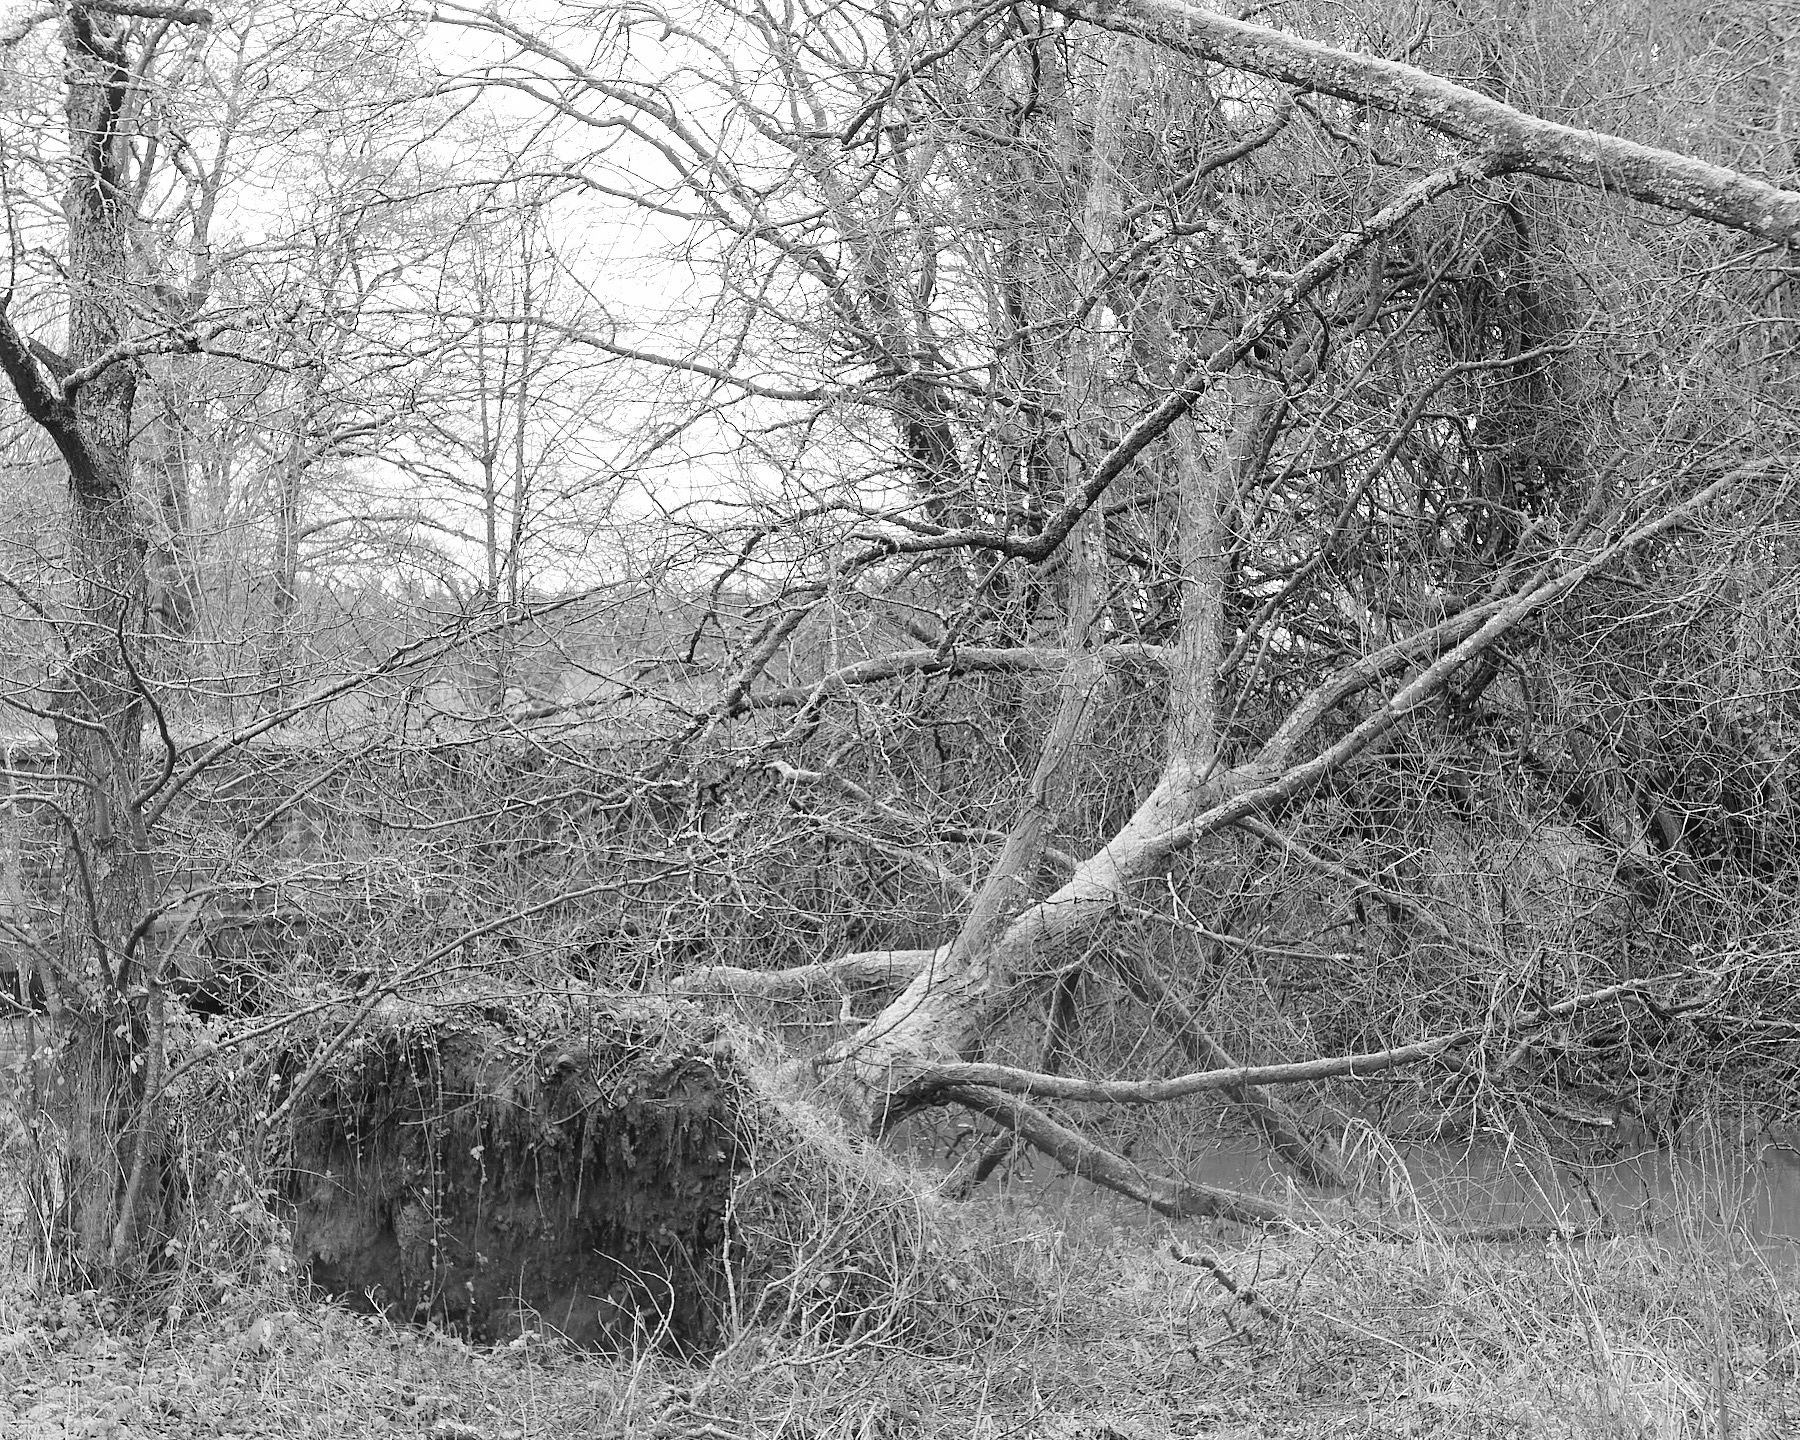
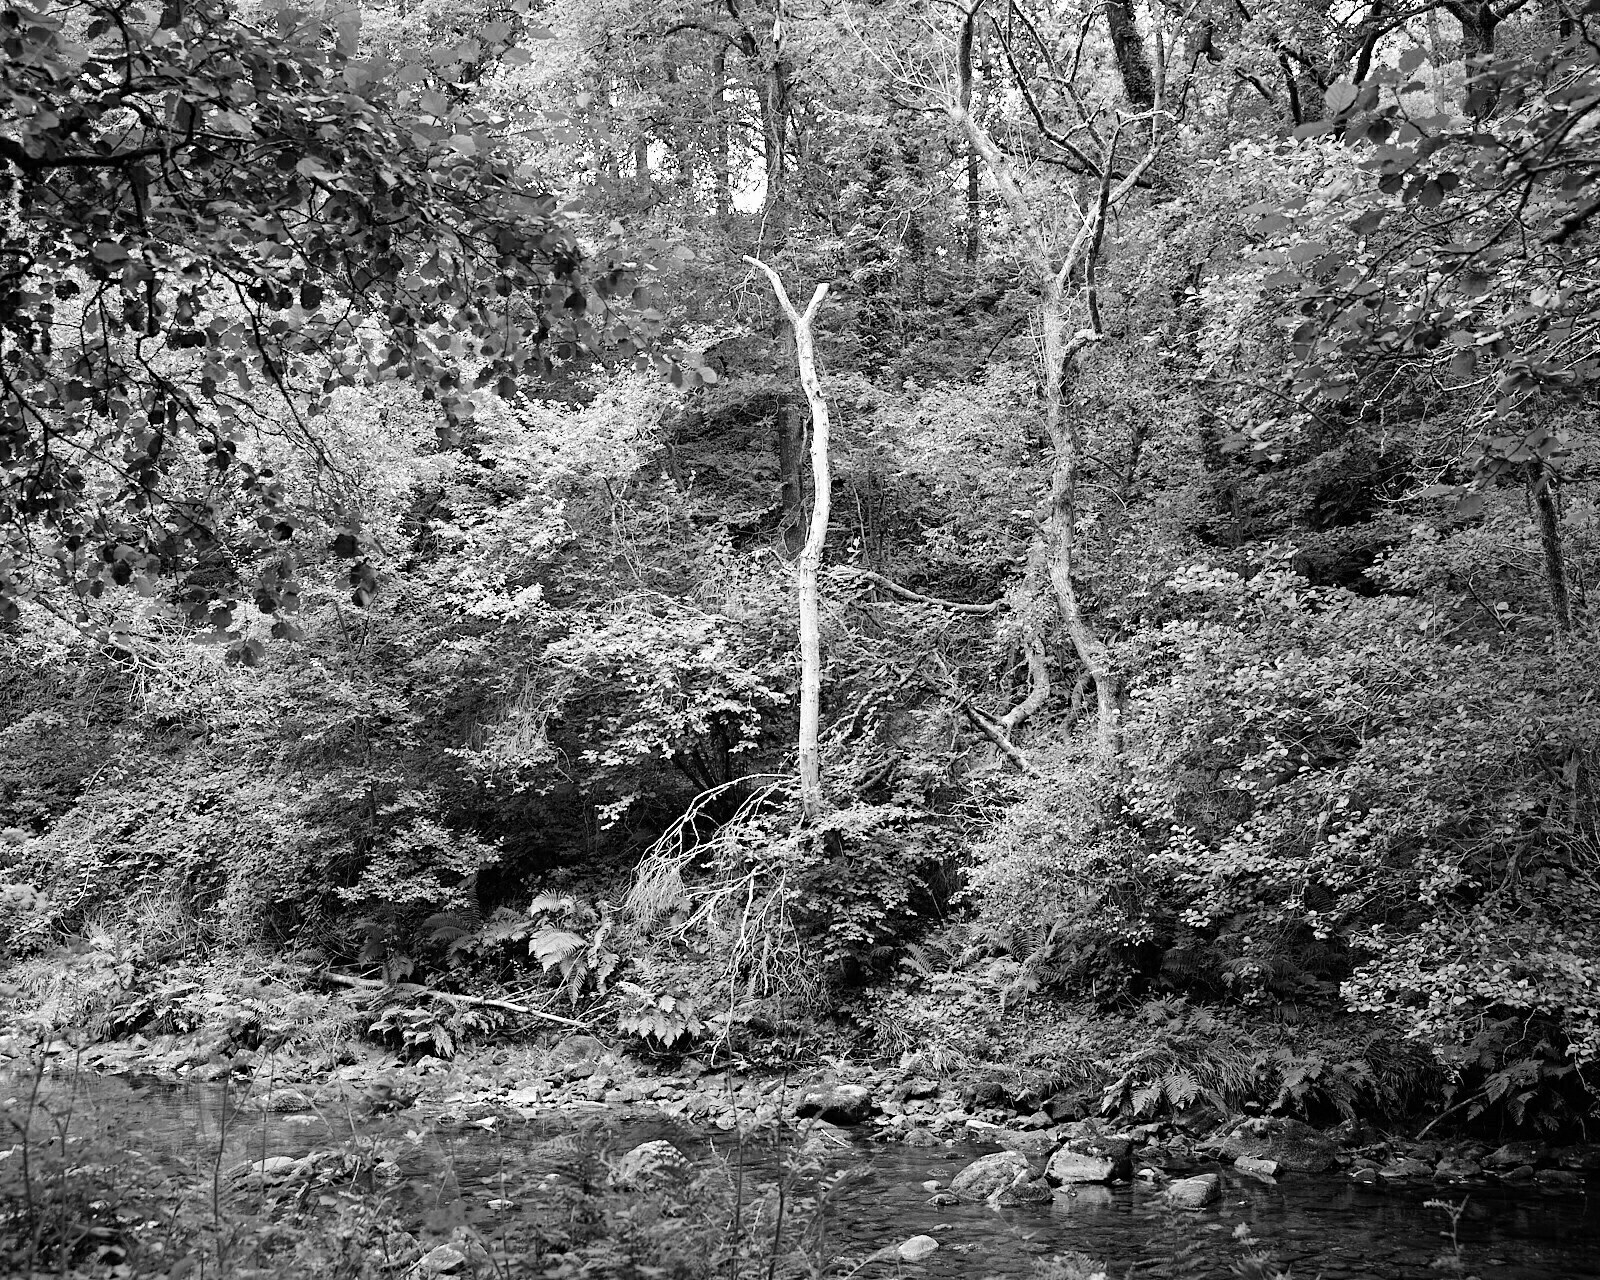
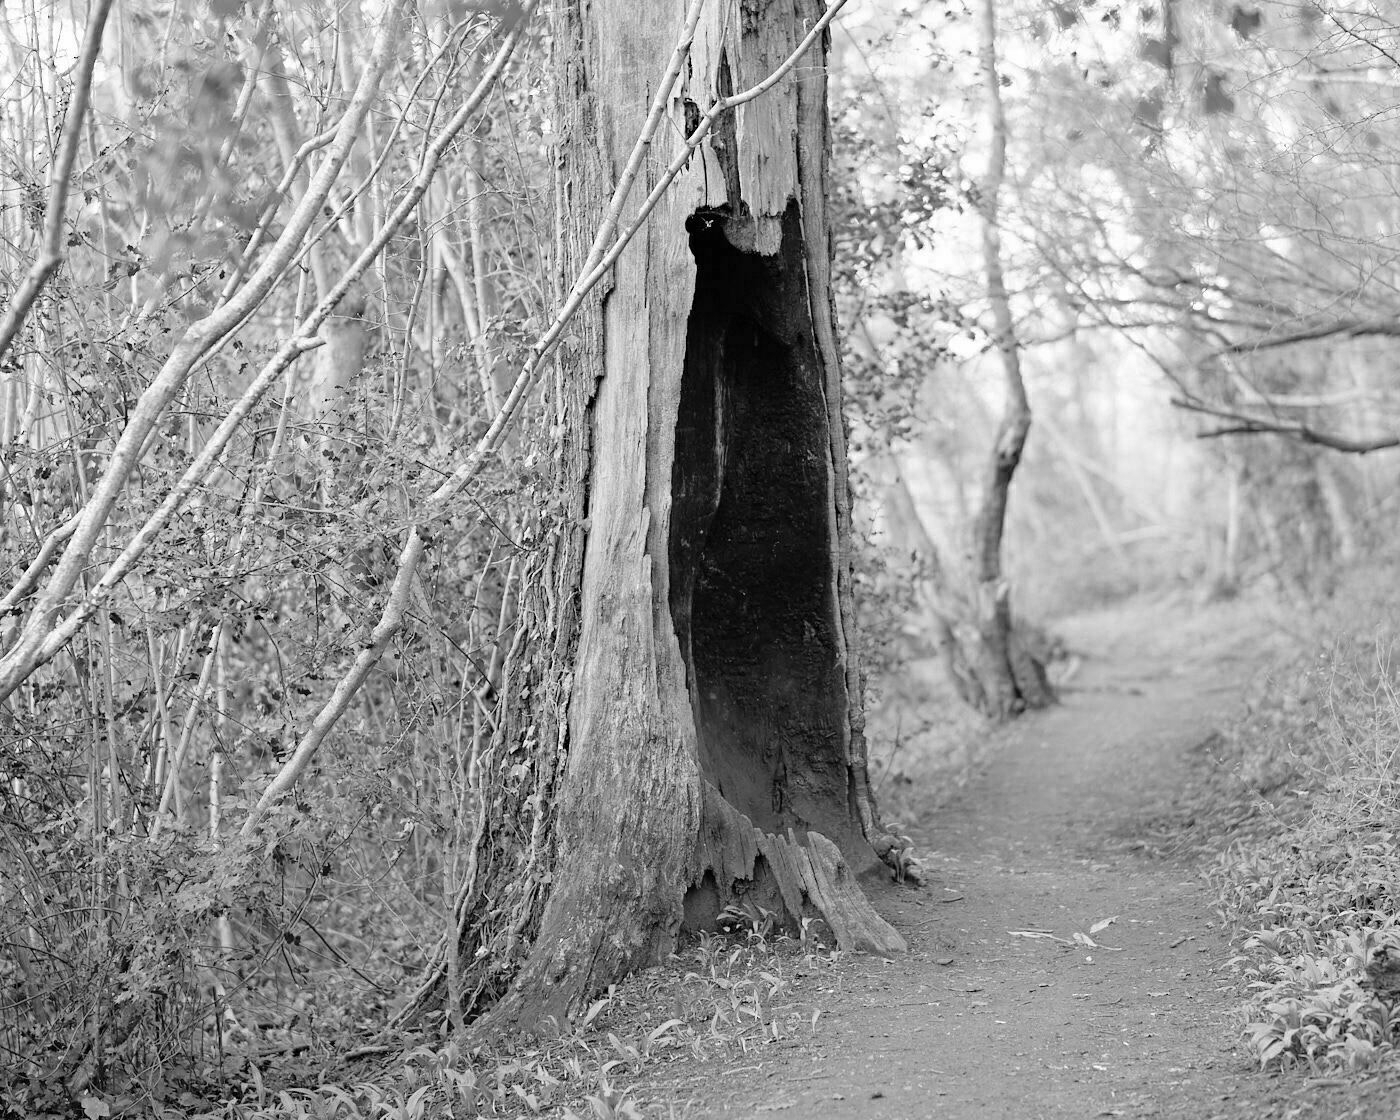
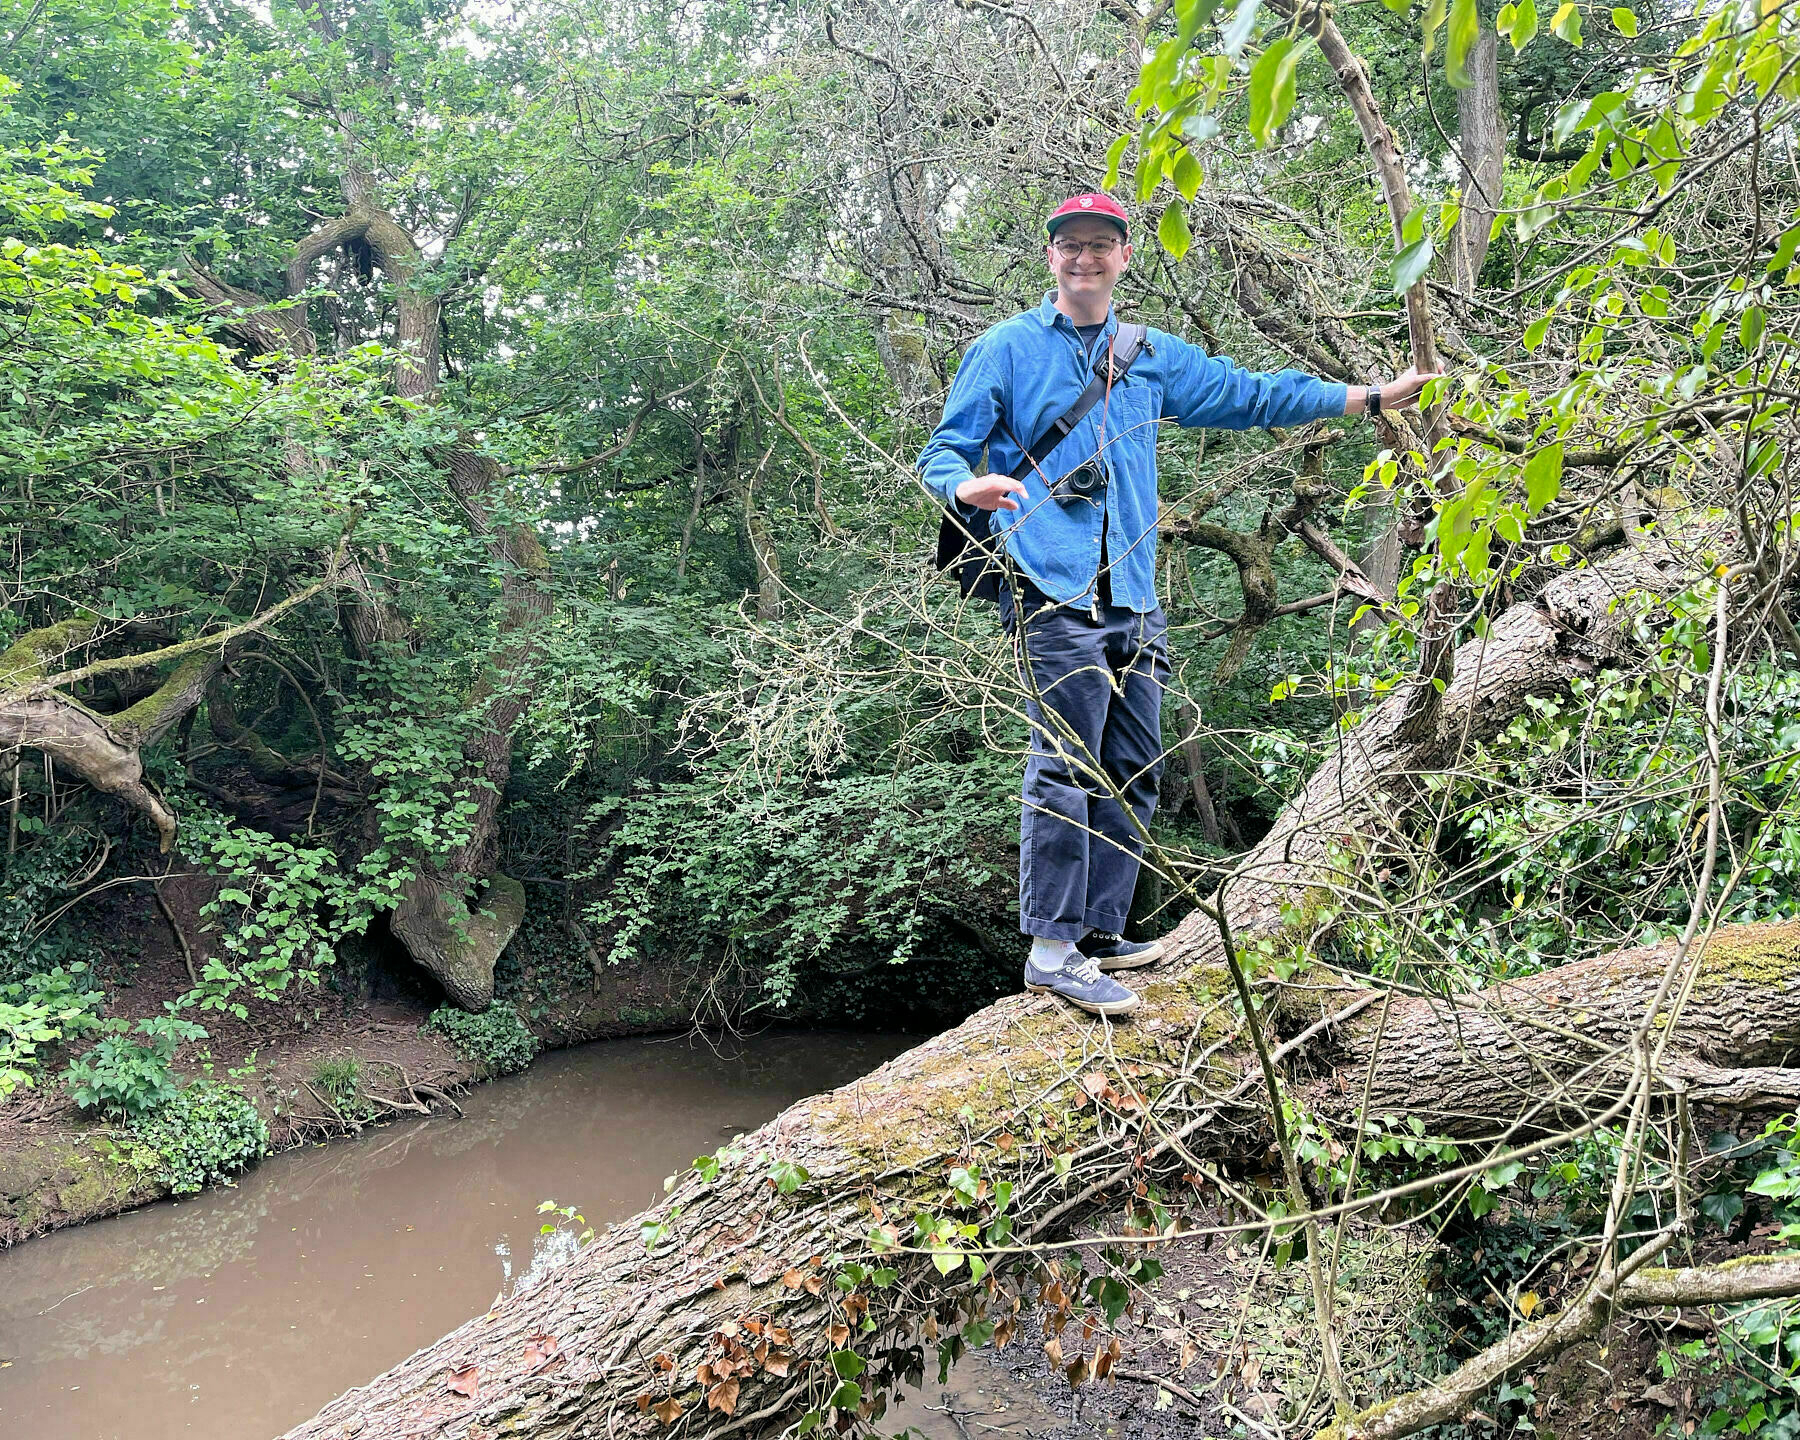
Overscourt is a huge woodland, right on the outskirts of Bristol in Siston, and from this visit I feel I only scratched the surface of all the potential routes through.
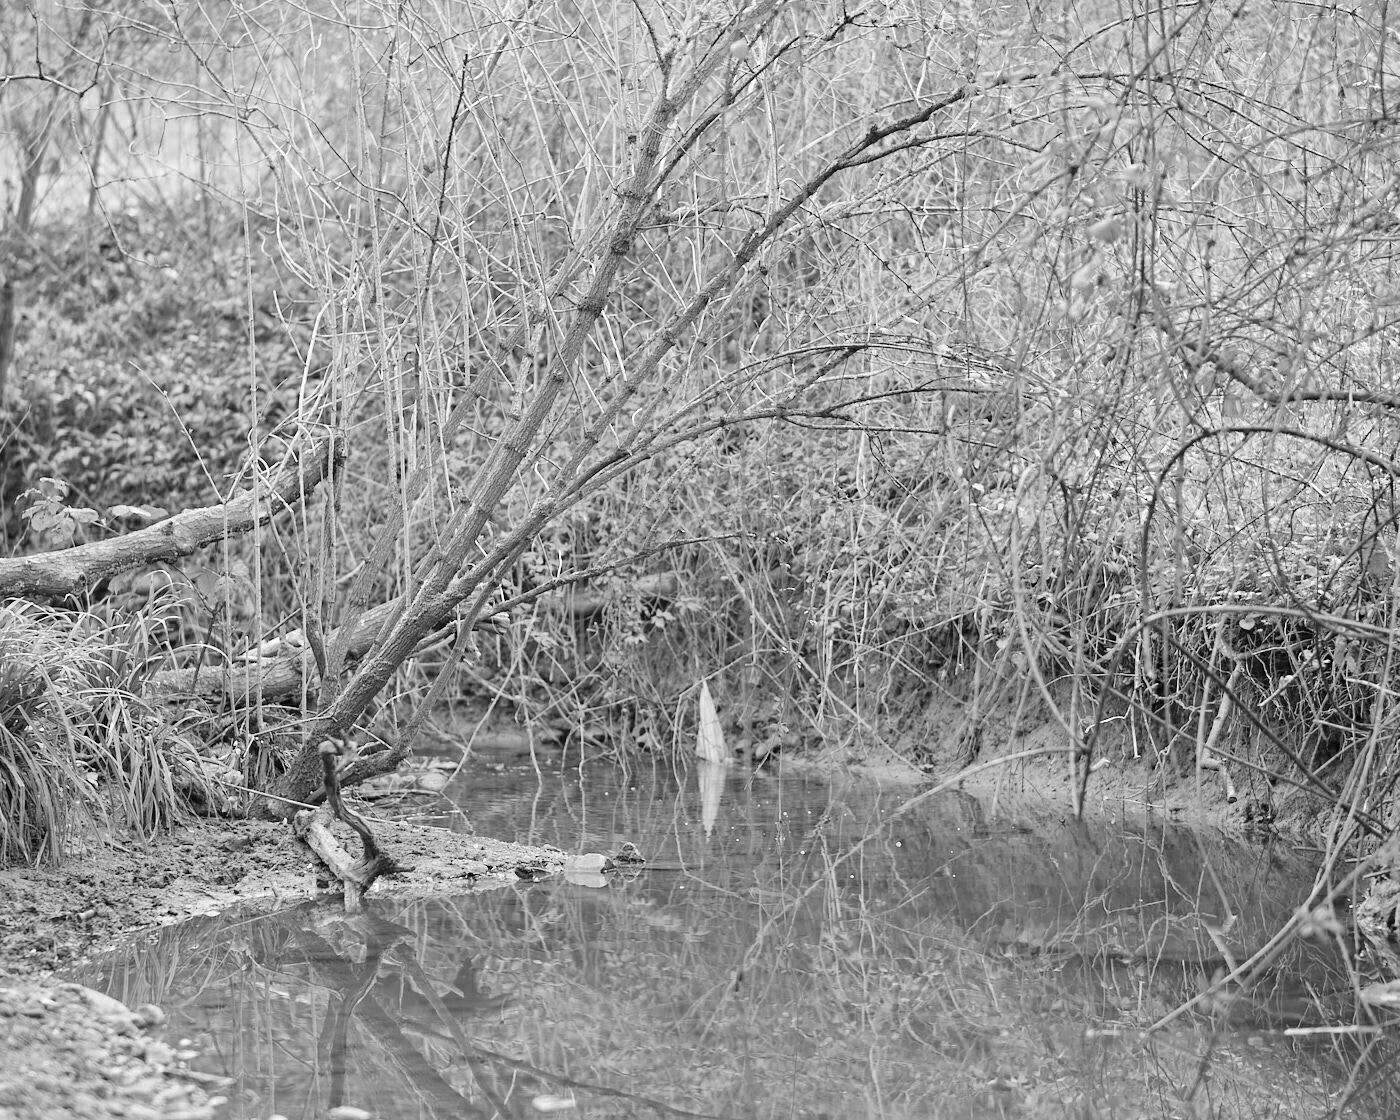
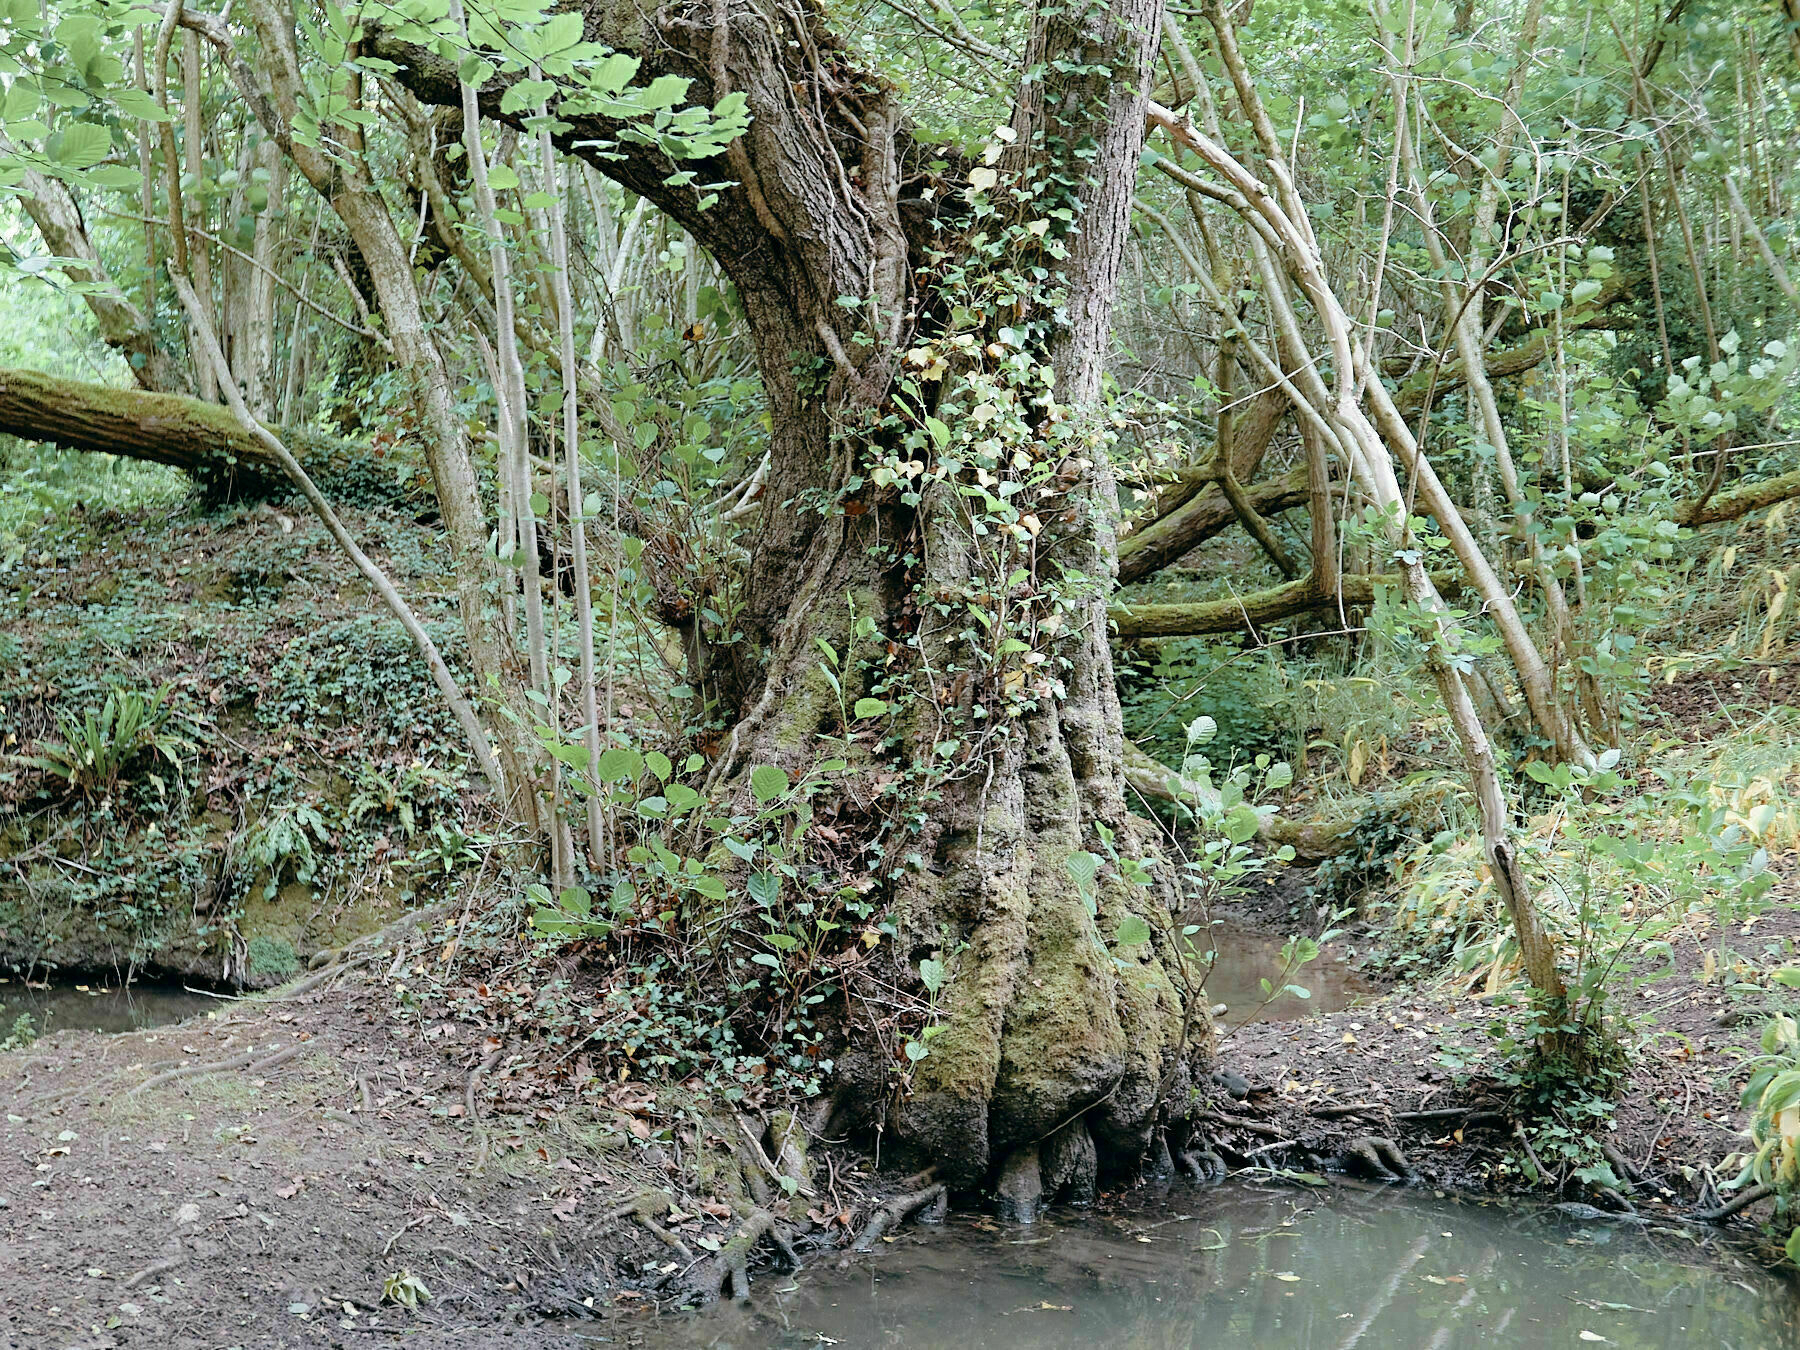
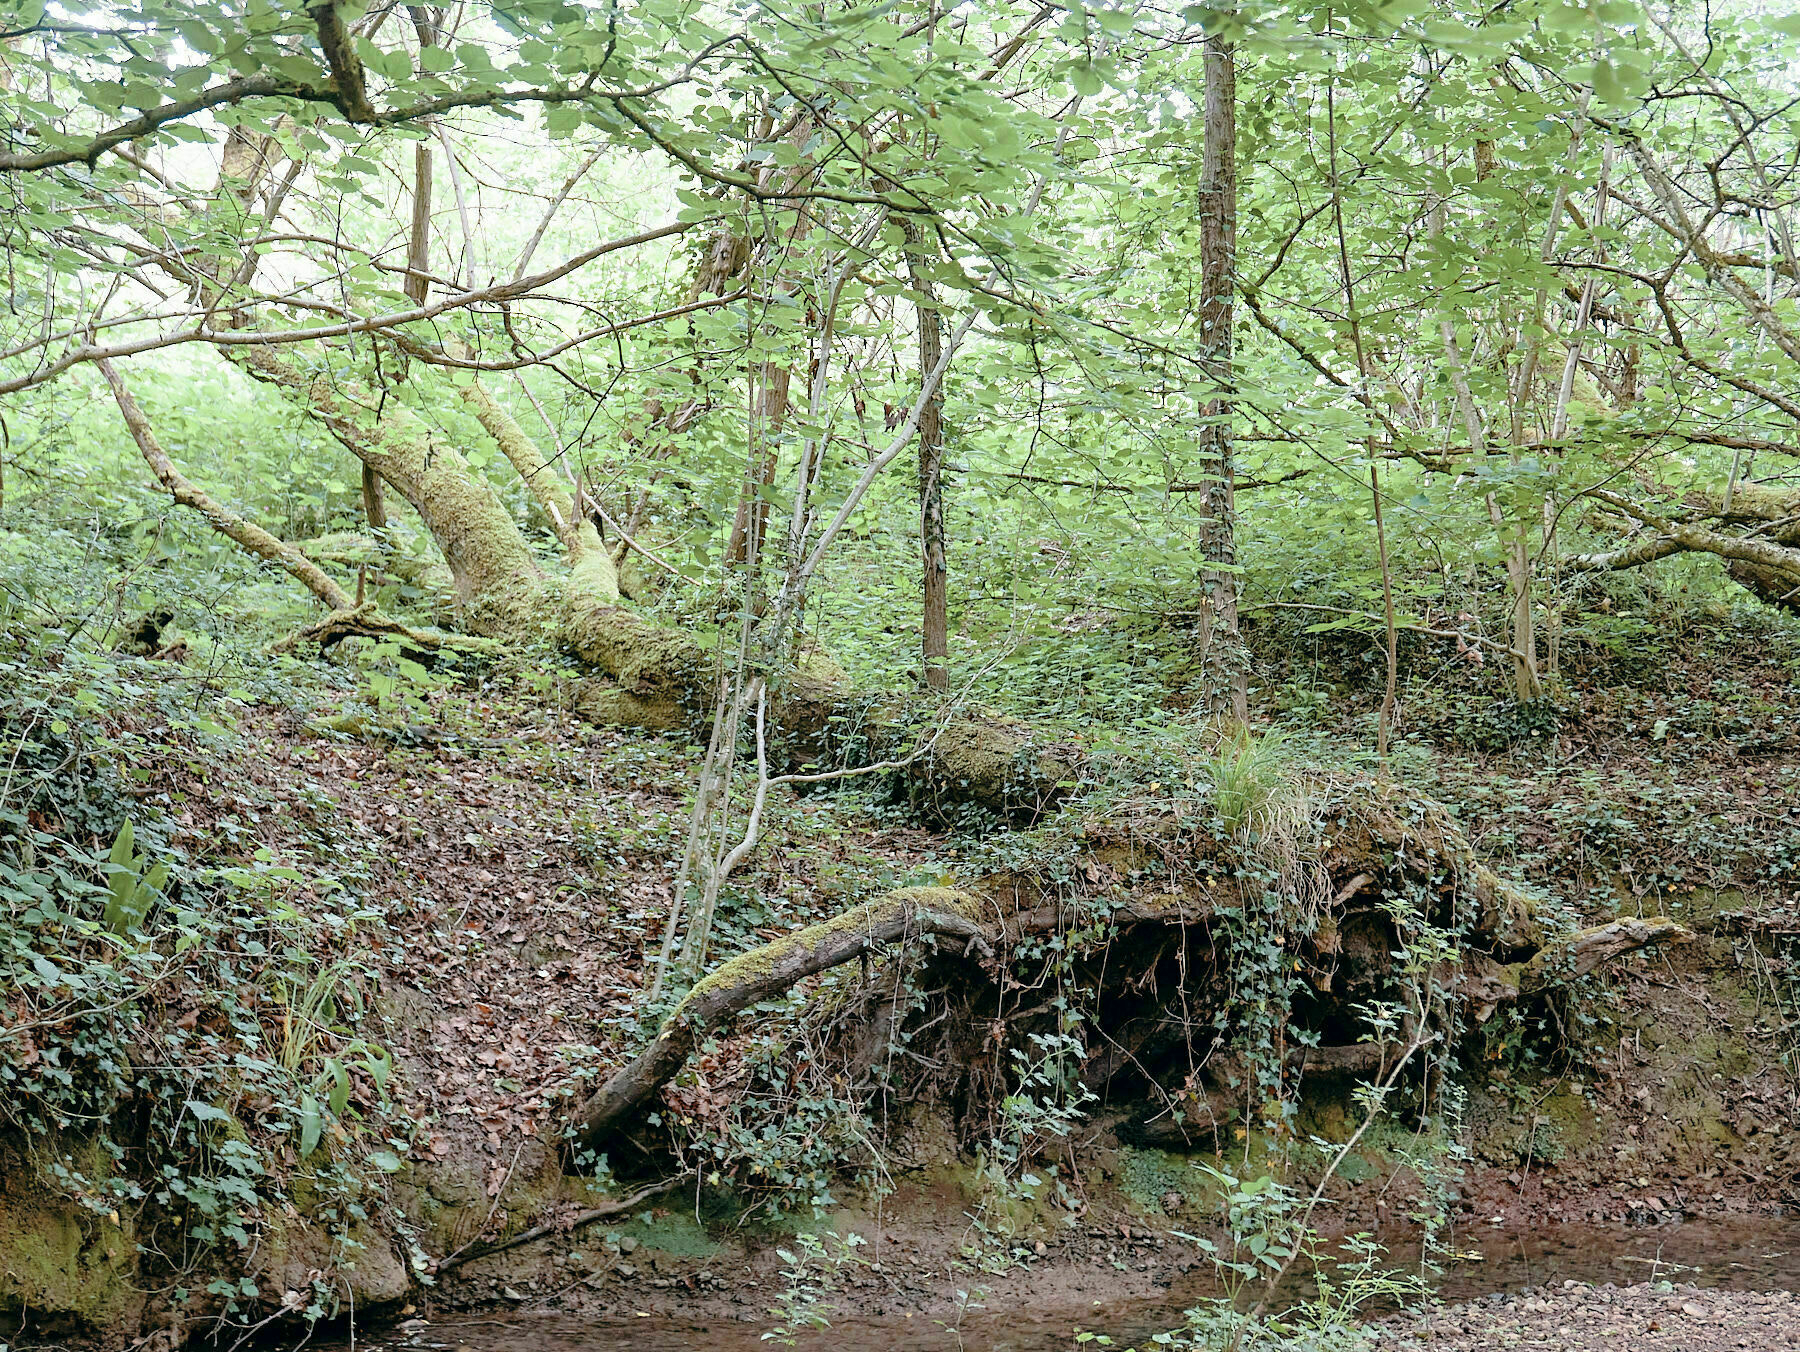
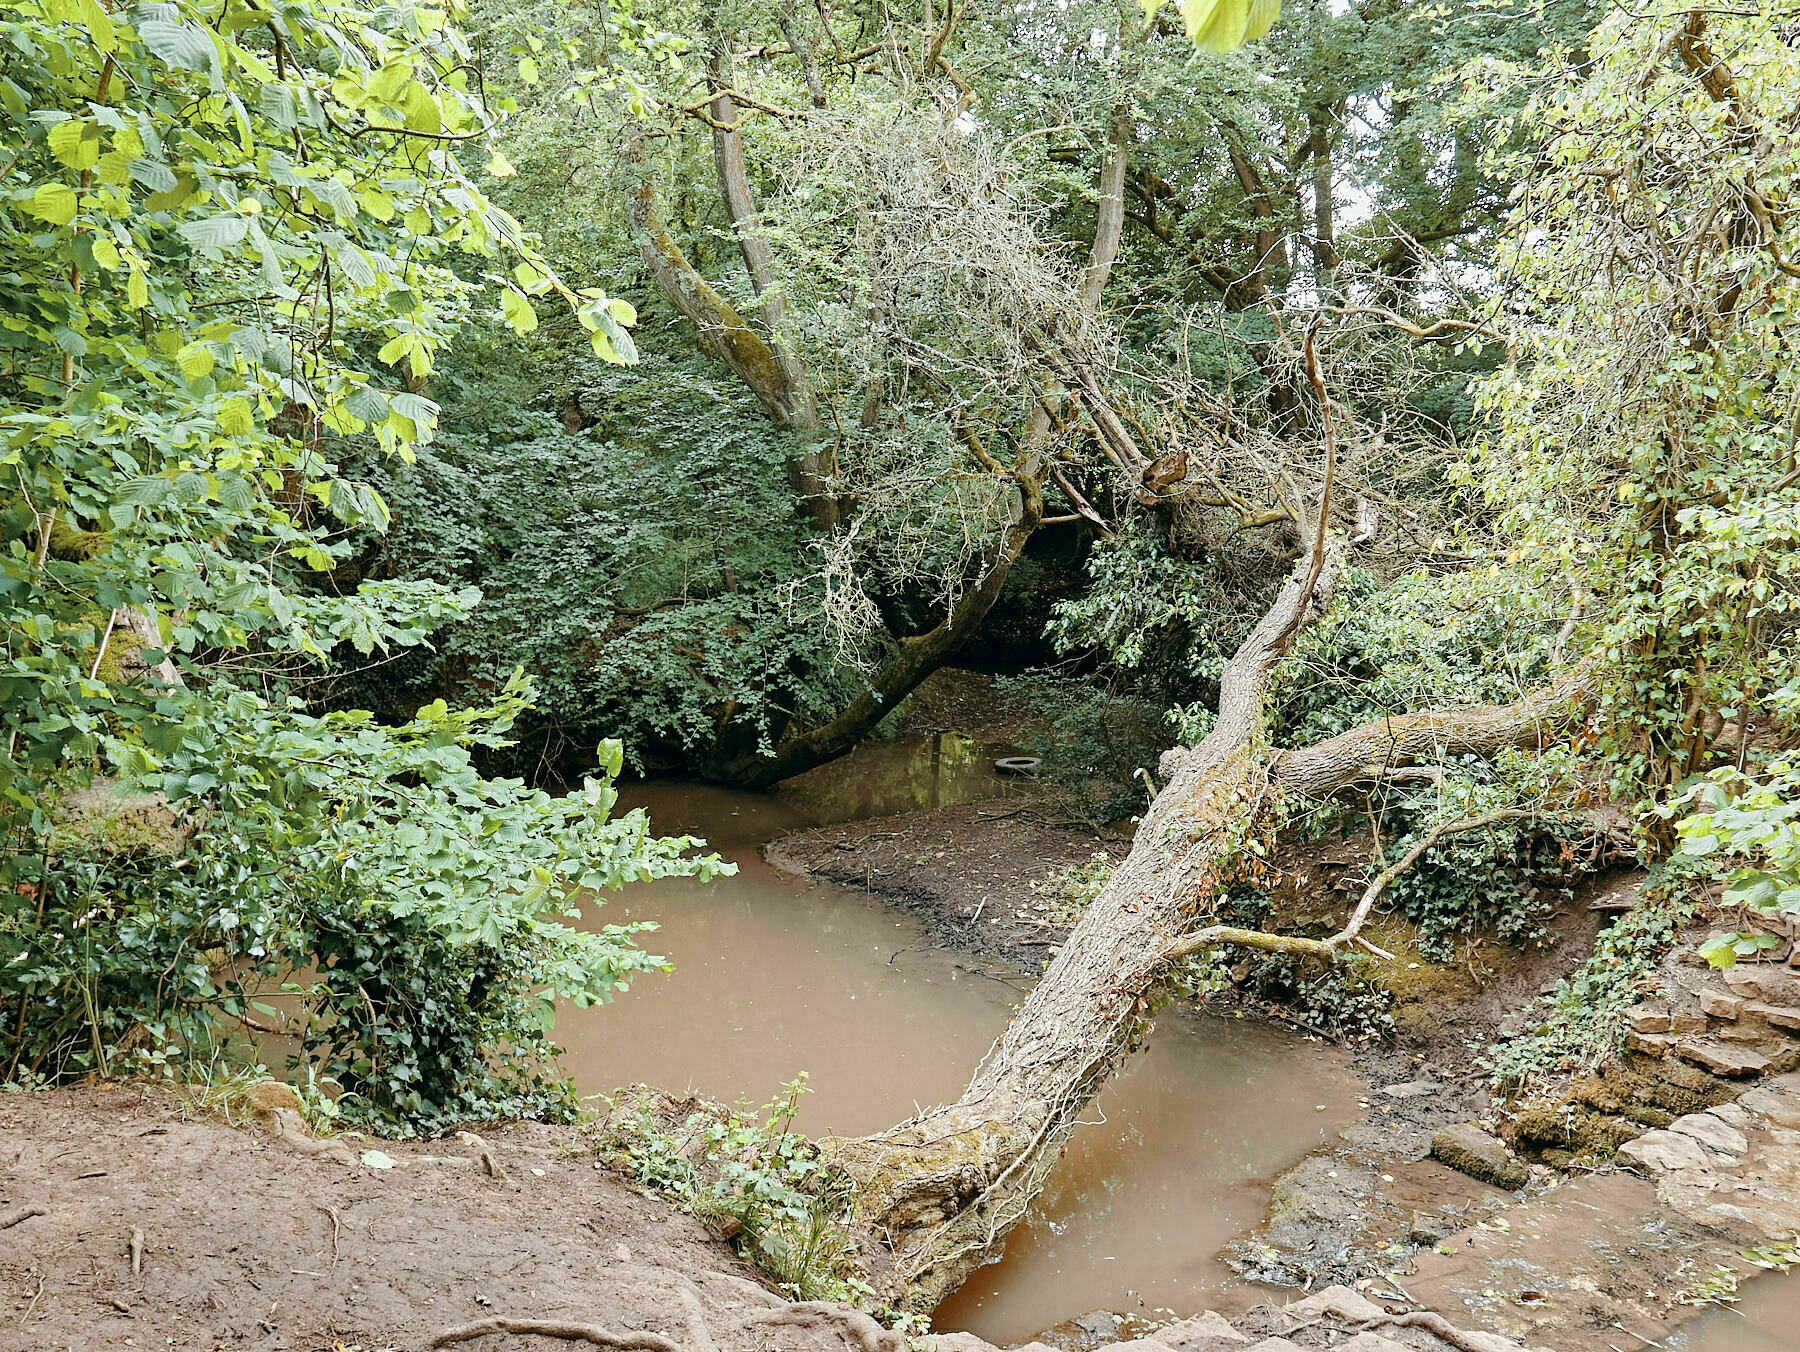
The route I took was through the middle, following the siston brook as it weaves it’s way through the trees.
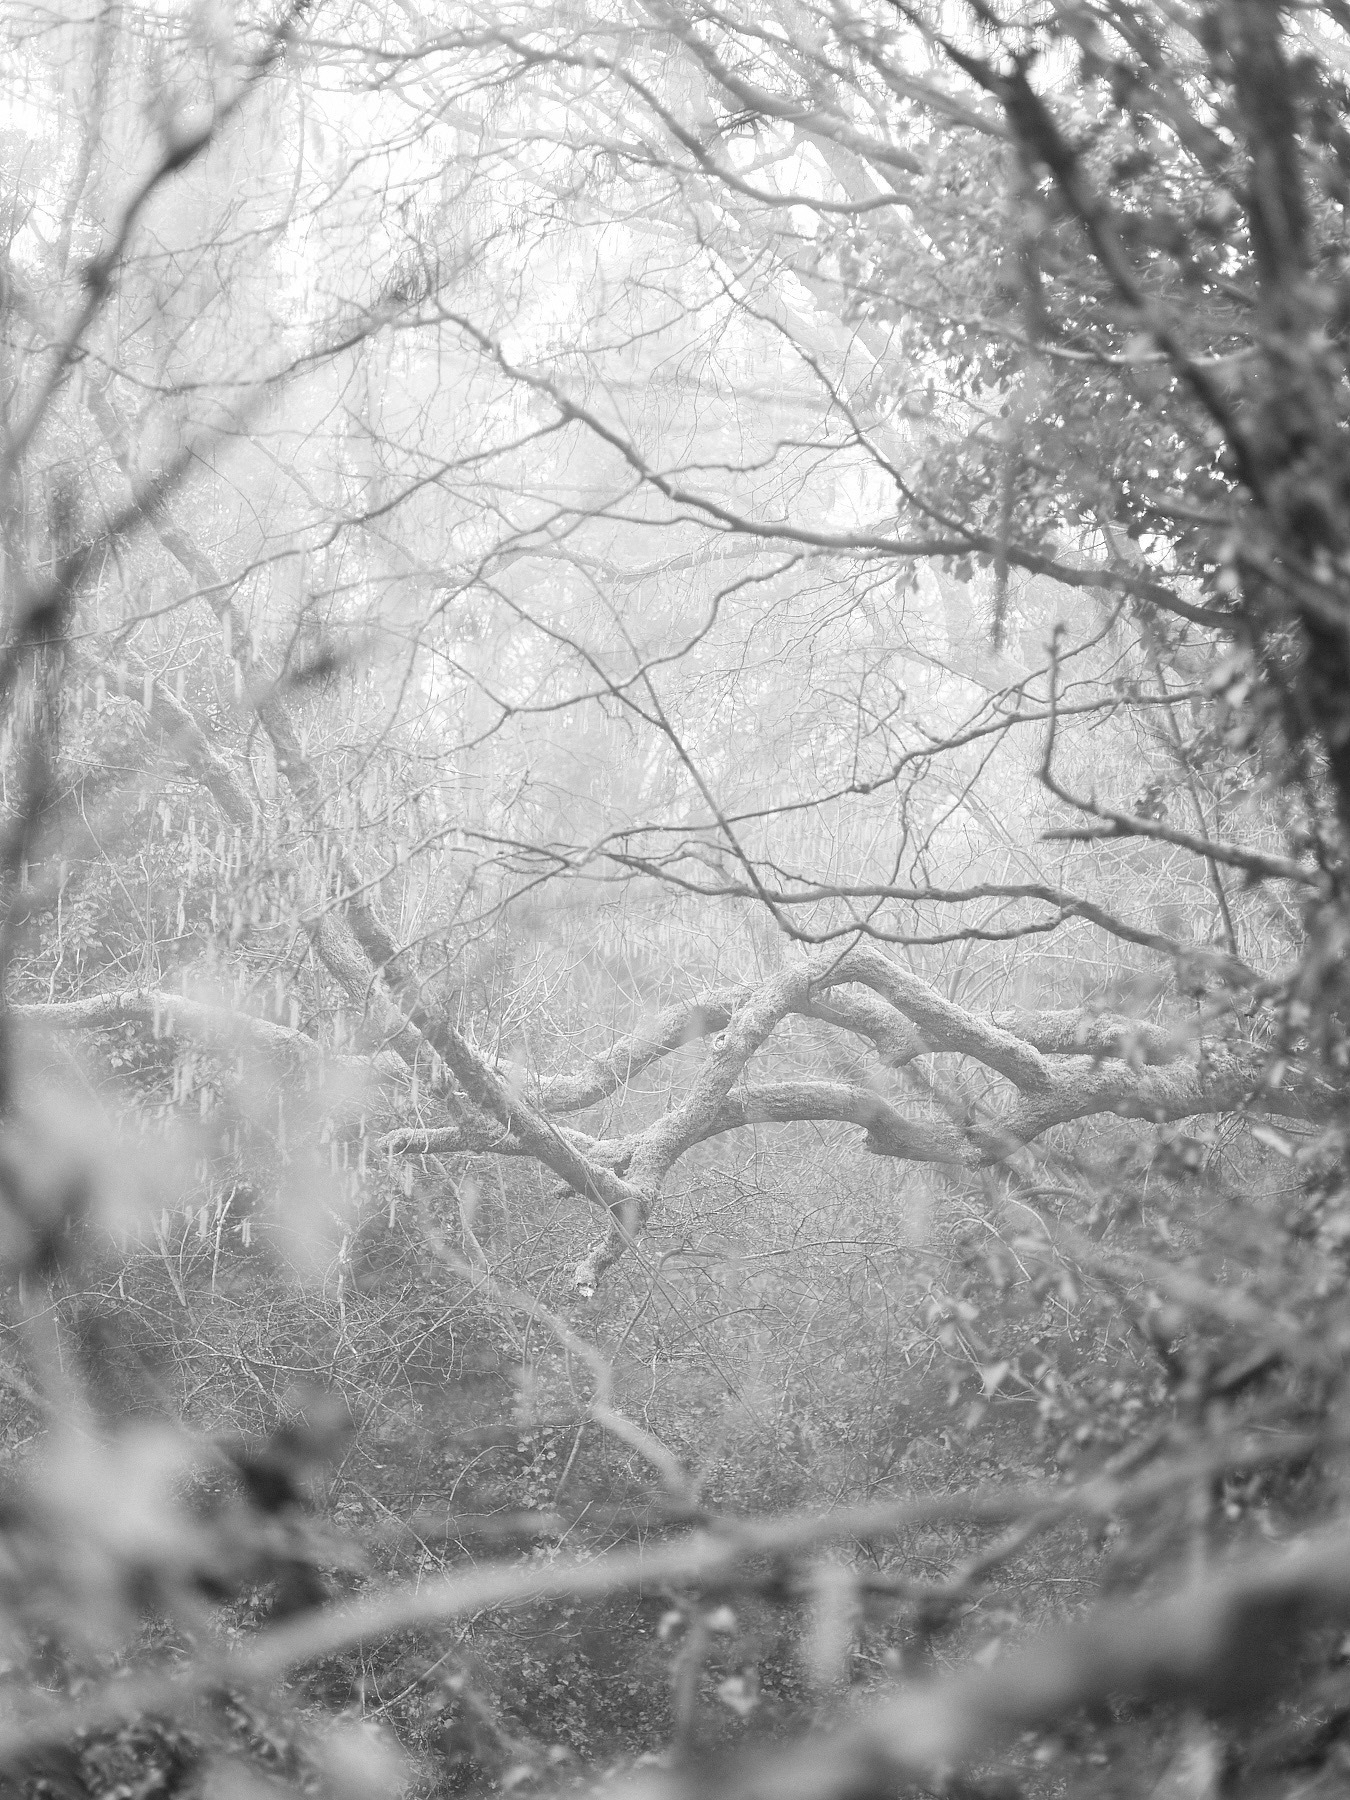
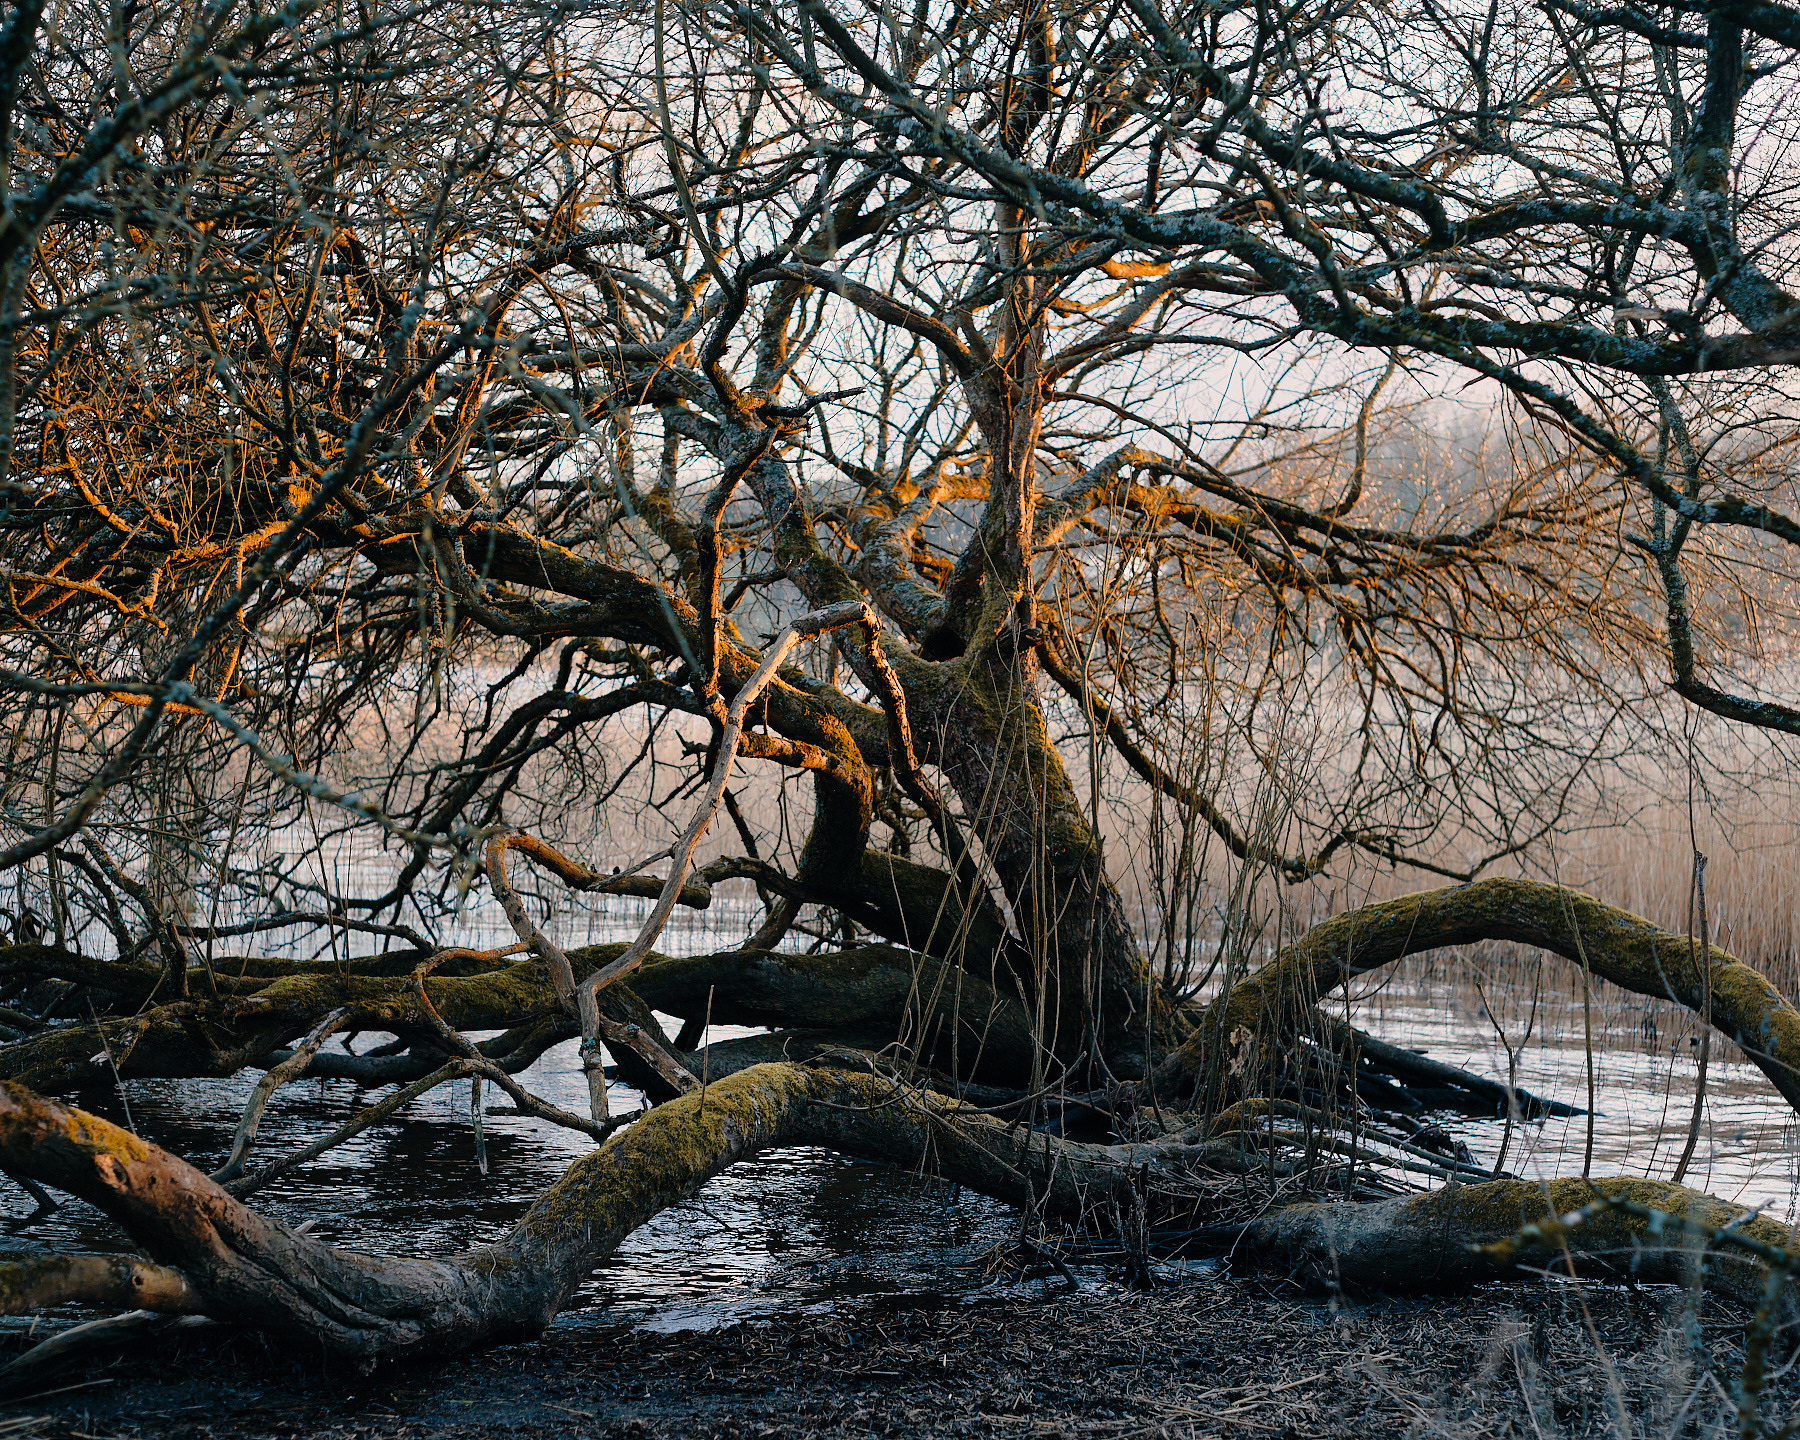
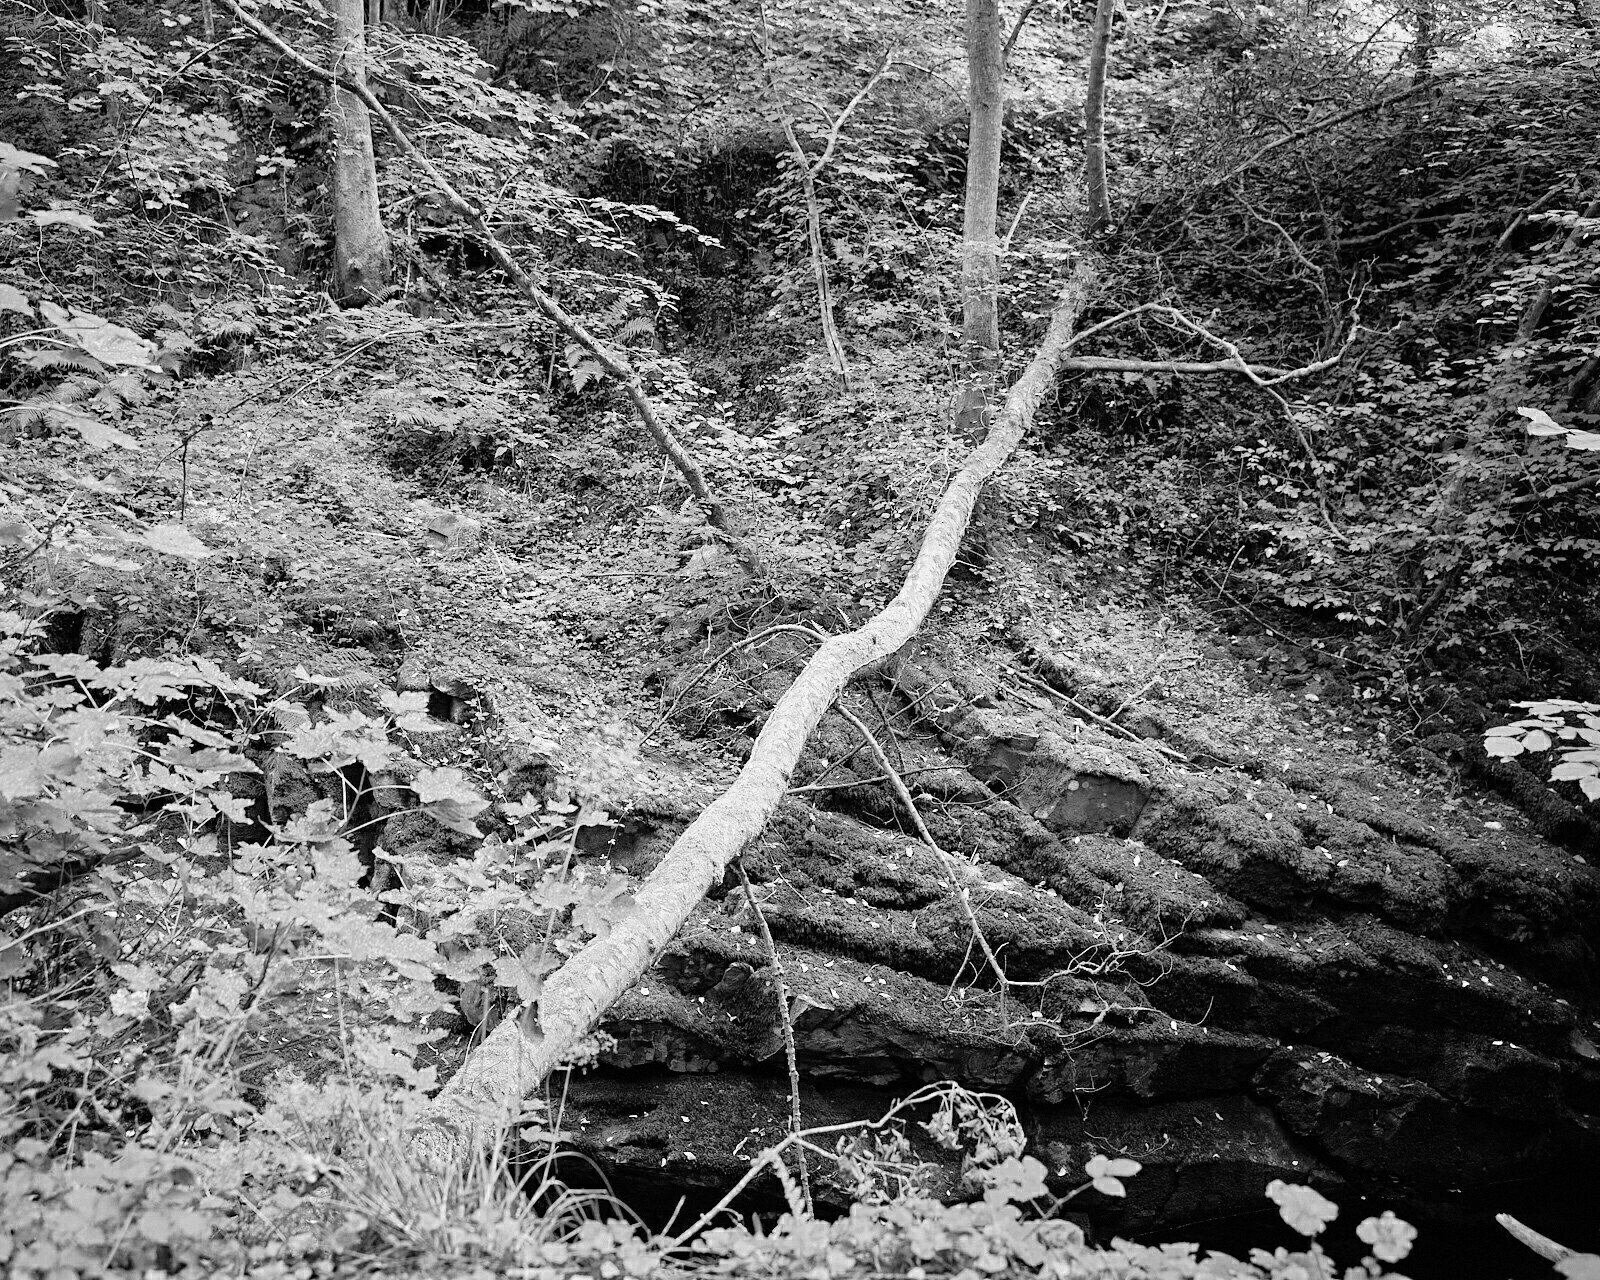
I’ve been obsessed recently with finding fallen trees to photograph, and found a few more here to add to this ongoing project.
This is the follow up to my original post, where I tried cyanotyping for the first time.
Since then I took the plunge and bought my own solution (these ones if you are interested) so I can make my own paper. This will give me more freedom over size, plus I can use some nice heavyweight paper, as I found the pre-coated ones to be too thin and flimsy.
I’m printing these outside using sunlight, trying to keep the paper as flat as possible, using some perspex and rocks. I ended up buying an old frame in a charity shop, just for the heavy glass that came with it, as that does a great job at keeping the paper and the negative squished down.
I’ve found a couple of issues with making my own paper is applying the solution evenly, I have a sponge brush that seems to work pretty well, but at times I’ve been too eager to coat the whole paper too quickly, which results in the final print being a little patchy in places. I need to be a little more patient, and apply with a drier brush, and then recoat if needed.
This print seems to suffer badly from it, I think it’s especially noticeable because there is so much negative space. I don’t actually mind it to be honest, because it’s DIY, handmade, so these imperfections are to be expected. But not so great if you are aiming for a pristine perfect print.
My other problem has been with exposure times, I think the level of UV changes day to day, which can make it tricky when trying to expose the prints correctly, as it involves a bit of guesswork. I thought I had my timings pretty accurate, but I had one afternoon where every print seemed perfect when removing the glass, but as soon as I dunked it in my water tray, it all just seemed to wash away, leaving me with washed out cloudy image, that was just no good.
I went online to look troubleshoot, and ended up getting myself in a jumble of new worries, paper type, even the ph level of the water (which seems insane) but it turned out I was just underexposing the images. I made some new prints the following day using a longer 10 minute exposure, and that seemed to fix the issue completely.
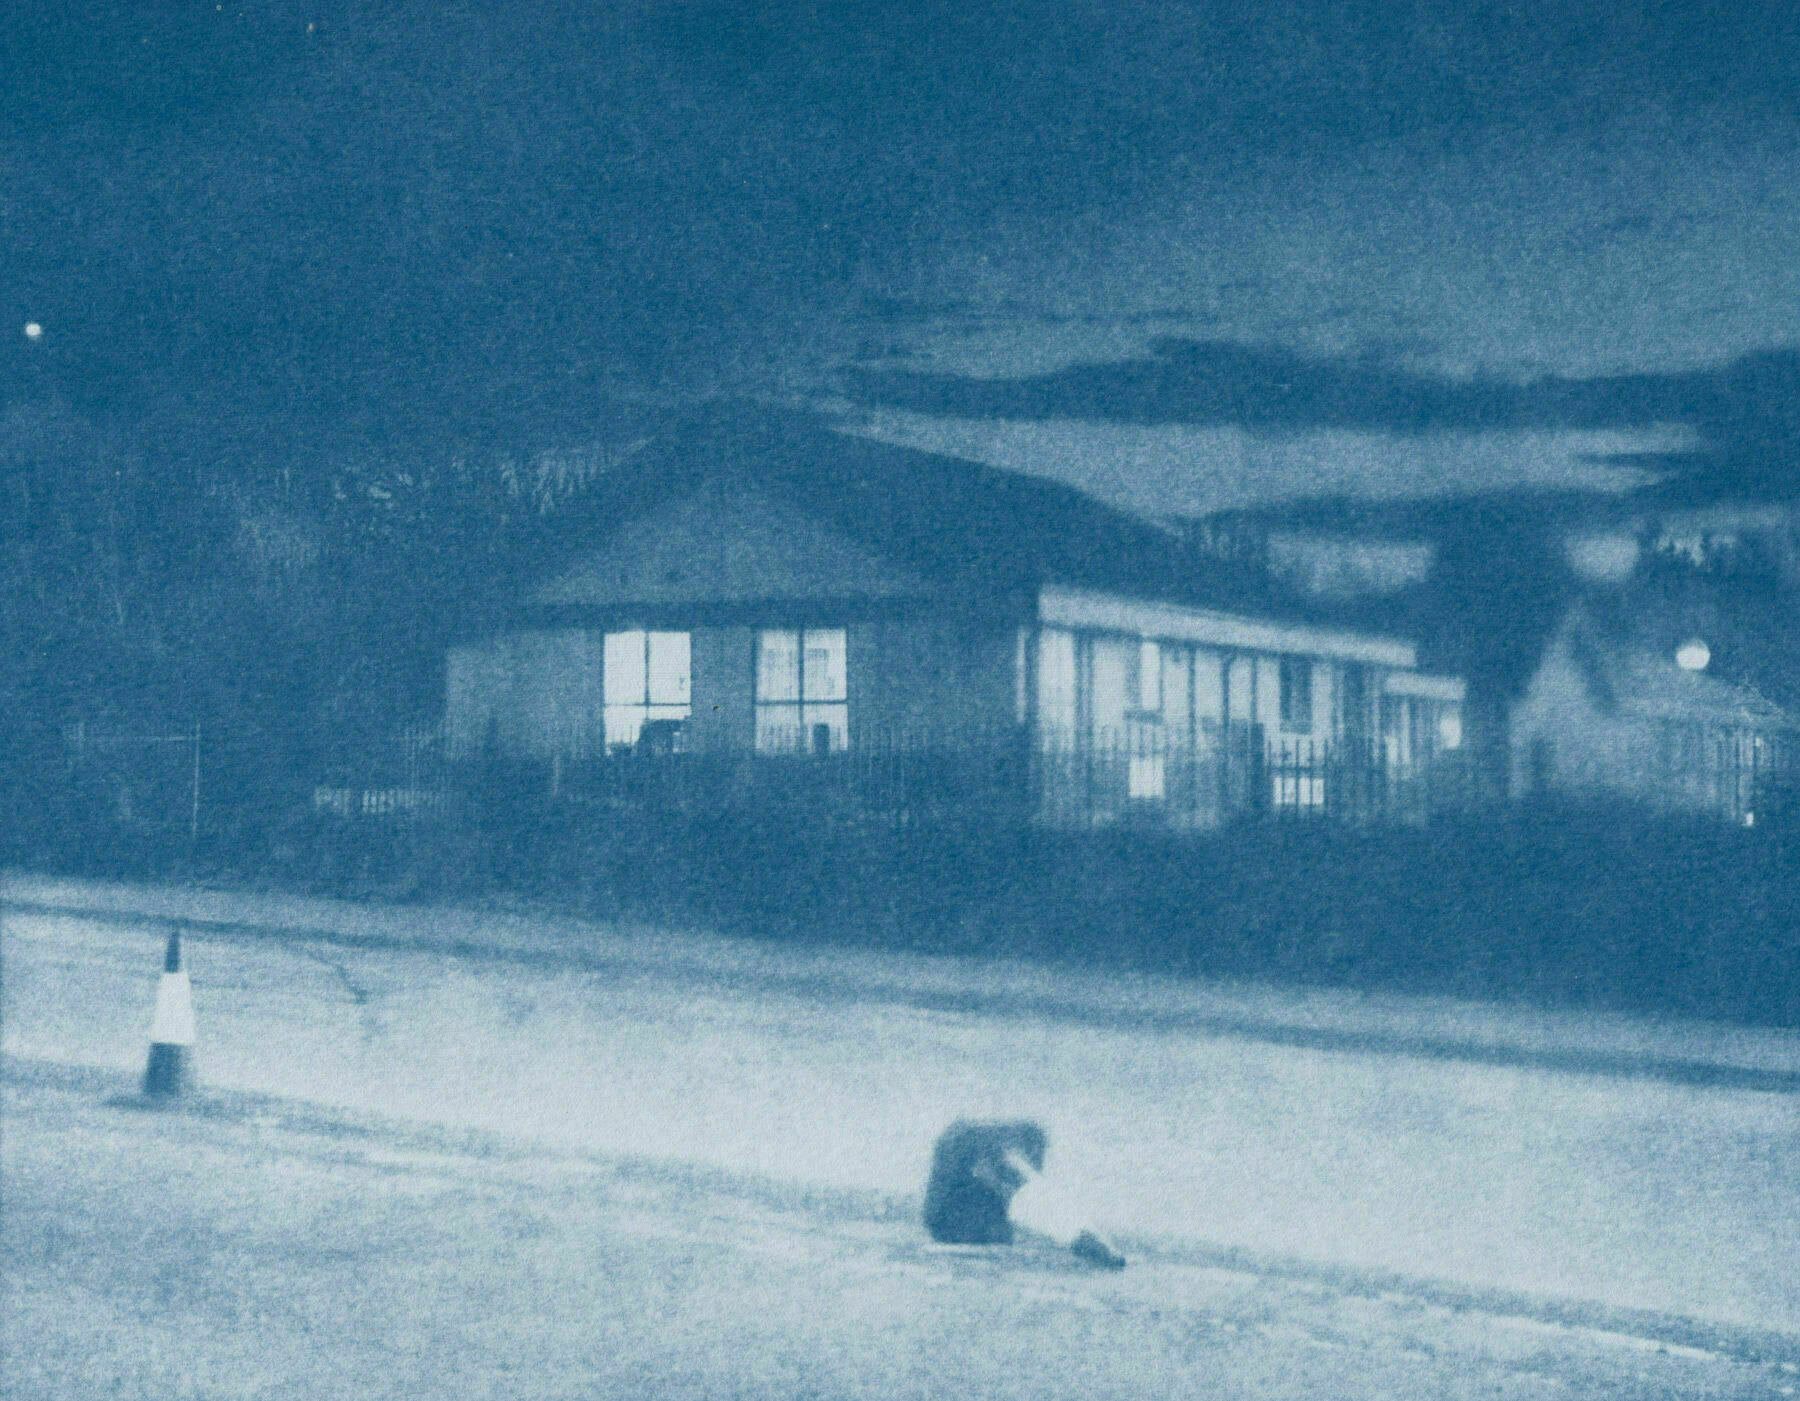
Looking back I think some of my previous images are underexposed, but I just got away with it a little more, as the blue doesn’t look as rich as some of the newer prints.
This is a more recent one, which looks saturated and punchier.
The good thing is, the solution bottles last for ages, I have loads left for future paper batches, so printing again is no issue, I can tweak it multiple times until I get it right. Plus through trial and error I’ve found that some images are better suited for cyanotyping than others. Images with strong geometric shapes and high contrast like this leaf seem to work well.
The other advantage to making your own paper, is the potential to experiment with different papers and surfaces, I’ve been trying printing on some found papers, with mixed results so far, but will be sharing in a future blog post.